
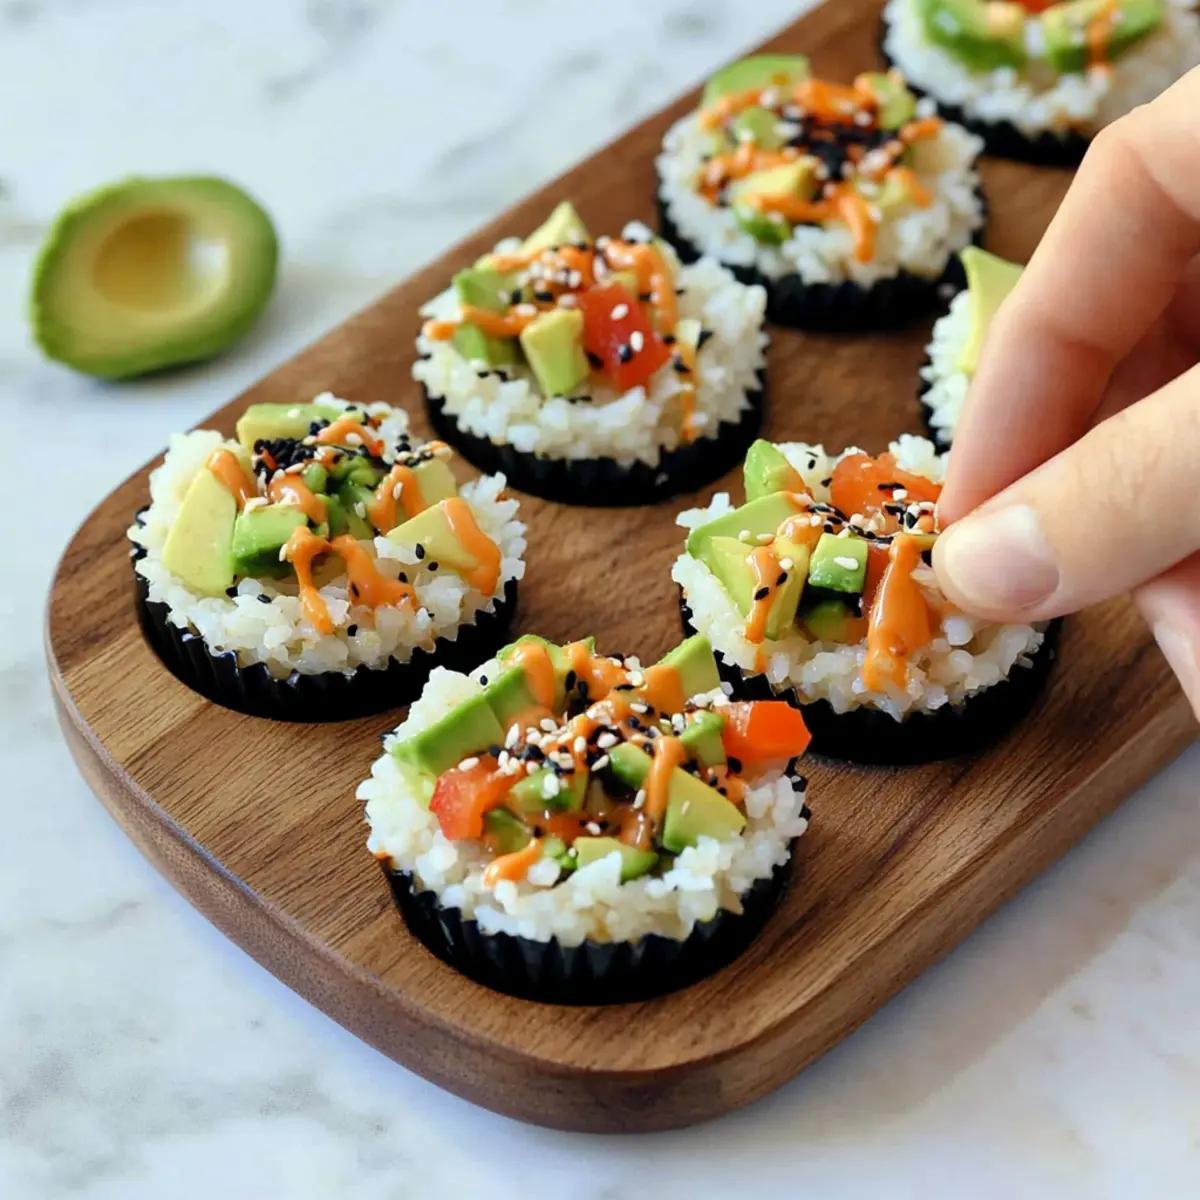
The first time I crafted these no-bake sushi cups, I couldn’t believe how simple yet impressive they turned out! Each little cup is a delightful balance of soft sushi rice, crisp veggies, and creamy avocado, all crowned with a spicy mayo drizzle that’s to die for. What makes these sushi cups truly special is their customizable nature; you can mix and match your favorite ingredients to suit every palate or occasion. With just a quick prep time and about 110 calories per cup, they make for a healthy snack or a standout appetizer for your next gathering. Ready to bring sushi to your kitchen table in a fun new way? Let’s dive into this delicious recipe that’s perfect for any home chef looking to impress!
Why Are Sushi Cups So Irresistible?
Simplicity at Its Best: No need for complex techniques—these sushi cups are a breeze to prepare!
Customizable Appeal: Tailor them to your taste by swapping ingredients; feel free to add proteins or switch up the veggies!
Healthy Snack: At only 110 calories per cup, guilty pleasures don’t exist here—enjoy a delicious snack that won’t weigh you down.
No Bake Required: Skip the oven and roll—cool and chill your way to sushi bliss without any fuss.
Perfect for Any Occasion: Whether it’s a casual lunch, snack time, or an elegant gathering, these sushi cups will wow your guests!
Once you give these a try, be sure to explore more inventive variations inspired by our other fantastic no-bake recipes for even more culinary joy!
Sushi Cups Ingredients
• For the Rice Base
- Sushi Rice – Provides the essential structure; rinse well before cooking for fluffy results.
- Water – Crucial for cooking the rice to the right consistency.
• For the Filling
- Chopped Veggies (1/2 cup) – Adds a crisp texture and flavor; opt for fresh choices like carrots, cucumbers, or bell peppers for the best results.
- Steamed Mukimame (1/4 cup) – Provides protein and a creamy texture; regular edamame pods work as a great substitute.
- Diced Avocado (1/4 cup) – Delivers creaminess and healthy fats; around half a small avocado works perfectly.
• For the Flavor Boost
- Sauce of Choice (1 tbsp) – Enhances flavor; try soy sauce, tamari, or coconut aminos.
- Mayonnaise (1/4 cup) – Forms the creamy base of the spicy mayo mix.
- Sriracha Sauce (1 tsp) – Adds a kick of heat; adjust according to your spice preference.
- Coconut Aminos or Soy Sauce (1 tsp) – Introduces a rich umami flavor to the mayo.
- Honey (1 tsp) – Balances the heat with a sweet touch.
- Sesame Oil (1/2 tsp) – Infuses depth with a nutty aroma.
• For Garnish
- Black Sesame Seeds – Optional, but they add lovely texture and visual appeal.
These sushi cups are an inviting way to bring your favorite sushi flavors home, adding both excitement and a hint of culinary adventure to your day!
Step‑by‑Step Instructions for Sushi Cups
Step 1: Cook the Sushi Rice
In a medium pot, combine 1 cup of rinsed sushi rice with 1 ¼ cups of water. Bring to a gentle boil over medium-high heat, then reduce the heat to low, cover, and simmer for 20 minutes until the water is absorbed and the rice is tender. Remove from heat and let it sit, covered, for an additional 5 minutes to steam, ensuring fluffy sushi rice for your cups.
Step 2: Form the Rice Cups
Once the sushi rice has cooled slightly, preheat your refrigerator. Press about 2 heaping tablespoons of the cooked rice into each cup of a silicone muffin tin to form compact cups. Use a spoon or your fingers to ensure the rice molds well into the shape of each cup. Chill the tin in the fridge for 20 minutes, allowing the rice to set firmly into its cup shape.
Step 3: Prepare the Veggie Filling
While the rice cups chill, chop your choice of veggies, like carrots, cucumbers, or bell peppers, into small bite-size pieces. In a mixing bowl, combine the chopped veggies with ¼ cup of steamed mukimame and ¼ cup diced avocado. Drizzle in your sauce of choice, such as soy sauce or coconut aminos, ensuring every piece is well-coated to enhance your delicious sushi cups.
Step 4: Make the Spicy Mayo
In a separate small bowl, mix together ¼ cup of mayonnaise, 1 teaspoon of Sriracha sauce, 1 teaspoon of coconut aminos (or soy sauce), 1 teaspoon of honey, and ½ teaspoon of sesame oil. Whisk until smooth, and taste to adjust the spice level to your liking. This creamy, spicy mayo will be drizzled on top of your sushi cups for the perfect flavor kick.
Step 5: Assemble the Sushi Cups
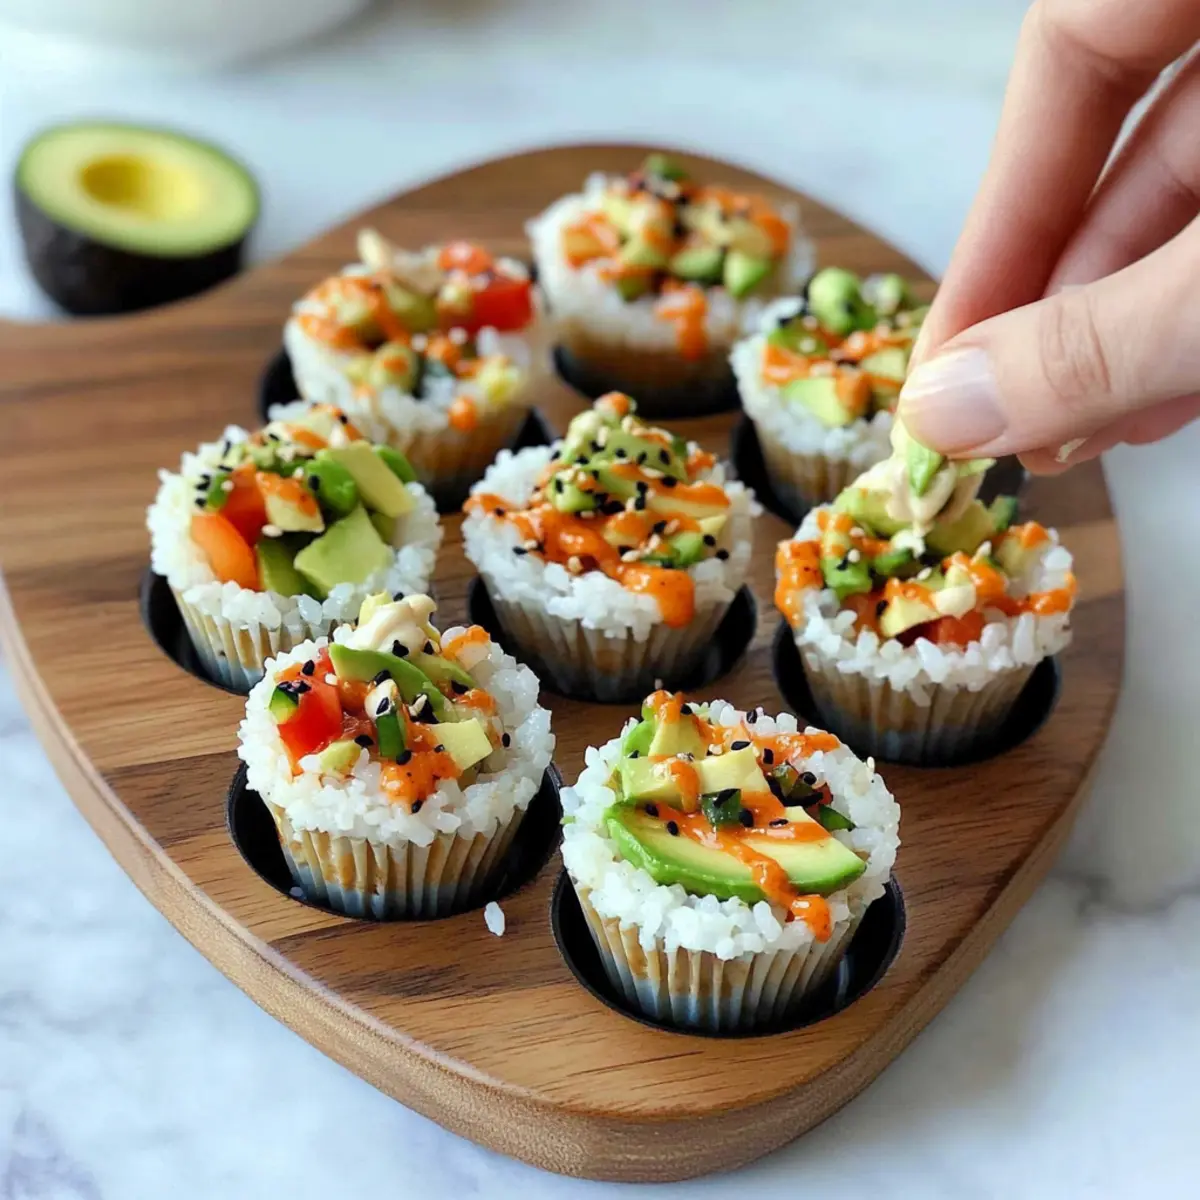
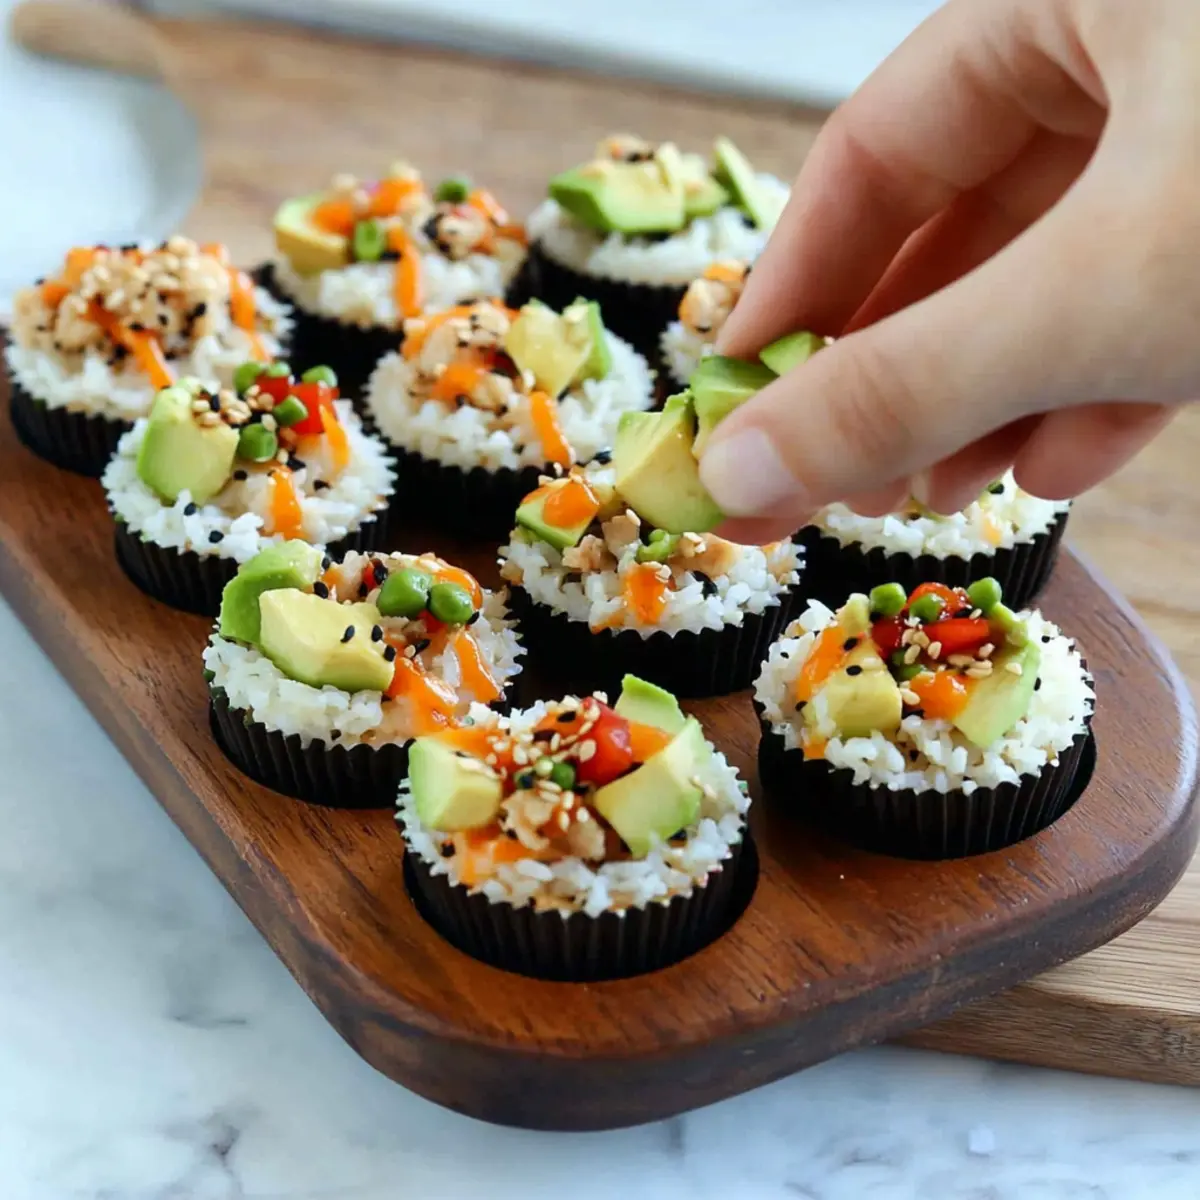
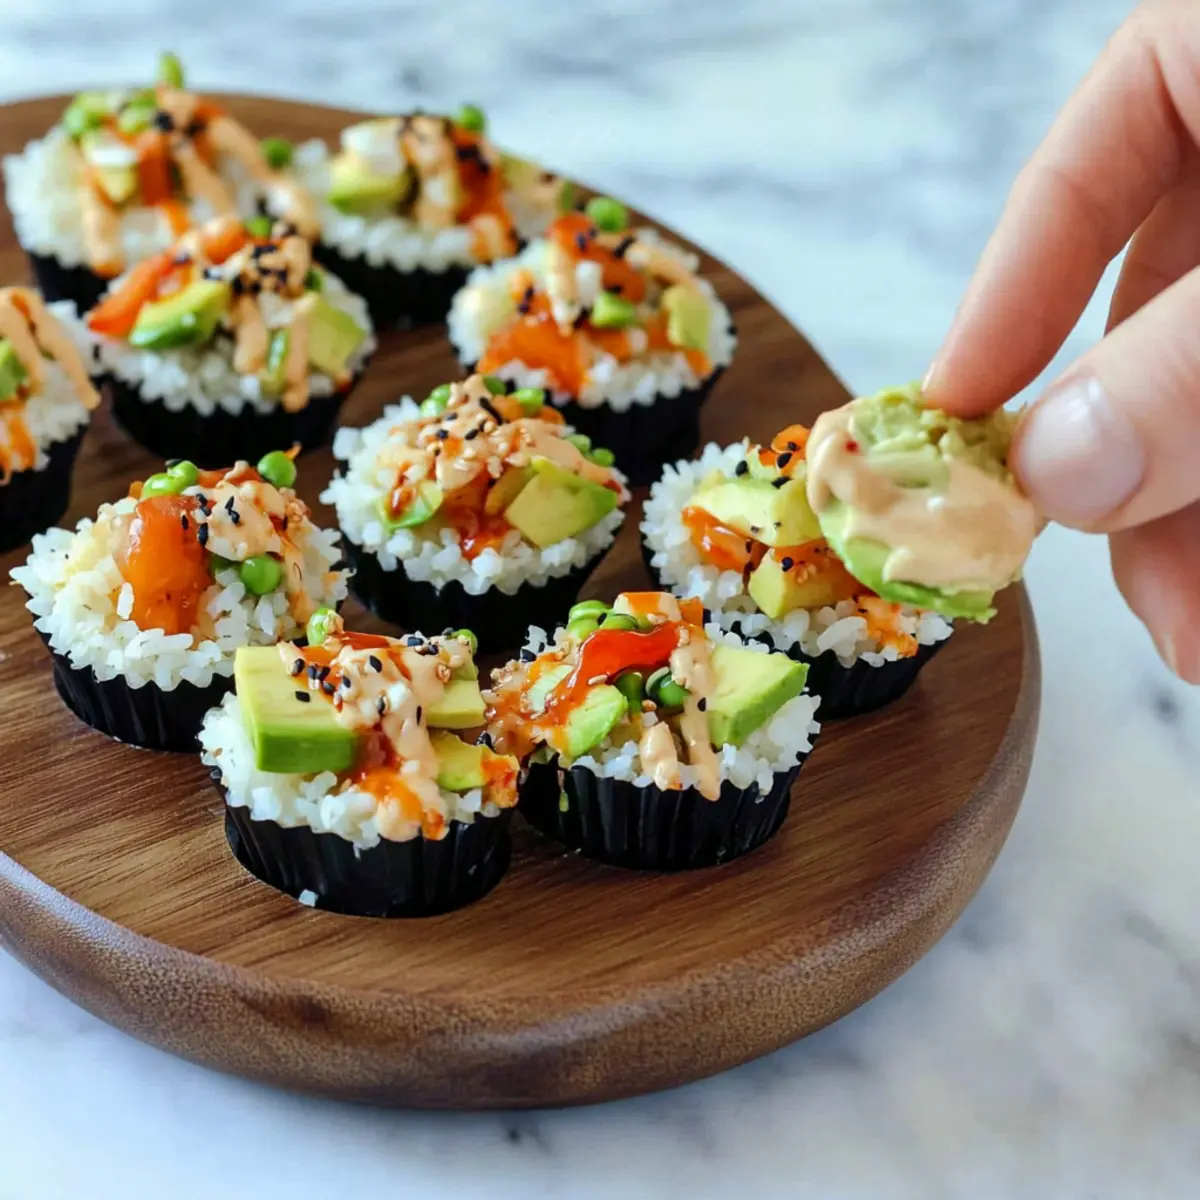
Remove the rice cups from the fridge and carefully spoon the veggie mixture into each rice cup, packing them gently but not overly tight. Next, drizzle a generous amount of the spicy mayo over each cup, allowing it to cascade down the sides. For an extra touch, sprinkle black sesame seeds on top for added texture and visual appeal.
Step 6: Serve and Enjoy
Your delightful sushi cups are now ready to serve! Present them chilled or at room temperature for a tasty snack or appetizer that will impress your guests. With their vibrant colors and enticing flavors, these sushi cups will bring the joy of sushi to any gathering, making them a fun and customizable option for every home chef.
Expert Tips for Sushi Cups
-
Use Silicone Liners: Make removing the sushi cups a breeze by using silicone muffin liners; they prevent sticking and help maintain shape.
-
Rice Consistency Matters: Ensure your sushi rice is well-pressed and compact in the muffin tin to avoid any crumbling when removed; fluffiness is essential!
-
Chill for Best Results: Allow your rice cups to chill in the fridge for at least 20 minutes; this helps them hold their shape and enhances flavor.
-
Taste as You Go: Don’t hesitate to adjust the spice level in your spicy mayo; a little extra Sriracha can elevate the flavor of your sushi cups!
-
Experiment with Fillings: Feel free to add proteins like imitation crab or smoked salmon for a heartier option; customizing is what makes these sushi cups special!
-
Storage Tips: Consume your sushi cups within 2 days for optimal freshness; the rice may become stale if stored longer.
Sushi Cups Variations & Substitutions
Feel free to let your creativity shine with these sushi cups by customizing the ingredients to match your taste and dietary preferences!
-
Dairy-Free: Swap the mayonnaise with avocado or a plant-based yogurt to create a creamy, dairy-free drizzle.
Embrace the rich creaminess of avocado; it’s a fabulous substitute that keeps the flavor intact and adds healthy fats. -
Seafood Option: Include proteins like smoked salmon or imitation crab for a delightful seafood twist.
Imagine the succulent flavors of smoked salmon blending beautifully with the veggies—it takes your sushi cups to an entirely new delicious level! -
Spicy Kick: Boost the heat by adding more Sriracha, or try spicy mayo made with wasabi for an intense flavor wake-up.
If you love heat, a touch of wasabi will amplify the zing of your cups and keep your taste buds dancing! -
Crunchy Twist: Incorporate crispy tempura veggies or fried onion straws for an added crunch.
A bit of crunch elevates the texture, making every bite an exciting experience, reminiscent of classic sushi rolls! -
Herb Infusion: Toss in fresh herbs like cilantro or basil to enhance freshness and flavor.
The burst of fresh herbs brings a new dimension, adding vibrant notes to each mouthful that elevate these cups. -
Flavorful Sauces: Experiment with different sauces, such as eel sauce or teriyaki sauce, instead of the usual soy sauce.
These rich sauces can change the whole profile of your sushi cups, giving them a sweet and savory balance that’s oh-so-satisfying. -
Vegan Delight: Opt for tofu or grilled tempeh instead of mukimame for a hearty, plant-based protein option.
Using tofu provides a chewy complement to the fresh veggies, delivering a healthy and satisfying bite!
By playing around with these variations, you’re guaranteed to create sushi cups that fit any occasion or taste preference. And if you’re curious about more inventive ideas, check out our other amazing no-bake recipes for even more flavorful fun!
Make Ahead Options
These sushi cups are a fantastic option for meal prep and save you time on busy weeknights! You can prepare the rice cups and store them in the refrigerator for up to 24 hours. Simply press the cooked sushi rice into the muffin tin and chill, then cover and refrigerate. The veggie filling can also be prepared in advance; just chop the veggies and mix them with mukimame and avocado, keeping them tightly sealed to prevent browning. When it’s time to serve, simply assemble the cups with the chilled veggie mixture and drizzle with spicy mayo for a deliciously fresh experience that tastes just as good as when you first made them!
What to Serve with Customizable No-Bake Sushi Cups
Elevate your sushi cups experience by pairing them with delightful sides and drinks that complement their fresh flavors and textures.
- Crispy Seaweed Salad: A tangy and crunchy seaweed salad provides a refreshing contrast to the creamy sushi cups, enhancing the theme of sushi flavors.
- Edamame Beans: Simple and lightly salted, these provide a satisfying bite-sized snack that aligns perfectly with the Japanese cuisine vibe of your meal.
- Miso Soup: Warm and umami-rich, this traditional Japanese soup is a soothing side, balancing the freshness of the sushi cups with comforting depth.
Pair your sushi cups with a chilled glass of Sake for an authentic touch; its delicate flavor enhances the culinary experience beautifully. Don’t forget a light, fruity dessert like Mochi Ice Cream to finish, keeping your meal light and enjoyable! Each pairing weaves together an experience that feels both refreshing and indulgent.
How to Store and Freeze Sushi Cups
Fridge: Keep sushi cups in an airtight container for up to 2 days. This preserves their freshness and prevents the rice from becoming stale.
Make-Ahead: You can prepare sushi cups up to 24 hours in advance; simply store them in the fridge until ready to serve.
Freezer: While not recommended for long-term freezing due to texture changes, if done, place sushi cups in a freezer-safe container for up to 1 month. Thaw in the fridge overnight before consuming.
Reheating: If desired, serve chilled or at room temperature; avoid reheating, as this can alter the rice’s texture and flavor. Enjoy your fresh sushi cups!
Sushi Cups Recipe FAQs
How do I choose the right sushi rice?
Absolutely! Look for short-grain sushi rice specifically labeled for sushi or Japanese cuisine. This type has the right starch content that yields the fluffy texture you want. Rinse it well under cold water before cooking until the water runs clear to remove excess starch, which also helps in achieving that perfect fluffiness.
How long do sushi cups last in the fridge?
You can store your sushi cups in an airtight container in the refrigerator for up to 2 days. To maintain their freshness and avoid the rice becoming stale, make sure they are well-sealed. I always recommend consuming them within this timeframe for the best flavor and texture.
Can I freeze sushi cups? If so, how?
While I don’t recommend freezing sushi cups for the best quality, you can if needed. Place the sushi cups in a single layer on a baking sheet to freeze them individually first. Once frozen, transfer them to a freezer-safe container, separating layers with parchment paper, and they can last for up to 1 month. Thaw them in the fridge overnight before serving to maintain texture.
What should I do if my sushi rice is too sticky?
If your sushi rice turns out too sticky, try adding a tad more water next time you cook it or use a separate bowl to fluff it gently with a fork after cooking. If it’s already cooked, you can rinse it briefly under cold water to help relieve some of the stickiness, but be careful not to wash away the flavor.
Are these sushi cups suitable for dietary restrictions?
Yes! These sushi cups can be vegetarian-friendly and are customizable to accommodate various dietary preferences. For a nut-free option, be cautious with sauces and may want to skip the sesame oil if necessary. Always double-check specific ingredient labels, especially mayo and sauces, to ensure they align with any allergies or dietary needs.
Can I add proteins to my sushi cups?
Very! You can easily enhance your sushi cups with proteins like imitation crab, smoked salmon, or even shrimp if you’re looking to boost the flavor. Just chop them into small pieces and mix them into your veggie filling before spooning it into your rice cups. It adds a delicious twist and heartiness you’ll love!
Deliciously Easy Sushi Cups: No-Bake and Totally Customizable
Ingredients
Equipment
Method
- Cook the Sushi Rice: In a medium pot, combine rinsed sushi rice with water. Bring to a gentle boil, reduce heat, cover, and simmer for 20 minutes. Let sit for 5 minutes.
- Form the Rice Cups: Pack about 2 heaping tablespoons of rice into each cup of a silicone muffin tin. Chill in the fridge for 20 minutes.
- Prepare the Veggie Filling: Chop veggies into small pieces, combine with mukimame and avocado. Drizzle in your sauce of choice.
- Make the Spicy Mayo: Combine mayonnaise, sriracha, coconut aminos (or soy sauce), honey, and sesame oil in a bowl. Whisk until smooth.
- Assemble the Sushi Cups: Remove rice cups from the fridge and fill with the veggie mixture. Drizzle spicy mayo on top and sprinkle with black sesame seeds.
- Serve and Enjoy: Serve the sushi cups chilled or at room temperature.
Leave a Reply