
As I stood in my kitchen, the aroma of melting butter and crushed biscuits wafted through the air, bringing back sweet memories of family gatherings filled with laughter and joy. Today, I’m sharing my go-to recipe for Easy Mini Cheesecakes, a delightful dessert that captures that same spirit but with a twist: they come together in just 30 minutes and don’t require the hassle of a water bath. Perfectly portioned and incredibly creamy, these mini wonders are a surefire way to impress your guests—and let’s not forget, they’re easily customizable to match any sweet craving. Whether topped with fresh fruit, a drizzling of caramel, or enjoyed plain, these mini cheesecakes are about to become your new favorite dessert. Curious to see how simple it is to create these little bites of happiness? Let’s dive in!

Why Are These Mini Cheesecakes So Irresistible?
Quick and Easy: You’ll find that making these mini cheesecakes is a breeze, taking just 30 minutes from start to finish!
No Water Bath Needed: Say goodbye to the hassle of using a water bath, ensuring perfect, crack-free cheesecakes every time.
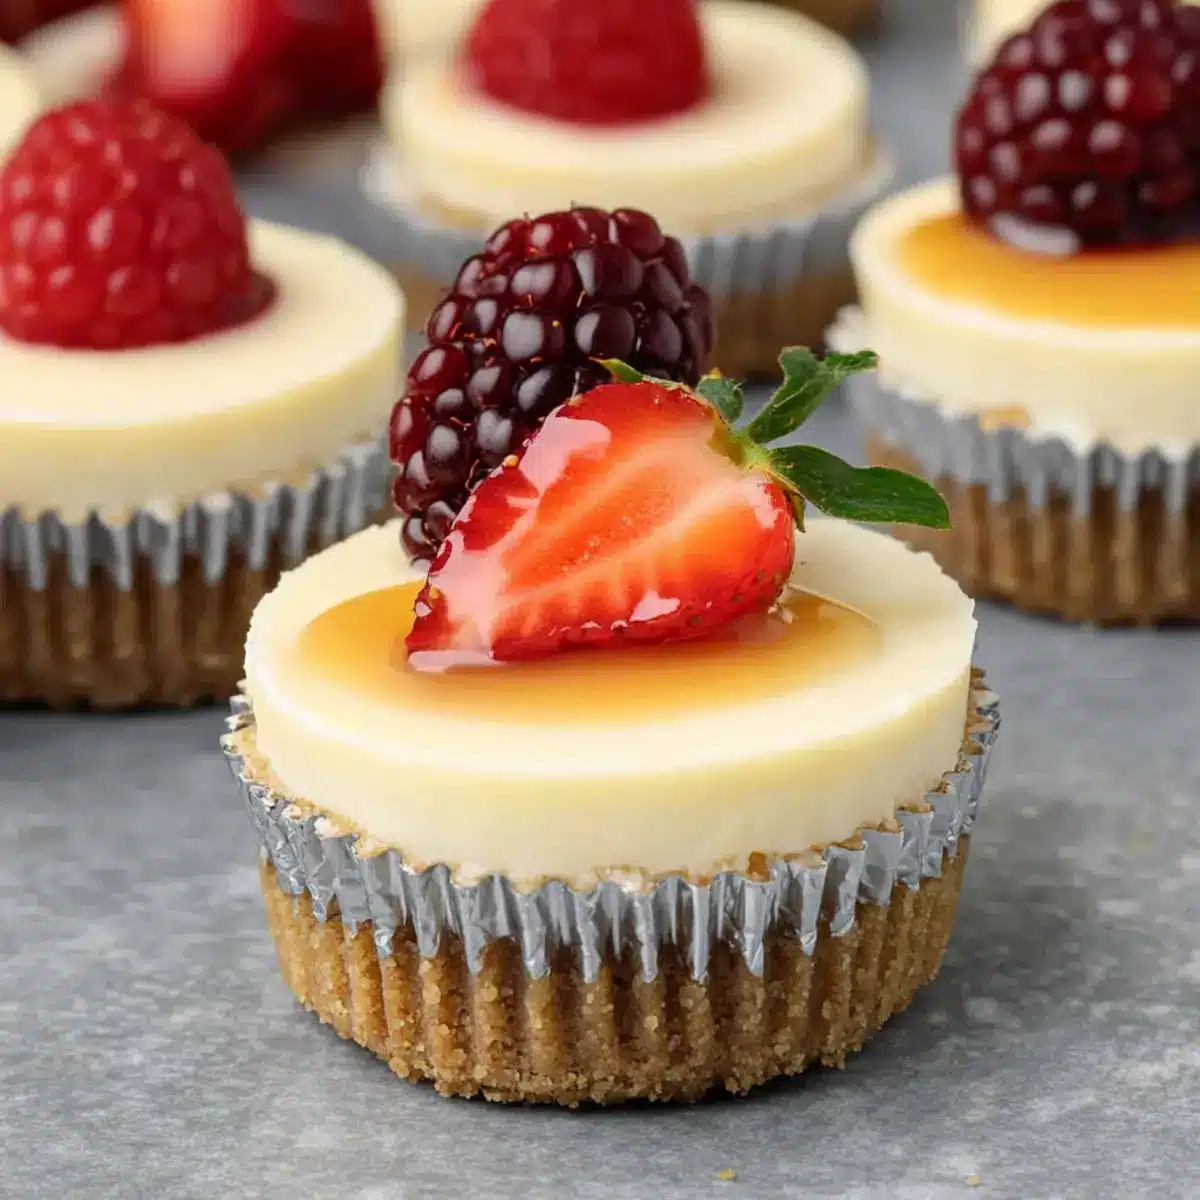
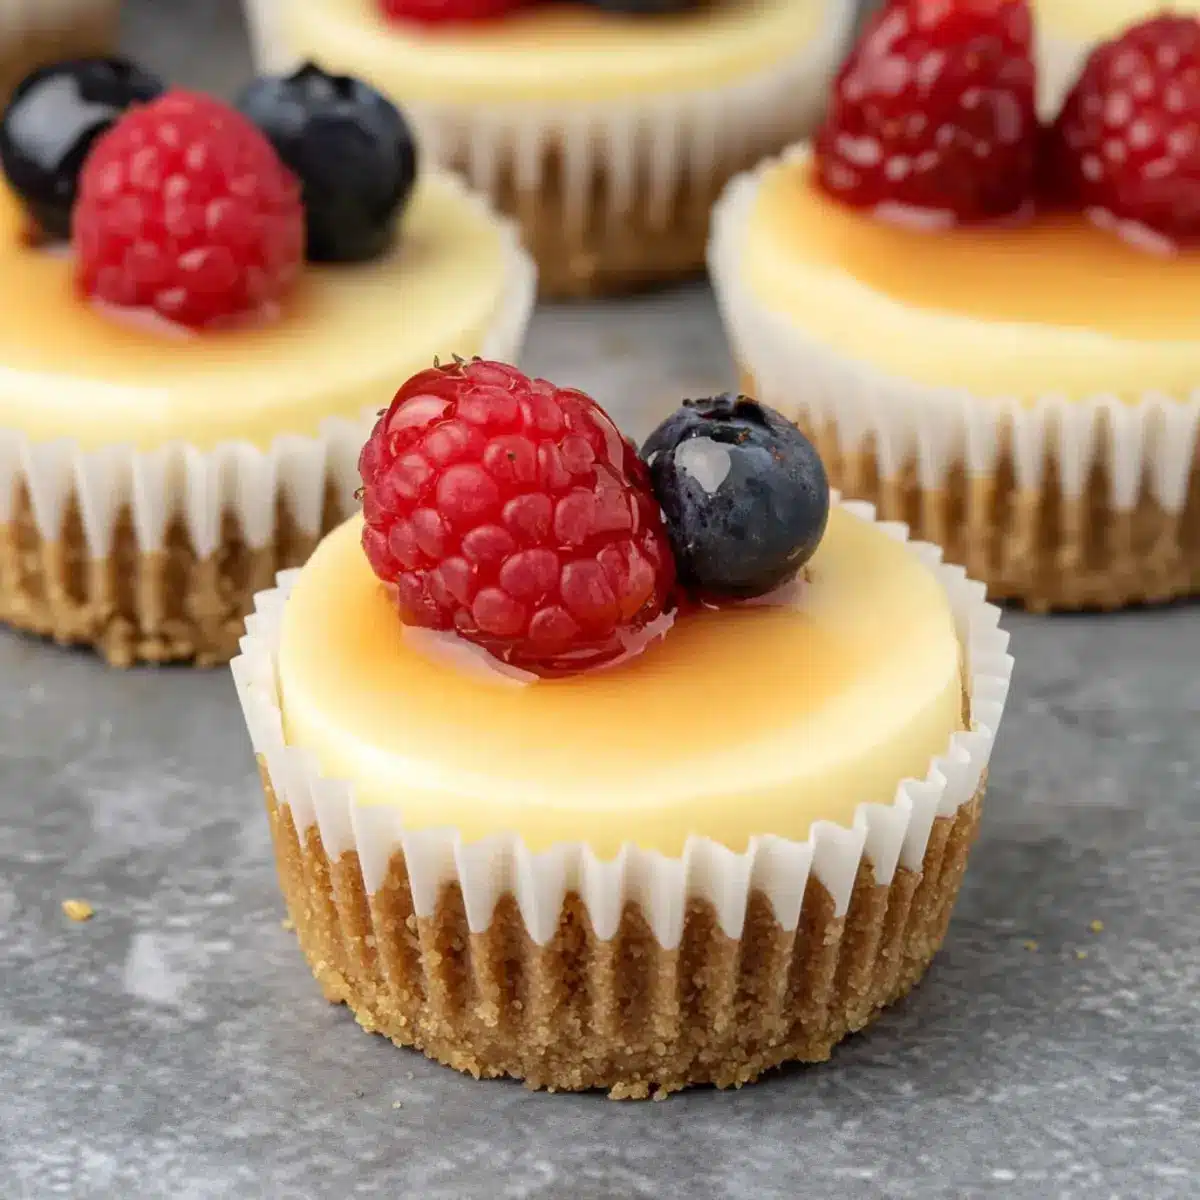
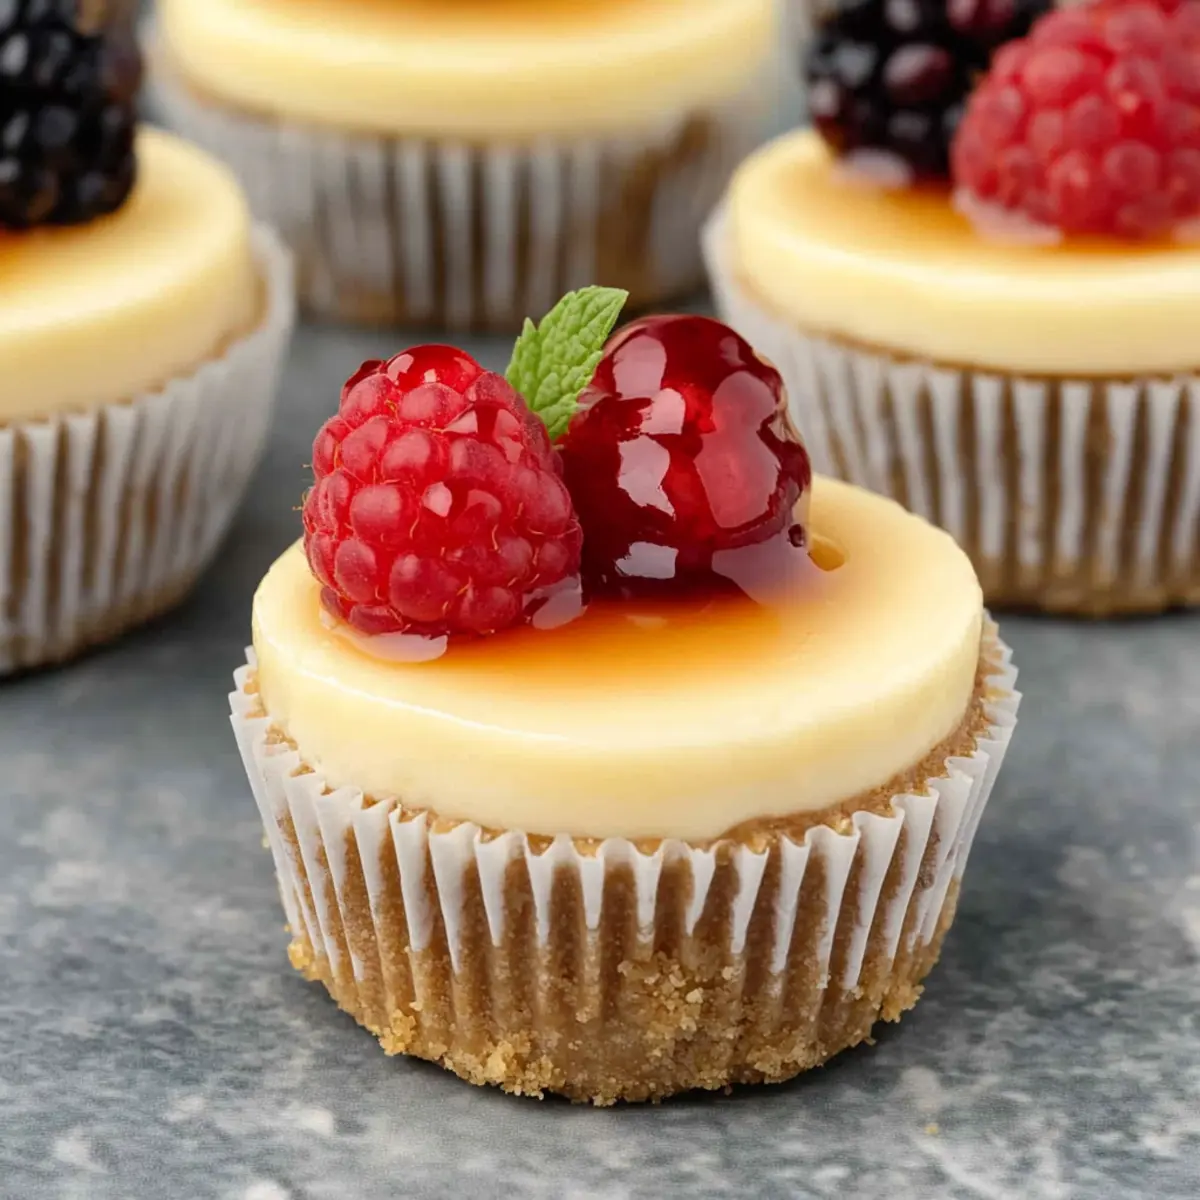
Customizable Delight: Top with fresh berries, drizzle with caramel, or keep it simple—these mini treats adapt to any occasion.
Crowd-Pleasing Flavor: Creamy, rich, and oh-so-delicious, they’re bound to become a favorite at your next gathering—just like my Cheeseburger Soup Cozy!
Guilt-Free Indulgence: With only 248.9 calories each, you can definitely indulge without the guilt!
Easy Mini Cheesecake Ingredients
• For the Crust
- Biscuits Crumbs – Provide a delightful, crunchy base; substitute graham crackers or your favorite cookies as needed.
- Unsalted Butter – Binds the crust ingredients together and adds richness; ensure it’s fully melted for easy mixing.
• For the Filling
- Full-Fat Cream Cheese – This creamy key ingredient delivers a luscious texture; remember to have it at room temperature for smooth blending.
- Granulated Sugar – Sweetens the filling to perfection; adjust according to your taste preference.
- Large Eggs – Essential for structure and creaminess; make sure they’re at room temperature to prevent lumps during mixing.
- Vanilla Extract – Enhances the flavor depth of the filling; a must-have for that classic cheesecake taste!
- Lemon Juice – Brightens the flavor and balances sweetness perfectly; fresh lemon juice works wonders!
- All-Purpose Flour – Helps stabilize the filling for a better texture; minimize mixing after addition to keep it light.
- Full-Fat Sour Cream – Adds extra creaminess and flavor depth; also, remember it should be at room temperature.
These Easy Mini Cheesecakes are waiting to be whipped up, and with this simple ingredient list, you’re one step closer to a delightful dessert experience!
Step‑by‑Step Instructions for Easy Mini Cheesecakes
Step 1: Preheat the Oven
Begin by preheating your oven to 320°F (160°C). This ensures a consistent baking temperature for your Easy Mini Cheesecakes. While the oven heats, the inside of your kitchen will start to warm up, making the perfect backdrop for crafting these delightful treats.
Step 2: Prepare the Muffin Pan
Line a 12-cup muffin pan with paper liners, which will aid in easy removal after baking. Make sure each liner is secure in its cup. This step not only keeps your mini cheesecakes intact but also adds a touch of charm, ready for serving at your next gathering.
Step 3: Make the Crust
In a mixing bowl, combine your crushed biscuits and melted unsalted butter. Mix until the crumbs are evenly coated, resembling wet sand. Press this mixture firmly into the bottom of each muffin cup, creating a compact crust. Aim for about a quarter-inch thickness, ensuring it holds together during baking.
Step 4: Blend the Filling
In a large mixing bowl, beat the softened cream cheese on low speed until it becomes smooth and creamy. Gradually add in the granulated sugar, continuing to mix until fully incorporated. Take your time with this step to ensure a velvety texture, free of lumps, crucial for your Easy Mini Cheesecake filling.
Step 5: Incorporate the Eggs
Add the large eggs one at a time into the cream cheese mixture, mixing just until each egg is fully incorporated. This careful addition helps maintain the richness of the filling while preventing extra air, which can cause cracks as they bake.
Step 6: Finalize the Filling
Next, mix in the vanilla extract, lemon juice, all-purpose flour, and full-fat sour cream until the mixture is blended into a smooth consistency. Avoid overmixing at this stage; just until incorporated will yield a lovely creamy filling. Divide this delightful mixture evenly among the muffin cups.
Step 7: Bake the Cheesecakes
Place the muffin pan in your preheated oven and bake for 15 to 18 minutes. You’ll know they’re done when the edges are set but the centers still jiggle slightly. This jiggle is key to achieving that perfect creamy texture, making your Easy Mini Cheesecakes irresistibly delicious.
Step 8: Cool and Chill
Allow the mini cheesecakes to cool in the pan completely before transferring them to the refrigerator. Chill for at least 4 hours, or preferably overnight, to help them firm up and enhance their flavor. This cooling process is essential for developing the rich taste and texture that define these delightful treats.
Make Ahead Options
Making these Easy Mini Cheesecakes ahead of time is a fantastic way to save precious minutes on busy weeknights or during special occasions! You can prepare the crust and filling separately up to 24 hours in advance. Simply store the crust in an airtight container to keep it fresh, while the filling can be kept in the refrigerator until you’re ready to bake. When you’re ready to finish, just fill the prepared crust with the cheesecake mixture, bake as directed, and allow to cool. This method ensures that your mini cheesecakes remain just as creamy and delicious, letting you impress guests with minimal last-minute effort!
Expert Tips for Easy Mini Cheesecakes
-
Room Temperature Ingredients: Ensure all dairy ingredients are at room temperature; this helps achieve a smooth, creamy filling and avoids lumps in your Easy Mini Cheesecakes.
-
Mixing Caution: Avoid overmixing after adding eggs; too much air can cause cracks. Mix just until incorporated to keep your cheesecakes perfect.
-
Bake Gently: Monitor your oven temperature closely for even baking; fluctuations can lead to unevenly baked cheesecakes.
-
Cool Gradually: Allow cheesecakes to cool in the pan completely before refrigerating. This helps maintain a smooth surface and texture for those luscious mini bites!
-
Store Wisely: Place any leftovers in an airtight container in the fridge for up to 5 days to keep your Easy Mini Cheesecakes fresh and delicious!
What to Serve with Easy Mini Cheesecakes
As you savor each creamy bite of these delightful mini cheesecakes, imagine the perfect companions that can enhance your dessert experience.
- Fresh Berries: The natural acidity of berries like strawberries or raspberries complements the sweet creaminess, adding a burst of freshness. Their vibrant colors also create an eye-catching presentation!
- Chocolate Drizzle: A rich chocolate sauce provides a decadent contrast to the smooth texture, making each bite feel indulgent and lavish. This pairing brings an extra layer of flavor that chocolate lovers will adore.
- Caramel Sauce: Drizzling warm caramel over your cheesecakes adds a sweet, buttery depth that melds beautifully with the creamy filling, elevating the overall experience. Think about the delightful texture of the gooey sauce against the cheesecake!
- Whipped Cream: Light and airy, whipped cream adds a luscious element, providing a pleasing textural contrast to the dense cheesecakes. It’s simple yet elevates the dessert to something special and festive.
- Mint Leaves: Garnishing with fresh mint creates a refreshing note that balances sweetness while adding a pop of green. It’s a small touch that brings sophistication and brightness!
- Iced Tea: A glass of refreshing iced tea brings a perfect counterbalance to the richness of the cheesecake, cleansing the palate with its lightness and subtle sweetness. Consider herbal or fruity options for a delightful match.
- Coffee: Enjoying your mini cheesecakes with a warm cup of coffee creates a comforting experience, as the rich aroma enhances the overall indulgence. The bitterness of coffee offsets the sweetness beautifully, keeping your taste buds guessing!
Easy Mini Cheesecakes Variations & Substitutions
Feel free to make these easy mini cheesecakes your own with these delightful variations and substitutions!
- Chocolate Crust: Swap out your biscuit crumbs for chocolate graham crackers or Oreo cookies for an indulgent twist.
- Fruit Topping: Top with fresh berries, sliced bananas, or even caramelized peaches for a burst of flavor and color.
- Nutty Crunch: Add crushed nuts like almonds or walnuts to the crust for an added layer of texture and flavor.
- Coconut Flavor: Substitute a splash of coconut extract for the vanilla to transport your mini cheesecakes to a tropical paradise!
- Caramel Swirl: Gently fold in some caramel sauce into the filling before baking for a decadent touch.
- Spiced Up: Add a sprinkle of ground cinnamon or nutmeg to the filling for a warm, cozy flavor.
- Vegan Option: Use dairy-free cream cheese and coconut milk to create a vegan-friendly version everyone can enjoy.
- Mini Cheesecake Bites: Instead of baked mini cheesecakes, try setting the filling in a silicone mold for easy no-bake bites. Perfect for a quick treat!
No matter how you decide to customize these, there’s no doubt these mini cheesecakes will be simply irresistible, just like my Chocolate Halloween Oreo treats! Enjoy creating your sweet masterpiece!
How to Store and Freeze Easy Mini Cheesecakes
Fridge: Store your Easy Mini Cheesecakes in an airtight container in the refrigerator for up to 5 days. This keeps them fresh and ready to serve whenever a craving strikes!
Freezer: For longer storage, these mini cheesecakes freeze well for up to 2 months. Wrap each cheesecake tightly in plastic wrap and then place them in a freezer-safe container.
Thawing: When ready to enjoy, simply transfer the frozen cheesecakes to the fridge and allow them to thaw overnight. This process helps retain their creamy texture.
Reheating: There’s no need to reheat; these delightful treats are best enjoyed chilled, allowing all their creamy goodness to shine through!
Easy Mini Cheesecakes Recipe FAQs
How do I choose and store ripe ingredients for the Easy Mini Cheesecakes?
When selecting your ingredients, ensure that your cream cheese and sour cream are fresh and at room temperature, which is essential for achieving a smooth filling. Look for cream cheese that is firm but slightly pliable, without any cracks or dry spots. For storage, keep these ingredients in the refrigerator and check the expiration dates—typically, both will last about 1-2 weeks past that date if unopened.
What is the best way to store leftover mini cheesecakes?
Absolutely! Your Easy Mini Cheesecakes can be stored in an airtight container in the refrigerator for up to 5 days. To maintain their texture and flavor, gently wrap each cheesecake with plastic wrap before placing them in the container. Just make sure to keep them in a cool section of your fridge, away from strong-smelling items.
Can I freeze the Easy Mini Cheesecakes? If so, how?
Yes, you can! To freeze your Easy Mini Cheesecakes, first allow them to cool completely in the muffin pan. Then, wrap each cheesecake tightly in plastic wrap, making sure no air can get in. Finally, place the wrapped cheesecakes in a freezer-safe container. They can be stored for up to 2 months. To thaw, simply transfer them to the refrigerator overnight—there’s no need to reheat; they taste best chilled!
What should I do if my cheesecakes crack on top during baking?
Very! If you notice cracks on your cheesecakes, it’s often due to overmixing after adding the eggs or baking at a temperatures that are too high. To avoid this, mix just until combined and maintain a stable oven temperature. If cracks do occur, don’t worry! They can be easily covered with toppings like fresh fruit or a drizzle of chocolate to make them even more tempting.
Are Easy Mini Cheesecakes suitable for people with dietary restrictions, such as lactose intolerance?
While these Easy Mini Cheesecakes contain dairy, you can modify the recipe for lactose intolerance. Look for lactose-free cream cheese and sour cream, which are widely available. Additionally, the crust can be made with gluten-free cookies to cater to gluten sensitivities. Just keep in mind that the flavor and texture might vary slightly, but they will still be delicious!
Can I substitute any of the ingredients in the Easy Mini Cheesecakes?
Of course! If you’re looking to make adjustments, graham cracker crumbs or any cookies of your choice can replace the biscuit crumbs for the crust. For the filling, you can use low-fat cream cheese or even a dairy-free alternative for a lighter version. If you want to add a unique twist, experiment with flavored extracts like almond or coconut for an extra layer of flavor—you’ll be amazed at the delicious results!
Creamy Easy Mini Cheesecakes Ready in Just 30 Minutes
Ingredients
Equipment
Method
- Preheat your oven to 320°F (160°C).
- Line a 12-cup muffin pan with paper liners.
- In a mixing bowl, combine crushed biscuits and melted unsalted butter. Press into the bottom of each muffin cup.
- Beat the softened cream cheese on low speed until smooth, then gradually add in the sugar and mix until incorporated.
- Add the large eggs one at a time, mixing just until each is fully incorporated.
- Mix in the vanilla extract, lemon juice, flour, and sour cream until smooth.
- Divide the filling evenly among the muffin cups.
- Bake for 15 to 18 minutes until the edges are set but the centers jiggle slightly.
- Allow to cool in the pan completely, then refrigerate for at least 4 hours before serving.
Leave a Reply