
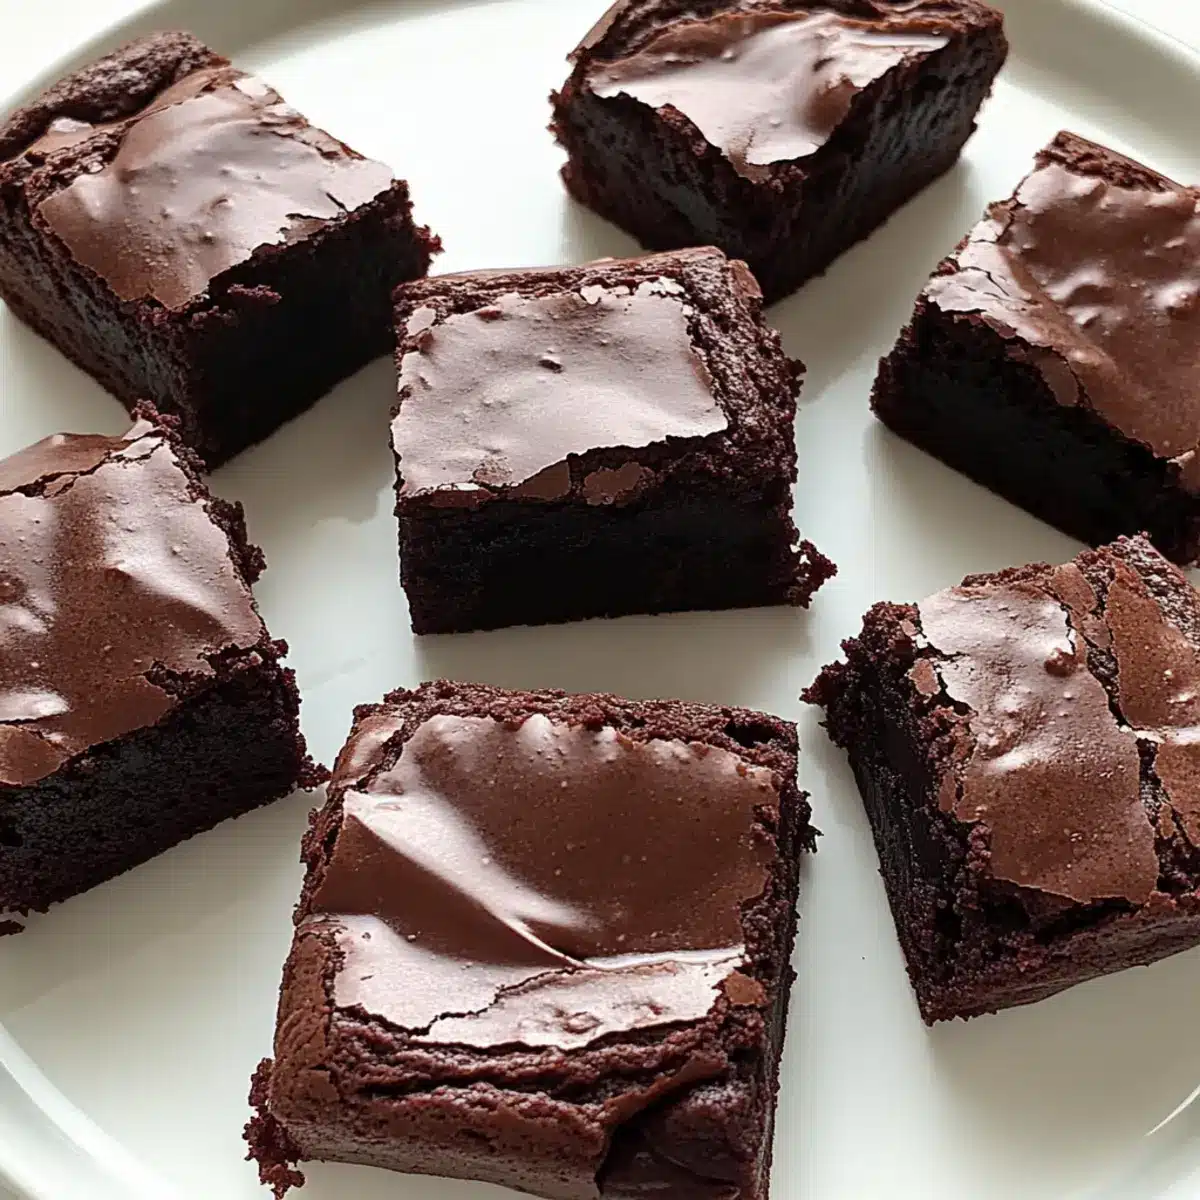
“Can you imagine satisfying your chocolate cravings while keeping things light and nutritious? That’s exactly what these Healthy Greek Yogurt Brownies offer. By cleverly using Greek yogurt to cut down on fat and boost protein, I’ve transformed a classic dessert into a guilt-free indulgence. Not only are these brownies moist and fudgy, but they’re also surprisingly easy to whip up, making them a perfect treat for any occasion. Whether you’re baking for yourself or looking to impress friends, these brownies promise a healthier alternative without compromising on those rich chocolate flavors. Could you resist the temptation of a delicious dessert that’s as kind to your waistline as it is to your taste buds?”
Why Choose Greek Yogurt Brownies?
Healthier alternative: These brownies are a guilt-free way to indulge in chocolate without excess fat. Protein-packed goodness: Greek yogurt adds a boost of protein, making these treats more satisfying. Moist and fudgy texture: You’ll love how rich and tender they feel with every bite. Versatile options abound: Experiment with nuts, or swap in your favorite sweeteners for a custom treat. Plus, they’re easy to make—perfect for both baking novices and seasoned chefs alike! If you’re craving something sweet, consider pairing them with a scoop of ice cream for an irresistible dessert experience.
Greek Yogurt Brownies Ingredients
- For the Brownie Base
• Greek Yogurt – Adds moisture and creaminess while replacing some fat. Substitution: Use plain, unsweetened yogurt for similar results.
• Applesauce – Contributes natural sweetness and moisture. Optional variation: Swap with pureed bananas for added flavor.
• Granulated Sugar & Brown Sugar – Provides sweetness and structure. Notes: Adjust to taste if using sugar alternatives like stevia.
• Eggs – Binds ingredients and adds richness. Ensure eggs are at room temperature for uniform mixing.
• Vanilla Extract – Enhances overall flavor. Tip: Use pure vanilla extract for a deeper taste.
• Whole Wheat Flour – Adds structure and fiber. Substitution: Use almond flour for a gluten-free version.
• Cocoa Powder – Key flavoring agent in brownies. Note: Opt for high-quality unsweetened cocoa powder for best results.
• Baking Powder – Helps brownies rise slightly. Important: Ensure baking powder is fresh for effective leavening.
• Salt – Balances sweetness and enhances flavor. Tip: Use sea salt for a more complex taste.
• Dark Chocolate Chips – Adds richness and texture. Optional: Substitute with milk chocolate chips or omit for a lighter recipe.
Step‑by‑Step Instructions for Greek Yogurt Brownies
Step 1: Preheat the Oven
Start by preheating your oven to 350°F (175°C). This ensures even baking for your Greek Yogurt Brownies. While the oven heats up, you can prepare your baking pan to save time later.
Step 2: Prepare the Baking Pan
Grease an 8×8-inch baking pan with a bit of oil or line it with parchment paper for easy removal of your brownies. It’s crucial to have this step ready so that once your batter is mixed, you can immediately pour it into the pan without delay.
Step 3: Combine Wet Ingredients
In a large mixing bowl, whisk together the Greek yogurt, applesauce, granulated sugar, and brown sugar until the mixture is smooth and creamy. This combination adds moisture and sweetness to your brownies, so take your time to ensure everything is well-blended.
Step 4: Add Eggs and Vanilla
Next, incorporate the eggs and vanilla extract into the yogurt mixture. Whisk vigorously for about a minute until the mixture becomes light and fluffy. This step is essential for achieving a light texture in your Greek Yogurt Brownies.
Step 5: Mix Dry Ingredients
In a separate bowl, combine the whole wheat flour, cocoa powder, baking powder, and salt. Mix them well for even distribution. This dry ingredient blend is what will bring richness and structure to the brownies, so ensure everything is uniform before adding it to the wet mixture.
Step 6: Combine Wet and Dry Mixtures
Gradually pour the dry ingredients into the wet mixture, folding gently with a spatula. Be careful not to overmix, as this can lead to dense brownies. Aim for a few flour streaks remaining, as it will ensure your Greek Yogurt Brownies stay soft and fudgy.
Step 7: Add Chocolate Chips
Now, gently fold in the dark chocolate chips, making sure they are evenly dispersed throughout the batter. These chips will melt and add an extra layer of delicious chocolate flavor, enhancing the overall experience of your brownies.
Step 8: Pour the Batter
Transfer the batter into your prepared baking pan and spread it evenly with a spatula. This ensures that the brownies bake uniformly. Your batter should look rich and chocolaty, tempting enough to dive right in!
Step 9: Bake the Brownies
Place the baking pan in your preheated oven and bake for 20 to 25 minutes. Start checking for doneness at the 20-minute mark; insert a toothpick into the center. It should come out clean or with a few moist crumbs for the perfect fudgy texture.
Step 10: Cool the Brownies
Once baked, remove the pan from the oven and allow the brownies to cool in the pan for about 10 minutes. After that, carefully transfer them to a wire rack to cool completely. This step is vital to ensure that your Greek Yogurt Brownies set properly before slicing.
Expert Tips for Greek Yogurt Brownies
- Mix Gently: Avoid overmixing the batter to prevent tough brownies; just combine until you see a few flour streaks remaining.
- Check Doneness: Start checking at 20 minutes to prevent overbaking; toothpicks should come out with a few moist crumbs for fudginess.
- Select Quality Ingredients: Use high-quality cocoa powder and ensure your baking powder is fresh for the best results in your Greek Yogurt Brownies.
- Cool Properly: Allow brownies to cool in the pan for 10 minutes before transferring them to a wire rack to set properly; this helps maintain their moist texture.
- Experiment with Add-ins: Feel free to add nuts or dried fruits for extra flavor and texture; just make sure to adjust baking time if adding more ingredients.
Make Ahead Options
These Greek Yogurt Brownies are perfect for meal prep enthusiasts! You can prepare the batter up to 24 hours in advance; simply mix all the wet and dry ingredients together, then cover and refrigerate. This not only allows the flavors to meld but also ensures the brownies remain just as delicious when baked. Alternatively, you can bake the brownies ahead of time and store them in an airtight container at room temperature for up to 3 days. Just be sure to let them cool completely before slicing to maintain their fudgy texture. When ready to enjoy, serve them straight from the container or warm them slightly for that melty chocolate goodness!
Greek Yogurt Brownies Variations
Feel like getting creative with your Greek Yogurt Brownies? Here are some delightful twists to elevate your dish!
-
Dairy-Free: Use a plant-based yogurt alternative to maintain creaminess while making it lactose-free. It’s a swap that doesn’t skimp on flavor!
-
Nutty Crunch: Toss in chopped walnuts or pecans for delightful texture and added healthy fats. The crunch complements the soft fudginess beautifully.
-
Fruit Fusion: Introduce pureed bananas instead of applesauce for a natural sweetness and an extra banana flavor that’ll brighten your brownies.
-
Decadent Swirl: Swirl in some peanut butter or Nutella into the batter right before baking for an added layer of richness that chocolate lovers will adore. It’s a heavenly surprise in every bite!
-
Gluten-Free: Substitute whole wheat flour with almond flour or a gluten-free baking blend to cater to gluten sensitivities. You won’t lose that gooey texture!
-
Sweetener Swap: Experiment with monk fruit or dates for a lower-sugar option without sacrificing sweetness. These alternatives offer unique flavors that can transform your brownies.
-
Chili Kick: Sprinkle in a pinch of cayenne pepper or chili powder for a surprising kick that contrasts with the chocolate’s sweetness. It’s a bold move that’s absolutely delicious!
-
Double Chocolate: Add an extra sprinkle of dark chocolate chips or chunks into the batter for a more intense chocolate experience. The richer, the better!
Get more inspiration for your baking by checking out these scrumptious Cookie Fudgy Brownies. Happy baking!
What to Serve with Greek Yogurt Brownies?
Indulging in fudgy Greek Yogurt Brownies is delightful, but pairing them with the right sides elevates the experience even more!
- Vanilla Ice Cream: A classic pairing, the creamy vanilla offsets the richness of the brownies, creating a heavenly bite.
- Fresh Berries: Juicy strawberries or raspberries add a refreshing zing, balancing the cocoa’s depth and enhancing the dessert’s visual appeal.
- Whipped Cream: Light and airy, a dollop of whipped cream brings an extra layer of indulgence while keeping things light.
- Chocolate Ganache: For true chocolate lovers, a drizzle of ganache over the brownies creates an irresistible, decadent experience.
- Nutty Granola: Sprinkle crunchy granola on top for a delightful contrast in texture, making each bite even more interesting.
- Coffee or Espresso: A warm cup of coffee complements the chocolate beautifully, enhancing the flavors of the brownies while providing a comforting finish.
- Chai Tea: The spices in chai tea harmoniously blend with the chocolate, creating a cozy and aromatic experience.
- Ice-Cold Almond Milk: For a dairy-free option, serve with almond milk’s nutty flavor, which pairs well with the chocolatey dessert.
- Mint Chocolate Chip Ice Cream: The refreshing mint flavor gives the brownies a cheerful lift, adding excitement to your tasting experience.
Storage Tips for Greek Yogurt Brownies
Room Temperature: Store brownies in an airtight container at room temperature for up to 3-4 days to maintain their moist texture.
Freezer: For longer storage, freeze brownies in a sealed container or plastic wrap for up to 2-3 months. Thaw them at room temperature before enjoying.
Reheating: To bring back the fudgy texture, gently warm the brownies in the microwave for 10-15 seconds before serving.
Serving Tip: Serve with a scoop of ice cream or a dollop of whipped cream if you wish to indulge a little more!
Greek Yogurt Brownies Recipe FAQs
How can I tell if my Greek yogurt is ripe for baking?
Absolutely! When choosing Greek yogurt, look for one that is smooth without any excess liquid. It should have a creamy texture and a fresh smell. Ensure it’s plain and unsweetened to get the best results in your Greek Yogurt Brownies. If you notice any dark spots or an off smell, it’s best to avoid using it.
How should I store my Greek Yogurt Brownies?
Very good question! Store your brownies in an airtight container at room temperature for up to 3-4 days. This will help retain their moist texture. If you want to keep them longer, you can freeze them for up to 2-3 months. Just make sure they are well-wrapped to prevent freezer burn!
What’s the best way to freeze Greek Yogurt Brownies?
To preserve your brownies for later, start by allowing them to cool completely. Then, wrap each brownie individually in plastic wrap and place them in a freezer-safe container or a resealable plastic bag. Label the bag with the date, and they should be good for up to 2-3 months. When you’re ready to enjoy, just let them thaw at room temperature for a few hours or microwave for about 10-15 seconds for that fresh-baked feel.
What should I do if my brownies turn out too dense?
If your brownies have a dense texture, it’s likely due to overmixing the batter. As a guideline, mix just until the dry ingredients are incorporated; it’s okay if there are a few small flour streaks left. Additionally, make sure you’re measuring your ingredients accurately—too much flour can also lead to denseness.
Can I make these brownies gluten-free?
Absolutely! To make gluten-free Greek Yogurt Brownies, simply substitute the whole wheat flour with almond flour or a gluten-free all-purpose flour. If using gluten-free flour, ensure it has xanthan gum if you want to replicate the structure that traditional flour would provide. Enjoy experimenting with this delicious, healthier version!
Deliciously Healthy Greek Yogurt Brownies You’ll Love
Ingredients
Equipment
Method
- Preheat your oven to 350°F (175°C).
- Grease an 8x8-inch baking pan with a bit of oil or line it with parchment paper.
- In a large mixing bowl, whisk together the Greek yogurt, applesauce, granulated sugar, and brown sugar until the mixture is smooth and creamy.
- Incorporate the eggs and vanilla extract into the yogurt mixture and whisk vigorously until light and fluffy.
- In a separate bowl, combine the whole wheat flour, cocoa powder, baking powder, and salt, mixing them well.
- Gradually pour the dry ingredients into the wet mixture, folding gently with a spatula.
- Gently fold in the dark chocolate chips.
- Transfer the batter into your prepared baking pan and spread it evenly.
- Place the baking pan in your preheated oven and bake for 20 to 25 minutes, checking for doneness at the 20-minute mark.
- Once baked, allow the brownies to cool in the pan for about 10 minutes before transferring them to a wire rack to cool completely.
Leave a Reply