
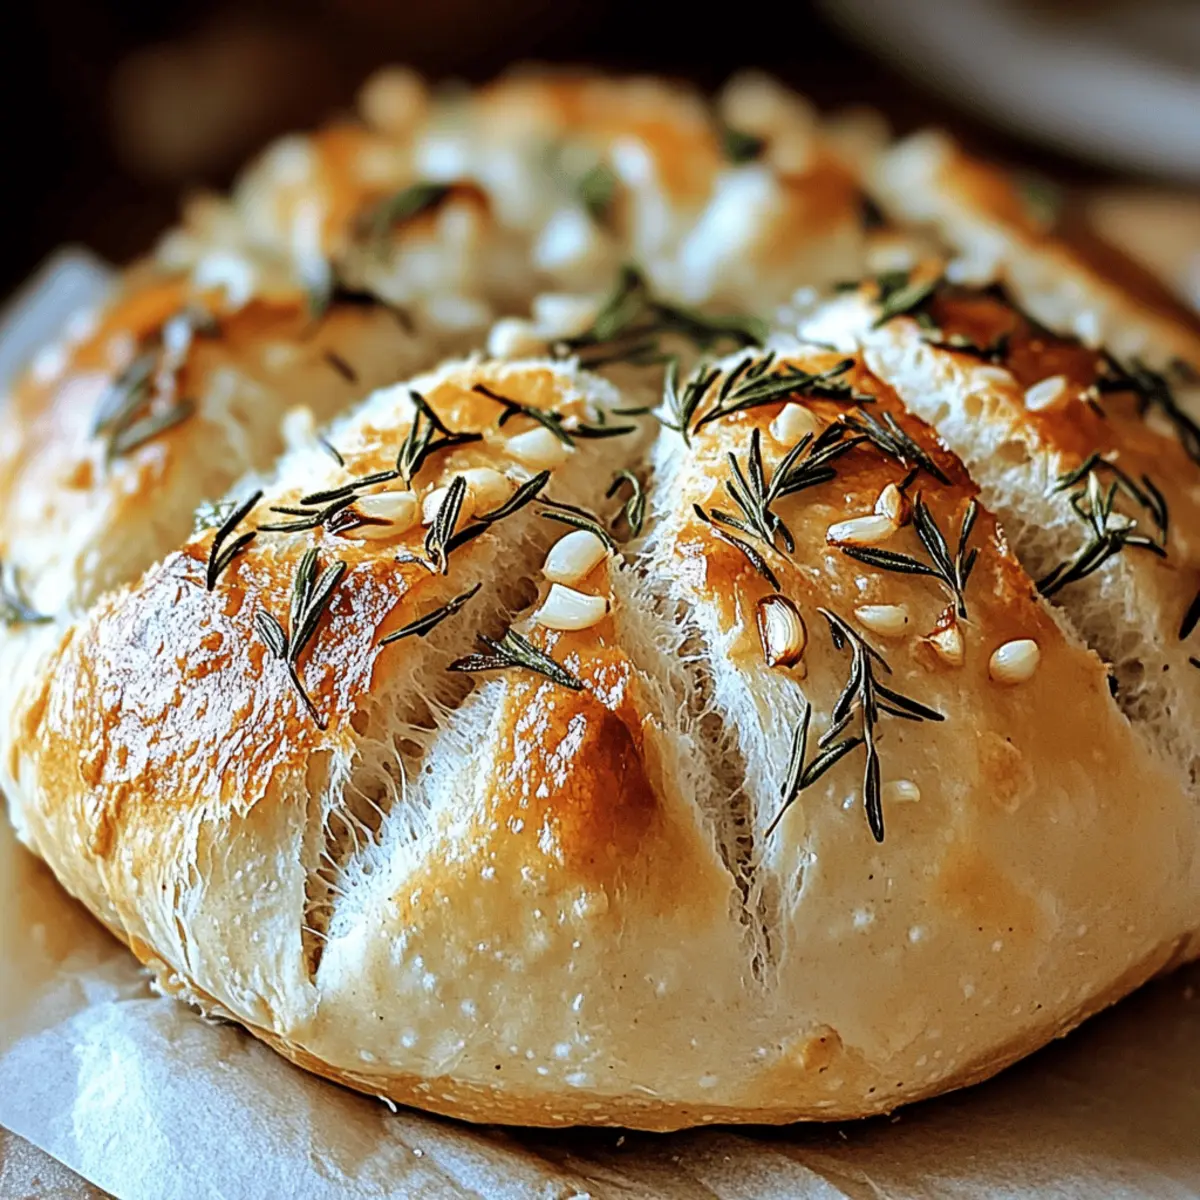
The first time I pulled a loaf of Easy Roasted Garlic Rosemary Artisan Bread from my oven, the kitchen transformed into a fragrant bakery, and I felt like a true artisan. This simple yet satisfying recipe combines the nutty sweetness of roasted garlic with the aromatic touch of rosemary, creating a homemade loaf that’s perfect for any occasion. With just a little patience, you can achieve a spectacular crusty exterior and a soft, chewy interior that your family will rave about. Plus, it’s easy enough for beginner bakers and works beautifully as a comforting side for hearty dinners or as a centerpiece for weekend brunches. Who wouldn’t want to add that special touch to their dining table? Ready to embark on this delightful baking adventure? Let’s get started!
Why is This Bread a Must-Try?
Freshly Baked Goodness: There’s nothing quite like pulling a warm loaf of Easy Roasted Garlic Rosemary Artisan Bread from the oven; your kitchen will fill with irresistible aromas.
Flavor Explosion: The combination of sweet roasted garlic and fragrant rosemary elevates this bread to a gourmet level, making it an unforgettable addition to any meal.
Simple Ingredients: With just a few pantry staples, this recipe is incredibly easy to master, perfect for both novice and experienced bakers alike.
Versatile Delight: Serve it alongside soups, or slice it for sandwiches—this artisan bread is versatile enough to complement any dish.
Impressive Results: Show-off your baking skills; your family and friends will be impressed with the bakery-worthy crust and tender crumb! You’ll want to serve it with a drizzle of olive oil, just like with my Roasted Beets and Carrots Salad with Burrata or with a hearty soup, like Gordon Ramsay’s Roasted Tomato Soup.
Easy Roasted Garlic Rosemary Artisan Bread Ingredients
For the Dough
- Whole head garlic – Adds deep, sweet, roasted flavor; substitute fresh garlic if unavailable, but note that it will have a sharper taste.
- Extra-virgin olive oil – Provides moisture and enhances flavor; can substitute with any neutral oil, but olive oil is preferred for taste.
- Coarse sea salt & freshly ground black pepper – Essential for developing taste in bread and enhancing flavor and texture.
- Water – Activates yeast and hydrates flour; use room temperature water (~70°F/21°C) for optimal results.
- Active dry yeast (1 teaspoon) – Leavens bread for a soft texture; ensure it’s fresh for best results.
- Bread or all-purpose flour (3 cups) – Forms the structure of the bread; bread flour yields a chewier texture, while all-purpose works well too.
- Dried oregano (½ teaspoon) – Adds aromatic flavor; can substitute with Italian seasoning for more complexity.
- Kosher or fine sea salt (1 teaspoon) – Essential for flavor and texture; never skip this step.
- Fresh rosemary (2 teaspoons finely chopped) – Adds a fragrant herbal note; can substitute with thyme or sage if preferred.
- Smashed roasted garlic cloves – Infuses the dough with a mellow, buttery garlic flavor; only use roasted for best results.
Step‑by‑Step Instructions for Easy Roasted Garlic Rosemary Artisan Bread
Step 1: Prepare the Garlic
Begin by preheating your oven to 400°F (200°C). Slice the top off the whole head of garlic, drizzle with 1 tablespoon of extra-virgin olive oil, and sprinkle with salt and pepper. Wrap it tightly in foil and roast for about 40 minutes or until the cloves are soft and caramelized. Once done, allow the garlic to cool slightly before squeezing the roasted cloves out into a bowl.
Step 2: Mix the Dough
In a medium bowl, combine 1 teaspoon of active dry yeast with 1 cup of warm water (about 70°F/21°C) and let it sit for 5 minutes until it becomes frothy. Meanwhile, in a large mixing bowl, whisk together 3 cups of bread or all-purpose flour, 1 teaspoon of kosher salt, ½ teaspoon of dried oregano, and 2 teaspoons of finely chopped fresh rosemary. Add the smashed roasted garlic and the yeast mixture, along with 2 tablespoons of olive oil, and stir until a sticky dough forms.
Step 3: First Rise
Once your dough comes together, cover the mixing bowl with a clean kitchen towel and let it rest at room temperature for about 12 to 18 hours or overnight. This long fermentation allows the dough to rise and develop deep flavors, transforming it into your Easy Roasted Garlic Rosemary Artisan Bread. You’ll know it’s ready when it has doubled in size and is bubbly on the surface.
Step 4: Shape and Second Fermentation
After the first rise, generously flour a clean surface, then gently turn the dough out onto it. Shape the dough into a round ball by folding the edges toward the center, being careful not to deflate it too much. Place the dough seam-side up in a floured bowl, cover it, and refrigerate for 1 to 24 hours for further flavor enhancement and easier handling.
Step 5: Bake
Preheat your oven to 450°F (230°C) with a Dutch oven inside to create a steamy environment. Once preheated, turn the dough out onto a piece of parchment paper, seam-side down. Score the top of the dough with a sharp knife for proper expansion. Carefully lift the parchment with the dough and place it into the hot Dutch oven. Cover and bake for 30 minutes, then remove the lid and bake for an additional 15-20 minutes, or until the bread is a deep golden brown.
Step 6: Cool
When your Easy Roasted Garlic Rosemary Artisan Bread is beautifully baked, carefully transfer it to a wire rack. Allow it to cool completely for at least 1 hour before slicing. This cooling time is crucial as it helps set the crust and finish the steaming process, ensuring a wonderful texture in each chewy slice.
Make Ahead Options
These Easy Roasted Garlic Rosemary Artisan Bread loaves are perfect for meal prep enthusiasts! You can prepare the dough up to 24 hours in advance by completing Steps 1 through 3 (roasting the garlic, mixing, and letting the dough rise), then refrigerate it for enhanced flavor. When you’re ready to bake, simply shape the cold dough and let it come to room temperature for about 30 minutes while you preheat your oven. This way, you ensure that the bread is just as delicious and fluffy. For ideal quality, be sure to wrap the dough tightly to prevent it from drying out. With these make-ahead options, enjoy freshly baked bread without the last-minute rush!
What to Serve with Easy Roasted Garlic Rosemary Artisan Bread
There’s something magical about combining a warm, aromatic loaf with the right dishes to elevate your dining experience.
-
Creamy Tomato Basil Soup: The acidity and sweetness of the tomato base complement the bread’s savory notes, creating a balanced, delightful pairing.
-
Mixed Green Salad with Vinaigrette: The freshness and crunch of seasonal greens contrast beautifully with the soft, warm bread, adding a refreshing touch to your meal.
-
Olive Oil for Dipping: A simple yet luxurious way to enjoy your artisan bread; drizzle some quality olive oil and sprinkle with sea salt for an irresistible starter.
-
Herb-Infused Butter: Softened butter blended with herbs enhances the bread’s flavors, offering a rich and savory spread that brings comfort with each bite.
-
Garlic and Cheese Stuffed Mushrooms: These bite-sized appetizers are earthy and cheese-laden, creating a perfect harmony with the roasted garlic in your bread.
-
Braised Short Ribs: The richness of tender beef pairs wonderfully with the rustic flavors of the artisan bread, making it a heartwarming main course choice.
-
Roasted Vegetable Medley: A blend of colorful vegetables adds a pop of freshness and texture, balancing the rich, savory taste of the bread.
-
Sweet Fig or Tomato Jam: A touch of sweetness contrasts with the savory garlic and rosemary, creating layers of flavor that delight the palate.
-
Red Wine: A glass of robust red wine will complement the bread’s hearty, rustic charm; it’s the perfect pairing for cozy gatherings.
Easy Roasted Garlic Rosemary Artisan Bread Customization
Feel free to explore the delightful world of flavors with these creative twists on your artisan bread!
-
Herb Infusion: Add fresh herbs like thyme or sage for an aromatic burst. These herbs work beautifully in combination or alone. A simple switch can bring an entirely new dimension to the bread.
-
Cheesy Delight: Mix in shredded cheese, such as cheddar or parmesan, into the dough for a savory explosion of flavor. Imagine the gooey, melty goodness waiting for you in each slice!
-
Sweet Surprise: Include caramelized onions or sun-dried tomatoes for a touch of sweetness. These additions not only elevate the taste but also add a unique flavor profile that can make your bread unforgettable.
-
Gluten-Free Option: Substitute regular flour with a 1:1 gluten-free baking flour blend. Though texture might vary slightly, it’s an excellent choice for those avoiding gluten.
-
Spice It Up: For a little heat, sprinkle chili flakes or add finely chopped jalapeños into the dough. These spicy elements can wonderfully contrast with the sweetness of the roasted garlic.
-
Nutty Crunch: Fold in toasted nuts, like walnuts or pine nuts, for an added crunch and nutty flavor. Each bite becomes a delightful blend of textures and tastes that complement the soft bread.
-
Balsamic Twist: Drizzle balsamic vinegar over the roasted garlic before adding it to the dough. This will impart a sweet tanginess that pairs well with the bread’s flavors.
-
Artisan Bread Platter: Consider serving this delightful chewy bread with a variety of accompanying dips. Think olive oil for dipping or mixing it with herbaceous flavors, just like you would with my Cinnamon Roll Zucchini Bread.
Feel inspired? Each variation opens up to a world of possibilities!
Storage Tips for Easy Roasted Garlic Rosemary Artisan Bread
Room Temperature: Store the bread in a paper bag at room temperature for up to 2 days to maintain its crusty texture. Avoid plastic bags, as they can make the crust soggy.
Fridge: While refrigeration is not recommended for the best taste, if you must, wrap the bread tightly in foil to prevent it from drying out and consume within 3 days.
Freezer: For longer storage, slice the Easy Roasted Garlic Rosemary Artisan Bread and freeze the slices in an airtight container or vacuum seal bag. It can last up to 3 months.
Reheating: To bring back the fresh-baked taste, reheat the slices directly from frozen in a preheated oven at 350°F (175°C) for about 10-15 minutes until warm.
Expert Tips for Easy Roasted Garlic Rosemary Artisan Bread
-
Check Your Yeast: Always ensure your active dry yeast is fresh and properly activated. If it doesn’t bubble, your bread won’t rise properly.
-
Don’t Rush Fermentation: Allow the dough to rise overnight. This process builds incredible flavor; skipping it will yield a less tasty loaf.
-
Preheat the Dutch Oven: A hot Dutch oven creates steam for a crispy crust. Make sure it’s preheated for the best results with your Easy Roasted Garlic Rosemary Artisan Bread.
-
Let It Cool: Allow the bread to cool on a wire rack for at least 1 hour before slicing. This helps the texture set and avoids a gummy interior.
-
Experiment with Herbs: Feel free to customize your artisan bread by incorporating different herbs or spices to enhance flavor even further.
Easy Roasted Garlic Rosemary Artisan Bread Recipe FAQs
How do I choose the best garlic for this recipe?
Look for a whole head of garlic that feels firm and heavy for its size, with no dark spots or sprouting. The cloves should be plump and intact; avoid any that feel soft or have dark spots all over, as they may be spoiled or dried out.
What is the best way to store leftover bread?
For up to 2 days, store your Easy Roasted Garlic Rosemary Artisan Bread in a paper bag at room temperature to maintain its crustiness. Avoid using plastic, as it traps moisture and can make the crust soggy. If you want to keep it longer, slice and freeze the bread in an airtight container for up to 3 months.
Can I freeze this artisan bread?
Definitely! To freeze your Easy Roasted Garlic Rosemary Artisan Bread, first slice it once it’s completely cool. Place the slices in an airtight container or kitchen wrap, ensuring as little air as possible is trapped inside. When you’re ready to enjoy, reheat the slices directly from frozen in a preheated oven at 350°F (175°C) for 10-15 minutes until warm.
What can I do if my bread doesn’t rise?
If your bread isn’t rising, it could be due to inactive yeast. Make sure your yeast is fresh and active; it should foam and bubble after being mixed with warm water (around 70°F/21°C) for 5 minutes. Also, don’t rush the fermentation process; overnight rising is essential. If it’s hot and humid in your kitchen, ensure the dough is covered to prevent a hard crust.
Are there any dietary considerations for this recipe?
Absolutely! For those with gluten sensitivities, gluten-free all-purpose flour can be used, but the texture may vary. If anyone has allergies to garlic or rosemary, feel free to omit or replace them with other favorite herbs or spices. Always inform guests of any ingredients that might trigger allergies.
How should I serve the Easy Roasted Garlic Rosemary Artisan Bread?
This artisan bread is delicious enjoyed warm with a drizzle of olive oil for dipping or paired with hearty soups, stews, or salads. You could also make delightful sandwiches with it! It’s perfect for impressing guests or cozy family dinners.
Easy Roasted Garlic Rosemary Artisan Bread for Cozy Nights
Ingredients
Equipment
Method
- Preheat your oven to 400°F (200°C). Slice the top off the whole head of garlic, drizzle with 1 tablespoon of extra-virgin olive oil, and sprinkle with salt and pepper. Wrap it tightly in foil and roast for about 40 minutes until soft and caramelized.
- In a medium bowl, combine 1 teaspoon of active dry yeast with 1 cup of warm water and let it sit for 5 minutes until frothy. In a large bowl, whisk together 3 cups of flour, 1 teaspoon of kosher salt, ½ teaspoon of oregano, and 2 teaspoons of rosemary. Add the smashed garlic and yeast mixture, along with 2 tablespoons of olive oil, and stir until a sticky dough forms.
- Cover the mixing bowl with a towel and let it rest at room temperature for about 12 to 18 hours or overnight.
- Generously flour a clean surface, gently turn the dough out, and shape it into a round ball. Place seam-side up in a floured bowl, cover, and refrigerate for 1 to 24 hours for further flavor enhancement.
- Preheat your oven to 450°F (230°C) with a Dutch oven inside. Turn the dough out onto parchment paper, seam-side down. Score the top with a knife, lift with parchment, and place it into the hot Dutch oven. Cover and bake for 30 minutes, then remove the lid and bake for an additional 15-20 minutes.
- Transfer the bread to a wire rack. Allow it to cool completely for at least 1 hour before slicing.
Leave a Reply