
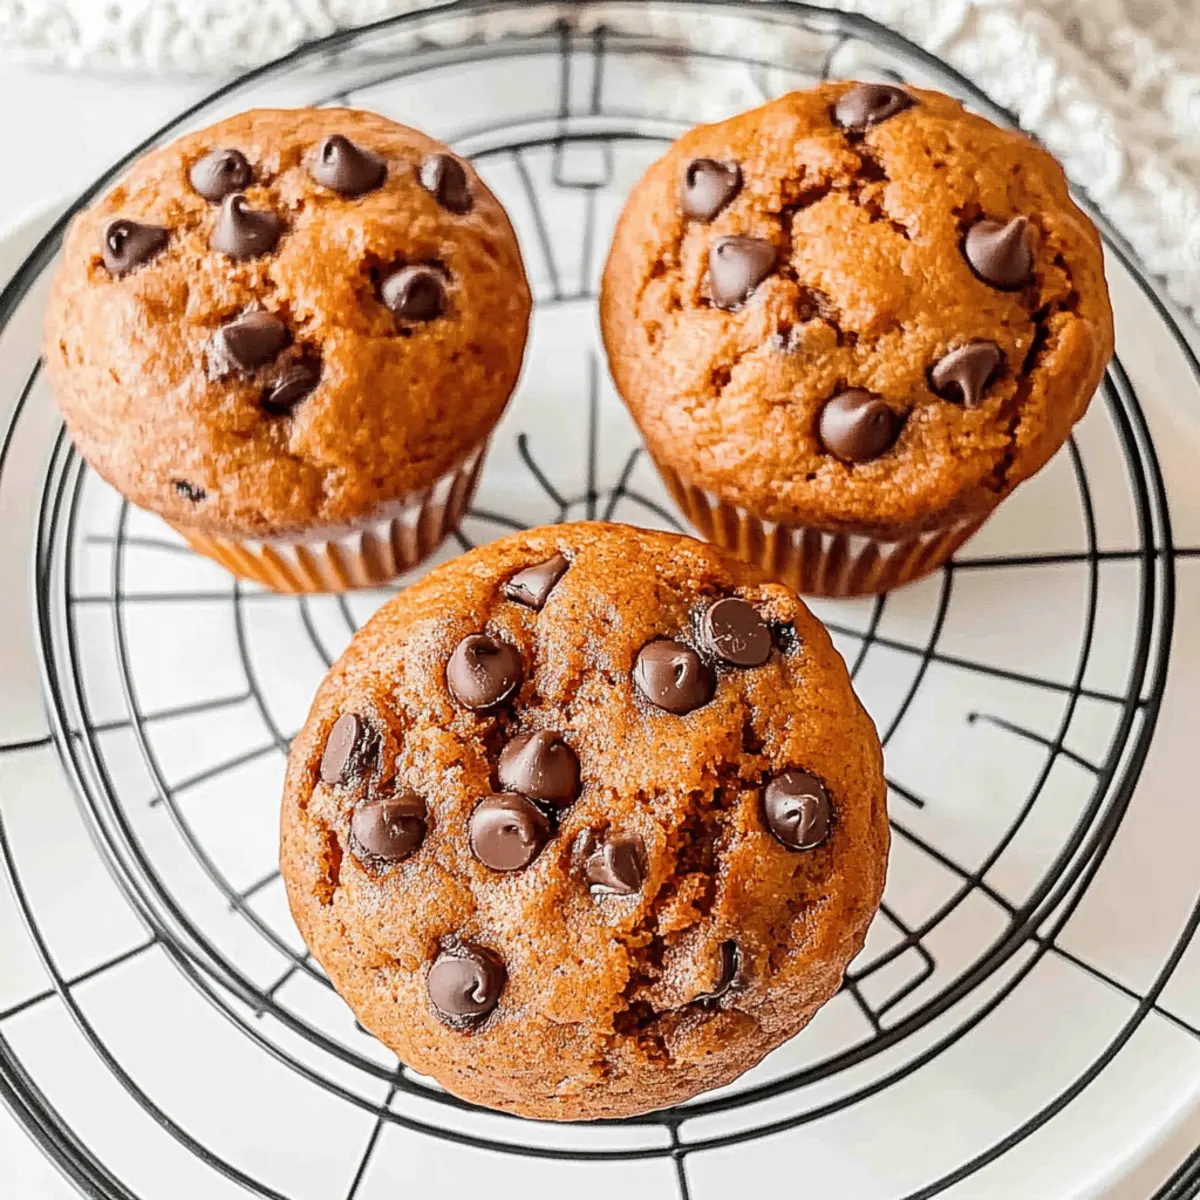
As I pulled my Pumpkin Protein Muffins from the oven, the warm aroma of cinnamon and nutmeg wrapped around me like a cozy blanket. These delightful muffins are perfect for those crisp autumn mornings or as a satisfying snack after a workout. Not only do they deliver a nourishing punch with every bite—thanks to the pumpkin puree and protein powder—they’re also incredibly versatile with options for gluten-free and vegan adaptations. It’s wonderful to find a treat that satisfies my sweet tooth without sacrificing my health goals. Curious to see how easy it is to whip up your own batch? Let’s dive into this delicious recipe!
Why Are Pumpkin Protein Muffins a Must-Try?
Wholesome Ingredients: These muffins are packed with nutrient-dense options like pumpkin puree and Greek yogurt, making them a healthy choice.
Protein Boost: With added protein powder, they provide a satisfying and energizing snack, perfect for post-workout recovery.
Versatile Options: Whether you’re gluten-free or vegan, this recipe easily accommodates different diets with simple swaps. Try using almond or oat milk for a dairy-free version!
Autumnal Flavors: The delightful blend of warm spices – think cinnamon and pumpkin pie spice – makes every bite feel like a cozy fall treat.
Quick and Easy: You can whip these up in no time, making them perfect for meal prep or a last-minute addition to your breakfast.
Crowd-Pleaser: Not just for fitness enthusiasts! Friends and family will love them too, whether enjoyed as a snack, breakfast, or alongside a warm beverage.
Pumpkin Protein Muffin Ingredients
Here’s everything you need to create these delightful and nutritious treats!
For the Batter
- Eggs – Provide structure and moisture; can be replaced with flax eggs for a vegan alternative.
- Canned Pumpkin Puree (15 oz) – Adds moisture and flavor; using a whole can prevents waste.
- Milk (¼ cup) – Ensures creaminess; substitute with almond or oat milk for a dairy-free option.
- Plain Greek Yogurt (⅓ cup) – Enhances moisture and adds protein; a non-dairy yogurt can be used for a vegan choice.
- Vanilla Extract (1 tsp) – Adds a lovely flavor; no direct substitutions recommended.
- Whole Wheat Flour (½ cup + 2 tbsp) – Provides structure; can swap for gluten-free flour.
- Vanilla Protein Powder (½ cup + 2 tbsp) – Boosts the protein content; omit for a flour-only version or use vegan protein.
- Baking Soda (1 tsp) – Acts as a leavening agent; no substitutions recommended.
- Baking Powder (1½ tsp) – Aids in rising; ensure it’s fresh for optimal effectiveness.
- Salt (¼ tsp) – Enhances flavors; essential for balance.
- Brown Sugar (½ cup) – Sweetens the muffins; consider coconut sugar for a lower glycemic index option.
- Pumpkin Pie Spice (1 tsp) – Adds warm spices for depth of flavor; a mix of cinnamon, nutmeg, ginger, and allspice works as a substitute.
- Ground Cinnamon (1 tsp) – Provides warmth; no direct substitution.
- Olive Oil (2 tbsp) – Keeps the muffins moist; melted coconut oil can be used as a substitute.
- Mini Chocolate Chips (½ cup) – Adds sweetness and richness; can swap for butterscotch chips or omit for a lower sugar content.
Feel free to get creative! These Pumpkin Protein Muffins are not only delicious but also adaptable to fit your dietary needs. Happy baking!
Step‑by‑Step Instructions for Pumpkin Protein Muffins
Step 1: Preheat the Oven
Begin by preheating your oven to 350°F (175°C) to ensure it’s hot and ready for baking. While the oven warms, gather your ingredients and prepare your muffin pan by placing cupcake liners in each cavity. This will help prevent sticking and make for easy cleanup after enjoying your delicious Pumpkin Protein Muffins.
Step 2: Mix the Wet Ingredients
In a large mixing bowl, whisk together the eggs, Greek yogurt, and pumpkin puree until the mixture is smooth and well combined. This step is crucial as it helps incorporate air, making your muffins light and fluffy. Take a moment to appreciate the lovely orange hue that indicates the healthiness these ingredients bring to your Pumpkin Protein Muffins.
Step 3: Incorporate Milk and Vanilla
Next, gently whisk in the milk and vanilla extract until fully blended. This will add a lovely creaminess to your batter and enhance the overall flavor of the muffins. Take care to mix until smooth, ensuring there are no lumps, which sets the foundation for the delightful texture you’re aiming for.
Step 4: Combine Dry Ingredients
In another bowl, sift together the whole wheat flour, protein powder, baking soda, baking powder, salt, brown sugar, pumpkin pie spice, and ground cinnamon. This process not only aerates the dry ingredients but also ensures even distribution of the leavening agents, which is vital for your Pumpkin Protein Muffins to rise uniformly as they bake.
Step 5: Mix Wet and Dry Ingredients
Gradually add the dry ingredient mixture to the wet ingredients, stirring gently until just combined. Be careful not to overmix, as this can lead to dense muffins. The batter should be slightly lumpy, which is perfect for ensuring those muffins remain soft and tender.
Step 6: Fold in Olive Oil and Chocolate Chips
Now, fold in the olive oil and mini chocolate chips using a spatula. This step brings moisture and sweetness to the batter, creating that delightful contrast in flavors. Aim for even distribution of the chocolate chips, as they will melt slightly and create little pockets of goodness in your Pumpkin Protein Muffins.
Step 7: Prepare the Muffin Pan
Take your prepared muffin pan and generously spray the liners with cooking spray to further prevent sticking. Using a cookie scoop, fill each muffin liner generously with the batter, filling them about three-quarters full. This will allow them to rise properly and achieve a perfect muffin dome once baked.
Step 8: Bake the Muffins
Carefully place the muffin pan in the preheated oven and bake for 25-28 minutes. You’ll know they’re done when the tops are slightly browned and a toothpick inserted in the center comes out clean. As they bake, your kitchen will be filled with the warm, inviting aroma of spices that herald the yumminess of your Pumpkin Protein Muffins.
Step 9: Cool Before Serving
Once baked, remove the muffins from the oven and let them cool in the pan for about 10 minutes before transferring them to a wire rack. Allowing them to cool will help maintain their moisture and prevent them from becoming soggy. Enjoy these wholesome treats as a delightful snack or quick breakfast option!
What to Serve with Pumpkin Protein Muffins
These muffins are not just tasty on their own; they are also wonderful companions to create a cozy, satisfying meal or snack.
-
Creamy Greek Yogurt: A dollop of Greek yogurt adds a rich, creamy texture that complements the spiced muffins beautifully. Pairing the muffins with yogurt not only provides a contrasting cold element but also boosts the protein content. You can enjoy it alongside for dipping or simply spread a little on top for added richness.
-
Fresh Sliced Apples: Crisp apple slices add a refreshing crunch and a burst of sweetness that beautifully balances the warm spices in the muffins. Imagine taking a bite of a muffin followed by a juicy slice of apple; it’s a delightful combination that echoes the flavors of fall.
-
Assorted Nuts: A handful of roasted almonds or walnuts on the side introduces a satisfying crunch and healthy fats, making your snack even more nutritious. The nuttiness perfectly complements the pumpkin flavor, elevating the overall experience.
-
Flavored Tea or Coffee: Enjoying these muffins with a warm cup of chai, pumpkin spice latte, or black coffee creates a harmonious autumn experience. The coffee’s rich, bold flavors meld perfectly with the sweetness of the muffins and add a touch of comfort to your day.
-
Honey Drizzle: A light drizzle of honey can transform your muffin into a gourmet treat. The sweetness enhances the existing flavors and brings out the warm spices in a whole new way, making it a delightful finishing touch.
-
Cottage Cheese: Pair your muffins with a scoop of cottage cheese for added protein. Its creaminess complements the soft texture of the muffins while providing a savory contrast that balances the sweet flavors beautifully.
Pumpkin Protein Muffins Variations & Substitutions
Feel free to unleash your creativity and tailor these muffins to your taste and dietary needs—there’s no wrong way to make them!
- Dairy-Free: Replace Greek yogurt and milk with non-dairy yogurt and almond or oat milk to make a delicious vegan muffin.
- Gluten-Free: Use a 1:1 gluten-free flour blend instead of whole wheat flour for an equally fluffy texture.
- Sweetener Swap: Try coconut sugar instead of brown sugar for a lower glycemic index option, keeping the sweetness intact.
- Nutty Addition: Fold in ½ cup of chopped walnuts or pecans for a delightful crunch and added healthy fats.
- Fruit Boost: Add ½ cup of raisins or dried cranberries for a touch of natural sweetness and a little chewiness in each bite.
- Spicy Kick: Increase the pumpkin pie spice to 1½ teaspoons, or mix in a pinch of cayenne pepper for a warm, spicy finish.
- Wholesome Extras: Toss in ¼ cup of chia seeds or ground flaxseeds to enhance the fiber content and add a nutty flavor.
- Ultimate Indulgence: Swap mini chocolate chips for dark chocolate chunks for a richer, more decadent muffin experience.
Experiment and find your favorite combination! The adaptability of these muffins makes them perfect for breakfast, snacks, or post-workout recovery. If you’re looking for other fun flavor boosters, check out this healthy pumpkin bread recipe for some fresh ideas!
Storage Tips for Pumpkin Protein Muffins
Fridge: Store in an airtight container for up to 5 days. Keeping them sealed will retain their moisture and freshness.
Freezer: For longer storage, freeze muffins for up to 3 months. Wrap each muffin individually in plastic wrap before placing them in a freezer bag to prevent freezer burn.
Reheating: To enjoy warm muffins, simply microwave for about 15-20 seconds or let them sit at room temperature for a while. Enjoy the delightful flavors of these Pumpkin Protein Muffins!
Meal Prep: Great for on-the-go snacks! Bake a batch ahead of time to keep healthy options ready throughout the week.
Expert Tips for Pumpkin Protein Muffins
-
Prevent Sticking: Use cooking spray liberally on muffin liners, especially when using protein powder, to avoid any unwanted sticking during baking.
-
Cool Correctly: Allow muffins to cool in the pan for at least 10 minutes before transferring to a wire rack. This helps maintain their moist texture.
-
Storage Solutions: For meal prep, store muffins in an airtight container in the fridge for up to 5 days or freeze them for up to 3 months, keeping them fresh and delicious.
-
Perfect Portions: Adjust baking time for mini muffins, decreasing to 12-15 minutes to ensure they don’t overbake and stay tender.
-
Add Flavor: Experiment with various mix-ins like nuts or dried fruit for a personal touch, enhancing your Pumpkin Protein Muffins even more!
Make Ahead Options
These Pumpkin Protein Muffins are perfect for busy home cooks looking to simplify meal planning! You can prepare the muffin batter up to 24 hours in advance by mixing all the wet and dry ingredients separately, then combining them shortly before baking to maintain the texture. Alternatively, bake the muffins and store them in an airtight container in the refrigerator for up to 5 days or freeze for up to 3 months. To keep them moist, ensure they cool completely before refrigeration or freezing. When you’re ready to enjoy, simply reheat in the microwave or toaster oven for warm, delectable muffins that are just as delicious as when they first came out of the oven!
Pumpkin Protein Muffins Recipe FAQs
What type of pumpkin puree should I use?
I recommend using canned pumpkin puree for convenience and consistent quality. Make sure to select 100% pure pumpkin and not pumpkin pie filling, which contains added sugars and spices that could alter the flavor and texture of your muffins.
How should I store leftover Pumpkin Protein Muffins?
For the best results, place your muffins in an airtight container and store them in the fridge for up to 5 days. This helps maintain their moist texture. If you’d like to keep them longer, I suggest freezing them to preserve their freshness.
Can I freeze Pumpkin Protein Muffins? If so, how?
Absolutely! To freeze your muffins, wrap each one individually in plastic wrap to prevent freezer burn, then place them in a freezer-safe bag. They can be frozen for up to 3 months. When you’re ready to eat, simply thaw in the fridge overnight or microwave for about 15-20 seconds to enjoy that fresh-baked taste!
What if my muffins come out too dense?
If your muffins turn out dense, it might be due to overmixing the batter. When combining wet and dry ingredients, stir just until everything is moistened; a few lumps are perfectly fine. Also, check that your baking powder is fresh, as this is key for helping the muffins rise correctly.
Are these muffins suitable for people with dietary restrictions?
Yes, these Pumpkin Protein Muffins are quite adaptable! You can use flax eggs in place of regular eggs for a vegan option, swap Greek yogurt for non-dairy yogurt, and choose gluten-free flour if needed. It’s wonderful to find a treat that meets various dietary needs without compromising flavor or texture.
Can pets eat pumpkin?
Yes, plain pumpkin puree is safe for pets in moderation, and it can even aid in digestion! However, ensure that the muffins themselves don’t contain any chocolate or sweeteners like xylitol, which can be harmful to dogs. Always consult with your veterinarian if you’re unsure about sharing human food with your furry friends.
Pumpkin Protein Muffins for Delicious Fall Fuel
Ingredients
Equipment
Method
- Preheat your oven to 350°F (175°C) and prepare your muffin pan with cupcake liners.
- In a large mixing bowl, whisk together the eggs, Greek yogurt, and pumpkin puree until smooth.
- Gently whisk in the milk and vanilla extract until fully blended.
- In another bowl, sift together the whole wheat flour, protein powder, baking soda, baking powder, salt, brown sugar, pumpkin pie spice, and ground cinnamon.
- Gradually add the dry ingredient mixture to the wet ingredients, stirring gently until just combined.
- Fold in the olive oil and mini chocolate chips with a spatula.
- Generously spray the muffin liners with cooking spray, then fill each about three-quarters full with batter.
- Bake for 25-28 minutes or until tops are slightly browned and a toothpick comes out clean.
- Allow the muffins to cool in the pan for about 10 minutes before transferring to a wire rack.
Leave a Reply