
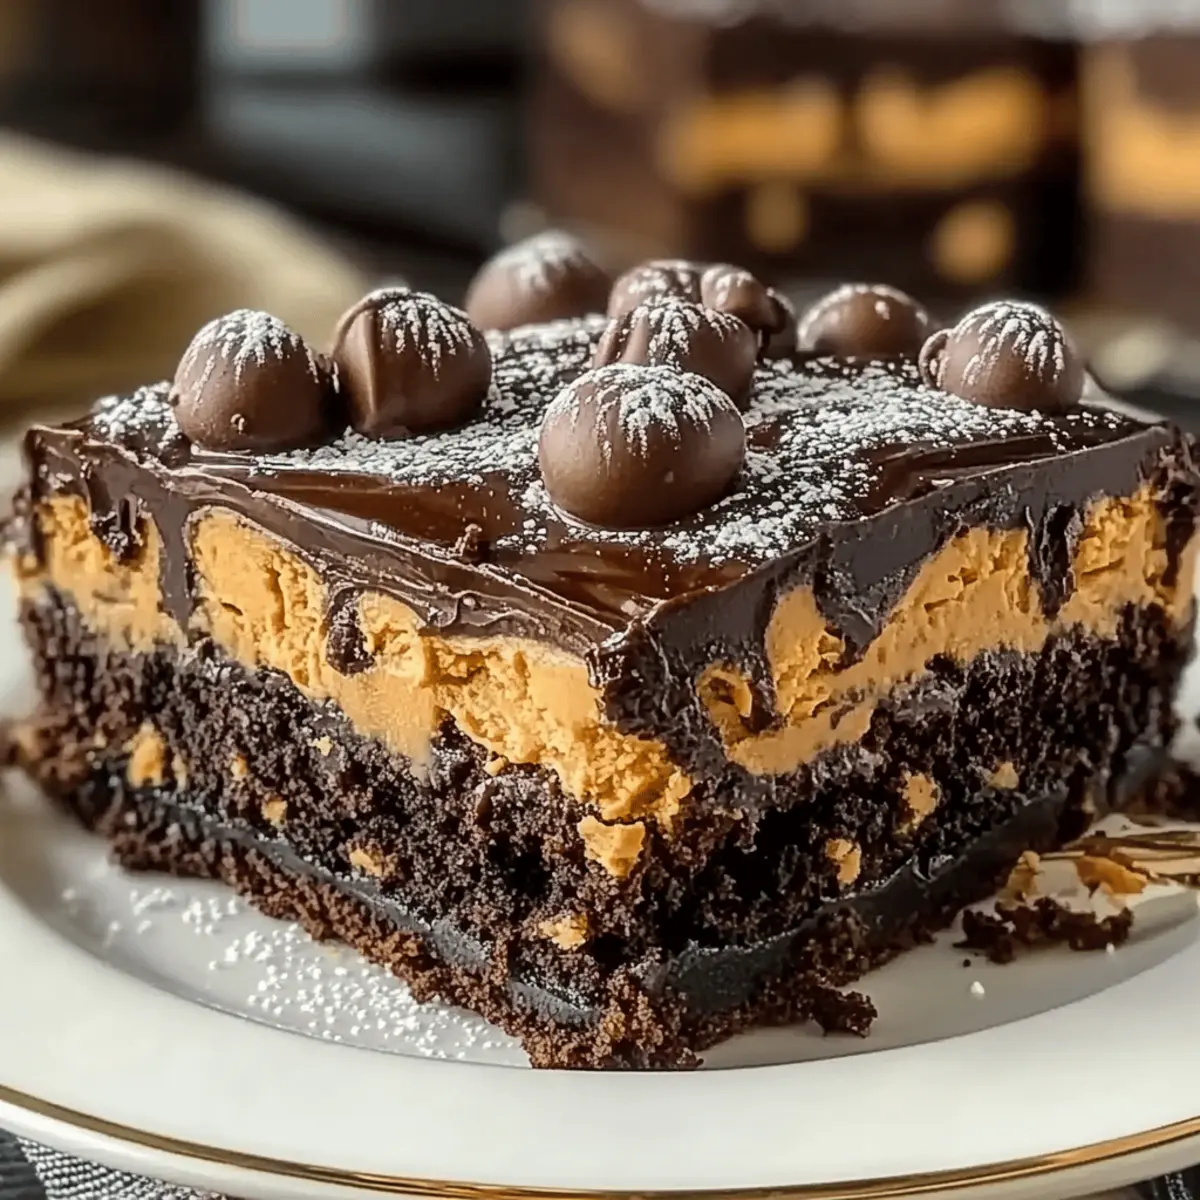
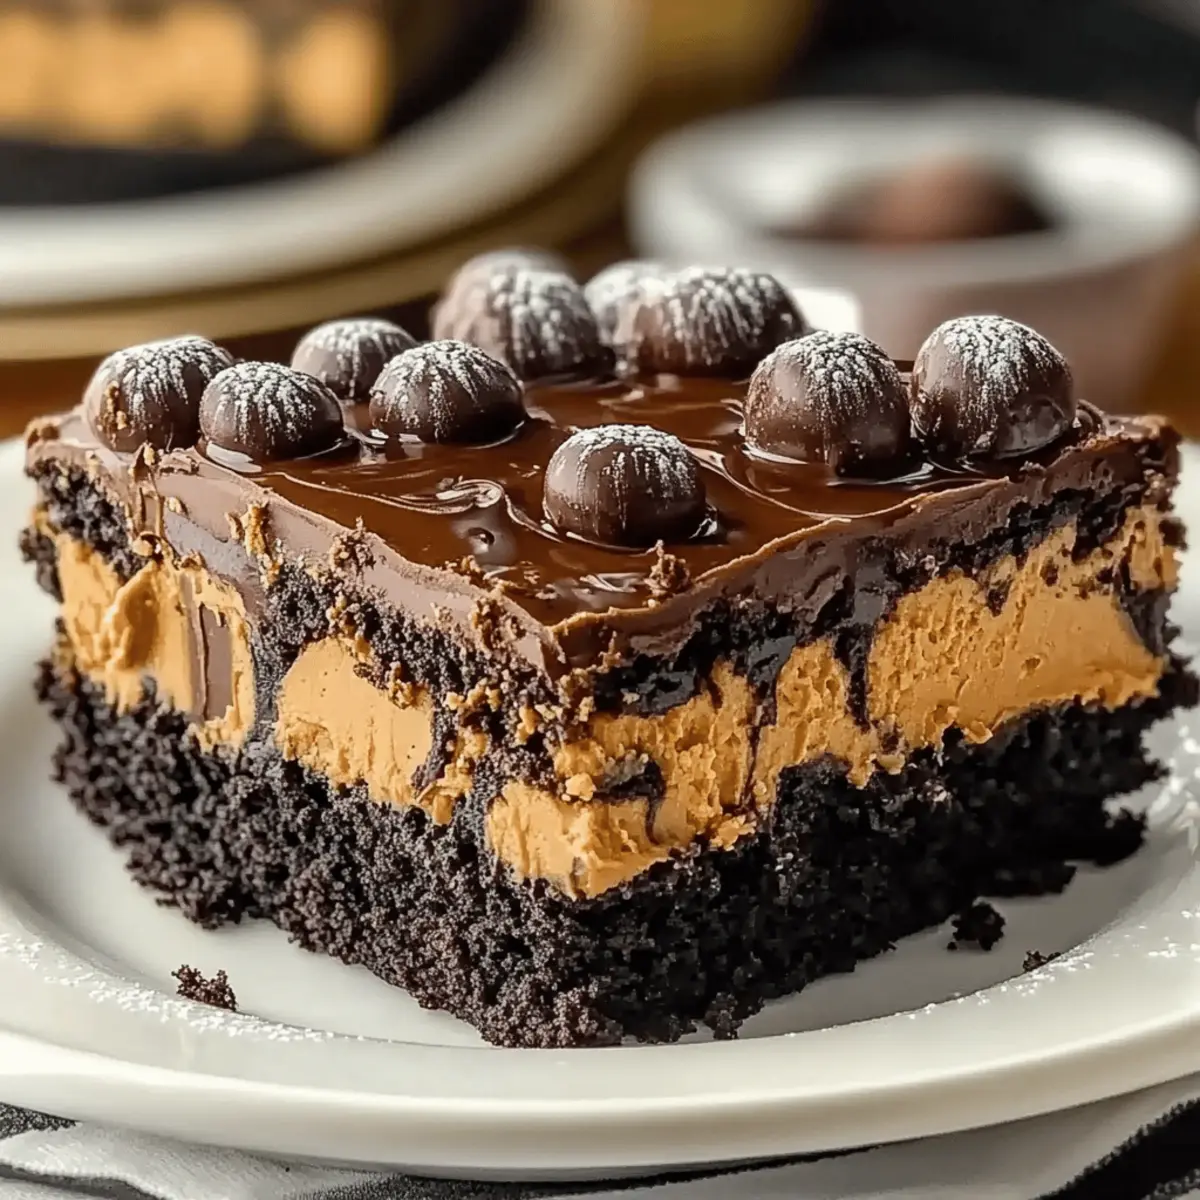
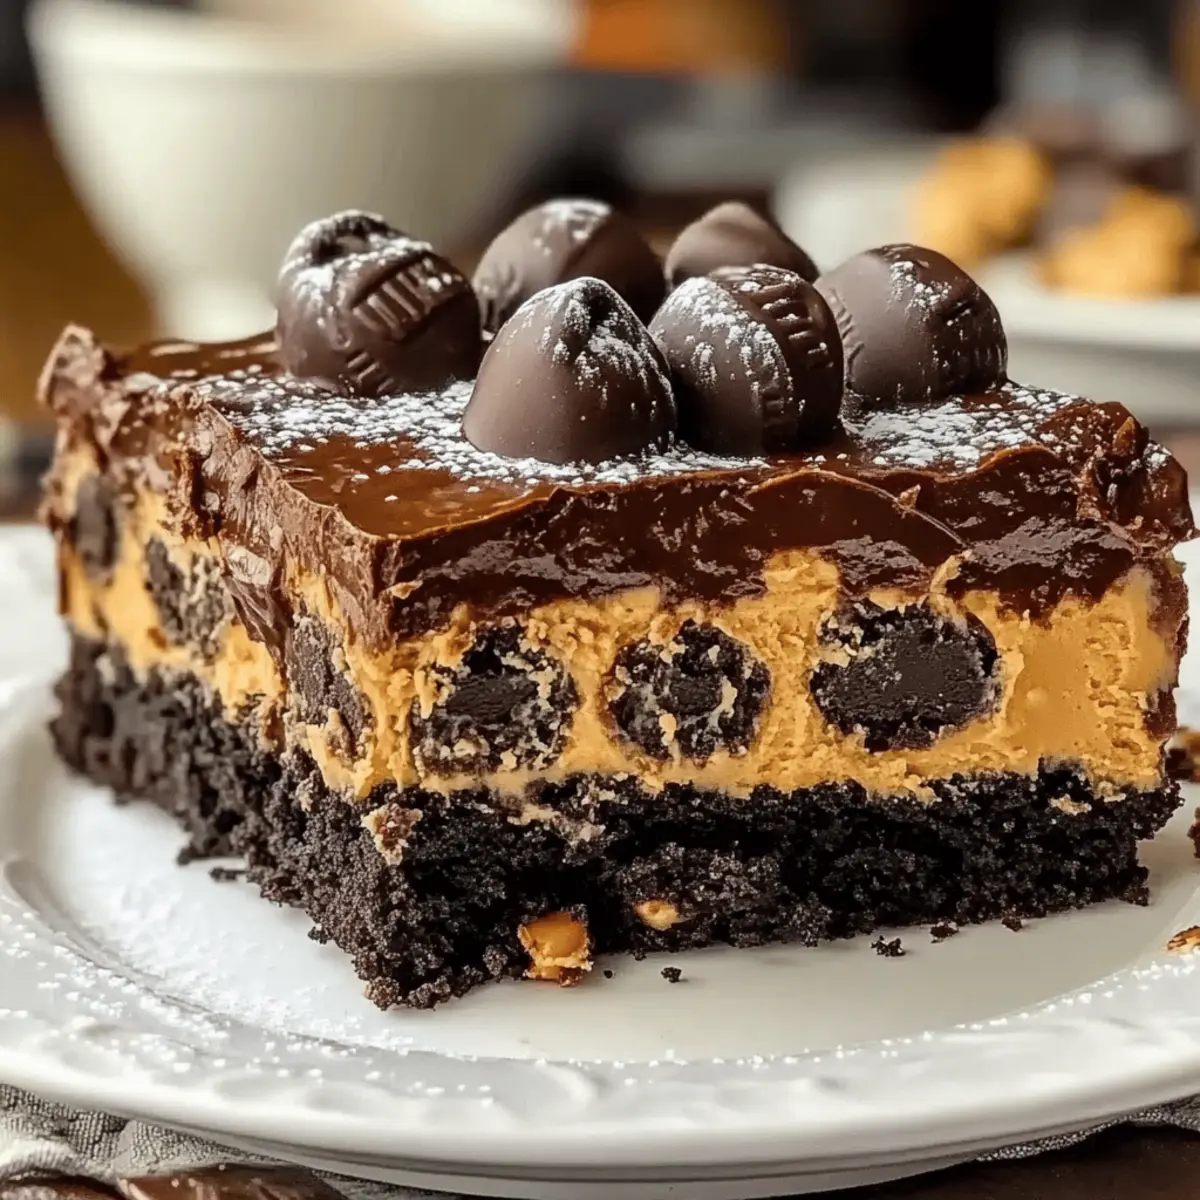
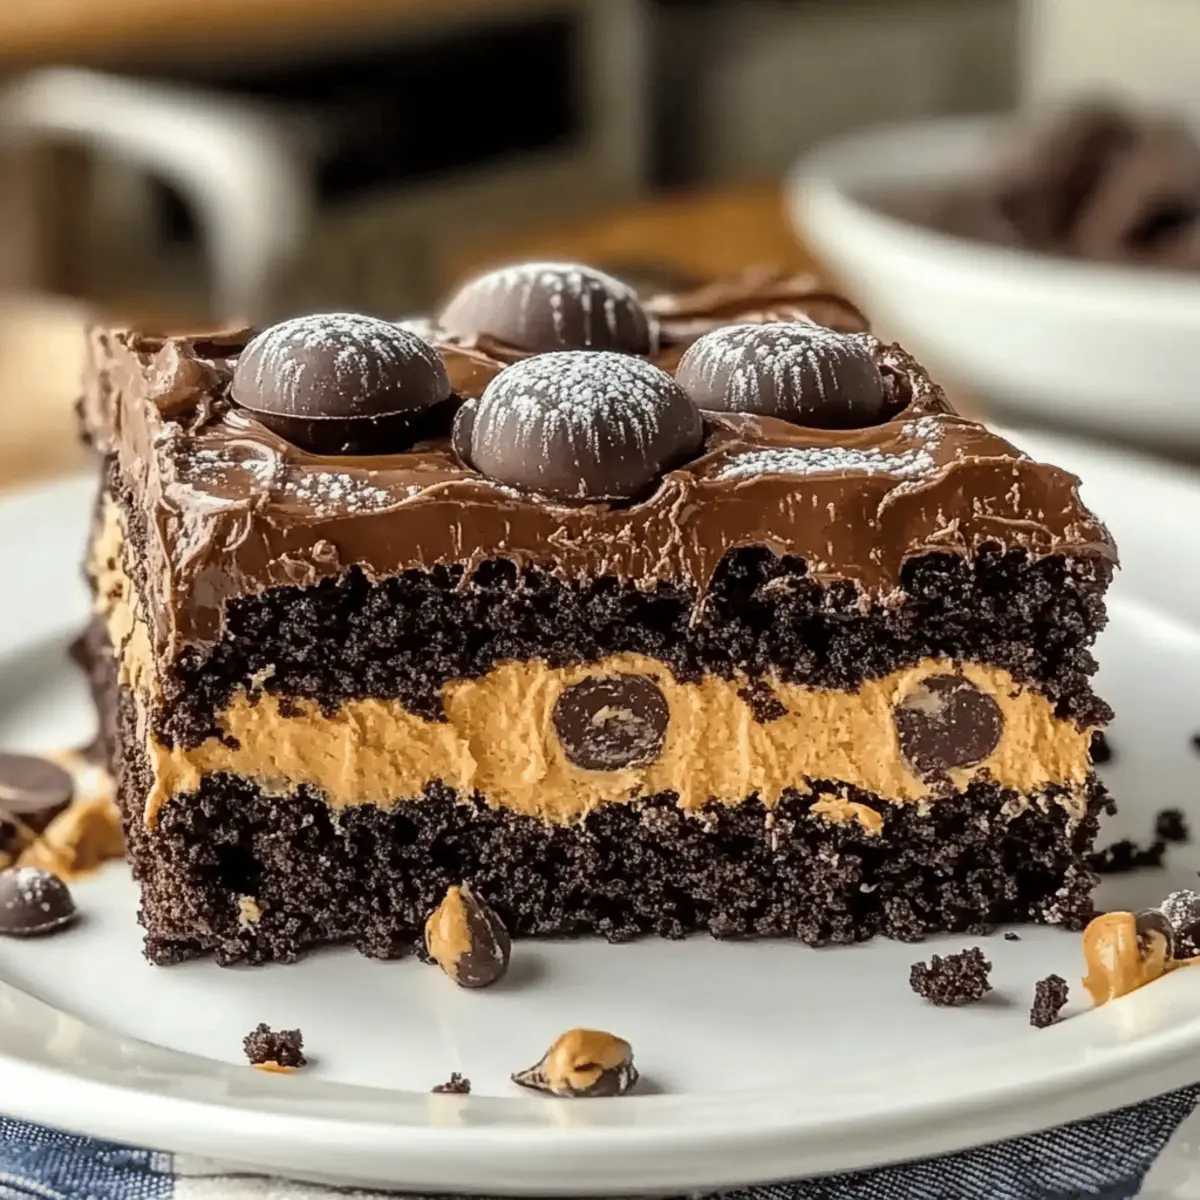
As I stood in my kitchen, the aroma of melting chocolate and peanut butter began to weave its magic around me, instantly transporting me back to joyful childhood baking sessions. You’re in for a delightful treat with this Reese’s Peanut Butter Earthquake Cake! This indulgent dessert is a perfect mix of rich, fudgy goodness and gooey chocolatey centers that make every slice irresistible. Not only is it incredibly easy to whip up, but it also doubles as the ultimate crowd-pleaser for any occasion. Imagine the smiles on your loved ones’ faces as they dig into this nostalgic gem! Ready to impress with a dessert that’s sure to steal the spotlight? Let’s get started!
Why is this cake a must-bake?
Decadent Flavor Explosion: This Reese’s Peanut Butter Earthquake Cake offers a rich fusion of chocolate and peanut butter that’s nothing short of heavenly.
Effortless Preparation: With just a few ingredients and simple steps, you can create a show-stopping dessert that looks as amazing as it tastes.
Gooey Goodness: The melty center filled with Reese’s Cups ensures every bite is a memorable indulgence.
Versatile Treat: Enjoy it warm as a cozy dessert or serve it at gatherings—this cake is a crowd favorite!
Family-Friendly: Perfect for all ages, it brings joy to any table, making it a staple for family get-togethers or potlucks.
Get ready to wow your friends and family with this delight, and consider pairing it with a scoop of vanilla ice cream or checking out my Thai Peanut Chicken Wraps for savory balance after this sweet treat!
Reese’s Peanut Butter Earthquake Cake Ingredients
For the Cake Base
• Chocolate Cake Mix – This is the foundation of the cake; a dark chocolate mix elevates the richness.
• Water – Hydrates the mix; feel free to use milk for a creamier result.
• Vegetable Oil – Adds moisture; can be substituted with melted coconut oil for a healthier twist.
• Eggs – Act as a binder; use flax eggs for a vegan option.
For the Filling
• Creamy Peanut Butter – The signature flavor; swapping with almond butter gives a unique taste.
• Reese’s Peanut Butter Cups – Essential for that gooey, sweet center; there’s no substitute for this classic!
For the Creamy Topping
• Cream Cheese – Adds a delightful tang and creaminess; make sure it’s softened for easy blending.
• Unsalted Butter – Enhances richness; margarine or coconut oil work for dairy-free needs.
• Powdered Sugar – Sweetens the topping while achieving desirable frosting consistency; can use coconut sugar.
• Vanilla Extract – A flavor booster; pure extract brings out the cake’s best qualities.
The Reese’s Peanut Butter Earthquake Cake will not only wow your guests but also bring back those cherished childhood memories with its delectable blend of flavors!
Step‑by‑Step Instructions for Reese’s Peanut Butter Earthquake Cake
Step 1: Preheat and Prepare
Begin by preheating your oven to 350°F (175°C). While it heats, grease a 9×13-inch baking dish to prevent the cake from sticking. A light coat of cooking spray or butter works great for this. Once you’re all set, it’s time to gather your mixing bowl and ingredients for the cake.
Step 2: Mix the Batter
In a large mixing bowl, combine the chocolate cake mix, water, vegetable oil, and eggs. Using a handheld mixer, blend the ingredients on medium speed for about 2 minutes, until the mixture becomes smooth and well combined. You’ll know it’s ready when the batter is thick and glossy, inviting you to take the next step in creating your Reese’s Peanut Butter Earthquake Cake.
Step 3: Add the Goodies
Gently fold in the chopped Reese’s Peanut Butter Cups and any additional chocolate chips you desire. Use a spatula for a delicate stir, ensuring that the candies are evenly distributed throughout the batter without overmixing. This step adds delightful bursts of peanut butter and chocolate to every bite, enhancing the overall flavor.
Step 4: Layer the Cake
Pour half of the luscious batter into your prepared baking dish, spreading it evenly across the bottom. Next, drizzle a generous layer of sweetened condensed milk over the batter. This special ingredient helps to create that ooey-gooey center for your cake, bringing the flavors to life in the most delightful way!
Step 5: Top It Off
Spoon the remaining batter over the condensed milk layer, ensuring it covers all the oozy goodness beneath. Smooth the top gently with a spatula to create an even surface. This step seals in the melted sweetness of the Reese’s Cups, making for a tantalizing rich texture once baked.
Step 6: Bake the Cake
Place the baking dish in the preheated oven and bake for 30-35 minutes. Keep an eye on it—when the cake is done, a toothpick inserted into the center should come out with moist crumbs rather than wet batter. This visual cue is key to ensuring that your Reese’s Peanut Butter Earthquake Cake has the perfect chewy texture.
Step 7: Cool and Serve
After baking, remove the cake from the oven and let it cool for about 10 minutes in the baking dish. This cooling period allows the cake to set slightly, making it easier to cut. For an extra touch, dust the top with powdered sugar before serving, or indulge with a scoop of vanilla ice cream to elevate your dessert experience!
How to Store and Freeze Reese’s Peanut Butter Earthquake Cake
Airtight Storage: Keep leftover slices in an airtight container at room temperature for up to 3 days to maintain freshness and flavor.
Refrigeration: If you prefer a longer storage time, transfer slices to the fridge, where they can last up to a week. Just make sure to cover them well to prevent drying out.
Freezing: For longer lasting cake, wrap individual slices in plastic wrap and then in aluminum foil before placing them in a freezer-safe bag. They can be frozen for up to 3 months.
Reheating Tips: To enjoy your Reese’s Peanut Butter Earthquake Cake again, simply microwave the slice for 15-30 seconds until warmed. Enjoy warm for the best gooey experience!
What to Serve with Reese’s Peanut Butter Earthquake Cake
Indulging in a slice of this rich cake is a delight, but complementing it with the perfect side dishes can elevate your dessert experience!
-
Vanilla Ice Cream: This classic pairing adds creamy coolness that contrasts beautifully with the warm, fudgy cake, creating a dreamy balance of flavors.
-
Whipped Cream: Light and airy, a dollop of whipped cream enhances the richness of the cake while adding a touch of elegance to each slice.
-
Crushed Peanuts: Sprinkling these on top adds a crunchy texture, providing an extra layer of flavor that highlights the peanut butter goodness within the cake.
-
Chocolate Sauce: A drizzle of warm chocolate sauce over the cake deepens its chocolate flavor, making each bite even more decadent and satisfying.
-
Fresh Berries: The tartness of fresh raspberries or strawberries contrasts the sweetness of the cake, offering a refreshing palate cleanser after each indulgent bite.
-
Milkshake: For a truly indulgent treat, serve with a creamy chocolate or peanut butter milkshake that mirrors the cake’s flavors in a fun, drinkable form.
-
Coffee: A warm cup of coffee enhances the rich chocolate notes of the cake and offers a delightful companion for an afternoon treat or evening dessert.
-
Peanut Butter Frosting: Elevate your cake slice with a layer of creamy peanut butter frosting on top for double the peanut butter pleasure in each bite!
Expert Tips for Reese’s Peanut Butter Earthquake Cake
-
Room Temperature Ingredients: Ensure cream cheese and butter are at room temperature. This makes mixing easier and results in a smoother topping.
-
Avoid Overmixing: Gently mix the batter to maintain a light texture. Overmixing can lead to a dense cake instead of the desired fudgy consistency.
-
Baking Dish Adjustments: If using a different type of baking dish, keep an eye on baking time. Glass dishes may require a few extra minutes for an even bake.
-
Setting Time Matters: Allow the cake to cool slightly before slicing. This enhances cutability and lets that gooey center thicken a bit for a better presentation.
-
Chilling for Flavors: For an even richer flavor, let the cake sit for an additional hour after baking. It intensifies the chocolate and peanut butter flavors in your Reese’s Peanut Butter Earthquake Cake.
Reese’s Peanut Butter Earthquake Cake Variations
Feel free to get creative with this delicious dessert—there’s always room for personal touches that can elevate your Reese’s Peanut Butter Earthquake Cake!
-
Crunchy Peanut Butter: Swap out creamy peanut butter for crunchy to add delightful texture. The added crunch pairs beautifully with the fudgy cake!
-
Chocolate Chip Boost: Incorporate chocolate chips mixed in for even more gooey goodness. This simple step adds bursts of melty chocolate throughout every bite.
-
Almond Butter Alternative: Try almond butter instead of peanut butter for a unique flavor twist. It’s a wonderful way to mix things up while maintaining that nutty richness.
-
Cake Mix Variation: Experiment with different flavored cake mixes, like vanilla or caramel. This creative choice can yield exciting taste surprises, turning a classic into something fresh and unexpected.
-
Heat It Up: Toss in some chili powder or cayenne for a spicy kick. Just a pinch will bring a new level of warmth that pairs surprisingly well with chocolate and peanut butter.
-
Add Nuts: Fold in chopped nuts like pecans or walnuts for added crunch. This also provides a lovely contrast to the creamy center and adds a layer of flavor you won’t forget.
-
Swirl in Marshmallow Cream: Create a marshmallow center by swirling in fluff before baking. The melted marshmallow adds a sweet, delightful twist to each slice.
-
Toppings Galore: Top with crushed pretzels or toffee bits for an unexpected crunch. The salty-sweet combination elevates the indulgence while providing a delightful texture contrast.
Take your dessert experience to the next level, and if you’re in the mood for something savory afterward, check out my Cowboy Butter Chicken Linguine for a comforting meal!
Make Ahead Options
These Reese’s Peanut Butter Earthquake Cake is perfect for meal prep enthusiasts looking to save time during busy weeknights! You can prepare the batter up to 24 hours in advance, storing it in an airtight container in the refrigerator. For added convenience, chop the Reese’s Peanut Butter Cups and mix them in just before baking to maintain their gooeyness. If you’re planning to serve the cake later, bake it ahead of time and let it cool completely, then refrigerate it for up to 3 days. When you’re ready to enjoy, simply reheat individual slices in the microwave for a few seconds to bring back the warm, melty goodness that makes this cake so irresistible!
Reese’s Peanut Butter Earthquake Cake Recipe FAQs
What’s the best way to select ripe ingredients for this cake?
Absolutely! For the best results, select fresh ingredients, especially your eggs and peanut butter. Make sure the peanut butter is smooth and creamy—opt for brands without added sugars or preservatives if possible. When choosing your chocolate cake mix, look for a brand with high cocoa content for richer flavor.
How should I store my leftover Reese’s Peanut Butter Earthquake Cake?
I recommend keeping any leftovers in an airtight container at room temperature for up to 3 days. If you want to prolong freshness, refrigerate them where they’ll stay enjoyable for up to a week. Just ensure they are covered well to avoid drying out.
Can I freeze Reese’s Peanut Butter Earthquake Cake?
Certainly! To freeze, wrap each slice in plastic wrap and then in aluminum foil. Place the wrapped slices into a freezer-safe bag. This method will allow you to enjoy your cake for up to 3 months. When you’re ready to indulge again, microwave a slice for 15-30 seconds to heat it up and enjoy that gooey goodness!
What if my cake ends up too dense?
Very common! If your cake turns out too dense, it may be because of overmixing the batter. Next time, gently fold the ingredients together until just combined. It’s also important to ensure that your baking powder is fresh, as this can affect the rise of your cake.
Is this cake safe for individuals with nut allergies?
Unfortunately, since this Reese’s Peanut Butter Earthquake Cake contains peanut butter and Reese’s Cups—both of which contain nuts—it’s not safe for those with nut allergies. You could try a nut-free butter substitute, like sunflower seed butter, but keep in mind that the taste will differ significantly.
Can I use other nut butters in this recipe?
Absolutely! While I recommend using creamy peanut butter for the best flavor, you can substitute with almond butter or cashew butter for a unique twist. Just be sure they are smooth and creamy to achieve the desired texture in your cake!
Reese’s Peanut Butter Earthquake Cake: A Chocolate Dream!
Ingredients
Equipment
Method
- Preheat your oven to 350°F (175°C) and grease a 9x13-inch baking dish.
- In a large mixing bowl, combine the chocolate cake mix, water, vegetable oil, and eggs. Blend on medium speed for about 2 minutes.
- Gently fold in the chopped Reese’s Peanut Butter Cups.
- Pour half of the batter into the prepared baking dish and drizzle sweetened condensed milk over it.
- Top with the remaining batter, covering the condensed milk layer.
- Bake for 30-35 minutes. A toothpick inserted should come out with moist crumbs.
- Let the cake cool in the dish for about 10 minutes before serving.
Leave a Reply