
As I rummaged through the fridge, I stumbled upon an abundance of leftover cake—an unassuming puzzle piece just waiting to be transformed. That’s when I had the delightful idea to create Halloween Cakesicles! With their smooth chocolate coating and whimsical decorations, these treats not only save cake from a sad fate but also make for an exciting, easy-to-make activity perfect for kids. They’re wonderfully customizable, allowing for a variety of flavors and fun toppings that cater to every little ghost and goblin’s taste buds. Whether you’re whipping these up for a festive gathering or simply indulging in a creative afternoon with the family, you’ll love how quickly they come together. Curious to learn how to bring a little magic into your kitchen? Let’s dive in!

Why Try Halloween Cakesicles?
Transforming leftovers into delights: These Halloween cakesicles elegantly turn leftover cake into festive treats that bring joy to any occasion.
Kid-friendly fun: Involve your little ones in the baking process for an unforgettable family activity.
Customizable options: With endless decorating possibilities, each cakesicle can reflect your personal creative flair!
Quick prep time: No complicated steps here—whip these up in no time! Plus, they’re perfect for last-minute Halloween gatherings.
Impressive presentation: Each cakesicle looks like a gourmet treat, making them a hit at parties or school events. Try dressing them up with sprinkles or festive themes, like with Halloween Chocolate Chip Cookies alongside your cakesicles for a spooky spread!
Halloween Cakesicles Ingredients
Note: Gather these ingredients to create your delicious Halloween cakesicles using leftover cake!
For the Cakesicles
• Leftover Cake/Cupcakes – The base for cakesicles; feel free to use any flavor like red velvet to add a delightful twist.
• Frosting – Acts as the glue to bind the cake together; buttercream or cream cheese frosting works beautifully.
For the Coating
• Coating Chocolate (Candy Melts or Coating Chocolate) – This forms the outer layer, keeping cakesicles intact, with Ghirardelli being a top choice for enhanced flavor.
• Food Color (optional) – For vibrant chocolate decorations; use oil-based candy colors or powdered food coloring to make your cakesicles stand out.
For the Tools
• Cakesicle Molds – Essential for shaping your treats; having 2-3 molds makes the process even more efficient.
Let’s get ready to turn those leftovers into fabulous Halloween cakesicles that are sure to enchant everyone!
Step‑by‑Step Instructions for Halloween Cakesicles
Step 1: Mix Cake and Frosting
Begin by crumbling your leftover cake or cupcakes in a large mixing bowl until it resembles fine crumbs. Add a generous amount of frosting and mix thoroughly with your hands or a spatula until the mixture is fully combined and holds together when pressed. This step is crucial to ensure your Halloween cakesicles have the right consistency.
Step 2: Fill Molds
Take your cakesicle molds and pack the cake and frosting mixture into each cavity. Use your fingers to firmly press down the mixture, leaving a tiny bit of space at the top for expansion. This ensures your cakesicles hold their shape. Once filled, the molds should feel compact and solid, ready for the next step.
Step 3: Freeze
Place the filled cakesicle molds into the freezer and let them chill for at least 30 minutes. This setting time is essential for the mixture to firm up, allowing for easy removal from the molds later. You will know they are ready when the mixture is solid to the touch and holds together well.
Step 4: Melt Coating Chocolate
While the cakesicles are freezing, melt your coating chocolate according to the package instructions, ensuring a smooth consistency. Use a microwave-safe bowl and heat in short bursts of 20-30 seconds, stirring in between until fully melted. The chocolate should be glossy and free of lumps, ready for dipping your Halloween cakesicles!
Step 5: Coat Cakesicles
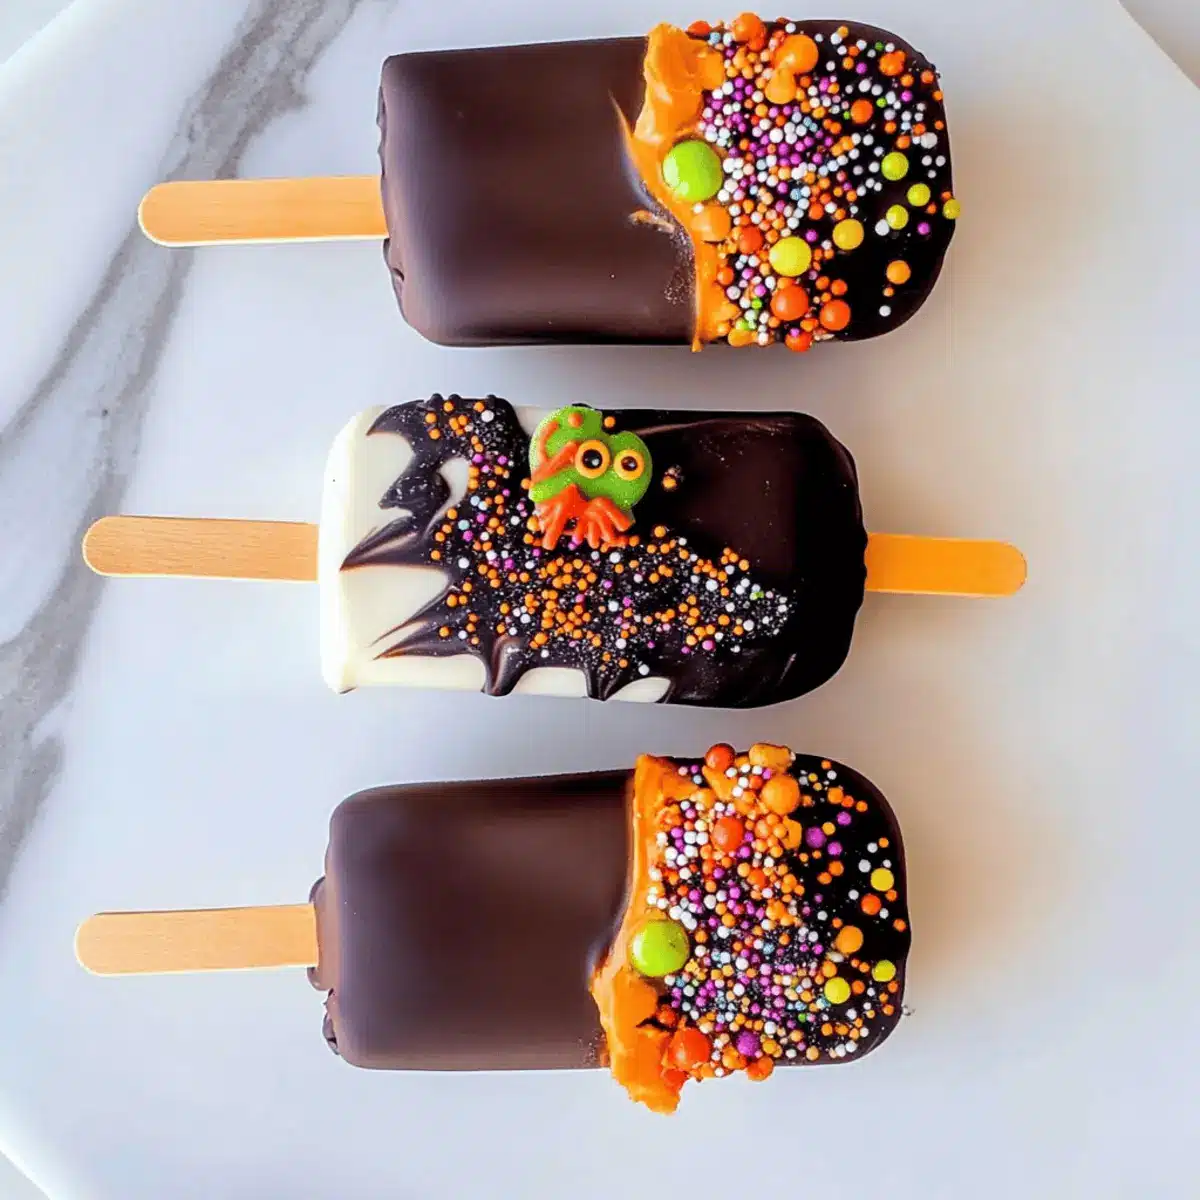
Carefully remove the frozen cakesicles from the molds, gently twisting to release if necessary. Dip each cakesicle into the melted chocolate, ensuring they are completely coated and letting the excess chocolate drip back into the bowl. The chocolate should appear even and thick, providing a delightful shell for your treats.
Step 6: Decorate
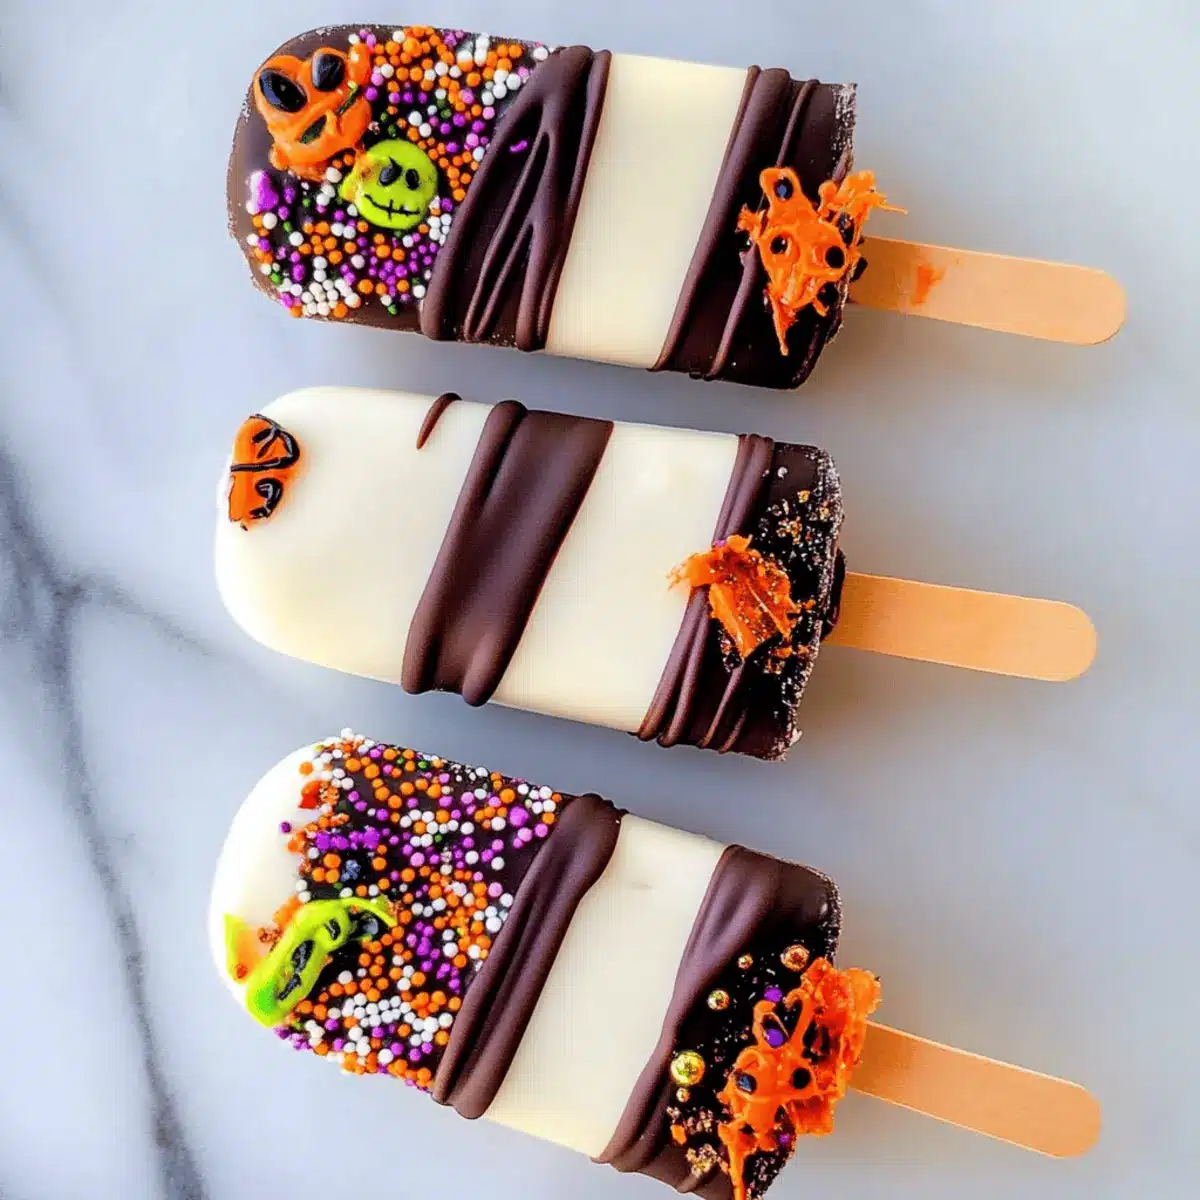
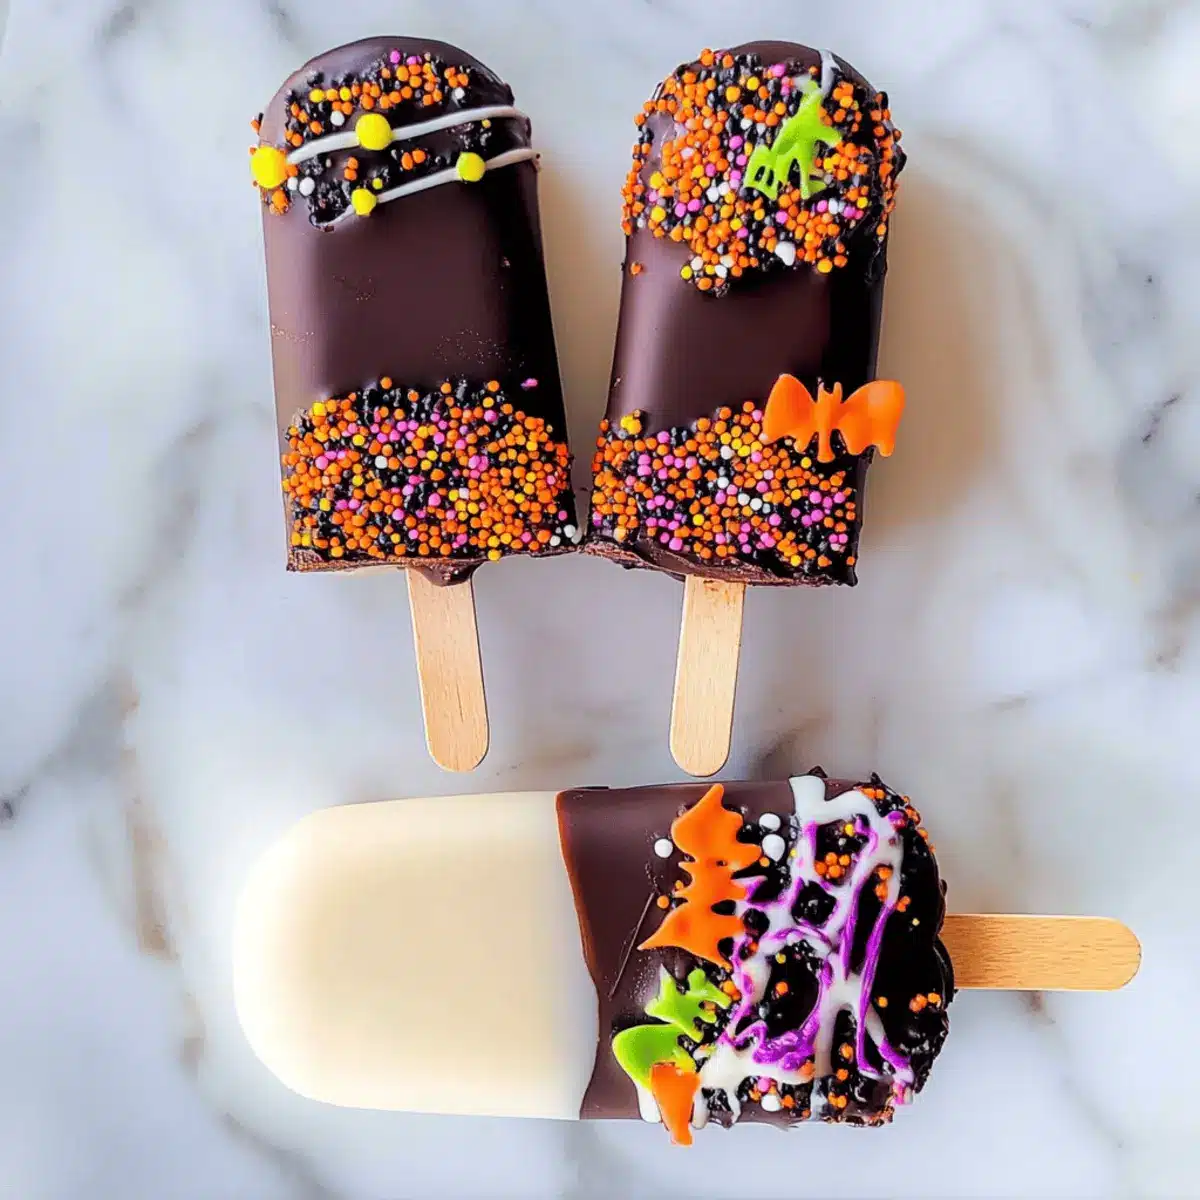
Before the chocolate sets, get creative by adding sprinkles, edible glitter, or themed decorations to your Halloween cakesicles. Ensure your toppings stick by applying them while the chocolate is still wet. This fun step allows for personalization and adds a whimsical touch to each cakesicle, perfect for Halloween festivities.
Step 7: Set & Serve
Place your decorated Halloween cakesicles on a parchment-lined baking sheet and let them sit at room temperature until the chocolate has completely set. This might take about 20-30 minutes. Once set, they’re ready to be enjoyed or stored in an airtight container in the refrigerator for a week. Your delightful Halloween cakesicles are now perfectly ready to share!
Halloween Cakesicles Variations
Feel free to get creative and customize these festive treats to your heart’s content!
-
Flavor Swap: Use any favorite cake flavor like chocolate or vanilla instead of red velvet. Let your imagination run wild with unique flavor combinations!
-
Chocolate Coating Options: Experiment with different chocolate coatings. Try dark, white, or even colorful candy melts for a vibrant twist and to match Halloween themes!
-
Sprinkles Galore: Top your cakesicles with a variety of Halloween-themed sprinkles, edible glitter, or even crushed candy for added texture and festive fun.
-
Heat It Up: Add a sprinkle of cayenne or chili powder to the melted chocolate for a spicy twist. It’ll surprise your taste buds in the best way!
-
Nutty Crunch: Incorporate finely chopped nuts or crushed cookies into your cake mixture for an added texture that’s sure to impress. Crunchy cakesicles? Yes, please!
-
Vegan Version: Use dairy-free frosting and dark chocolate to make vegan cakesicles that everyone can enjoy! It’s a sweet solution for all dietary needs.
-
Dipped Alternatives: Instead of coating them in chocolate, try dipping your cakesicles in yogurt or white chocolate for a lighter option.
-
Mini Sizes: Make smaller, bite-sized cakesicles for party platters or school snacks. They’re just as adorable and easy to customize!
Don’t forget to pair these delightful treats with some of our other Halloween favorites, like White Chocolate Halloween for a spooky dessert spread!
Make Ahead Options
These Halloween Cakesicles are perfect for busy home cooks looking to save time! You can prepare the cakesicle mixture (leftover cake and frosting blended together) up to 24 hours in advance. Simply follow the initial steps of mixing the cake and frosting, then pack them into the molds, and freeze. For best results, wrap the filled molds tightly in plastic wrap to maintain their consistency and prevent freezer burn. When you’re ready to finish the cakesicles, just remove them from the freezer, dip in melted chocolate, and decorate! This way, you’ll have beautifully crafted treats that are just as delicious and festive, ready for any gathering with minimal last-minute effort.
How to Store and Freeze Halloween Cakesicles
Room Temperature: Store cakesicles at room temperature for up to 2 days, in a cool, dry place away from direct sunlight.
Fridge: Keep your Halloween cakesicles in an airtight container in the refrigerator for up to a week. This preserves their freshness and taste.
Freezer: For longer storage, freeze them in a single layer on a baking sheet until solid, then transfer to a freezer-safe container for up to 2 months.
Reheating: Thaw frozen cakesicles in the fridge overnight before serving. They can be enjoyed cold or at room temperature—no need to reheat!
Helpful Tricks for Halloween Cakesicles
• Quality Ingredients: Use high-quality chocolate for the coating to enhance flavor and ensure a smooth melt. Cheap chocolate can lead to disappointing results.
• Don’t Overfill: Avoid overfilling the molds. Leave a small space at the top to allow for easy removal and to prevent spilling during freezing.
• Mix Well: Ensure the cake and frosting mixture is well combined. This will help the cakesicles hold together and maintain their shape during coating.
• Don’t Rush the Freeze: Give the cakesicles enough time in the freezer to set properly. If they’re too soft, they may break apart when you dip them in chocolate.
• Creative Decorations: Experiment with various types of coatings and decorations, incorporating seasonal colors and themes to make your Halloween cakesicles extra festive!
Feel free to make your Halloween cakesicles as unique as your creativity allows!
What to Serve with Halloween Cakesicles?
Elevate your festive gathering with delightful sides and sweets that perfectly complement these whimsical treats.
- Spooky Fruit Platter: A colorful array of seasonal fruits adds a refreshing contrast to the rich cakesicles, making for a balanced dessert spread.
- Pumpkin Spice Cupcakes: Embrace the flavors of fall with these moist, spiced creations that harmonize beautifully with the sweet chocolate of cakesicles.
- Creamy Hot Chocolate Bar: Perfect for cozy gatherings, this drink pairs excellently with cakesicles, as each sip enhances their delightful sweetness.
- Gooey Caramel Dip: A warm, luscious dip for apple slices or pretzels, this indulgent treat echoes the rich flavors of the cakesicles.
- Crisp Fall Salad: Incorporate roasted butternut squash and pecans in a light salad; the freshness offers a delightful contrast to the treat’s sweetness.
- Haunted Gingerbread Cookies: The spicy warmth of these cookies adds a nostalgic touch, creating a colorful, Halloween-themed dessert table alongside the cakesicles.
- Festive Candy Corn Mix: Serving this sweet-and-salty snack mix brings a playful crunch that pairs well with the soft texture of the cakesicles.
- Carrot Sticks with Hummus: For a healthy bite, crunchy carrot sticks dipped in creamy hummus provide a savory balance to the dessert-centric celebration.
Halloween Cakesicles Recipe FAQs
How do I choose the best leftover cake for cakesicles?
Absolutely! You can use any leftover cake or cupcakes; I often recommend dense cakes like red velvet or chocolate. Just make sure they are not overly dry or crumbly, as this could hinder the binding process with frosting. If the cake has dark spots all over, it might be better to skip it to avoid undesirable flavors.
What is the best way to store Halloween cakesicles?
For short-term storage, simply keep your Halloween cakesicles in an airtight container at room temperature for up to 2 days. If you want to save them for longer, place them in the refrigerator, where they can last up to a week. Just remember to keep them covered to prevent them from drying out!
Can I freeze Halloween cakesicles?
Yes, you can! To freeze your cakesicles, arrange them in a single layer on a baking sheet and freeze them until solid. Once frozen, transfer them to a freezer-safe container or a zip-top bag, making sure to remove as much air as possible. They can be stored in the freezer for up to 2 months. Thaw them in the fridge overnight before serving, and they’ll be ready to delight again!
What should I do if my cakesicles break apart during coating?
That can happen, but don’t worry! Ensure your cakesicles are properly frozen for at least 30 minutes before dipping to prevent them from breaking. If they do break, you can remold them in the mold again using some chocolate to hold them together or simply enjoy the pieces as a delicious mess!
Are Halloween cakesicles safe for my kids and pets?
As for kids, these treats are very kid-friendly, but do watch out for any allergies you may have with chocolate or specific toppings, like nuts. Regarding pets, it’s best to avoid sharing these chocolates as they can be harmful to dogs due to the presence of chocolate in the recipe. Always check any ingredients for potential allergens!
Can I use different flavors when making cakesicles?
The more the merrier! Feel free to swap out any leftover cake flavor you have, from vanilla to carrot cake! Just ensure the frosting complements the cake flavor. I often mix and match flavors to customize each batch, creating a delightful variety of treats. Enjoy experimenting!
Halloween Cakesicles that Turn Leftovers into Sweet Magic
Ingredients
Equipment
Method
- Begin by crumbling your leftover cake or cupcakes in a large mixing bowl until it resembles fine crumbs. Add a generous amount of frosting and mix thoroughly until the mixture holds together when pressed.
- Take your cakesicle molds and pack the cake and frosting mixture into each cavity, leaving a tiny bit of space at the top for expansion.
- Place the filled cakesicle molds into the freezer and let them chill for at least 30 minutes until solid.
- While the cakesicles are freezing, melt your coating chocolate according to the package instructions until fully melted and glossy.
- Carefully remove the frozen cakesicles from the molds, dip each into the melted chocolate, ensuring they are completely coated.
- Before the chocolate sets, add sprinkles or themed decorations to your cakesicles while the chocolate is still wet.
- Place your decorated cakesicles on a parchment-lined baking sheet and let them sit at room temperature until the chocolate has completely set.
Leave a Reply