
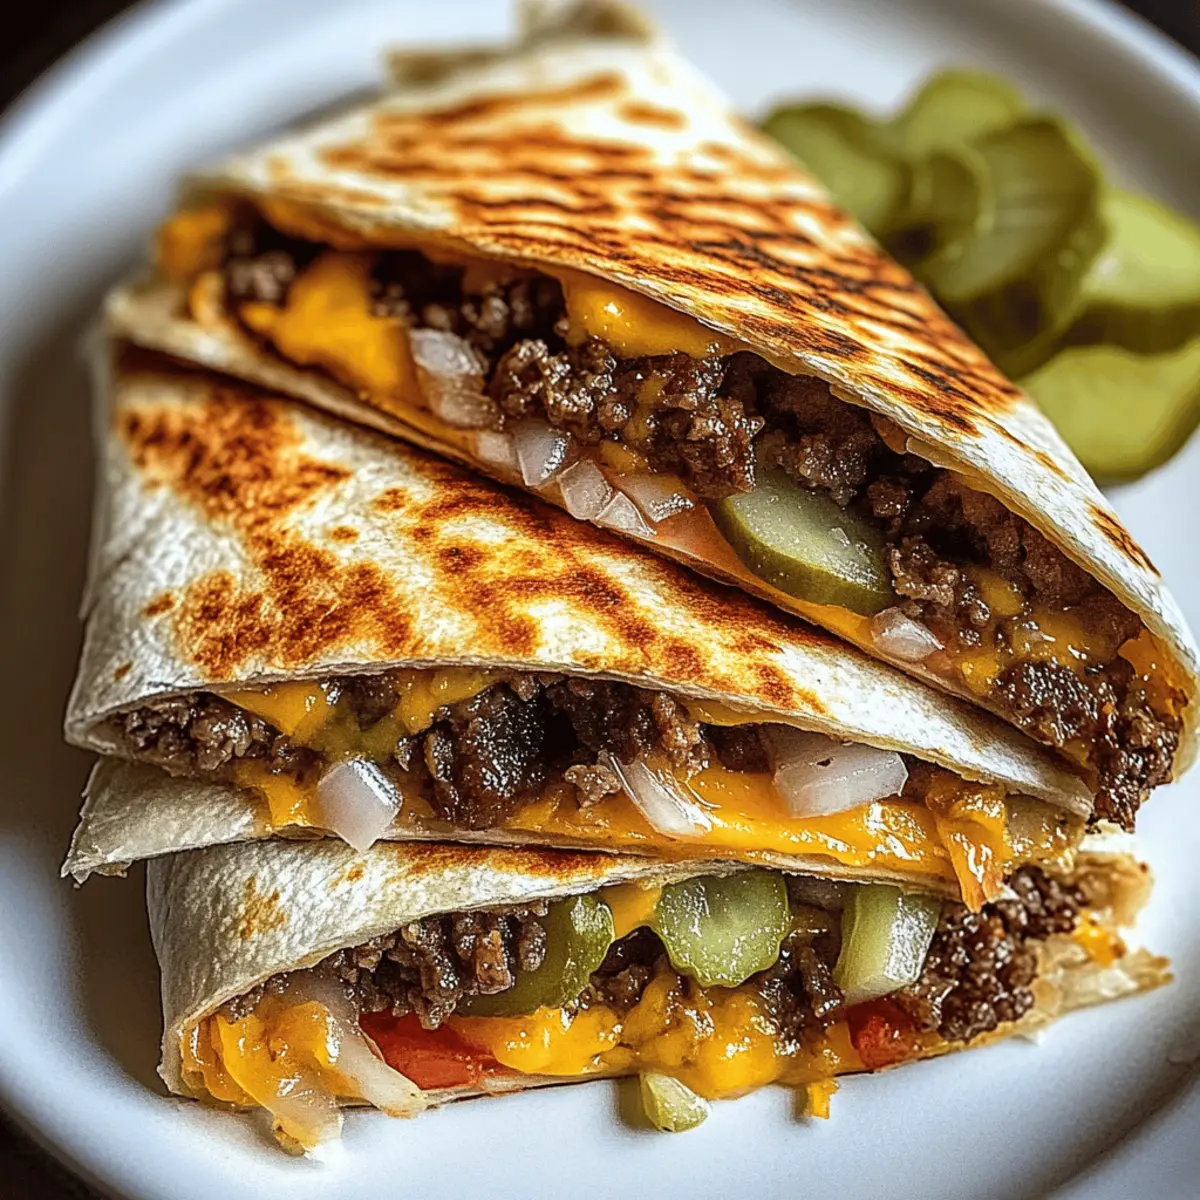
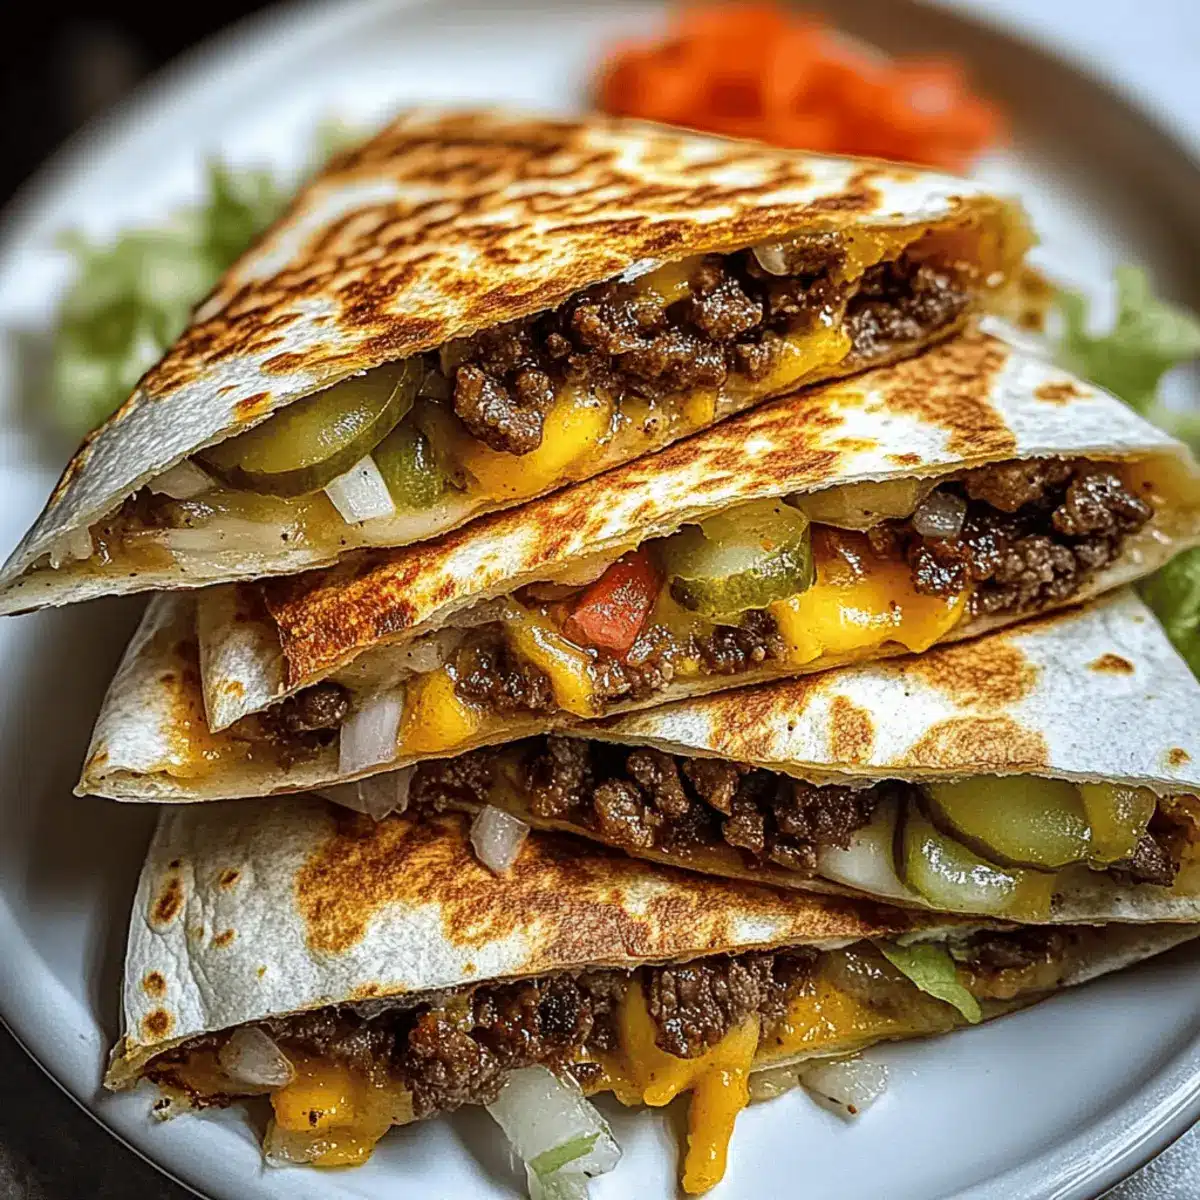
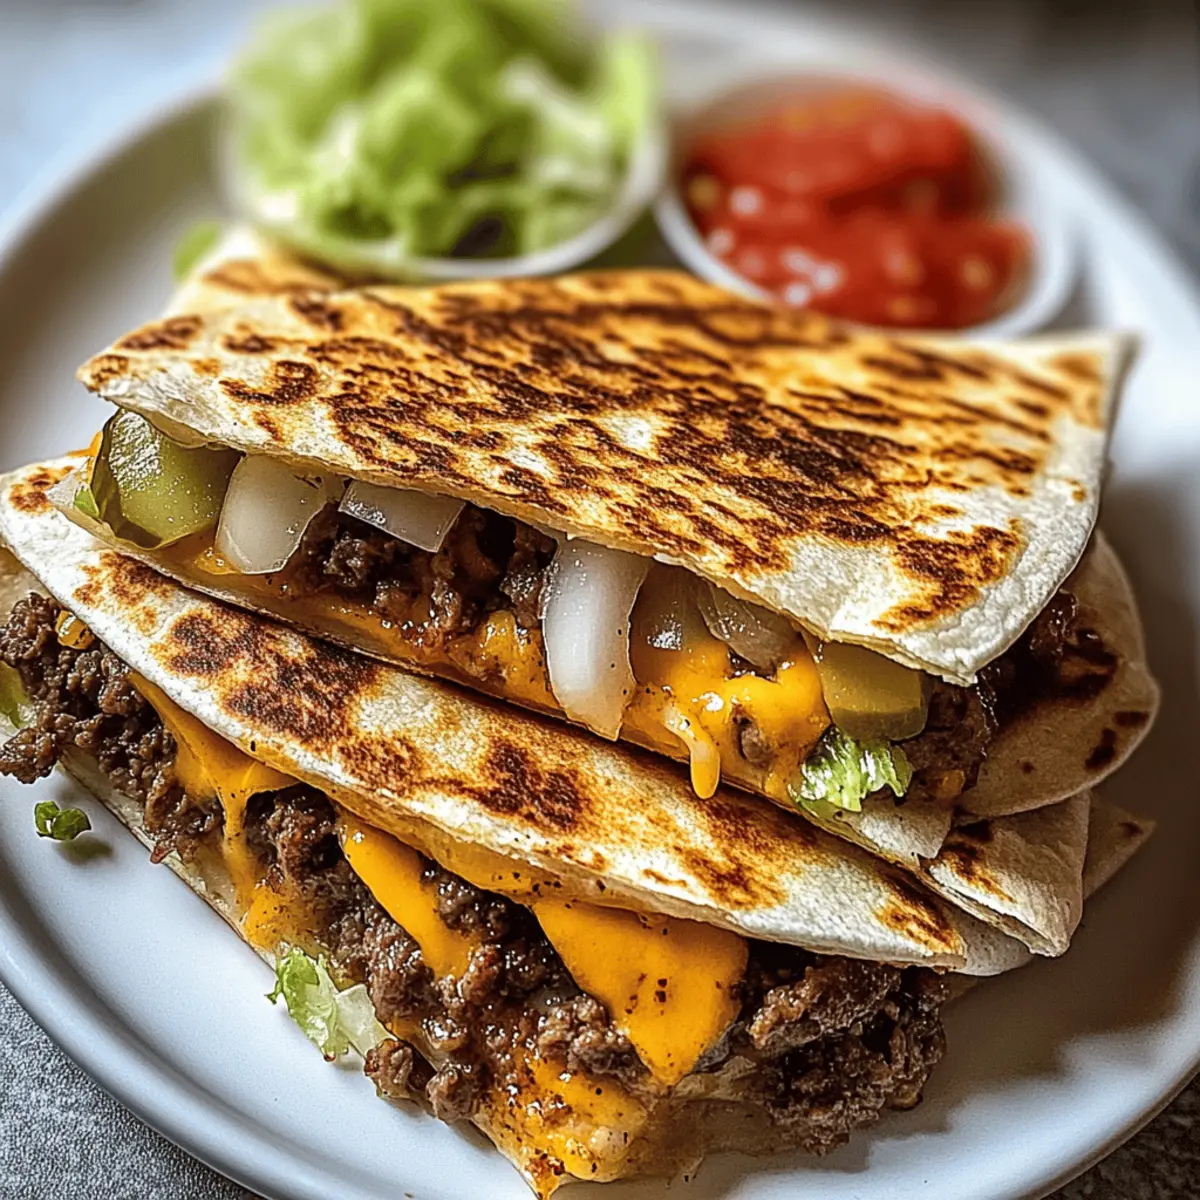
As I stood by the grill, the warm sun kissed my cheeks while I savored the intoxicating smell of sizzling meat. That’s when I had the revelation: why not unite two beloved comfort foods into one mouthwatering creation? Enter Juicy Grilled Smashburger Quesadillas! Perfectly juicy beef patties meet melted cheese, all enveloped in a crispy tortilla, offering a delightful twist on traditional favorites. Not only are these quesadillas beginner-friendly, but they also promise a quick cooking adventure that’s ready in just 40 minutes. Whether it’s a busy weeknight dinner or a spontaneous gathering with friends, this recipe is sure to satisfy cravings and appetites alike. So, are you ready to take your taste buds on a comforting ride?

Why Are Smashburger Quesadillas Perfect?
Bold flavor fusion: Juicy beef and melted cheese combine deliciously, creating a delightful burst of flavors in every bite.
Quick and easy: With just 40 minutes of cooking time, this recipe is perfect for busy weeknights or last-minute gatherings.
Crowd-pleaser: Loved by both adults and kids, these quesadillas offer a fun twist that appeals to everyone at the table.
Total versatility: Feel free to customize with your favorite toppings or substitute proteins, like turkey or chicken, to suit your preference! Experience the joy of homemade comfort food with these Smashburger Quesadillas.
Smashburger Quesadilla Ingredients
-
For the Beef Filling
• Ground Beef (80/20 blend) – Provides maximum juiciness and flavor, essential for crispy, caramelized edges.
• Worcestershire Sauce – Adds rich, tangy umami and helps bind the meat.
• Garlic Powder – Infuses the beef with consistent mellow garlic flavor without burning.
• Onion Powder – Provides a sweet and savory depth that blends seamlessly into the beef.
• Salt and Pepper – Essential for enhancing all natural flavors of the beef with added warmth from pepper. -
For the Quesadilla
• Flour Tortillas – Acts as the vessel for fillings and crisps beautifully when grilled.
• Cheddar Cheese – Delivers bold, tangy flavor with excellent meltability.
• Monterey Jack Cheese – Provides a creamy, mild base that balances sharper cheddar. -
For the Fresh Additions
• Diced Onions – Added for crunch and mild flavor balance.
• Sliced Pickles – Adds a refreshing contrast that elevates the overall flavor.
• Diced Tomatoes – Enhances sweetness and color in the dish. -
For Cooking and Topping
• Unsalted Butter – Brushed on tortillas for a golden crust.
• Olive Oil – Prevents sticking and adds a nice sear to patties.
• Lettuce – Adds fresh crunch and contrast as a garnish.
• Ketchup and Mustard – Classic condiments that complement the smashburger theme.
These delightful Smashburger Quesadilla ingredients come together for a comforting meal that will impress your family and friends!
Step‑by‑Step Instructions for Juicy Grilled Smashburger Quesadillas
Step 1: Prepare the Beef Mixture
In a mixing bowl, combine ground beef, Worcestershire sauce, garlic powder, onion powder, salt, and pepper. Use your hands to gently mix until just combined, avoiding over-mixing to keep the patties tender. Allow the mixture to rest at room temperature for about 10 minutes, letting the flavors meld together for your flavorful Smashburger Quesadillas.
Step 2: Preheat the Grill or Skillet
While the beef rests, preheat your grill or heavy skillet over medium-high heat. Make sure it’s hot enough that a drop of water sizzles upon contact, indicating perfect cooking conditions. This will ensure that your beef patties sear beautifully, creating that desirable crispy exterior for the Juicy Grilled Smashburger Quesadillas.
Step 3: Shape the Beef Patties
Divide the beef mixture into eight equal portions, gently rolling them into balls. Using the palms of your hands, shape each ball into a flat patty, about ½ inch thick to ensure they cook evenly. These patties are the star of your juicy quesadillas, so make sure they are evenly shaped for optimal grilling.
Step 4: Cook the Beef Patties
Brush the grill or skillet with olive oil to prevent sticking, then add your patties. Cook the beef for 2-3 minutes without moving them, allowing the bottom to caramelize. You’ll see the edges starting to brown; this is the perfect sign that they are ready to be flipped for that juicy, smashburger flavor in your quesadillas.
Step 5: Flip and Finish Cooking
Carefully flip the patties and cook on the other side for another 2-3 minutes until they reach your desired level of doneness; aim for a nice char. After cooking, move the patties to a plate and let them rest while you prepare the quesadillas, locking in those savory juices.
Step 6: Prepare the Tortillas
Reduce the heat to medium and brush one side of each flour tortilla with melted unsalted butter. This step is essential as it allows the tortillas to crisp up beautifully, creating a golden crust for your delicious Smashburger Quesadillas. Ensure the butter is evenly spread to achieve consistent browning.
Step 7: Assemble the Quesadillas
Place one buttered tortilla on the grill or skillet, and fill one half with cheddar and Monterey Jack cheese, followed by a beef patty, diced onions, sliced pickles, and diced tomatoes. Fold the tortilla over to enclose the filling, creating a half-moon shape that will soon become a crunchy delight.
Step 8: Grill the Quesadillas
Grill the assembled quesadilla for 2-3 minutes on one side until golden brown and the cheese is melted. Using a spatula, carefully flip the quesadilla to the other side and grill for another 2-3 minutes. Keep an eye on them to prevent burning and achieve that perfect golden crust that defines your Smashburger Quesadillas.
Step 9: Repeat and Serve
Repeat the assembly and grilling process with the remaining ingredients until all quesadillas are prepared. Once done, allow them to rest for a minute before slicing into wedges. This ensures they hold their structure and the cheese remains gooey. Serve warm with fresh lettuce, ketchup, and mustard for that classic smashburger experience.
Step 10: Enjoy Your Creation!
Garnish your Juicy Grilled Smashburger Quesadillas as desired and savor the crispy, delicious blend of flavors and textures. Whether it’s a fun family dinner or a casual gathering with friends, these quesadillas are sure to be a hit, delighting everyone at the table with their comfort and satisfaction.
Make Ahead Options
These Juicy Grilled Smashburger Quesadillas are perfect for meal prep enthusiasts! You can prepare the beef mixture up to 24 hours in advance by combining the ground beef with Worcestershire sauce, garlic powder, onion powder, salt, and pepper, then refrigerate it in an airtight container. Additionally, you can slice your veggies (diced onions, pickles, and tomatoes) and store them in the fridge for up to 3 days. When ready to serve, simply shape the beef into patties, grill them, and assemble the quesadillas with the prepped ingredients. This way, you’ll enjoy a quick, fresh meal, all while saving time during busy weeknights!
What to Serve with Juicy Grilled Smashburger Quesadillas
Creating the perfect meal experience is all about balancing flavors, textures, and freshness alongside your tantalizing quesadillas.
-
Crispy Coleslaw: A tangy crunch that offsets the richness of the quesadillas, this slaw adds a refreshing bite. Tossed with a light vinaigrette, it’s the ideal palate cleanser!
-
Sweet Corn on the Cob: Grilled sweet corn drizzled with melted butter creates a delightful contrast in sweetness that’s sure to please family and friends.
-
Guacamole: Creamy avocados blended with lime and spices add a velvety richness that complements the savory flavors of the quesadillas. Perfect for dipping!
-
Fresh Garden Salad: Light and vibrant, a mix of leafy greens, cherry tomatoes, and cucumbers provides a refreshing counterpoint, enhancing the meal without overshadowing it.
-
Salsa Verde: A zesty and tangy option, this green salsa made from tomatillos gives your quesadillas an extra kick, amplifying their fresh flavors.
-
Iced Tea: A cool, slightly sweet beverage, iced tea harmonizes beautifully with the warmth of the quesadillas, making for a comforting dining experience.
Indulging in Juicy Grilled Smashburger Quesadillas? Pair them with these delightful sides for a memorable meal full of flavors and textures!
Expert Tips for Smashburger Quesadillas
-
Perfect Patties: Avoid over-mixing the ground beef to keep your patties tender. Gentle handling makes all the difference in your delicious Smashburger Quesadillas.
-
Get That Sear: Ensure your grill or skillet is hot enough before cooking. A sizzling sound when you place the patties indicates ideal searing conditions for extra flavor.
-
Crispy Tortillas: Brush your tortillas evenly with melted butter before grilling. This leads to a beautifully golden and crispy exterior that enhances your quesadillas.
-
Resting Time: Allow cooked quesadillas to rest for a minute before slicing. This helps maintain their structure and keeps the cheesy filling intact.
-
Quality Ingredients: Use high-quality tortillas to prevent sogginess. Choosing the right ingredients elevates your Smashburger Quesadillas, ensuring a comforting and satisfying meal.
Smashburger Quesadilla Variations
Feel free to play around with these delightful variations that can enhance your quesadilla experience, adding new flavors and textures.
-
Turkey Swap: Substitute ground beef with ground turkey for a leaner option. Pair with a spicy aioli for extra zing.
-
Veggie Delight: Use black beans or lentils instead of meat. They add protein and work beautifully when seasoned with taco spices.
-
Jalapeño Kick: Slice fresh jalapeños into the filling to crank up the heat. This fiery addition brings a fantastic contrast to the creamy cheese.
-
Cheese Overload: Try adding a blend of different cheeses like Gouda or Pepper Jack for a melty experience that’s bursting with flavor.
-
Flavored Tortillas: Swap regular flour tortillas for spinach or sun-dried tomato tortillas to add a pop of color and taste to your quesadillas. The visually appealing twist will delight diners!
-
Gourmet Touch: Mix in some caramelized onions and mushrooms for a gourmet upgrade that melds sweet and savory notes gloriously.
-
Crunch Factor: Add crushed tortilla chips or taco toppings for a crunch that complements the softness of the quesadilla. Pair them with salsa for an added flavor bomb!
-
Tender Greens: Swap out lettuce for fresh arugula or baby spinach in the filling, adding a peppery note that rounds out the flavors beautifully.
Experimenting with these variations will not only make each bite an adventure but also ensure your family keeps coming back for more! Want to explore more on cooking variations? Check out our guide on baking versatile casseroles and creating hearty vegetarian meals for even more inspiration.
Storage Tips for Smashburger Quesadillas
-
Room Temperature: Allow cooked quesadillas to cool briefly before sealing them. They can sit at room temperature for up to 2 hours, but should be stored in the fridge afterward to ensure freshness.
-
Fridge: Store leftover Smashburger Quesadillas in an airtight container in the refrigerator for up to 3 days. To maintain crispness, try to avoid stacking them directly on top of each other.
-
Freezer: For longer storage, wrap quesadillas tightly in plastic wrap, then place them in a freezer-safe bag. They can be frozen for up to 2 months. Thaw overnight in the refrigerator before reheating.
-
Reheating: To reheat, place thawed quesadillas on a preheated skillet or grill over medium heat for about 2-3 minutes per side, or until warmed through and crispy again. Enjoy the flavors of homemade comfort food!
Juicy Grilled Smashburger Quesadillas Recipe FAQs
How do I select the right ground beef for Smashburger Quesadillas?
Absolutely! I recommend using an 80/20 blend for optimal juiciness and flavor. Look for beef with a bright red color without any dark spots, which can indicate spoilage. Don’t hesitate to ask your butcher for advice if needed.
How should I store leftovers of Smashburger Quesadillas?
To keep your tasty leftovers at their best, allow them to cool briefly before placing them in an airtight container. Store them in the refrigerator for up to 3 days. If you want to retain their crispness, avoid stacking them directly on top of each other.
Can I freeze my Smashburger Quesadillas?
Definitely! For freezing, wrap each quesadilla tightly in plastic wrap, then place them in a freezer-safe bag. You can freeze them for up to 2 months. Just remember to thaw them overnight in the refrigerator before reheating to ensure the best texture.
What should I do if my quesadillas are soggy?
If your quesadillas turn out soggy, make sure you’re using high-quality tortillas that are pliable. It’s also crucial to brush them lightly with butter and grill them until they’re golden and crispy. If grilling, directly avoid adding too many watery toppings like fresh tomatoes; opt for roasted instead.
Are there any dietary considerations for this recipe?
Very! If you have dietary restrictions, you can substitute the ground beef with turkey, chicken, or even plant-based protein. Just be cautious with the seasonings, adjusting them according to your taste preference. For allergies, make sure to verify that your condiments like ketchup and mustard are free of any allergens you might be sensitive to.
Mouthwatering Smashburger Quesadillas for Ultimate Comfort
Ingredients
Equipment
Method
- In a mixing bowl, combine ground beef, Worcestershire sauce, garlic powder, onion powder, salt, and pepper. Mix gently and let rest for 10 minutes.
- Preheat your grill or skillet over medium-high heat until hot enough that a drop of water sizzles.
- Divide the beef mixture into eight portions, shape into patties about ½ inch thick.
- Brush the grill or skillet with olive oil, add patties, and cook for 2-3 minutes without moving.
- Flip the patties and cook for another 2-3 minutes until desired doneness; then let them rest.
- Brush one side of each tortilla with melted unsalted butter for better crispiness.
- Assemble the quesadilla: place buttered tortilla on grill, fill half with cheese, beef patty, onions, pickles, and tomatoes, then fold.
- Grill the quesadilla for 2-3 minutes on one side, flip carefully, and grill for another 2-3 minutes until golden.
- Repeat with remaining ingredients, let rest for a minute, slice into wedges, and serve warm.
- Garnish as desired and enjoy!
Leave a Reply