
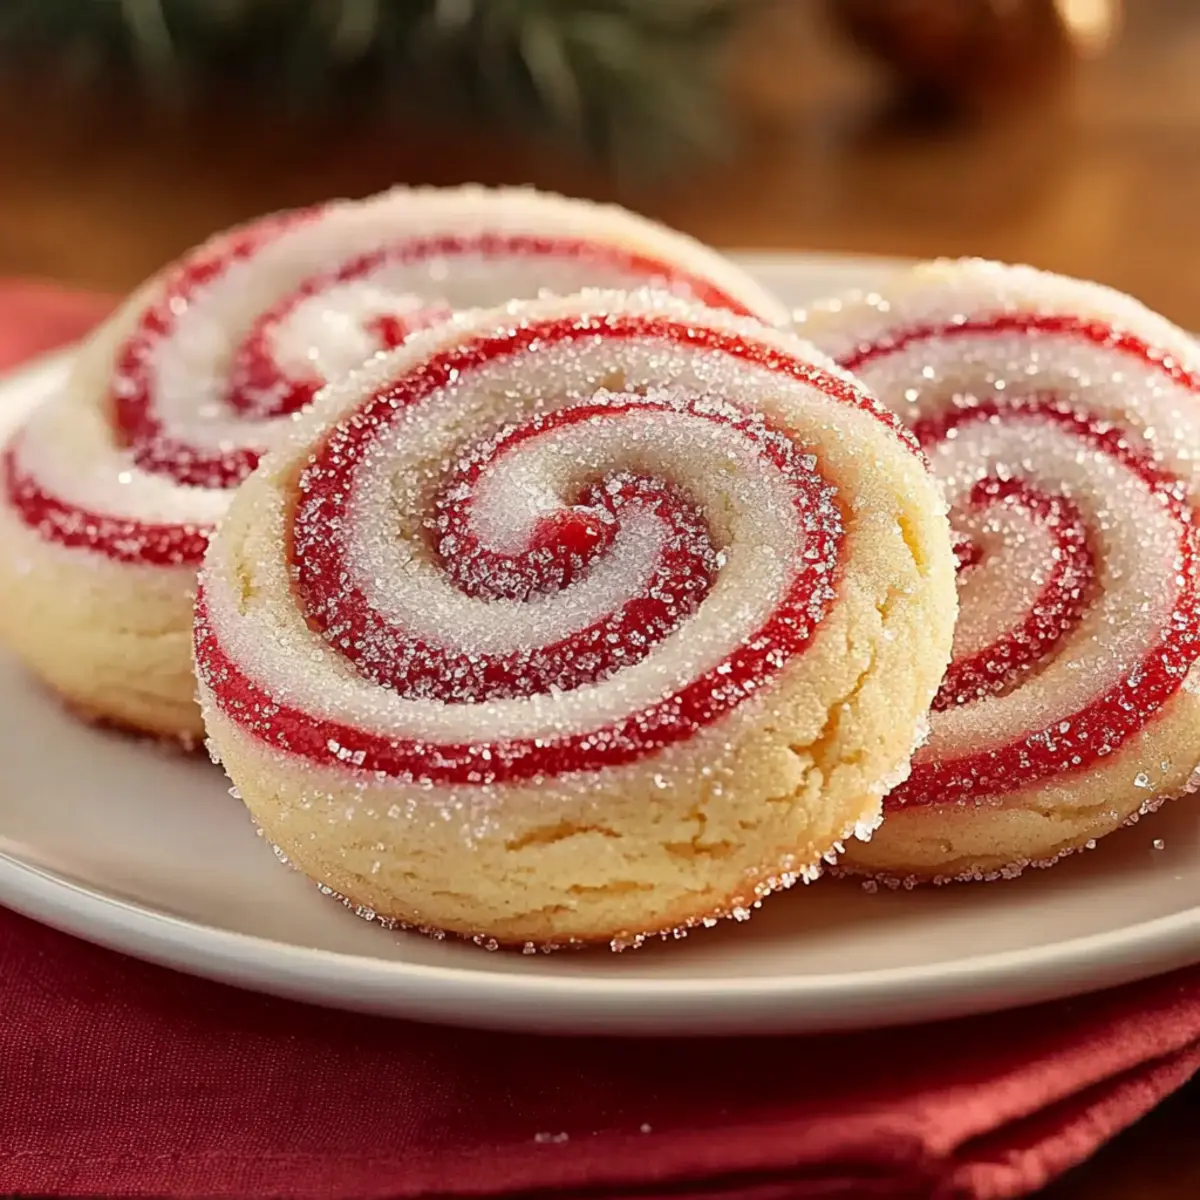
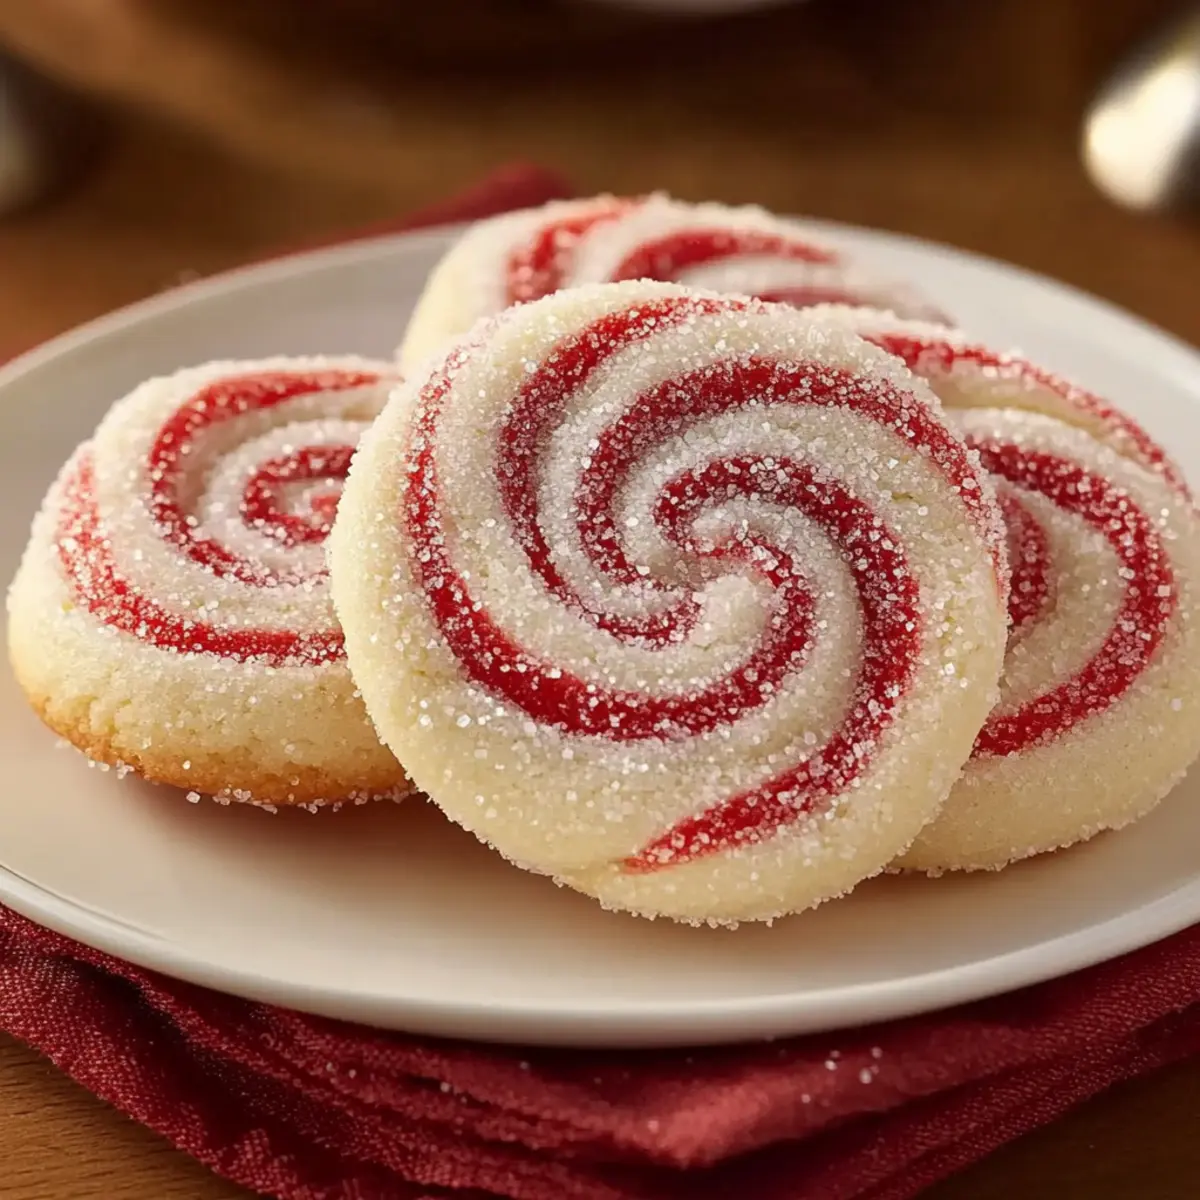
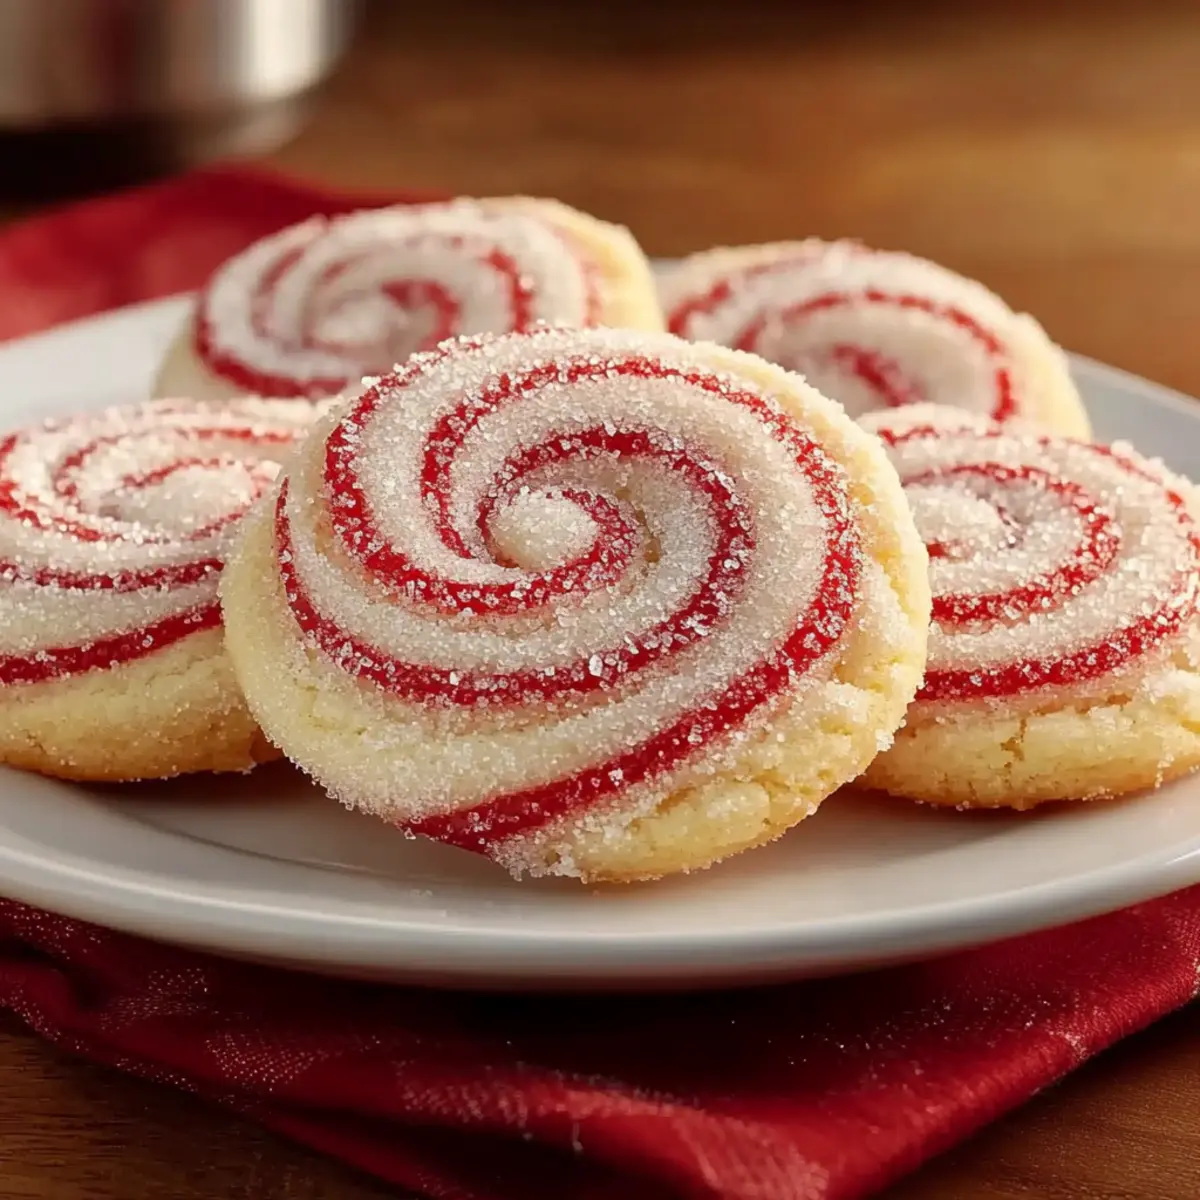
Every holiday season, the kitchen transforms into a canvas of delightful aromas and colorful treats, and nothing brings a smile quite like the sight of Peppermint Swirl Cookies. These festive delights boast vibrant red and white spirals, capturing the essence of seasonal cheer with their cool minty flavor and a hint of vanilla. Not only are they visually impressive, but this easy-to-follow recipe also ensures that even novice bakers can create stunning cookie masterpieces, perfect for holiday gatherings or as thoughtful gifts. Whether you’re looking to impress guests or simply indulge in a homemade treat, these cookies are sure to be a crowd-pleaser. Are you ready to add a splash of color and flavor to your holiday baking? Let’s dive into the making of these joyful Peppermint Swirl Cookies!
Why Choose Peppermint Swirl Cookies?
Festive Appeal: The striking red and white spirals transform your holiday cookie platter into a festive masterpiece.
Refreshing Flavor: With a delightful cool mint essence combined with a hint of vanilla, these cookies offer a unique taste that’s perfect for the season.
Easy Recipe: Designed for bakers of all skill levels, you can whip up these treats without a hitch, ensuring everyone can participate in the holiday baking fun!
Perfect for Gifting: These cookies make memorable gifts, beautifully packaged alongside a cup of hot cocoa or nestled in a decorative tin.
Versatile Style: Feel free to experiment with different colors to match any celebration; think vibrant greens for St. Patrick’s Day or pastels for Easter!
For more cookie inspiration, don’t miss out on our delightful Pumpkin Sugar Cookies with Cream Cheese Frosting or the iconic Marshmallow Swirl Cookies.
Peppermint Swirl Cookie Ingredients
For the Cookie Dough
• All-purpose flour – Provides structure for cookies; a gluten-free 1:1 blend works as a substitute.
• Baking powder – Acts as a leavening agent, ensuring a light and airy texture.
• Salt – Enhances the overall flavor of your cookies.
• Unsalted butter – Ensures a tender crumb and rich flavor; avoid margarine for best results.
• Granulated sugar – Adds sweetness and helps create a fluffy texture in your cookies.
• Large egg – Binds all the ingredients together seamlessly.
• Vanilla extract – Balances the mintiness with a touch of depth and warmth.
• Peppermint extract – Delivers the signature cool mint flavor that defines these festive Peppermint Swirl Cookies.
For Coloring and Coating
• Red gel food coloring – Offers vibrant, concentrated color without adding extra moisture; avoid liquid food coloring.
• Coarse sugar or crushed peppermint candies – For topping, adds sparkle and a delightful crunch to your cookies.
Step‑by‑Step Instructions for Peppermint Swirl Cookies
Step 1: Prepare Dry Ingredients
In a medium bowl, whisk together 2 cups of all-purpose flour, 1 teaspoon of baking powder, and 1/4 teaspoon of salt until well combined. This step ensures that your Peppermint Swirl Cookies will have a balanced flavor and a perfect texture. Set this mixture aside while you move on to the next delicious phase of your cookie adventure.
Step 2: Cream Butter and Sugar
Using an electric mixer, beat 1 cup of softened unsalted butter and 1 cup of granulated sugar together in a large bowl. Mix on medium speed for about 2-3 minutes until the mixture becomes light and fluffy, with a pale color. This process is crucial for incorporating air into the dough, resulting in tender, airy cookies.
Step 3: Combine Wet Ingredients
Add 1 large egg, 1 teaspoon of vanilla extract, and 1 teaspoon of peppermint extract to your creamed mixture. Beat the ingredients on low speed until fully combined, scraping down the sides of the bowl as necessary. The fragrant aroma of mint and vanilla will begin to fill your kitchen, enhancing the anticipation for your festive Peppermint Swirl Cookies.
Step 4: Mix Dry Into Wet
Gradually add the flour mixture to the wet ingredients, mixing on low speed until a cohesive dough forms, which should take about 1-2 minutes. Be careful not to overmix, as this can lead to tough cookies. The dough will be slightly sticky but should hold together well, ready for the next stage in creating these delightful treats.
Step 5: Separate Dough
Divide the dough into two equal portions. Leave one portion plain for the white base of your Peppermint Swirl Cookies, and add 1 tablespoon of red gel food coloring to the other half. Knead the colored dough with your hands until the color is evenly distributed, creating a vibrant red that contrasts beautifully with the white.
Step 6: Chill Doughs
Wrap each portion of dough separately in plastic wrap, ensuring a tight seal. Chill both doughs in the refrigerator for at least 30 minutes. Chilling prevents the colors from bleeding during baking, allowing for those lovely defined swirls when baked.
Step 7: Roll Out the Dough
After chilling, take the plain dough and roll it out on a lightly floured surface into a rectangle measuring approximately 10×12 inches and 1/4 inch thick. Repeat this process for the red dough, achieving the same dimensions. These layers will create the beautiful swirls in your Peppermint Swirl Cookies.
Step 8: Layer and Roll
Carefully stack the red dough on top of the plain dough, pressing down gently to adhere them together. Starting from one edge, roll the dough tightly into a log shape, ensuring an even distribution. Wrap the log in plastic wrap and chill in the refrigerator for at least 2 hours, allowing the shapes to set properly.
Step 9: Prep for Baking
Preheat your oven to 350°F (175°C) and line baking sheets with parchment paper. Once chilled, unwrap the dough log and gently brush the surface with water or egg white. Roll the log in coarse sugar or crushed peppermint candies, coating it well for a festive sparkle before slicing.
Step 10: Slice and Bake
Using a sharp knife, cut the chilled dough into 1/4-inch rounds, placing them onto the prepared baking sheets about 2 inches apart. Bake in the preheated oven for 8-10 minutes or until the edges are lightly golden. Keep an eye on them, as baking time may vary depending on your oven.
Step 11: Cool Cookies
Remove the Peppermint Swirl Cookies from the oven and let them cool on the baking sheets for about 5 minutes. Then, transfer them to a wire rack to cool completely. Their vibrant swirls and delightful aroma will make it hard to resist trying one right away!

Make Ahead Options
These Peppermint Swirl Cookies are a fantastic choice for meal prep lovers! You can prepare the cookie dough up to 3 days in advance by following steps 1 through 6, then wrap each portion tightly in plastic wrap to maintain freshness and prevent drying out. If you’d like to extend the prep time, you can freeze the wrapped dough log for up to 2-3 months. Just be sure to thaw it in the refrigerator overnight before slicing and baking. When you’re ready to serve, simply slice the chilled log into rounds, roll them in coarse sugar or crushed peppermint candies, and bake as instructed for freshly baked, restaurant-quality results with minimal effort!
How to Store and Freeze Peppermint Swirl Cookies
Airtight Container: Store your Peppermint Swirl Cookies in an airtight container at room temperature for up to 5-7 days, placing a slice of bread inside to help maintain moisture.
Refrigeration: If you prefer a cooler cookie, these treats can be stored in the refrigerator for about a week; just be sure to keep them sealed well to prevent drying out.
Freezing Cookies: To extend their shelf life, freeze baked cookies in a single layer on a baking sheet until solid, then transfer to a freezer-safe bag or container for up to 3 months.
Freezing Dough: If you’d like to prepare ahead, you can freeze the dough log before slicing and baking. Wrap it tightly in plastic wrap and foil, storing it in the freezer for up to 2-3 months.
Peppermint Swirl Cookies: Fun Variations
Feel free to add your personal touch to the Peppermint Swirl Cookies and enhance their festive flair!
-
Almond Extract: Substitute peppermint extract with almond extract for a surprising nutty flavor twist. This slightly sweet, distinctive taste can redefine your holiday baking experience.
-
Citrus Zest: Add a teaspoon of orange or lemon zest to the dough for a refreshing citrusy brightness. This small addition can make a big difference, balancing the mint taste beautifully.
-
Chocolate Chips: Fold in a handful of mini chocolate chips to the dough for a delicious chocolate-mint combination. The melty chocolate complements the refreshing peppermint, creating an indulgent treat.
-
Gluten-Free Option: Swap the all-purpose flour with a gluten-free 1:1 blend, and you can enjoy these delightful cookies without missing out. Many gluten-free blends work wonderfully for texture.
-
Different Colors: Use green gel food coloring instead of red for St. Patrick’s Day or a pastel color for spring celebrations. The visual appeal is versatile for any occasion!
-
Spiced Variation: Add a sprinkle of cinnamon or nutmeg to the dough for a warm, spiced flavor perfect for cozy winter gatherings. This can give an extra layer of warmth and comfort to your cookies.
-
Peppermint Crunch Topping: Instead of coarse sugar, use crushed peppermint candies as a topping for a more intense peppermint flavor. It adds a delightful crunch and festive sparkle!
-
Hot Cocoa Pairing: Serve these cookies with homemade hot cocoa for an indulgent treat. Dip them in the cocoa for a cozy and delightful pairing!
Don’t forget to check out our festive Soft Pumpkin Cookies with Cinnamon Frosting for another seasonal twist, or for a surprise, try adding some Banana Bread Cookies to your cookie platter!
What to Serve with Peppermint Swirl Cookies?
Indulging in the festive delight of these vibrant cookies opens the door to a world of enchanting pairings that elevate your holiday experience.
-
Hot Cocoa: The warm, rich chocolate flavor pairs perfectly with the cool mint of the cookies, creating a classic winter duo. Nothing warms the soul quite like this cozy combination!
-
Eggnog: The creamy, spiced notes of eggnog complement the refreshing minty swirls, making it an ideal drink choice for holiday festivities.
-
Vanilla Ice Cream: A scoop of creamy vanilla ice cream balances the cookies’ mintiness, creating a delightful contrast of textures and flavors in every bite.
-
Milk: The timeless pairing of cold milk with cookies adds a nostalgic touch, making them feel even more like a treat from childhood.
-
Chocolate Dipped Fruit: Fresh strawberries or bananas dipped in chocolate provide a fresh and slightly tart contrast to the sweet peppermint cookies, adding a burst of flavor.
-
Festive Fruit Salad: A colorful mix of seasonal fruits adds a refreshing contrast, lightening up the dessert table and offering a sweet yet tangy element.
-
Gingerbread Men: The spiced warmth of gingerbread cookies enhance the holiday ambiance, coupling wonderfully with peppermint for a festive flavor experience.
Enjoy these delightful pairings to create a memorable holiday gathering filled with love, laughter, and delicious treats!
Expert Tips for Peppermint Swirl Cookies
Softened Butter: Ensure your butter is softened properly for optimal creaming; this adds air and results in a fluffy cookie texture.
Chill Dough: Don’t skip chilling the dough—this helps prevent color bleeding and keeps those beautiful swirls intact during baking.
Avoid Overmixing: Be mindful not to overmix after combining dry and wet ingredients, as overmixing can lead to tough peppermint swirl cookies.
Sharp Knife: Use a sharp knife when slicing the log for even, clean cuts, which also helps maintain the cookie’s swirl design.
Monitor Baking Time: Keep an eye on your cookies while baking; they should be lightly golden at the edges. Overbaking can dry them out.
Peppermint Swirl Cookies Recipe FAQs
What is the best way to select peppermint extract?
Absolutely! When choosing peppermint extract, it’s best to go for pure peppermint extract rather than imitation, as the flavor is more robust and aromatic. Look for a brand that uses natural ingredients and has a strong scent, which typically means you’ll get better flavor in your cookies.
How should I store leftover Peppermint Swirl Cookies?
Store your Peppermint Swirl Cookies in an airtight container at room temperature for up to 5-7 days. To keep them fresh and soft, place a slice of bread in the container, as it helps maintain moisture. Just be sure to check on the bread, replacing it if it gets stale!
Can I freeze Peppermint Swirl Cookies, and if so, how?
Yes, you can certainly freeze these delightful cookies! Begin by placing the baked cookies in a single layer on a baking sheet and freeze them until solid, about 1-2 hours. Then, transfer them into a freezer-safe bag or container where they can last up to 3 months. To enjoy, simply thaw at room temperature when you’re ready.
What if my cookie dough is too sticky?
Very! If you find that your Peppermint Swirl Cookie dough is too sticky to roll out, don’t worry! This can typically happen if the butter was too soft or if it’s warm in your kitchen. Chill the dough in the refrigerator for an additional 15-30 minutes before rolling it out, which should make it easier to handle.
Are Peppermint Swirl Cookies safe for pets?
It’s crucial to keep Peppermint Swirl Cookies away from pets, especially dogs, as ingredients like butter and sugar aren’t ideal. Plus, the peppermint oil can cause stomach upset in some animals. Always check with a veterinarian if you’re unsure about giving your pet any human foods.
Can I change any ingredients for dietary needs?
Certainly! If you need a gluten-free option, substitute all-purpose flour with a gluten-free 1:1 baking blend, which usually works perfectly. Also, for those who are lactose intolerant, you can replace the unsalted butter with a plant-based alternative, though the texture may vary slightly.
Delicious Peppermint Swirl Cookies That Brighten Your Holidays
Ingredients
Equipment
Method
- In a medium bowl, whisk together flour, baking powder, and salt until well combined.
- Beat the softened butter and granulated sugar together until light and fluffy.
- Add the egg, vanilla extract, and peppermint extract to the creamed mixture and mix until combined.
- Gradually add the flour mixture to the wet ingredients, mixing until a cohesive dough forms.
- Divide the dough into two portions, coloring one with red gel food coloring, and knead until combined.
- Wrap both portions in plastic wrap and chill in the refrigerator for at least 30 minutes.
- Roll out the plain dough and colored dough into rectangles measuring approximately 10x12 inches.
- Layer the red dough on top of the plain dough, roll tightly into a log shape, and chill for at least 2 hours.
- Preheat oven to 350°F and line baking sheets with parchment paper.
- Unwrap the log, brush with water or egg white, and roll in coarse sugar or crushed peppermint.
- Slice the log into 1/4-inch rounds, placing them on baking sheets.
- Bake for 8-10 minutes or until the edges are lightly golden, then cool on a wire rack.
Leave a Reply