
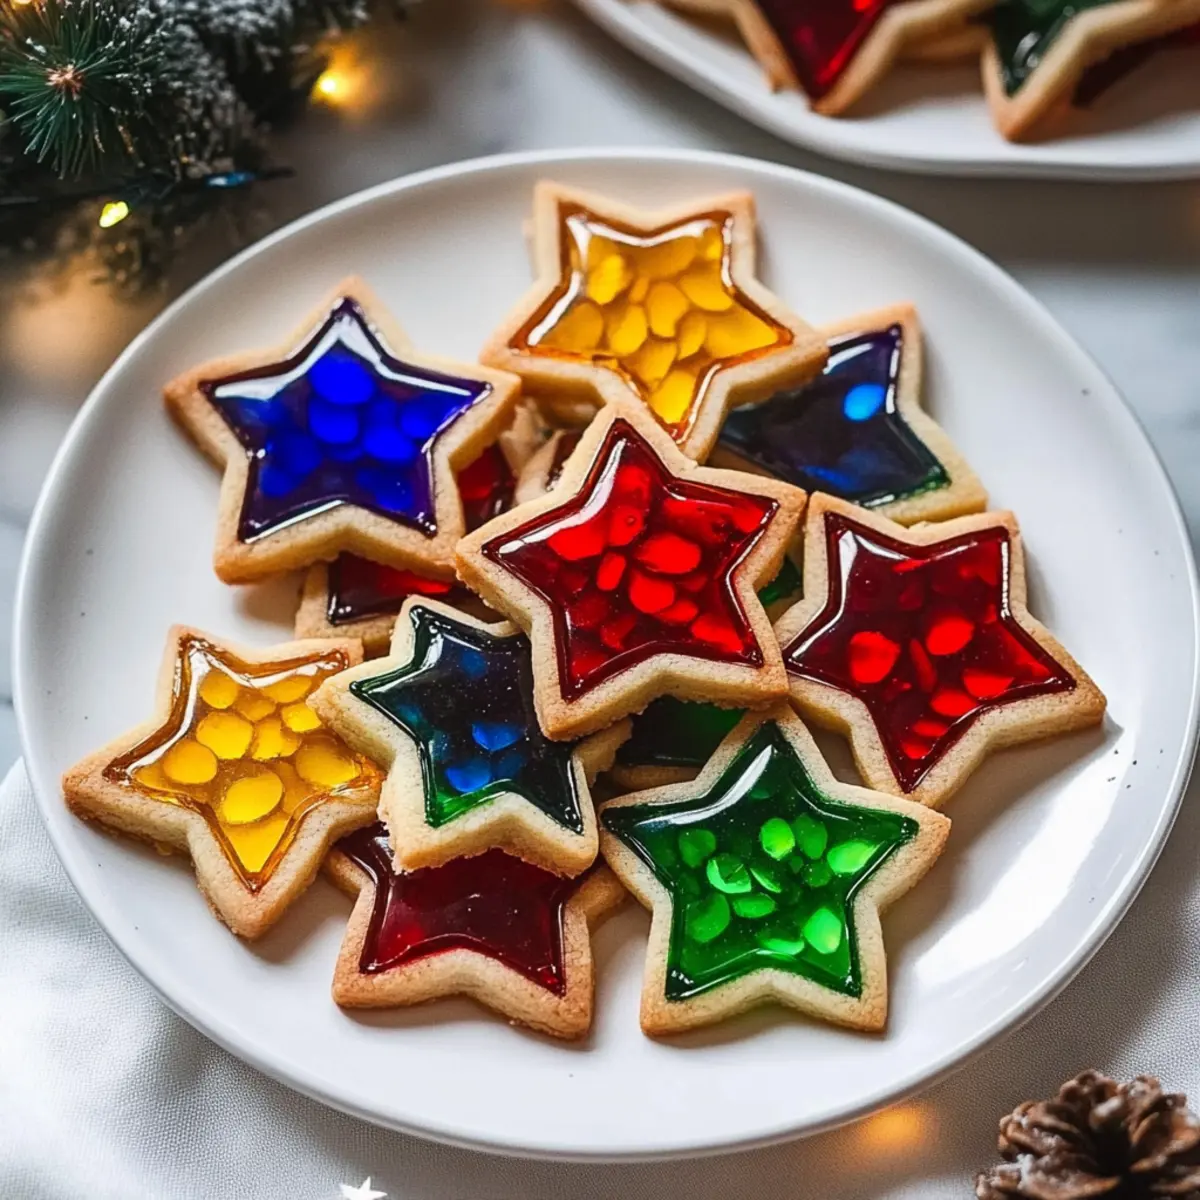
The kitchen filled with laughter as I watched my niece carefully pour crushed candies into the heart-shaped cutouts. These Stained Glass Cookies quickly turned into our favorite holiday tradition, a joyous combination of buttery sugar cookie and colorful candy that creates an enchanting “glass” effect. Perfect for cookie exchanges and festive gatherings, their vibrant hues not only tantalize the taste buds but also serve as charming decorations. Plus, they’re a breeze to whip up, making them a fun project for all ages. Each batch brings a sprinkle of magic to our celebrations, and the kids love choosing different shapes and colors for every occasion. Are you ready to dazzle your loved ones with these delightful treats?
Why Are Stained Glass Cookies So Special?
Colorful and festive, these cookies brighten any occasion with their stunning “glass” effect. Easy to customize, you can use different shapes and colors to match every holiday. Perfect for sharing, they make delightful gifts or eye-catching decorations for your festive table. Fun for all ages, baking these cookies is a joyous activity the whole family can enjoy together. Plus, if you love experimenting, try incorporating unique flavors as seen in my other recipes like Pumpkin Sugar Cookies or Banana Bread Cookies for a tasty twist!
Stained Glass Cookies Ingredients
These vibrant and delightful cookies will surely bring joy to your holiday gatherings!
For the Cookie Dough
- Sugar – Sweetness base for cookies; substitute half with brown sugar for added moisture and flavor.
- Butter – Provides structure and a rich, tender texture; use unsalted for better control over salt content.
- Egg – Binds the dough and adds richness; no direct substitute, but a flax egg can work for a vegan version.
- Flour – Main structural component; all-purpose flour is standard, or use a gluten-free blend for dietary needs.
- Baking Powder – Leavening agent to help achieve a light texture; baking soda can be used in a pinch.
- Almond Extract (optional) – Adds flavor depth; vanilla extract can be a substitute if preferred.
For the Stained Glass Effect
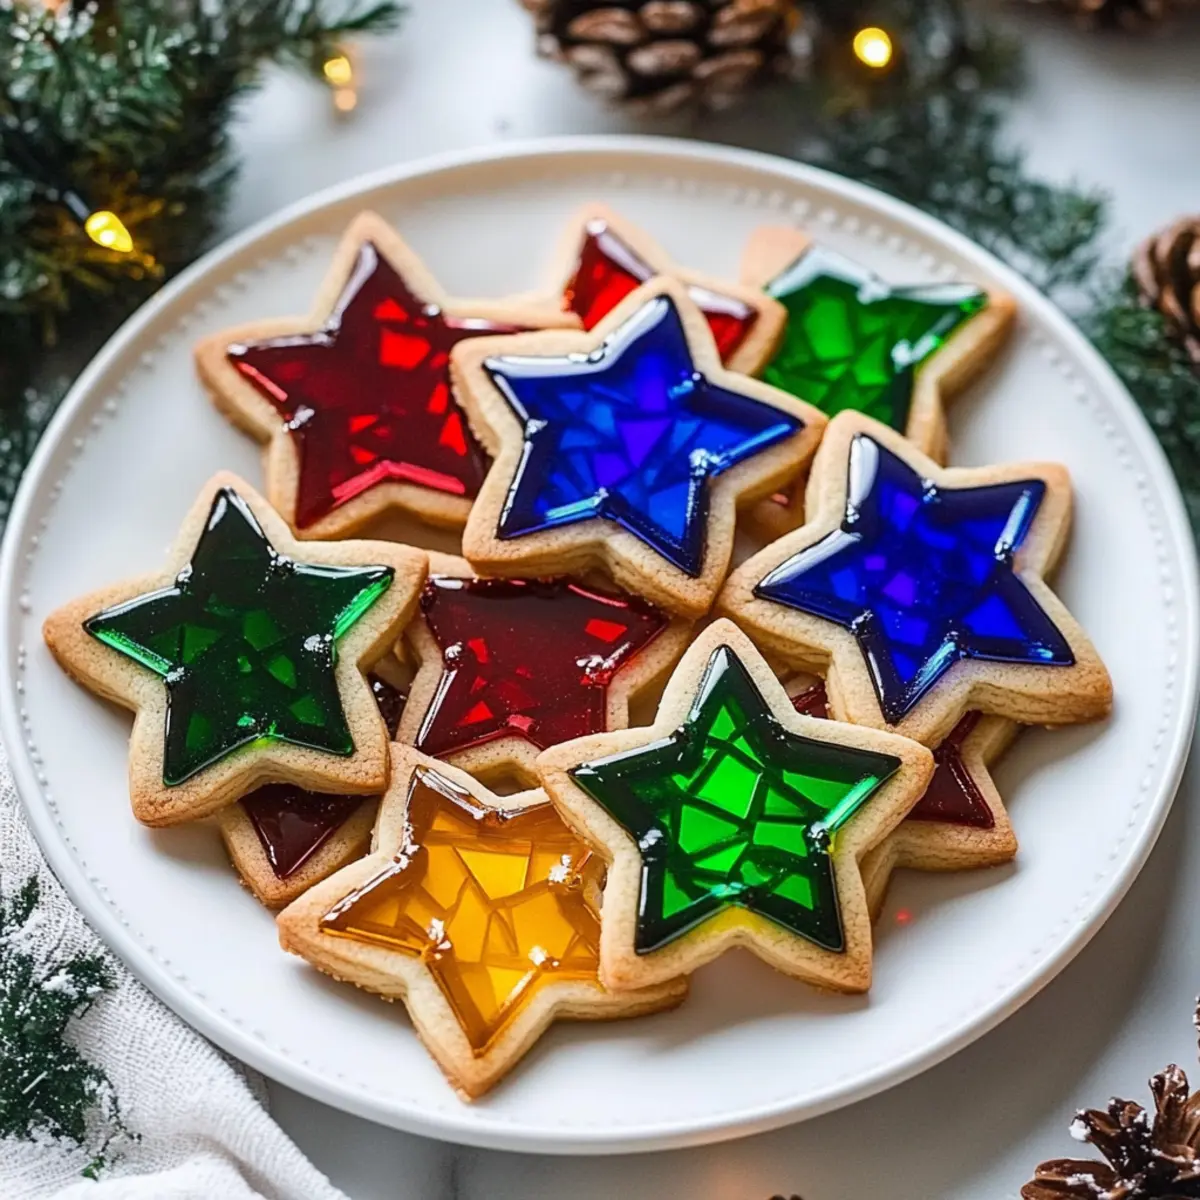
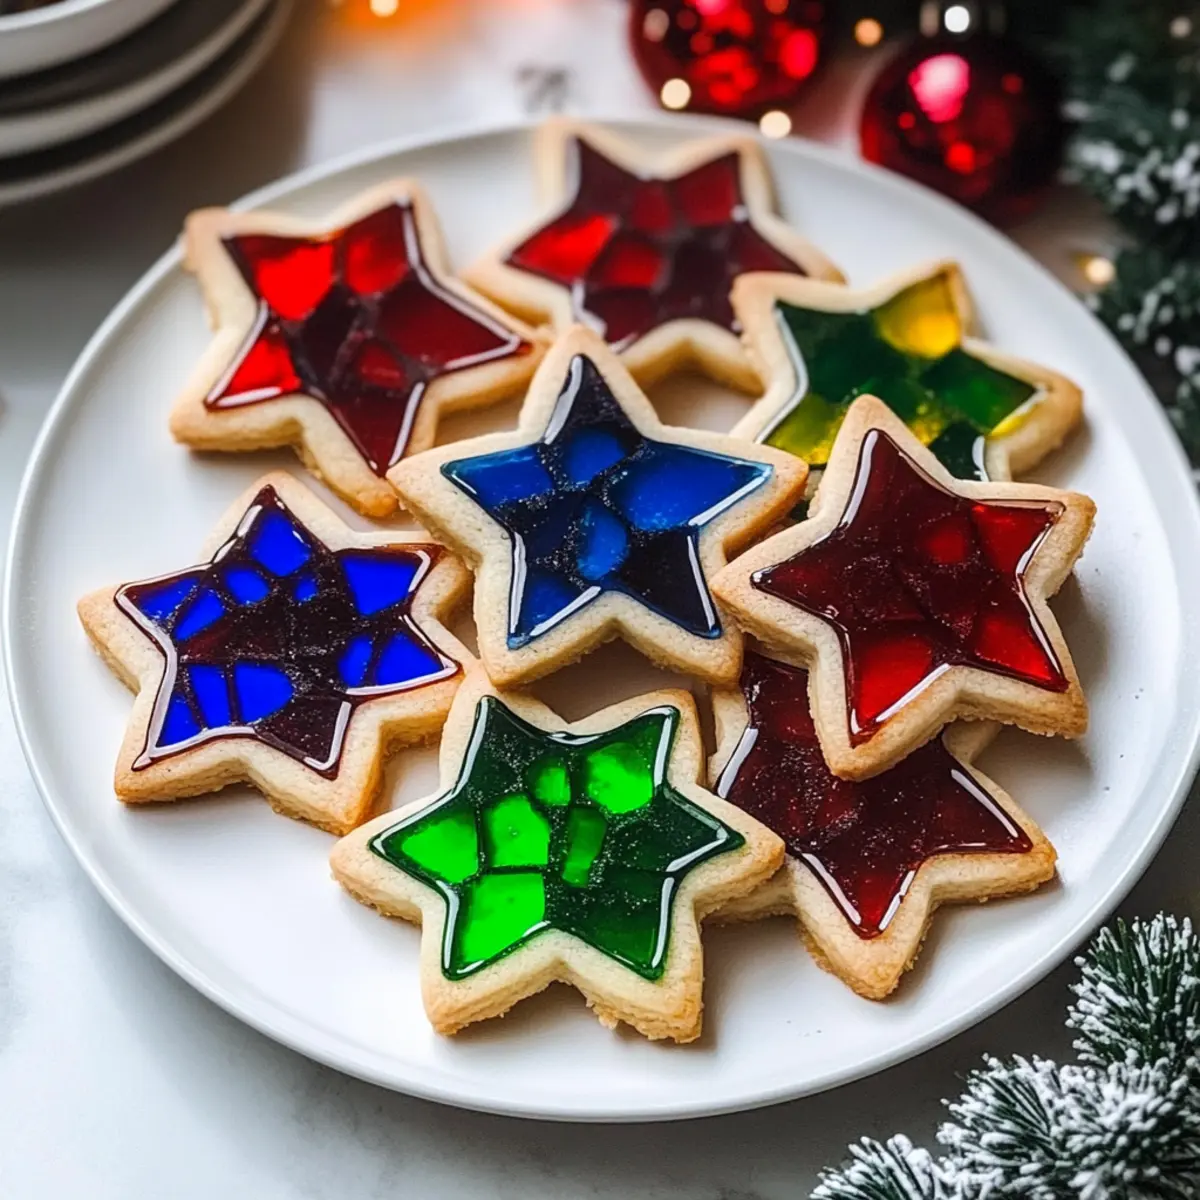
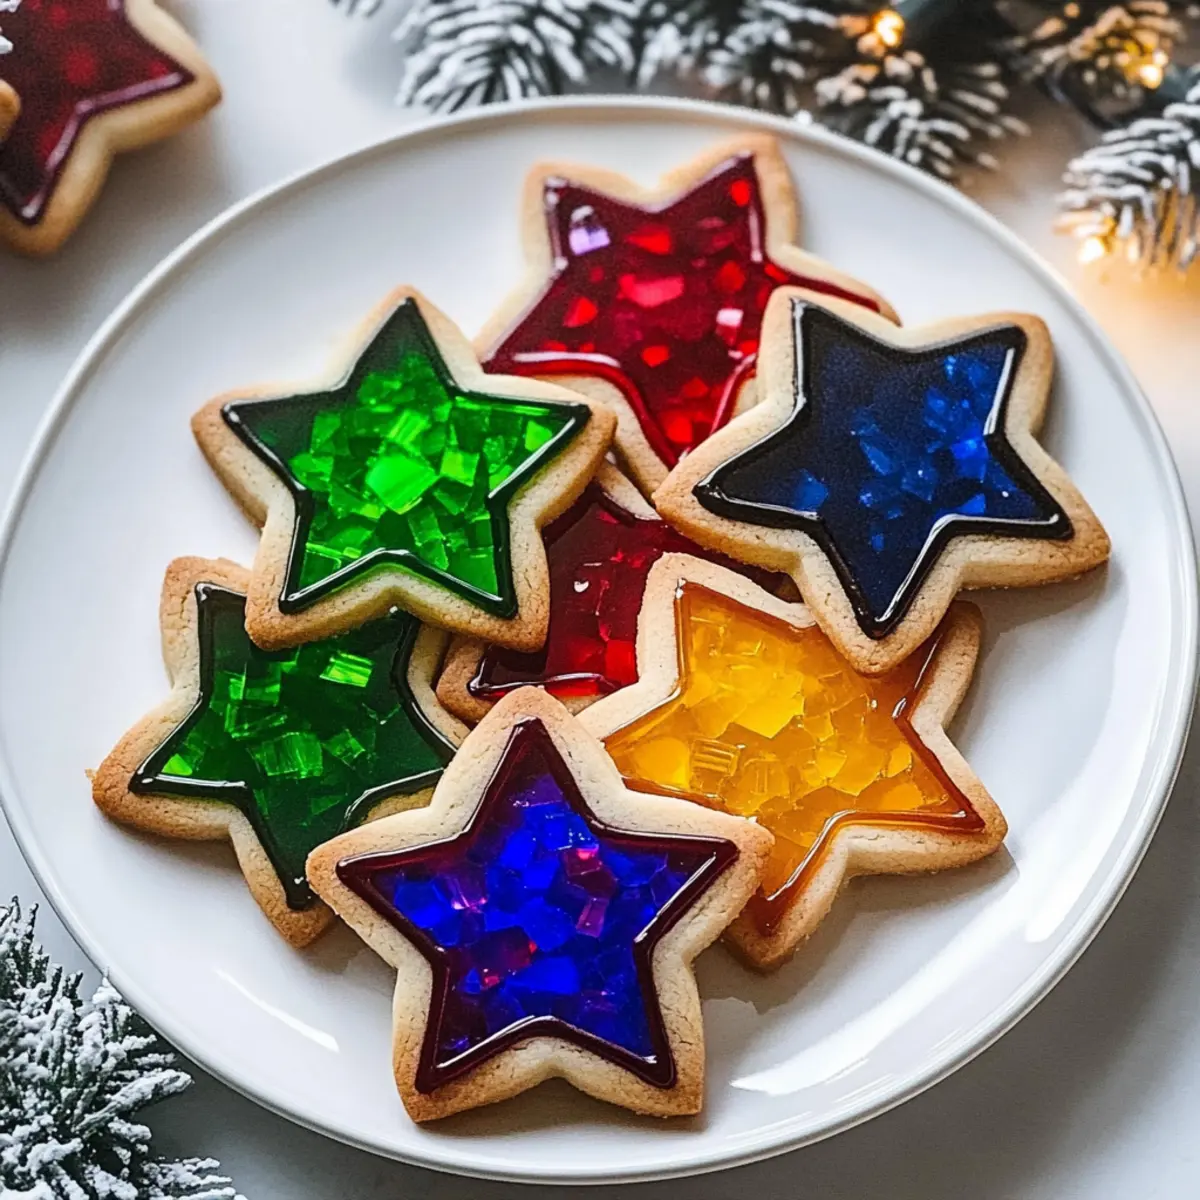
- Hard Candies (various colors) – Create the stained glass effect; ensure to use clear candies for the best appearance. Separate colors for a defined look.
Enjoy your baking adventure with these Stained Glass Cookies, sure to delight family and friends!
Step‑by‑Step Instructions for Stained Glass Cookies
Step 1: Dough Preparation
Begin by creaming together 1 cup of softened unsalted butter and 1 cup of granulated sugar in a large mixing bowl until the mixture is light and fluffy, about 3-4 minutes. Beat in 1 large egg and 1 teaspoon of almond extract until well combined. Gradually add 3 cups of all-purpose flour and 1 teaspoon of baking powder, mixing until the dough is evenly combined. Chill this dough in the refrigerator for at least 30 minutes to make it easier to roll out.
Step 2: Cutting Cookies
Preheat your oven to 350°F (175°C) while you work on the dough. Roll out the chilled cookie dough on a lightly floured surface to a thickness of about 1/4 inch. Use a larger cookie cutter to create the outer shapes and a smaller one to cut out the centers, creating fun designs for your Stained Glass Cookies. If the dough becomes too soft, return it to the fridge for a quick chill before proceeding.
Step 3: Adding Candy
Carefully transfer your cookie cutouts onto a parchment-lined baking sheet, ensuring they are spaced a couple of inches apart. For the iconic stained glass effect, fill each center cutout with crushed clear hard candies, avoiding overfilling to prevent bubbling during baking. You can use different colors for a vibrant variety, but make sure to separate the candies for a more defined look.
Step 4: Baking
Place the cookies in your preheated oven and bake for about 8 to 10 minutes, or until the edges of the cookies are golden brown. Keep a close eye on them; you want the candy centers to be melted but not bubbling over the edges of the cookies. The delightful aroma will fill your kitchen as they bake!
Step 5: Cooling
Once baked, remove the cookies from the oven and let them cool on the baking sheet for 5 minutes. This resting period allows the candy to firm up slightly. Then, carefully transfer the cookies to a wire rack to cool completely. If you wish to hang them as ornaments, poke holes in the tops while they are still warm using a toothpick.
Step 6: Storing and Enjoying
Once fully cooled, these colorful Stained Glass Cookies can be stored in an airtight container, layered with parchment paper to prevent sticking. They maintain their vibrant colors and delicious taste for up to a week. Perfect for sharing at parties or as festive decorations, these cookies are sure to be a hit among family and friends!
Make Ahead Options
These Stained Glass Cookies are perfect for busy home cooks looking to save time without sacrificing flavor! You can prepare the cookie dough up to 48 hours in advance; simply wrap it tightly in plastic wrap and refrigerate. For extra efficiency, you can also cut the cookie shapes (after chilling) and store them on a baking sheet in the fridge for up to 24 hours. To maintain that delightful texture and prevent browning, keep the dough chilled. When you’re ready to bake, simply fill with crushed candies and bake as instructed, ensuring they come out just as delicious as if made fresh. Enjoy the ease of holiday baking!
Variations & Substitutions for Stained Glass Cookies
Invite your inner artist to shine as you explore delightful twists and unique substitutions for these stunning cookies!
-
Flavor Twist: Experiment with different extracts like lemon or mint for a refreshing flavor profile. Each variation can bring a new layer of excitement to your holiday cookie collection.
-
Colorful Shapes: Use festive cookie cutters to create themed shapes like Christmas trees or Easter eggs. This adds an extra dash of fun and makes them perfect for any occasion, not just the holidays!
-
Dairy-Free Option: Substitute coconut oil for butter in equal amounts for a dairy-free version. The subtle coconut flavor pairs beautifully with the sweet candy, offering a tropical twist.
-
Gluten-Free Delight: Replace all-purpose flour with a gluten-free flour blend. This ensures everyone can enjoy the beauty and taste of stained glass cookies without dietary concerns.
-
Candy Alternatives: Swap in fruit-flavored hard candies to infuse a fruity pop into your cookies. Experimenting with flavors can turn each batch into a delightful surprise!
-
Add a Crunch: Mix in chopped nuts like pecans or almonds to the dough for added texture. This will provide a lovely contrast to the chewy candy center and enhance the overall experience.
-
Spiced Up Version: Incorporate spices like cinnamon or nutmeg into the dough for a warm, cozy flavor. These hints of spice will elevate the classic cookie taste and give them a festive spirit.
As you create your unique masterpiece, don’t forget to check out my other delightful recipes like Chewy Pumpkin Snickerdoodle Cookies or Soft Pumpkin Cookies for even more delicious inspiration!
Expert Tips for Stained Glass Cookies
-
Chill Your Dough: Keeping your dough well-chilled at every stage helps maintain its structure and makes cutting shapes much easier.
-
Candy Choices: Use only clear hard candies for the best stained glass appearance. Avoid colored candies that can end up duller after baking.
-
Watch Closely: Monitor baking time carefully; overcooking can cause the candy centers to bubble and lose their delightful clarity.
-
Rolling Technique: Dust your rolling pin with flour to prevent the dough from sticking, ensuring smooth cuts and beautiful edges.
-
Cut Shape Considerations: Choose larger cookie cutters for outer shapes and smaller ones for center cutouts, allowing for a striking visual effect in your Stained Glass Cookies.
How to Store and Freeze Stained Glass Cookies
Airtight Container: Store cooled cookies in a single layer in an airtight container for up to 7 days, ensuring they remain fresh and colorful.
Freezer: For longer storage, freeze cookies layered with parchment paper in a freezer-safe container for up to 3 months. This prevents sticking and preserves their vibrant stained glass effect.
Reheating: To enjoy frozen cookies, thaw at room temperature for about 30 minutes. Avoid microwaving, as it can cause the candy to lose its beautiful clarity.
Decorative Use: If using as holiday decorations, hang dried cookies with twine or ribbon. Ensure they are kept in a cool place to maintain their stunning appearance even while stored.
What to Serve with Stained Glass Cookies
These colorful cookies are not just delightful treats but also a wonderful centerpiece for your holiday tablescape.
-
Festive Hot Cocoa: A warm cup of cocoa pairs beautifully with these cookies, enhancing their sweetness and providing a cozy feel to your gathering. Top with whipped cream and a sprinkle of cocoa for an indulgent touch.
-
Gingerbread Muffins: The spiced flavors of gingerbread muffins complement the bright candy centers, offering a perfect balance of sweetness and warmth during the holidays.
-
Citrus Salad: A refreshing citrus salad can cut through the sweetness of the cookies, adding a bright, zesty contrast that awakens the palate. Toss in some mint for an aromatic twist.
-
Holiday Charcuterie Board: Serve these cookies alongside a festive charcuterie board filled with assorted cheeses, nuts, and fruits. The colorful cookies will add a playful visual element to your spread!
-
Chewy Chocolate Chip Cookies: Pairing these cookies with warm, chewy chocolate chip cookies creates a delightful cookie experience. The contrast of textures and flavors will have everyone reaching for more.
-
Spiced Tea: A fragrant spiced tea harmonizes beautifully with the sugary sweetness of the stained glass effect. Its warmth and spices provide a comforting note to the cookie experience.
-
Rich Vanilla Ice Cream: Top your stained glass cookies with a scoop of rich vanilla ice cream to create an eye-catching dessert. The creaminess will complement the crisp cookie texture perfectly.
Stained Glass Cookies Recipe FAQs
How do I choose the right candies for the stained glass effect?
When selecting hard candies, opt for clear varieties like Jolly Ranchers or Life Savers to achieve the best stained glass look. Avoid dark or opaque candies, as they may lose their vibrancy during baking. If you’re feeling adventurous, try mixing different colors for a fun, festive appearance!
How should I store my Stained Glass Cookies?
Store your cooled cookies in a single layer within an airtight container for up to 7 days. To retain their brightness and crispiness, place parchment paper between layers if stacking. Make sure to keep them in a cool, dry place away from direct sunlight to prevent any melting or fading of the candy centers.
Can I freeze Stained Glass Cookies?
Absolutely! To freeze, layer the cookies with parchment paper in a freezer-safe container or bag. They can be stored in the freezer for up to 3 months. When you’re ready to enjoy them, simply thaw at room temperature for about 30 minutes. Avoid microwaving them to protect the candy’s clarity and consistency.
What should I do if my candy bubbles during baking?
If the candy learns to bubble while baking, it may mean that the oven is too hot or that you may have overfilled the cookie centers. To prevent this, ensure not to exceed the suggested amount of crushed candy and monitor them closely while baking. If you encounter bubbling, you can remove the cookies from the oven and let them cool quickly, but note they may not be as visually appealing if the candy has bubbled over.
Are there any dietary considerations I should keep in mind with this recipe?
For those who need to avoid certain ingredients, be sure to use gluten-free flour for the cookie base if you’re making it gluten-free. Additionally, if anyone is allergic to nuts, you can omit the almond extract and substitute with vanilla extract. Always double-check the labels of the hard candies as well, as some may contain allergens.
What’s the ideal ripeness for the sugar?
For this recipe, you’ll want to use granulated sugar that is fresh and free from clumping. Ensure your sugar isn’t old or has absorbed moisture, which could affect the dough’s texture. If you do opt to mix in brown sugar, just half a portion will lend extra flavor and moisture that complements the cookies wonderfully!
Stained Glass Cookies: A Festive Holiday Baking Delight
Ingredients
Equipment
Method
- Cream together the butter and granulated sugar until light and fluffy. Beat in the egg and almond extract. Gradually add flour and baking powder, mixing until combined. Chill for 30 minutes.
- Preheat the oven to 350°F (175°C). Roll out the chilled dough to 1/4 inch thick. Cut out shapes and create center cutouts with a smaller cookie cutter.
- Transfer the cookie shapes to a parchment-lined baking sheet. Fill center cutouts with crushed hard candies, separating colors for a defined look.
- Bake for 8 to 10 minutes, keeping an eye on them to avoid bubbling. The cookies should be golden brown around the edges.
- Let the cookies cool on the baking sheet for 5 minutes, then transfer to a wire rack. Poke holes if you wish to hang them as ornaments.
- Store cooled cookies in an airtight container for up to 7 days, layered with parchment paper.
Leave a Reply