
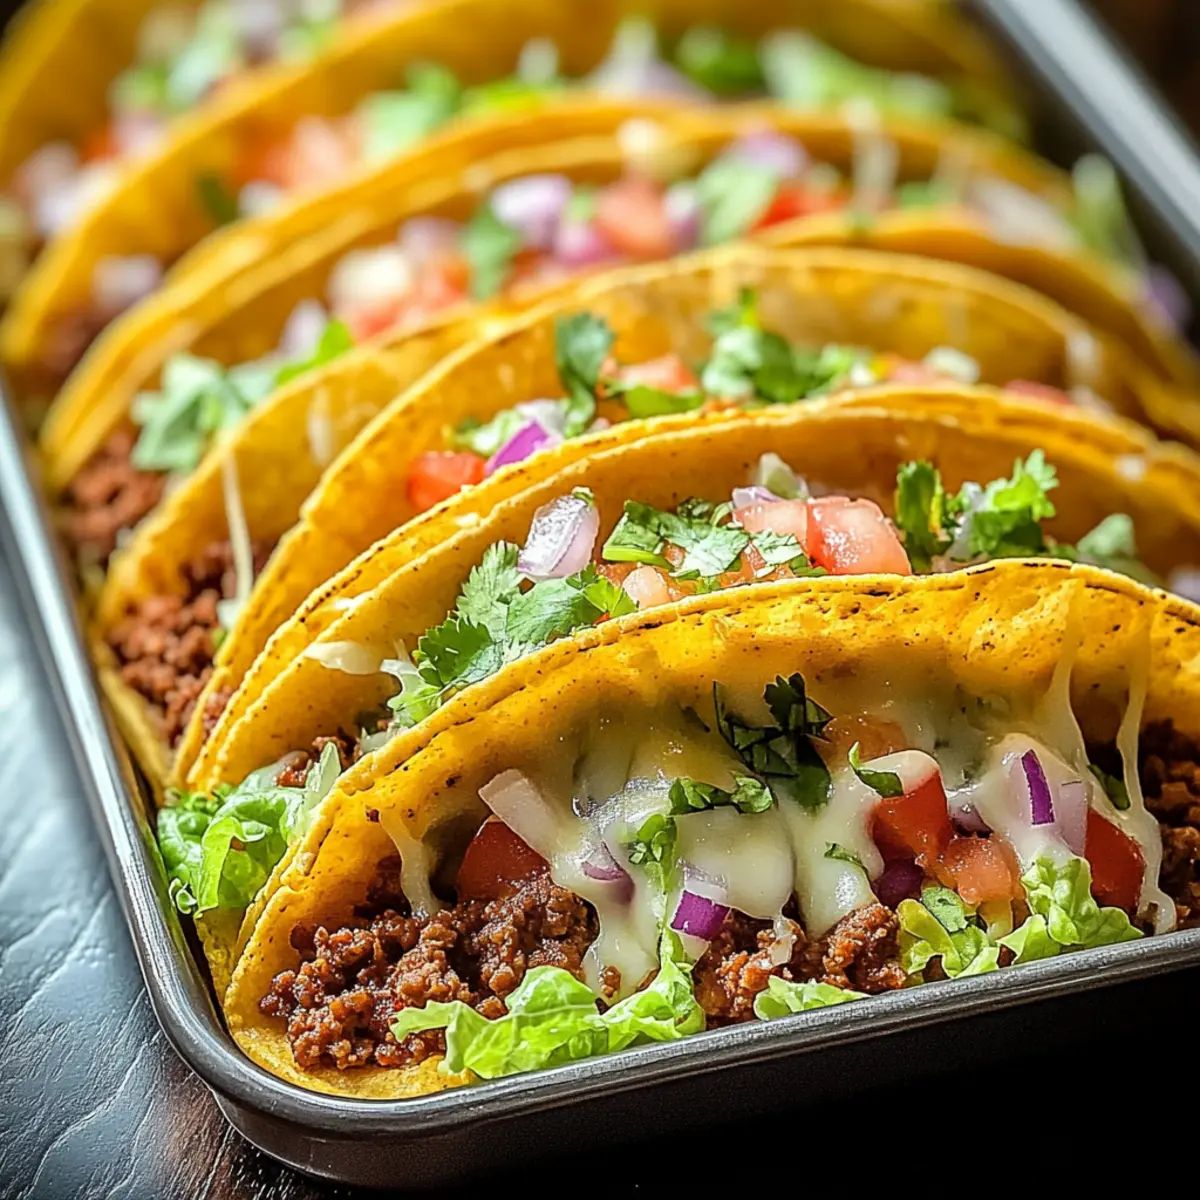
As I rummaged through the pantry one busy evening, I stumbled upon a box of taco shells and a longing for something deliciously comforting. That’s when the idea for Oven-Baked Cheesy Tacos sparked to life! Imagine the delightful crunch of crispy shells cradling a mouthwatering mixture of seasoned meat, melting cheese, and fresh toppings—all coming together in just 35 minutes. This recipe isn’t just quick; it’s completely customizable to suit your family’s taste buds, whether you prefer classic ground beef, turkey, or a hearty veggie option. These tacos are the perfect busy weeknight dinner that will not only satisfy your cravings but also impress your loved ones at gatherings. So, are you ready to dive into cheesy, crispy bliss? Let’s get cooking!
Why Will You Love These Tacos?
Quick and Easy: You can whip up these Oven-Baked Cheesy Tacos in just 35 minutes, making them a perfect solution for busy weeknights.
Completely Customizable: With options for ground beef, turkey, or even vegetarian substitutes, you can tailor each taco to suit your family’s preferences.
Delectably Crunchy: The combination of crispy shells filled with gooey cheese creates a delightful texture that satisfies every craving.
Crowd-Pleasing Appeal: Perfect for family dinners or get-togethers, these tacos are sure to impress and leave everyone wanting more—just like my Cheesy Buffalo Chicken and Spicy Southern Cheesy options!
Make-Ahead Friendly: Prep the filling ahead of time and assemble before baking, saving you even more time.
Oven-Baked Cheesy Tacos Ingredients
For the Filling
- Ground Beef – The star of the dish; substitute with ground turkey or beans for lighter options.
- Olive Oil – Essential for sautéing; can use vegetable or canola oil for similar results.
- Diced Onion – Adds depth of flavor; shallots or green onions work well as substitutes.
- Minced Garlic – Infuses the dish with aroma; fresh is best but powdered can be convenient.
- Taco Seasoning – Delivers delightful spice; use store-bought or whip up a homemade blend.
- Tomato Sauce – Keeps the filling moist; swap in diced tomatoes or salsa for extra texture.
For Assembly
- Shredded Cheese – Binds ingredients together; cheddar, Monterey Jack, or Mexican blend all melt beautifully.
- Taco Shells – The crispy vessel for your filling; consider corn or gluten-free tortillas for dietary preferences.
For Toppings
- Salt and Pepper – Adjust seasoning to your taste; don’t be shy about enhancing flavor.
- Fresh Toppings (Lettuce, Tomatoes, Onion, Cilantro) – Adds freshness and crunch; customize with avocado, sour cream, or jalapeños for a twist.
Feel free to explore your creativity with these Oven-Baked Cheesy Tacos! Each component is designed to enhance both flavor and texture, creating a delicious dish that will become a staple in your home.
Step‑by‑Step Instructions for Oven-Baked Cheesy Tacos
Step 1: Preheat the Oven
Begin by preheating your oven to 375°F (190°C) to ensure it reaches the perfect temperature for baking. This crucial step will help the taco shells become crispy and the cheese bubbly. While the oven is warming up, gather your ingredients and get ready to create your flavorful filling.
Step 2: Sauté the Vegetables
Heat a tablespoon of olive oil in a large skillet over medium heat. Add the diced onion and minced garlic, sautéing them until the onions turn translucent, which should take about 2-3 minutes. The aroma of the garlic will fill your kitchen, setting the stage for the delicious Oven-Baked Cheesy Tacos you’re about to make.
Step 3: Cook the Meat Filling
Next, add the ground beef (or your chosen substitute) to the skillet, breaking it apart with a spatula as it cooks. Mix in the taco seasoning, tomato sauce, salt, and pepper. Allow this mixture to simmer for about 5 minutes, stirring occasionally until the meat is thoroughly cooked and the flavors meld together beautifully.
Step 4: Assemble the Tacos
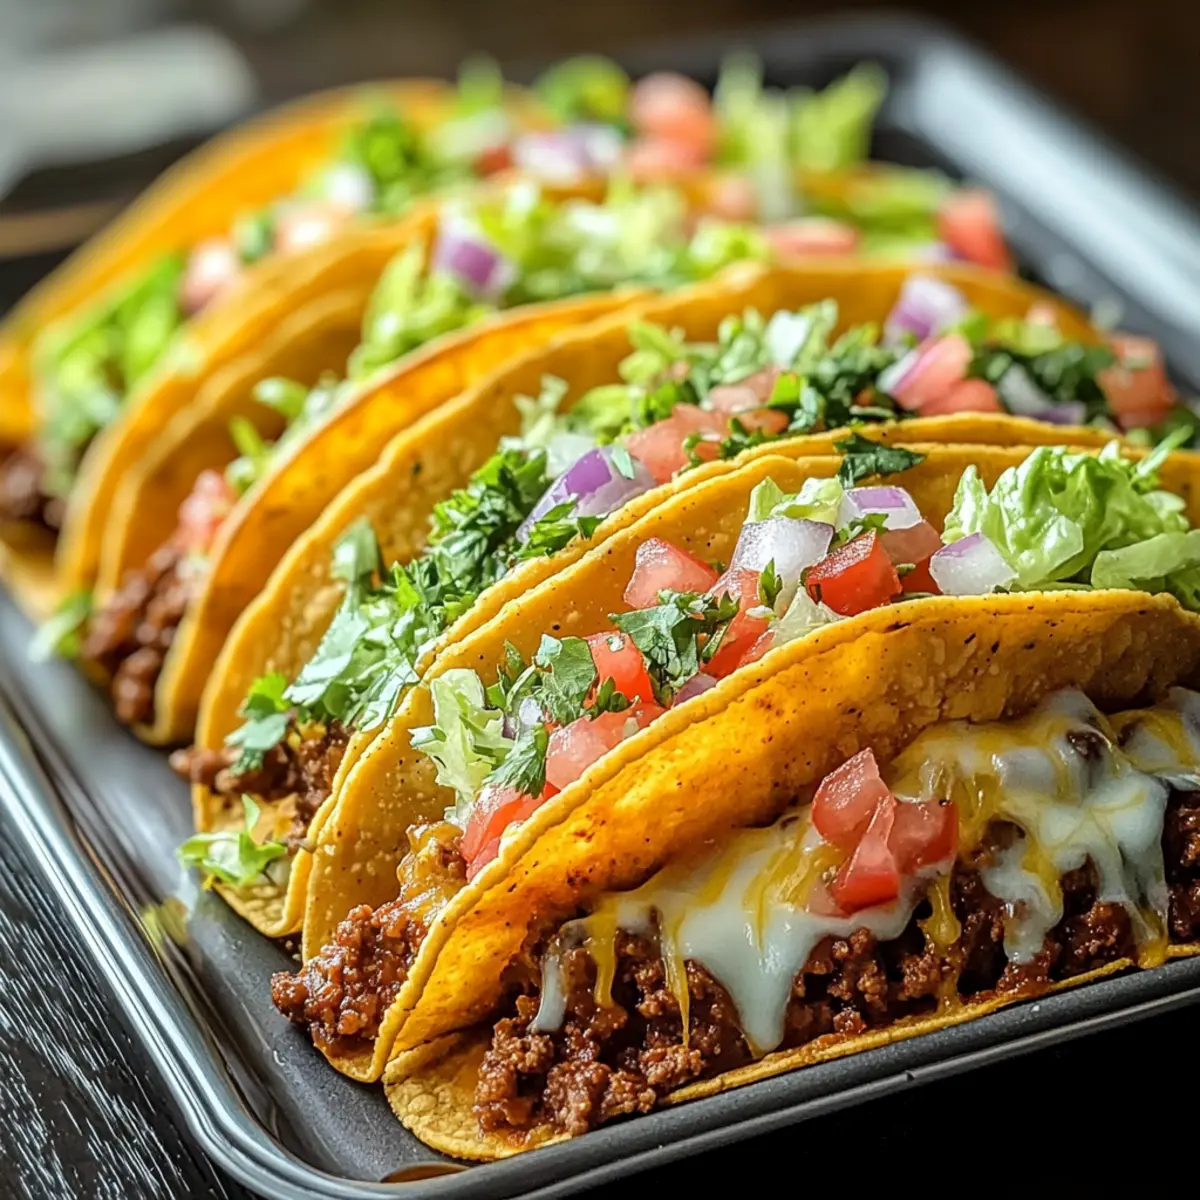
Once the filling is ready, warm your taco shells slightly in the oven for about 2 minutes to make them more pliable. Carefully fill each taco shell with the savory meat mixture and top them generously with shredded cheese. This layer of cheese will melt and hold everything together while baking, ensuring that your Oven-Baked Cheesy Tacos are both delicious and satisfying.
Step 5: Bake the Tacos
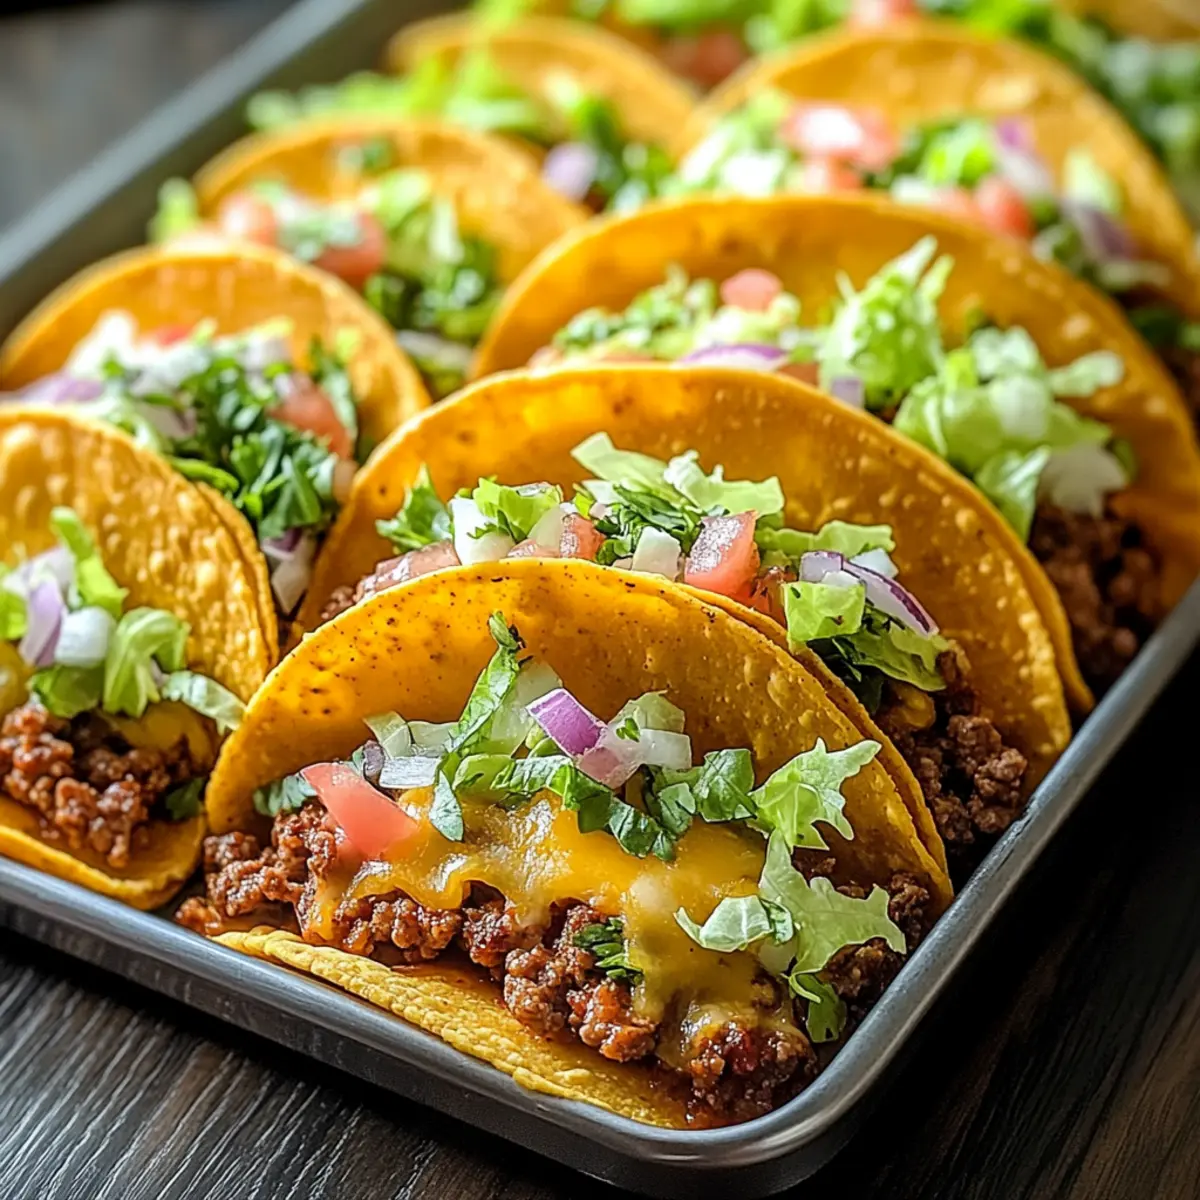
Place the filled taco shells upright in a greased baking dish, ensuring they stand securely. Slide the dish into your preheated oven and bake for 10-15 minutes, or until the cheese is melted and starts to bubble, creating that irresistible visual appeal that signals it’s time to dig in.
Step 6: Add Fresh Toppings
After removing the tacos from the oven, let them cool slightly before garnishing with your favorite fresh toppings. Load them up with crisp lettuce, juicy tomatoes, diced onions, and cilantro. Feel free to get creative by adding avocado, sour cream, or jalapeños to personalize your Oven-Baked Cheesy Tacos, making each bite a burst of flavor.
How to Store and Freeze Oven-Baked Cheesy Tacos
Fridge: Store leftover Oven-Baked Cheesy Tacos in an airtight container for up to 3 days. This ensures they maintain their flavor while keeping them safe for your next meal.
Freezer: For longer storage, freeze unbaked tacos (filled and assembled without baking) for up to 2 months. Wrap each taco tightly in plastic wrap, then place them in a freezer-safe bag.
Reheating: To reheat, bake in the oven at 350°F (175°C) for about 15-20 minutes until heated through. This method keeps the shells crispy and the cheese melty.
Make-Ahead Tips: You can prepare the filling in advance and store it in the fridge for up to 2 days. Assemble just before baking for a fresh, hot meal!
What to Serve with Oven-Baked Cheesy Tacos
Elevate your taco night with delicious sides and drinks that will leave you and your loved ones happily satisfied!
- Crispy Nachos: Perfect for dipping, these thin tortilla chips topped with melted cheese and jalapeños echo the flavors of your tacos.
- Fresh Guacamole: This creamy, zesty dip brightens up the whole meal, providing a smooth contrast to the crunchy tacos.
- Zesty Mexican Rice: Fluffy rice seasoned with lime and cilantro rounds out your plate, adding a delightful, fresh flavor that enhances every bite.
- Cool Coleslaw: A refreshing tangy slaw adds crunch and a hint of sweetness, balancing the richness of cheese-filled tacos beautifully. A perfect match!
- Spicy Black Beans: Hearty and flavorful, these beans offer a tasty protein boost while complementing the spices in your tacos.
- Chilled Sangria: Sweet and fruity, this colorful drink is a lovely accompaniment that will keep the fiesta atmosphere alive.
- Fruit Salsa: A vibrant mix of diced fruit like mango and pineapple provides a sweet counterpoint to your savory tacos, making every bite a flavorful surprise!
- Churros with Chocolate Sauce: End your meal on a sweet note with these crispy, doughy treats, perfect for dipping in warm chocolate—an indulgent finish after your cheesy tacos!
Make Ahead Options
These Oven-Baked Cheesy Tacos are a fantastic meal prep option that can save you loads of time during a busy week! You can prepare the taco filling up to 3 days in advance; just store it in an airtight container in the refrigerator to keep it fresh and flavorful. Additionally, you can assemble the filled taco shells and refrigerate them overnight. When you’re ready to serve, simply bake the tacos directly from the fridge for 10-15 minutes at 375°F (190°C) until the cheese is bubbling and golden. This way, you’ll enjoy the same delicious, crispy texture without any compromise on taste!
Expert Tips for Oven-Baked Cheesy Tacos
-
Preheat Wisely: Ensure your oven is fully preheated before baking to achieve crispy taco shells—that sogginess is a common mistake!
-
Simmer for Flavor: When cooking the meat filling, let it simmer on gentle heat for at least 5 minutes to allow the spices to infuse fully for delicious Oven-Baked Cheesy Tacos.
-
Don’t Overfill: Avoid packing taco shells too tightly; overfilling can lead to spillage and uneven cooking.
-
Cheese Selection: Experiment with different cheese blends like pepper jack or Gouda for a unique flavor profile.
-
Keep It Pliable: Warm taco shells before filling to make them easier to work with and less likely to crack when assembled.
Oven-Baked Cheesy Tacos Variations
Feel free to get creative with these Oven-Baked Cheesy Tacos to suit your taste and dietary needs!
- Ground Turkey: Swap ground beef for ground turkey for a lighter, healthier twist without sacrificing flavor.
- Vegetarian Delight: Replace meat with black beans, lentils, or diced tofu to create a hearty, vegetable-forward alternative.
- Spicy Kick: Add diced jalapeños or a dash of hot sauce into the filling for a fiery flavor boost that spice lovers will adore.
- Extra Veggies: Bulk up your filling with chopped bell peppers, zucchini, or spinach for extra nutrients and a delightful crunch.
- Different Cheeses: Mix it up with cheese varieties like pepper jack for heat, or creamy Goat cheese for a tangy richness that elevates the dish.
- Gluten-Free Option: Use corn tortillas or gluten-free tortillas, ensuring everyone can enjoy these cheesy delights without worry.
- Salsa Swirl: Incorporate your favorite salsa into the meat mixture for added moisture and flavor; a fresh mango salsa would be a refreshing twist!
- Garnish Galore: Experiment with toppings like olives, different herbs like cilantro or dill, or even a dollop of guacamole for an extra layer of yum.
Digging into these customizable options will allow you to reinvent your Oven-Baked Cheesy Tacos with every cooking adventure. For more taco inspiration, try my favorite Smash Chicken Caesar Tacos or delicious Cheesy Beef Potato recipes!
Oven-Baked Cheesy Tacos Recipe FAQs
How do I select ripe ingredients for my Oven-Baked Cheesy Tacos?
Absolutely! When choosing your fresh toppings, look for vibrant lettuce with no wilting or brown edges, bright red tomatoes that are firm yet slightly yielding to the touch, and fresh cilantro that smells fragrant. For onions, opt for ones that are firm and have no dark spots or blemishes. It’s these quality ingredients that will elevate your tacos to the next level!
How should I store leftovers of Oven-Baked Cheesy Tacos?
Store any leftover Oven-Baked Cheesy Tacos in an airtight container in the fridge for up to 3 days. If you’d like to keep them longer, I recommend separating the toppings and storing them separately to maintain freshness and texture.
Can I freeze Oven-Baked Cheesy Tacos?
Yes! For the best results, assemble your unbaked tacos and wrap each one tightly in plastic wrap, then place them in a freezer-safe bag. They can be frozen for up to 2 months. When you’re ready to enjoy, simply bake them directly from the freezer for 15-20 minutes at 375°F (190°C), adding a few extra minutes if needed to ensure they’re heated through.
What should I do if my taco shells turn soggy?
To prevent soggy shells, always preheat your oven and warm the taco shells briefly before filling them. Additionally, don’t overfill them with the meat mixture, as excess moisture can lead to a mushy texture. It’s also a good practice to bake them upright and not packed too closely together!
Are there any dietary considerations I should keep in mind?
Definitely! If you’re serving these Oven-Baked Cheesy Tacos to guests with dietary restrictions, consider using gluten-free taco shells and opting for vegetable-based fillings like black beans or lentils. Always check ingredient labels, especially for pre-made taco seasoning, to avoid any allergens.
Can I make the taco filling ahead of time?
Certainly! You can prepare the taco filling up to 2 days in advance. Store it in an airtight container in the refrigerator. When you’re ready to bake, just warm it up slightly in a skillet, stuff the taco shells, and then bake. This will save you time during busy weeknights!

Oven-Baked Cheesy Tacos That Will Revolutionize Dinner
Ingredients
Equipment
Method
- Preheat your oven to 375°F (190°C) to ensure it reaches the perfect temperature for baking.
- Heat a tablespoon of olive oil in a large skillet over medium heat. Add the diced onion and minced garlic, sautéing until the onions turn translucent, about 2-3 minutes.
- Add the ground beef (or your chosen substitute) to the skillet, breaking it apart as it cooks. Mix in the taco seasoning, tomato sauce, salt, and pepper. Simmer for about 5 minutes.
- Warm your taco shells in the oven for about 2 minutes to make them pliable. Fill each shell with the meat mixture and top with shredded cheese.
- Place the filled taco shells upright in a greased baking dish. Bake for 10-15 minutes, or until the cheese is melted and bubbly.
- Remove the tacos from the oven and let them cool slightly. Garnish with fresh toppings like lettuce, tomatoes, onions, and cilantro.
Leave a Reply