
As I stood in my kitchen, the rich aroma of melting chocolate wafted around me, instantly lifting my spirits. That’s how I discovered the magic of Chocolate Maritozzi—a delightful twist on the classic Italian bun that not only looks impressive but is surprisingly simple to whip up. These soft, airy treats are filled with luscious whipped cream, making them perfect for a cozy afternoon snack or an elegant dessert option. With just a handful of pantry staples, you can create a crowd-pleasing delight that satisfies your chocolate cravings while keeping your prep time minimal. Trust me, once you take that first bite, you’ll be hooked! Curious how to master this indulgent treat? Let’s dive into the sweet details!

Why is Chocolate Maritozzi a must-try?
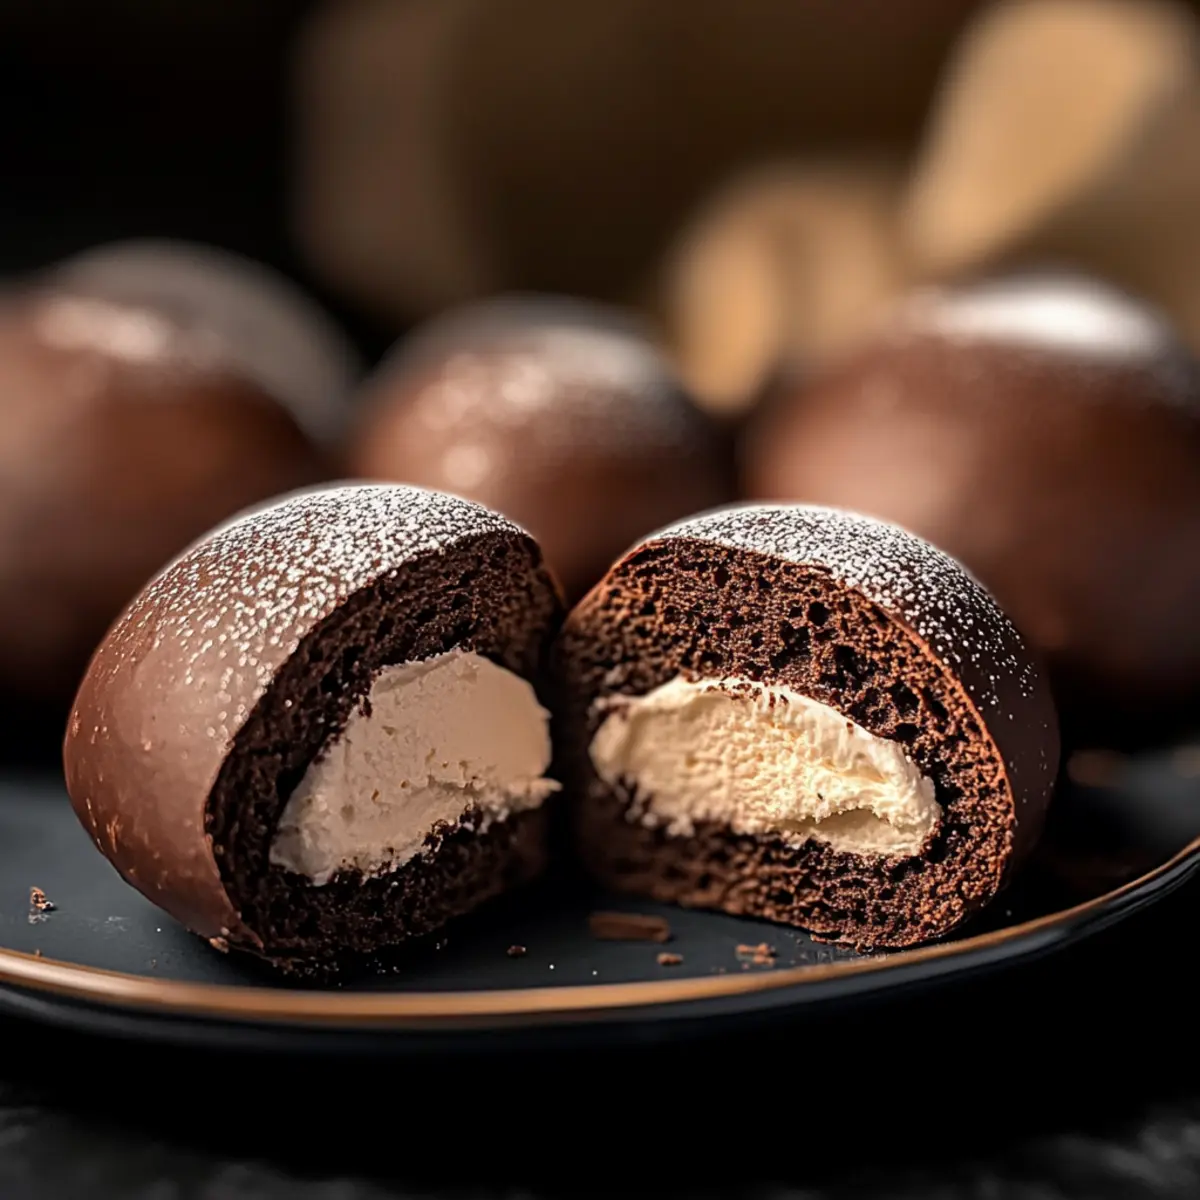
Irresistible, these Chocolate Maritozzi boast an incredible combination of soft, pillowy dough and a rich, velvety whipped cream filling (or chocolate whipped cream for a twist). Surprisingly Simple, even novice bakers can create these treats with just a few pantry staples. Versatile Options allow for variations—add chocolate chips, spices, or fruit preserves for a personal touch! Perfect for Sharing, these delectable buns are sure to impress guests at any gathering. Time-Saving Delight, prepping and baking can be done in under two hours. Indulge in these sweet creations that pair beautifully with your favorite coffee or tea! If you love chocolate desserts, check out Chocolate Marshmallow Swirl Cookies for another delightful treat!
Chocolate Maritozzi Ingredients
• Create these delightful Chocolate Maritozzi with simple ingredients that bring joy to every bite!
For the Dough
- AP Flour – Provides structure and tenderness; consider using bread flour for a chewier texture.
- Bread Flour – Essential for adding strength to the dough for that perfect pillowy bite.
- Instant Yeast – Helps the dough rise easily; regular yeast can work if you proof it first.
- Granulated Sugar – Sweetens the dough and enhances browning; try brown sugar for a deeper flavor.
- Salt – Balances the sweetness and brings out the flavor in every morsel.
- Vanilla – Adds a warm, aromatic profile; substitute with almond extract for a unique twist.
- Eggs – Bring moisture and richness; for a vegan option, use flaxseed meal mixed with water.
- Milk – Hydrates and enhances the dough flavor; use plant-based milk for dairy-free needs.
- Neutral Oil (Vegetable/Canola) – Keeps the buns tender; melt some butter for extra flavor.
- Dutch Process Cocoa Powder – Gives that rich chocolate flavor and color; regular cocoa can be used for a lighter hue.
- Egg Wash (Egg & Milk) – Ensures a shiny, golden finish on the buns before baking.
For the Whipped Cream Filling
- Heavy Whipping Cream – Creates a rich, velvety texture; switch to coconut cream for a dairy-free alternative.
- Powdered Sugar – Sweetens the whipped cream and helps maintain its structure; optional for less sweetness.
- Additional Cocoa Powder – Intensifies the chocolate taste in your decadent filling; ensure you sift it for smoothness.
With these ingredients, you’ll be on your way to making warm, soft Chocolate Maritozzi that your family and friends won’t be able to resist!
Step‑by‑Step Instructions for Chocolate Maritozz
Step 1: Dough Preparation
In a stand mixer, combine all dough ingredients: all-purpose flour, bread flour, instant yeast, granulated sugar, salt, vanilla, eggs, milk, neutral oil, and Dutch process cocoa powder. Mix on low speed for about 2 minutes until combined, then knead on medium speed for 8-10 minutes until the dough is smooth and elastic. It should pull away from the bowl easily, indicating it’s ready for rising.
Step 2: First Rise
Transfer the kneaded dough into a greased bowl, covering it with a clean kitchen towel or plastic wrap. Let the dough rise in a warm, draft-free place until it has doubled in size, which should take about 1 to 2 hours. You’ll know it’s ready when you gently press the dough and it springs back slightly.
Step 3: Shape Buns
Once the dough has risen, punch it down to release air. Divide the dough into equal pieces, roughly weighing about 3 ounces each. Shape each piece into a smooth ball and place them on a parchment-lined tray. Cover the tray with a kitchen towel, and let the buns rise again until they become puffy, approximately 30 to 60 minutes.
Step 4: Preheat Oven
While the buns are rising, preheat your oven to 350°F (175°C). Prepare an egg wash by whisking together an egg with a splash of milk. This step is essential for achieving a beautiful, shiny golden finish on your Chocolate Maritozzi once they bake in the oven.
Step 5: Bake
After the buns have risen, gently brush them with the egg wash to enhance their golden color while baking. Place the tray in the preheated oven and bake for about 16 minutes, or until they turn golden brown and sound hollow when tapped on the bottom. Keep an eye on them to avoid over-baking.
Step 6: Whipped Cream Filling
While the Chocolate Maritozzi are cooling, prepare the filling. In a mixing bowl, whip the heavy cream with cocoa powder, powdered sugar, and a pinch of salt until you reach medium-stiff peaks. The whipped cream should hold its shape well, making for a delightful and airy filling for these rich buns.
Step 7: Assembly
Once the buns are completely cool, carefully slice them open partially; do not cut all the way through. Take spoonfuls of the whipped cream filling and generously fill each bun. Serve them immediately for the best experience, or if you choose to store filled Chocolate Maritozzi, place them in the fridge to maintain their freshness.

Expert Tips for Chocolate Maritozzi
-
Dough Consistency: Ensure your dough is smooth and elastic. If it’s too sticky, add a touch more flour gradually to avoid dense buns.
-
Proper Rising: Always let the dough rise in a warm environment. Cold rooms can slow down yeast activity, resulting in flat Chocolate Maritozzi.
-
Egg Wash Application: Apply the egg wash gently for a shiny finish. Avoid letting it drip into the buns to prevent sogginess.
-
Cooling Time: Wait until the buns are completely cool before slicing. This prevents melting of the whipped cream filling, ensuring a delightful texture.
-
Fill Right Before Serving: To maximize freshness, fill the Chocolate Maritozzi just before serving. Pre-filled buns can dry out in the fridge.
-
Experiment with Flavors: Don’t hesitate to swap in your favorite flavors or fillings; chocolate chips or fruit preserves can reinvent this classic treat!
How to Store and Freeze Chocolate Maritozzi
Room Temperature: Unfilled Chocolate Maritozzi can be stored in an airtight container at room temperature for up to 2-3 days to preserve their soft texture.
Fridge: Filled buns should be consumed within 1-2 days for best quality. Store them in the fridge in an airtight container, but remember that the whipped cream filling may become slightly denser over time.
Freezer: If you want to save some for later, freeze unfilled Chocolate Maritozzi for up to 1 month. Wrap them tightly in plastic wrap and place in a freezer-safe bag.
Reheating: To enjoy a warm bun, reheat unfilled Chocolate Maritozzi in the oven at 350°F (175°C) for about 5-7 minutes or until warmed through, then fill with whipped cream.
Make Ahead Options
Preparing Chocolate Maritozzi ahead of time is a fantastic way to save precious moments on busy days! You can make the dough up to 24 hours in advance; simply prepare it and let it rise as usual, then refrigerate it after the first rise. When you’re ready to bake, bring it back to room temperature before shaping and letting the buns rise again. For the whipped cream filling, whip it up and store it in the fridge for up to 3 days in an airtight container to maintain its light, airy texture. However, to ensure the best flavor and prevent sogginess, fill the buns only right before serving. This way, you’ll enjoy gorgeous, fluffy Chocolate Maritozzi that taste just as delightful as if made fresh!
What to Serve with Chocolate Maritozzi
Indulging in rich Chocolate Maritozzi is just the beginning of an enticing culinary experience.
-
Fresh Berries: The tartness of raspberries or strawberries provides a refreshing contrast to the sweetness of the Chocolate Maritozzi. A burst of juicy flavor enhances each decadent bite, making for a delightful pairing.
-
Espresso or Coffee: A bold cup of espresso offsets the sweetness of the buns beautifully, creating a harmonious balance. The rich, warm notes of coffee will elevate your dessert experience to new heights.
-
Vanilla Ice Cream: This creamy dessert melts luxuriously alongside the Chocolate Maritozzi, creating a decadent combination. Imagine scooping up some ice cream with the fluffy filling for an indulgent treat!
-
Whipped Cream Topping: For an extra layer of fluffiness, serve a dollop of plain whipped cream on the side. It adds an airy finish that complements the chocolate beautifully.
-
Dark Chocolate Sauce: A drizzle of molten dark chocolate amplifies the rich chocolate flavor within the buns. Its bittersweet notes intensify your chocolate cravings, creating a truly indulgent experience.
-
Mint Tea: This refreshing drink pairs wonderfully with Chocolate Maritozzi, cleansing the palate after each sweet bite. The lightness of mint tea rejuvenates while allowing you to savor the dessert uninterrupted.
-
Fruit Preserves: Offers a sweet and tangy element that can be spread on the buns for a burst of additional flavor. Pairing with blueberry or peach preserves brings the dessert to life, perfect for enhancing your enjoyment.
-
Milk or Plant-Based Milk: A classic pairing that brings comfort to your dessert. Whether it’s almond milk or whole milk, the creaminess balances the rich flavors beautifully, making it a nostalgic treat.
Elevate your dessert experience by pairing your Chocolate Maritozzi with these delightful options!
Chocolate Maritozzi Variations & Substitutions
Looking to personalize your Chocolate Maritozzi? Let your creativity flow and enjoy this delectable treat even more!
- Dairy-Free: Swap whole milk and cream for almond or coconut milk along with coconut cream for the filling.
- Chocolate Chips: Add dark chocolate chips to the dough for an extra burst of melty goodness.
- Brown Sugar: Replace granulated sugar with brown sugar to deepen the flavor profile of the dough.
- Fruit Preserves: Substitute whipped cream with your favorite fruit preserves, like raspberry or strawberry, for a fruity twist.
- Nutty Delight: Incorporate finely chopped nuts into the chocolate dough or filling for an added crunch and richness.
- Spiced Dough: Infuse cinnamon or nutmeg into the dough to give these buns a warm, aromatic touch that enhances their sweetness.
- Citrus Zest: Brighten things up by adding orange or lemon zest to the dough for a refreshing flavor contrast to the chocolate.
- Chocolate Whipped Cream: For a richer filling, whip the cream with more cocoa powder (or even melted chocolate) for that chocolate lover’s dream!
Explore these variations on your next baking day and make your Chocolate Maritozzi uniquely yours! And if you’re ever in the mood for something different, check out the rich flavors in Moist Chocolate Chip Banana Bread or indulge in Pumpkin White Chocolate Chip Cookies.
Chocolate Maritozzi Recipe FAQs
What ingredients should I look for to ensure my Chocolate Maritozzi dough is perfect?
Absolutely! For the best results, choose high-quality all-purpose flour and bread flour. Look for a fine texture and smell; your flour should be fresh and not have any clumps. Make sure your cocoa powder is Dutch processed for a rich taste. Always check that the yeast is fresh—the expiration date matters. It’s great to use farm-fresh eggs and whole milk for added richness!
How should I store my Chocolate Maritozzi?
To store unfilled Chocolate Maritozzi, simply place them in an airtight container at room temperature for up to 2-3 days. If you have already filled them, it’s best to enjoy them within 1-2 days and store them in the fridge to maintain their freshness. This slight chill will work wonders!
Can I freeze Chocolate Maritozzi for later enjoyment?
Definitely! You can freeze unfilled Chocolate Maritozzi by wrapping them tightly in plastic wrap and placing them in a freezer-safe bag. They will keep well for up to a month. When you’re ready to enjoy them, reheat from frozen at 350°F (175°C) for about 5-7 minutes, then fill them with the whipped cream to serve warm and delicious!
What should I do if my Chocolate Maritozzi dough isn’t rising?
Very often, if your dough isn’t rising, it’s due to the yeast not being activated properly. Make sure your liquids are warm (but not hot) before adding the yeast. If you’re using regular yeast, it must be proofed first. If the dough feels too cold from the start, tuck it into a warm, draft-free location for optimal rising conditions. Patience is key!
Are there any dietary considerations for making Chocolate Maritozzi?
Certainly! If you’re looking to make these delightful buns suitable for dietary restrictions, you can easily substitute ingredients. For a dairy-free version, use plant-based milk and coconut cream for the filling. You can also use flaxseed meal mixed with water as a replacement for eggs. Just keep in mind the filling should be adjusted for sweetness to suit your needs.
How can I ensure my whipped cream filling stays fluffy and perfect?
To create that cloud-like whipped cream filling, start by chilling your mixing bowl and beaters in the fridge for about 10 minutes. This cool temperature helps the cream achieve those luscious, stiff peaks. Always sift the cocoa powder and powdered sugar before mixing in; this prevents clumping and ensures a smoother finish. Aim for medium-stiff peaks—this gives you the ideal consistency to fill those beautiful Chocolate Maritozzi perfectly!

Irresistible Chocolate Maritozz: Soft, Sweet Italian Delights
Ingredients
Equipment
Method
- In a stand mixer, combine all dough ingredients: all-purpose flour, bread flour, instant yeast, granulated sugar, salt, vanilla, eggs, milk, neutral oil, and Dutch process cocoa powder. Mix on low speed for about 2 minutes until combined, then knead on medium speed for 8-10 minutes until the dough is smooth and elastic.
- Transfer the kneaded dough into a greased bowl, covering it with a clean kitchen towel or plastic wrap. Let the dough rise in a warm, draft-free place until it has doubled in size, about 1 to 2 hours.
- Once the dough has risen, punch it down to release air. Divide the dough into equal pieces weighing about 3 ounces each. Shape into smooth balls and place on a parchment-lined tray. Cover and let rise for another 30 to 60 minutes.
- Preheat your oven to 350°F (175°C) while the buns are rising.
- Gently brush the buns with the egg wash and bake for about 16 minutes, or until golden brown.
- In a mixing bowl, whip the heavy cream with cocoa powder, powdered sugar, and a pinch of salt until you reach medium-stiff peaks.
- Once the buns are cooled, carefully slice them open and fill with whipped cream.
Leave a Reply