
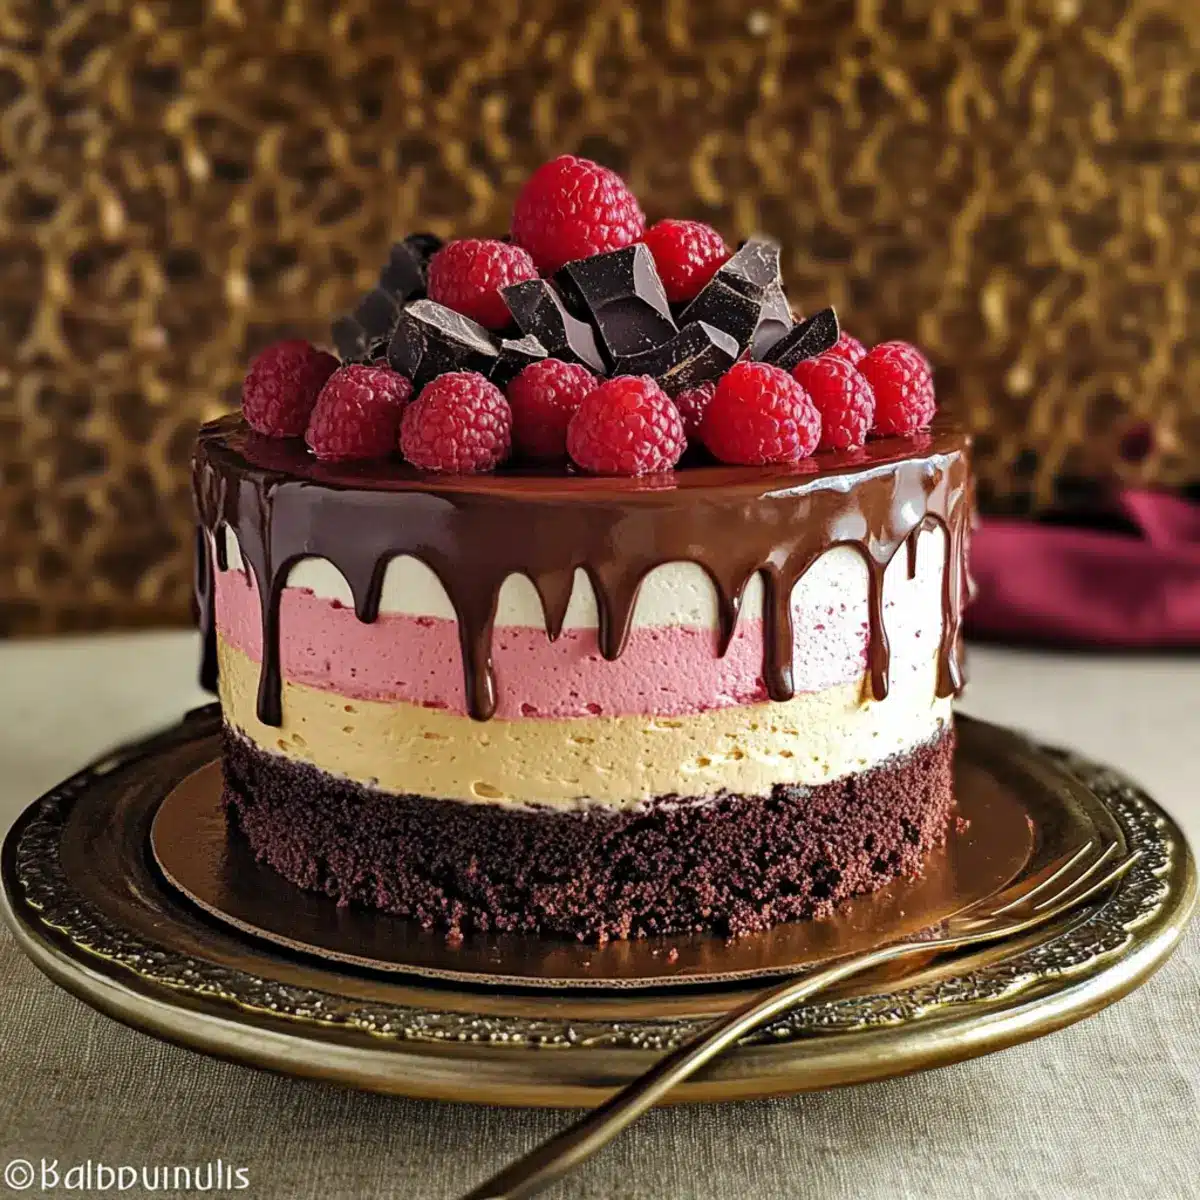
As I stood in my kitchen, the sweet scent of melting chocolate intertwined with the tartness of fresh raspberries, I realized it was the perfect moment to create something truly special. Enter the Chocolate Raspberry Mousse Cake, a dessert that not only looks like a showstopper but also tastes heavenly. With its rich brownie base and airy mousse layers, this cake is a dream come true for any home chef eager to impress without the fuss of complex techniques. It’s a delightful balance of textures—a chewy brownie complemented by silky mousses—making it an inviting addition to any celebration. Plus, it’s surprisingly achievable, so you can savor the joy of making this luxurious treat even on a weeknight. Are you ready to swoon over this indulgent creation? Let’s dive in!
Why is this cake a must-try?
Indulgence: Every bite of the Chocolate Raspberry Mousse Cake delivers a balanced harmony between rich brownie and luscious mousses that will make your taste buds sing.
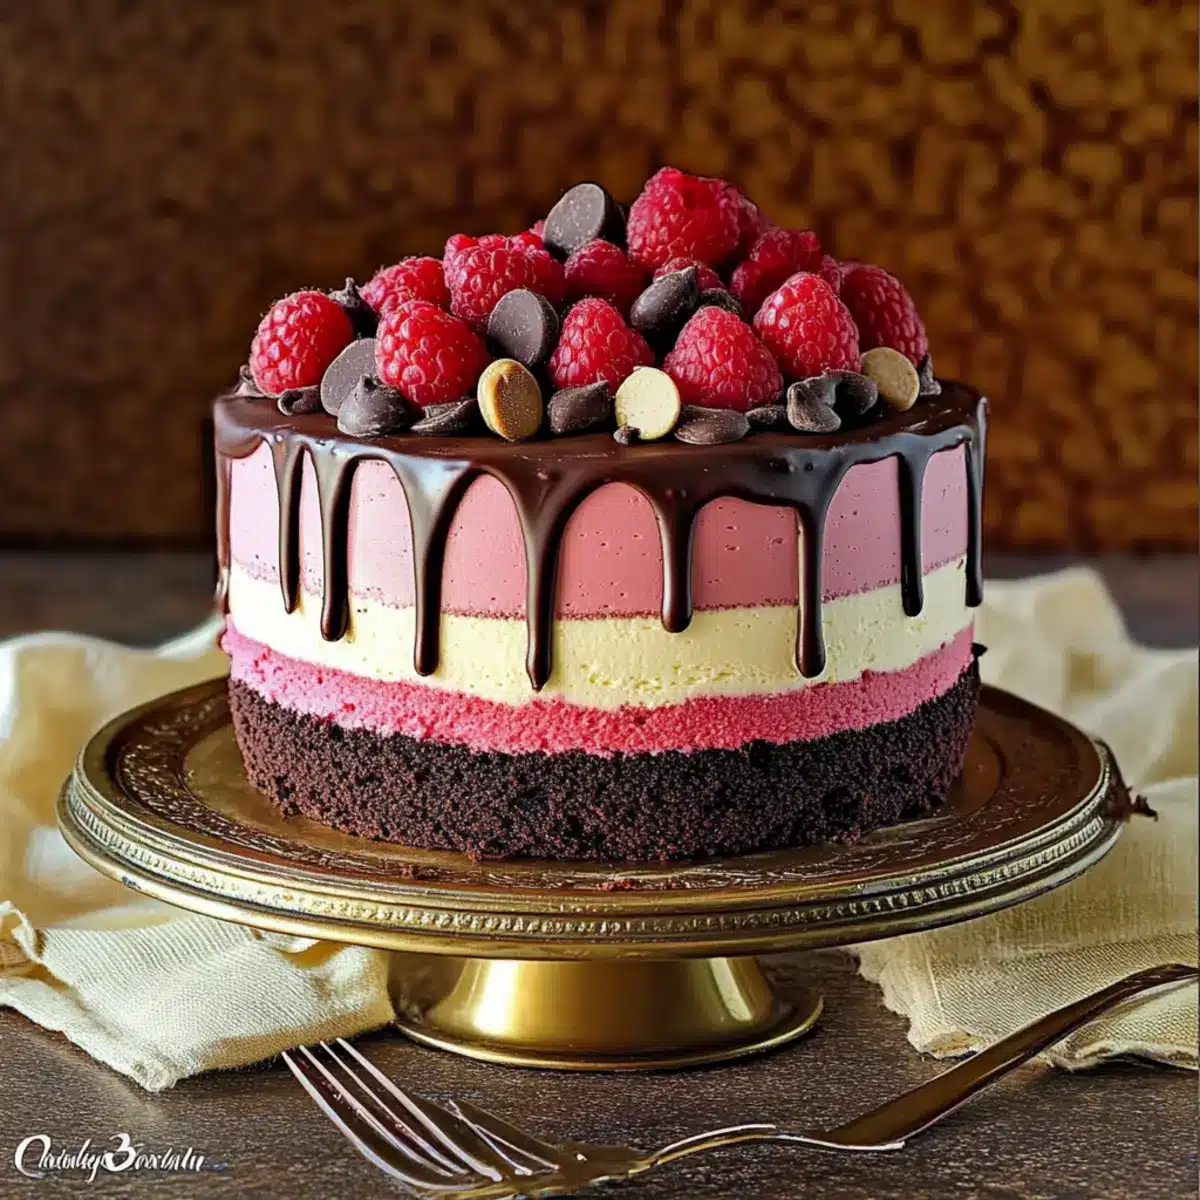
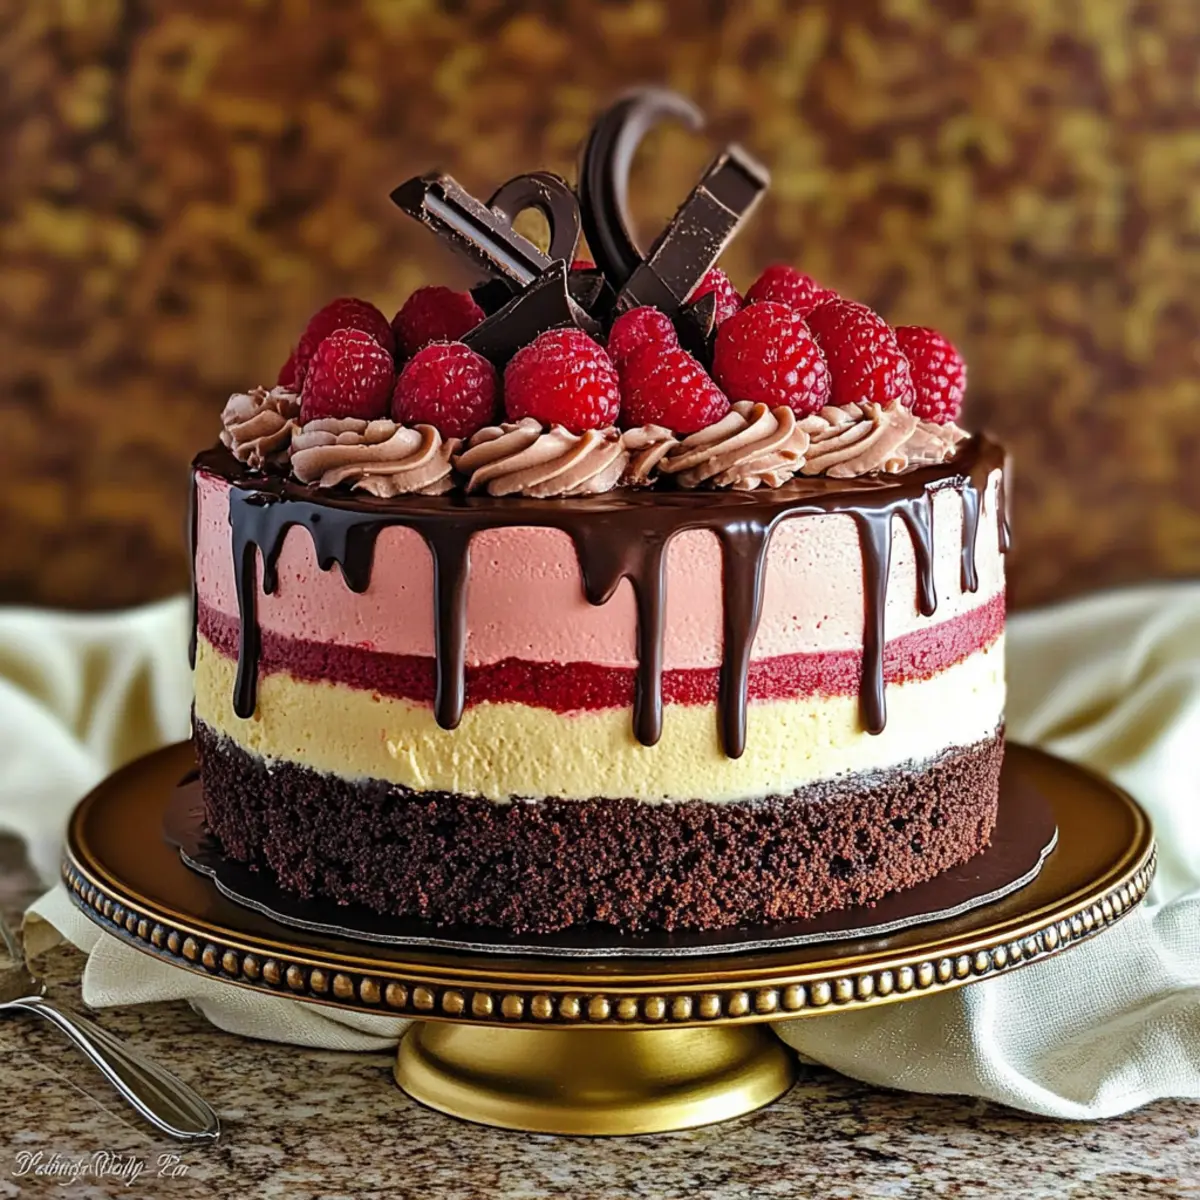
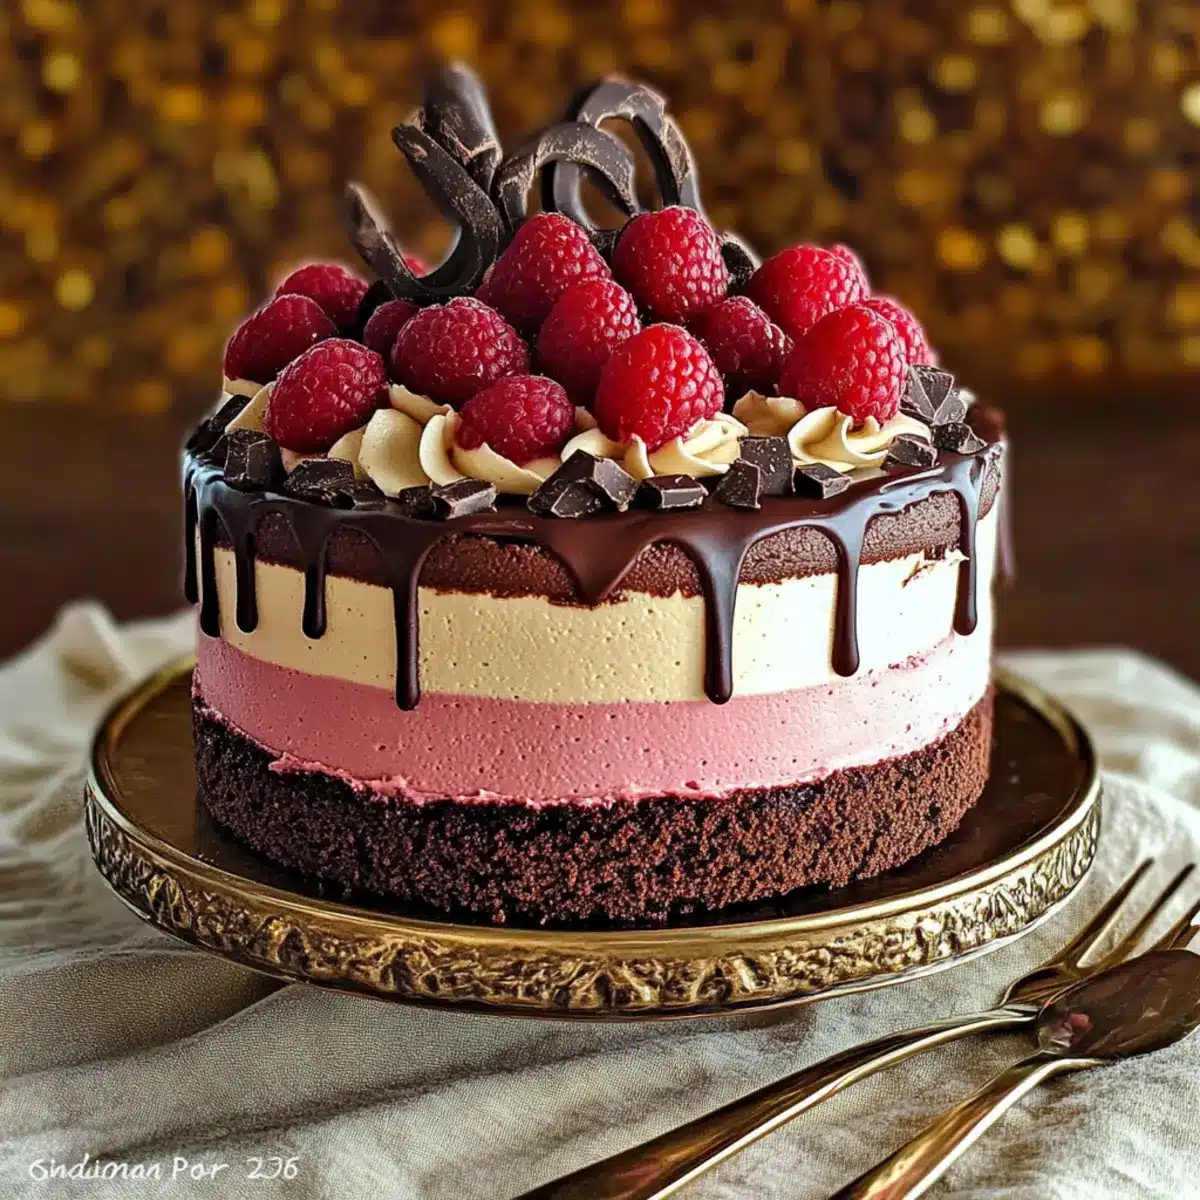
Visual Appeal: The stunning layers and vibrant raspberries create a visual masterpiece that’s perfect for impressing guests at any gathering.
Simplicity: Crafted with straightforward techniques, this dessert allows even novice bakers to create something extraordinary, reminiscent of pro-level pastries.
Versatile Flavors: Whether you swap fresh raspberries for strawberries or choose to simplify with fewer layers, this recipe offers flexibility to suit any palate.
Crowd-Pleasing: Serving this cake will undoubtedly elevate any occasion, leaving guests raving and coming back for seconds—ideal for celebrations or simply satisfying your sweet tooth!
For more delightful recipes like this one, check out my Moist Chocolate Chip or Pumpkin White Chocolate desserts!
Chocolate Raspberry Mousse Cake Ingredients
For the Brownie Base
• All-Purpose Flour – Provides structure to the brownie layer.
• Unsweetened Cocoa Powder – Adds rich chocolate flavor; ensure it’s unsweetened for a balanced taste.
• Salt – Enhances flavor across all layers; helps in accentuating sweetness.
• Baking Powder – Leavening agent for the brownie, making it tender.
• Unsalted Butter – Used for moisture and richness in the brownie layer.
• Granulated Sugar – Sweetener for the brownie; contributes to browning and moisture.
• Large Eggs – Adds moisture and richness in brownies; ensure they’re at room temperature.
• Vanilla Extract – Enhances the flavor profile throughout the cake; can substitute with vanilla bean paste for added depth.
For the Mousse Layers
• Semi-Sweet Chocolate – Base for chocolate mousse, providing a rich chocolate flavor.
• Heavy Cream – Key for creating airy mousse; ensures a creamy, light result.
• Unflavored Powdered Gelatin – Stabilizes mousse layers; must be properly dissolved to avoid lumps.
• Fresh Raspberries – Provides a fruity element; can substitute with strawberries if fresh raspberries are unavailable.
• White Chocolate – For both raspberry and vanilla mousses; finely chopped for melting ease.
• Honey – Sweetener for vanilla mousse; offers floral notes that balance the sweetness.
• Pink Gel Food Coloring (optional) – Enhances raspberry mousse color for visual appeal.
For Decoration
• Chocolate Curls – For decoration; adds visual contrast when serving.
• Fresh Raspberries – Brightens the presentation and adds a burst of flavor.
This Chocolate Raspberry Mousse Cake is a charming centerpiece at any gathering, inviting everyone to savor its intricate layers and delightful taste!
Step‑by‑Step Instructions for Chocolate Raspberry Mousse Cake
Step 1: Prepare Brownie Base
Preheat your oven to 350°F (175°C), and line a 9-inch cake pan with parchment paper while greasing the sides. In a spacious bowl, whisk together the all-purpose flour, cocoa powder, salt, and baking powder until well combined. Melt the unsalted butter and mix it with granulated sugar; then incorporate the eggs and vanilla extract. Gradually add the dry ingredients to form a batter, then bake for 22-24 minutes until a toothpick inserted comes out with moist crumbs. Allow it to cool completely.
Step 2: Make Chocolate Mousse
For the chocolate mousse, begin by melting the semi-sweet chocolate with heavy cream and a pinch of salt over a double boiler; stir until smooth, then let it cool slightly. Meanwhile, mix gelatin with water according to package instructions and then blend it with the melted chocolate mixture. In a separate bowl, whip heavy cream to soft peaks and gently fold it into the chocolate until combined. Pour this luscious layer over the cooled brownie base and refrigerate for 25 minutes until set.
Step 3: Create Raspberry Mousse
Next, whip up the raspberry mousse by blending fresh raspberries until smooth, then strain to remove the seeds. Combine the raspberry puree with melted white chocolate, heavy cream, and a pinch of salt in a mixing bowl. Add the gelatin mixture and gently fold in the remaining whipped cream and fresh raspberries. Spread this vibrant layer on top of the chocolate mousse and refrigerate for an additional 25 minutes to allow it to set.
Step 4: Prepare Vanilla Mousse
To make the vanilla mousse, melt white chocolate with cream, honey, and a pinch of salt in a double boiler until smooth—allow it to cool slightly before proceeding. Incorporate the dissolved gelatin and fold in whipped cream, then stir in vanilla bean paste for added flavor. Carefully layer this creamy mixture over the raspberry mousse, smoothing it out evenly. Refrigerate the entire cake for at least 4 hours or overnight for optimal set.
Step 5: Finish the Cake
Once set, carefully unmold the cake from the pan and prepare to make the ganache. Heat cream in a saucepan until just boiling, then pour it over chopped semi-sweet chocolate. Stir until the chocolate melts completely and the mixture is silky. Pour the ganache over the top of the cake, using a spatula to spread it evenly. Decorate with fresh raspberries and chocolate curls for an elegant touch, then chill again to set the ganache for a perfect finish.
Step 6: Serve and Enjoy
When ready to serve your Chocolate Raspberry Mousse Cake, slice it with a sharp knife, cleaning it between cuts for neat servings. Let the slices sit at room temperature for a few minutes to enhance flavor and texture. Each slice reveals the stunning layers of brownie, chocolate mousse, raspberry mousse, and vanilla mousse, ready to impress your guests at any gathering!
What to Serve with Chocolate Raspberry Mousse Cake
Elevate your dessert experience with complementary dishes that perfectly balance the richness of this heavenly cake.
-
Fresh Fruit Salad: A vibrant mix of seasonal fruits adds a refreshing contrast and balances the chocolate’s richness.
-
Whipped Cream Globes: Light and airy, a dollop of freshly whipped cream enhances the cake’s luxurious texture, making every bite feel indulgent.
-
Chocolate Ganache Dipping Sauce: Serve alongside for an extra chocolatey experience, letting guests personalize their slices with additional richness.
-
Crispy Almond Biscotti: The crunchy texture of biscotti pairs beautifully, adding a delightful crunch that complements the cake’s creamy layers.
-
Espresso or Coffee: Pair this dessert with a cup of espresso or coffee to cut through the sweetness with a robust flavor, enhancing the overall experience.
-
Chocolate-Covered Strawberries: These visually stunning bites mirror the mousse cake’s flavors while providing a fun and festive touch.
-
Cheese Platter: A selection of tangy cheeses can contrast the sweetness, inviting a delightful balance of flavors on your palate.
-
Mint Tea: A soothing hot beverage, mint tea cleanses the palate between bites, creating a refreshing finish to this decadent meal.
How to Store and Freeze Chocolate Raspberry Mousse Cake
Fridge: Wrap the cake tightly in plastic wrap or aluminum foil and refrigerate for up to 1 week. This helps maintain its luxurious layers of flavor.
Freezer: For longer storage, freeze the cake for up to 3 months. Avoid adding any toppings until you’re ready to serve to keep them fresh.
Thawing: To enjoy frozen slices, transfer them to the fridge and thaw overnight. This will keep the mousse textures intact for a delightful experience.
Reheating: While not usually reheated, if desired, allow slices to come to room temperature before serving for the best texture and flavor of the Chocolate Raspberry Mousse Cake.
Make Ahead Options
These Chocolate Raspberry Mousse Cakes are perfect for meal prep, saving you time on busy weeknights and special occasions! You can prepare the brownie base up to 3 days in advance, wrapping it tightly and refrigerating it to maintain moisture. The mousse layers can also be made ahead—both the chocolate and raspberry mousses can be refrigerated for up to 24 hours before serving. For optimal results, make the vanilla mousse the day you plan to serve, as it holds best when fresh. Simply allow the cake to set in the refrigerator, and when ready to enjoy, finish with ganache and decorations before serving. This way, you can impress your guests with little last-minute effort and just as delicious results!
Chocolate Raspberry Mousse Cake Variations
Feel free to put your own spin on this delightful dessert, as there are endless possibilities to customize its flavors and textures!
-
Strawberry Swap: Replace fresh raspberries with strawberries for a sweeter, fruitier twist. The strawberry flavor pairs wonderfully with chocolate!
-
Gluten-Free Option: Use a gluten-free flour blend in place of all-purpose flour for a fantastic gluten-free brownie base. This variation makes it accessible yet indulgent.
-
Dairy-Free Delight: Substitute cream with full-fat coconut milk and use dairy-free chocolate for a rich, vegan-friendly chocolate mousse.
-
Nutty Flavor: Add a tablespoon of finely ground nuts like almonds or hazelnuts to the brownie batter for a lovely crunch and an earthy flavor profile.
-
Add Some Spice: Incorporate a pinch of cayenne pepper or cinnamon into the chocolate mousse for an unexpected warm flavor that’s oh-so-good!
-
Fruity Layer: Blend in a hint of fruit puree, such as passion fruit, into the vanilla mousse for an additional layer of flavor that’s bright and refreshing.
-
Compressed Time: For a quicker preparation, try a two-layer cake by eliminating the vanilla mousse. Blend chocolate and raspberry mouse layers only for a streamlined yet delicious dessert.
-
Fun Decoration: Instead of chocolate curls, use crushed candy or sprinkles on top for a fun, festive look that’s perfect for kids’ parties or special occasions.
Embrace these variations and let your creativity flow, making the Chocolate Raspberry Mousse Cake truly yours! If you’re looking for more baking inspiration, check out my Chocolate Zucchini Bread or White Chocolate Halloween desserts!
Expert Tips for Chocolate Raspberry Mousse Cake
-
Perfectly Whipped Cream: Stop whipping just before reaching stiff peaks. This keeps your mousse airy and light, avoiding any collapse.
-
Warm, Not Hot: When combining your melted chocolate with cream, ensure the chocolate is warm but not hot. This prevents the cream from curdling and maintains a silky mousse texture.
-
Clean Knife Cuts: Use a sharp knife and clean it between cuts to maintain the pristine layers of your Chocolate Raspberry Mousse Cake. This will enhance the cake’s presentation!
-
Set Time: Be patient! Allow the cake to set in the refrigerator for at least 4 hours or ideally overnight. This ensures the mousses hold their shape beautifully when sliced.
-
Dissolving Gelatin: Properly dissolve gelatin in warm water before adding it to any mousse mixture; lumps can ruin the fluffy texture you’re aiming for.
Chocolate Raspberry Mousse Cake Recipe FAQs
How do I select ripe raspberries for this recipe?
Absolutely! When choosing fresh raspberries, look for those that are vibrant in color, plump, and firm to the touch. Avoid any with dark spots all over or signs of mushiness, as these can indicate overripeness. Fresh raspberries should have a fragrant aroma, which is a good sign of quality.
How should I store leftover Chocolate Raspberry Mousse Cake?
To store your delicious Chocolate Raspberry Mousse Cake, wrap it tightly in plastic wrap or aluminum foil and refrigerate it. This will keep it fresh and maintain its luxurious layers for up to 1 week. Remember to keep it in an airtight container if you have one handy to protect it from absorbing flavors from the fridge.
Can I freeze the Chocolate Raspberry Mousse Cake?
Certainly! For longer storage, you can freeze your cake for up to 3 months. Be sure to wrap it tightly in plastic wrap, followed by aluminum foil to prevent freezer burn. It’s best not to add any decorations, like raspberries or chocolate curls, before freezing. When you’re ready to indulge, thaw it in the refrigerator overnight.
What if my mousse layers don’t set properly?
Very! If you find that your mousse layers haven’t set properly, there are a couple of things you can try. First, ensure that you properly dissolve the gelatin in warm water before adding it to your mixtures; lumps will prevent the mousse from achieving that perfect fluffy texture. If your mousse hasn’t set after the recommended refrigeration time, return it to the fridge for an additional hour or more until firm.
Is this recipe suitable for people with allergies?
Yes! For allergy considerations, be mindful of the ingredients. The Chocolate Raspberry Mousse Cake contains dairy (butter, cream, chocolate) and eggs, which are common allergens. You can substitute dairy-free products—like coconut cream for heavy cream and dairy-free chocolate—to make a version suitable for those with dairy allergies.
Can I use frozen raspberries instead of fresh?
Indeed! If fresh raspberries aren’t available, you can use frozen raspberries. Just make sure to thaw and drain them thoroughly to remove excess moisture before adding them to the mousse. This will help maintain the texture and flavor profile of the cake while still delivering that delightful raspberry element.
Decadent Chocolate Raspberry Mousse Cake for Ultimate Indulgence
Ingredients
Equipment
Method
- Preheat your oven to 350°F (175°C), and line a 9-inch cake pan with parchment paper while greasing the sides.
- In a spacious bowl, whisk together the all-purpose flour, cocoa powder, salt, and baking powder until well combined.
- Melt the unsalted butter and mix it with granulated sugar; then incorporate the eggs and vanilla extract.
- Gradually add the dry ingredients to form a batter, then bake for 22-24 minutes until a toothpick inserted comes out with moist crumbs.
- Allow it to cool completely.
- Melt the semi-sweet chocolate with heavy cream and a pinch of salt over a double boiler; stir until smooth, then let it cool slightly.
- Mix gelatin with water according to package instructions and then blend it with the melted chocolate mixture.
- In a separate bowl, whip heavy cream to soft peaks and gently fold it into the chocolate until combined.
- Pour this luscious layer over the cooled brownie base and refrigerate for 25 minutes until set.
- Blend fresh raspberries until smooth, then strain to remove the seeds.
- Combine the raspberry puree with melted white chocolate, heavy cream, and a pinch of salt in a mixing bowl.
- Add the gelatin mixture and gently fold in the remaining whipped cream and fresh raspberries.
- Spread this vibrant layer on top of the chocolate mousse and refrigerate for an additional 25 minutes to allow it to set.
- Melt white chocolate with cream, honey, and a pinch of salt in a double boiler until smooth—allow it to cool slightly before proceeding.
- Incorporate the dissolved gelatin and fold in whipped cream, then stir in vanilla bean paste for added flavor.
- Carefully layer this creamy mixture over the raspberry mousse, smoothing it out evenly.
- Refrigerate the entire cake for at least 4 hours or overnight for optimal set.
- Once set, carefully unmold the cake from the pan and prepare to make the ganache.
- Heat cream in a saucepan until just boiling, then pour it over chopped semi-sweet chocolate.
- Stir until the chocolate melts completely and the mixture is silky.
- Pour the ganache over the top of the cake, using a spatula to spread it evenly.
- Decorate with fresh raspberries and chocolate curls for an elegant touch, then chill again to set the ganache for a perfect finish.
- When ready to serve your Chocolate Raspberry Mousse Cake, slice it with a sharp knife, cleaning it between cuts for neat servings.
- Let the slices sit at room temperature for a few minutes to enhance flavor and texture.
- Each slice reveals the stunning layers of brownie, chocolate mousse, raspberry mousse, and vanilla mousse.
Leave a Reply