
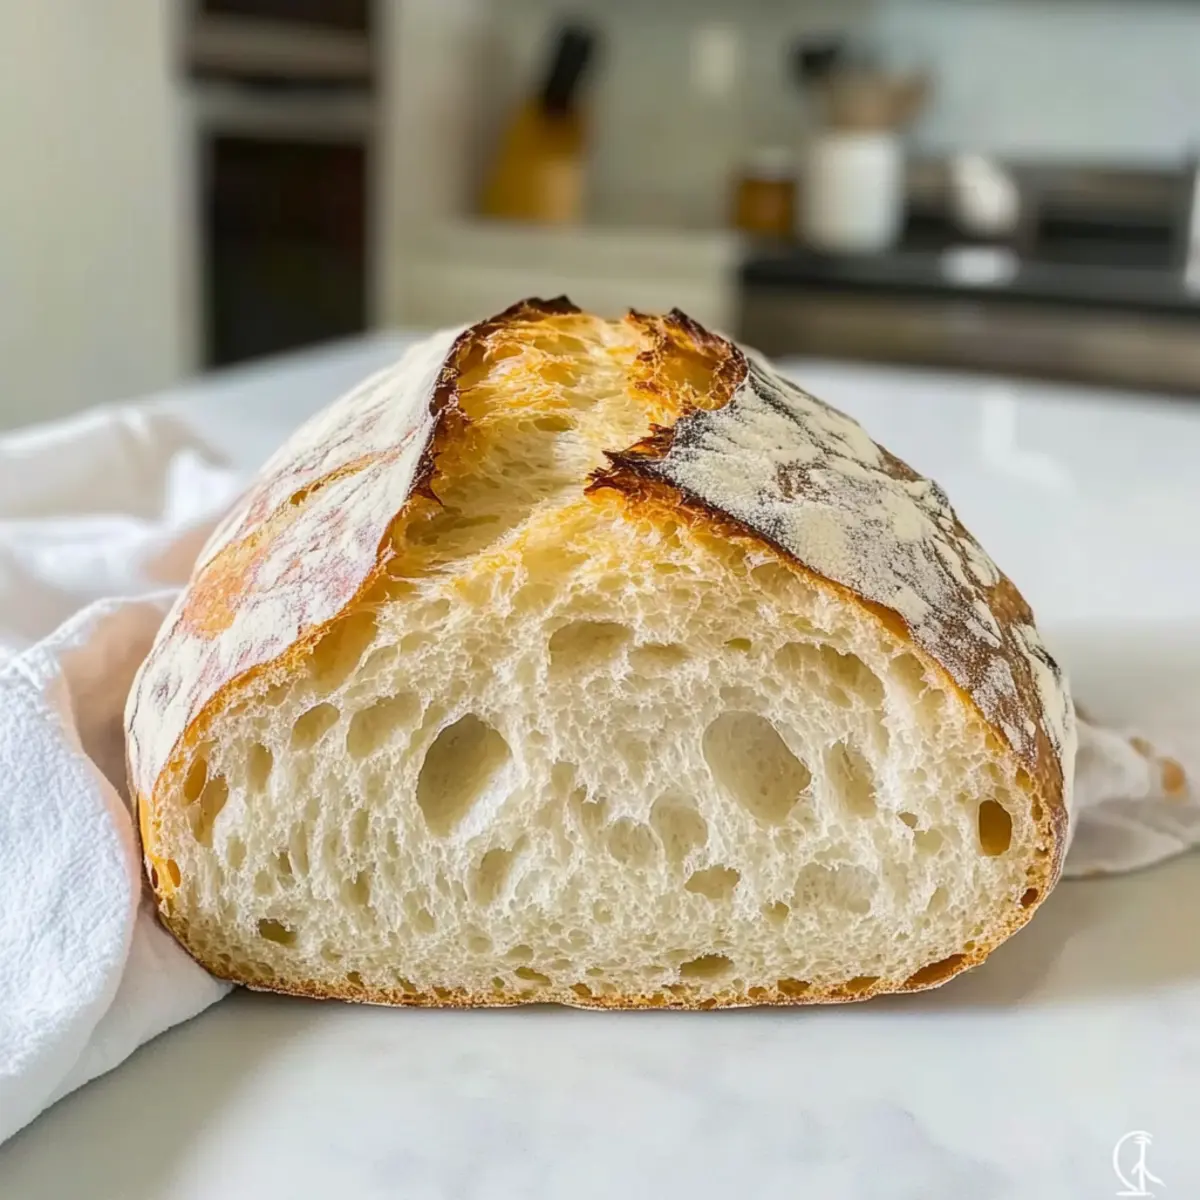
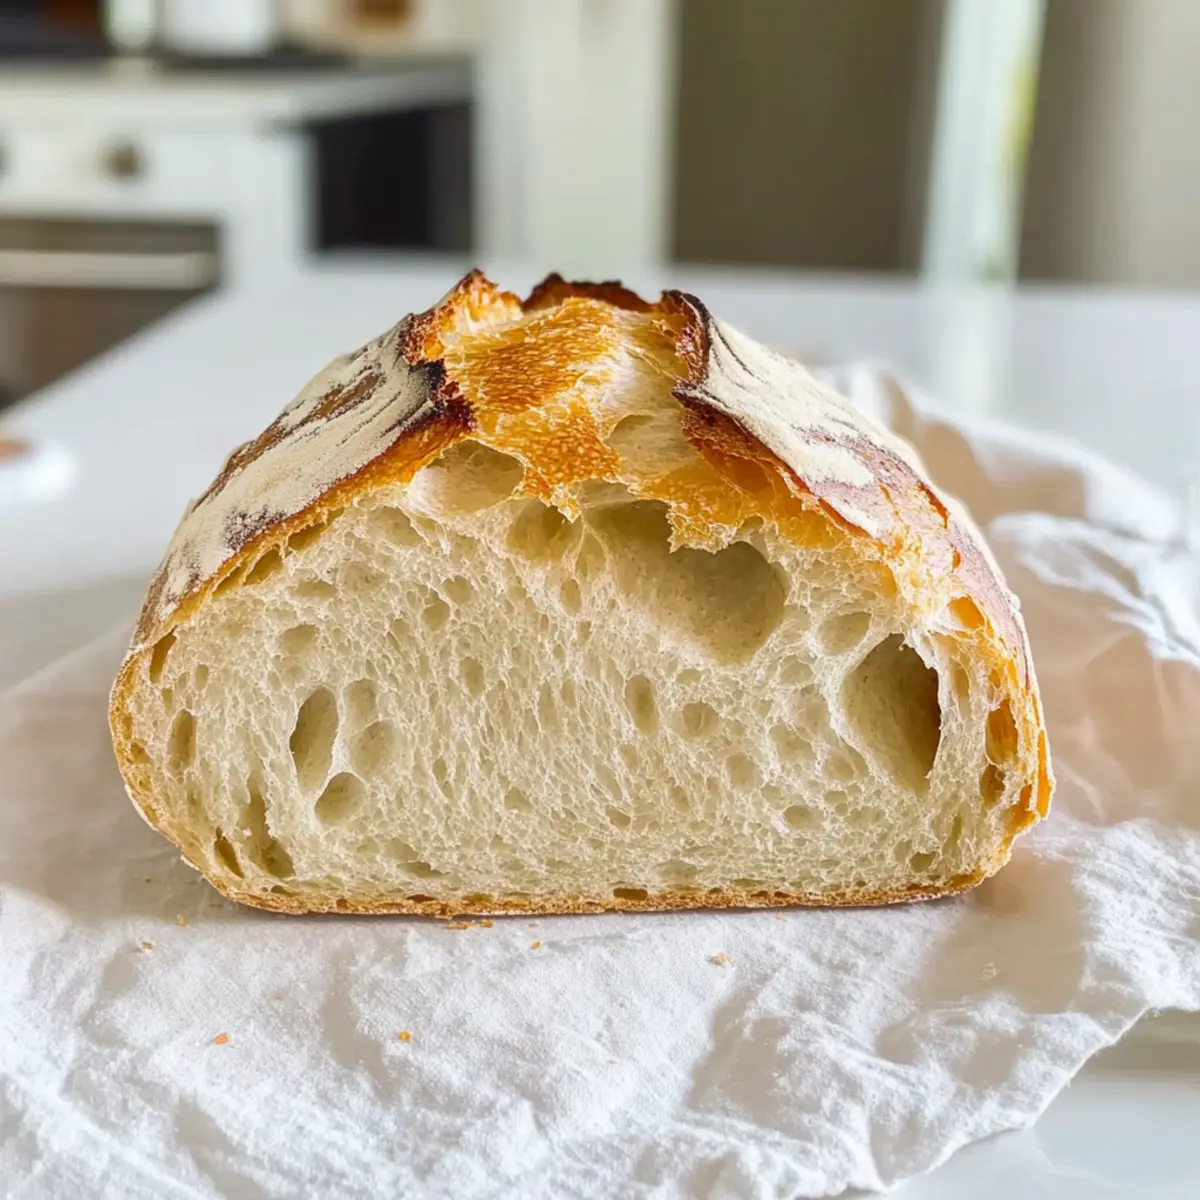
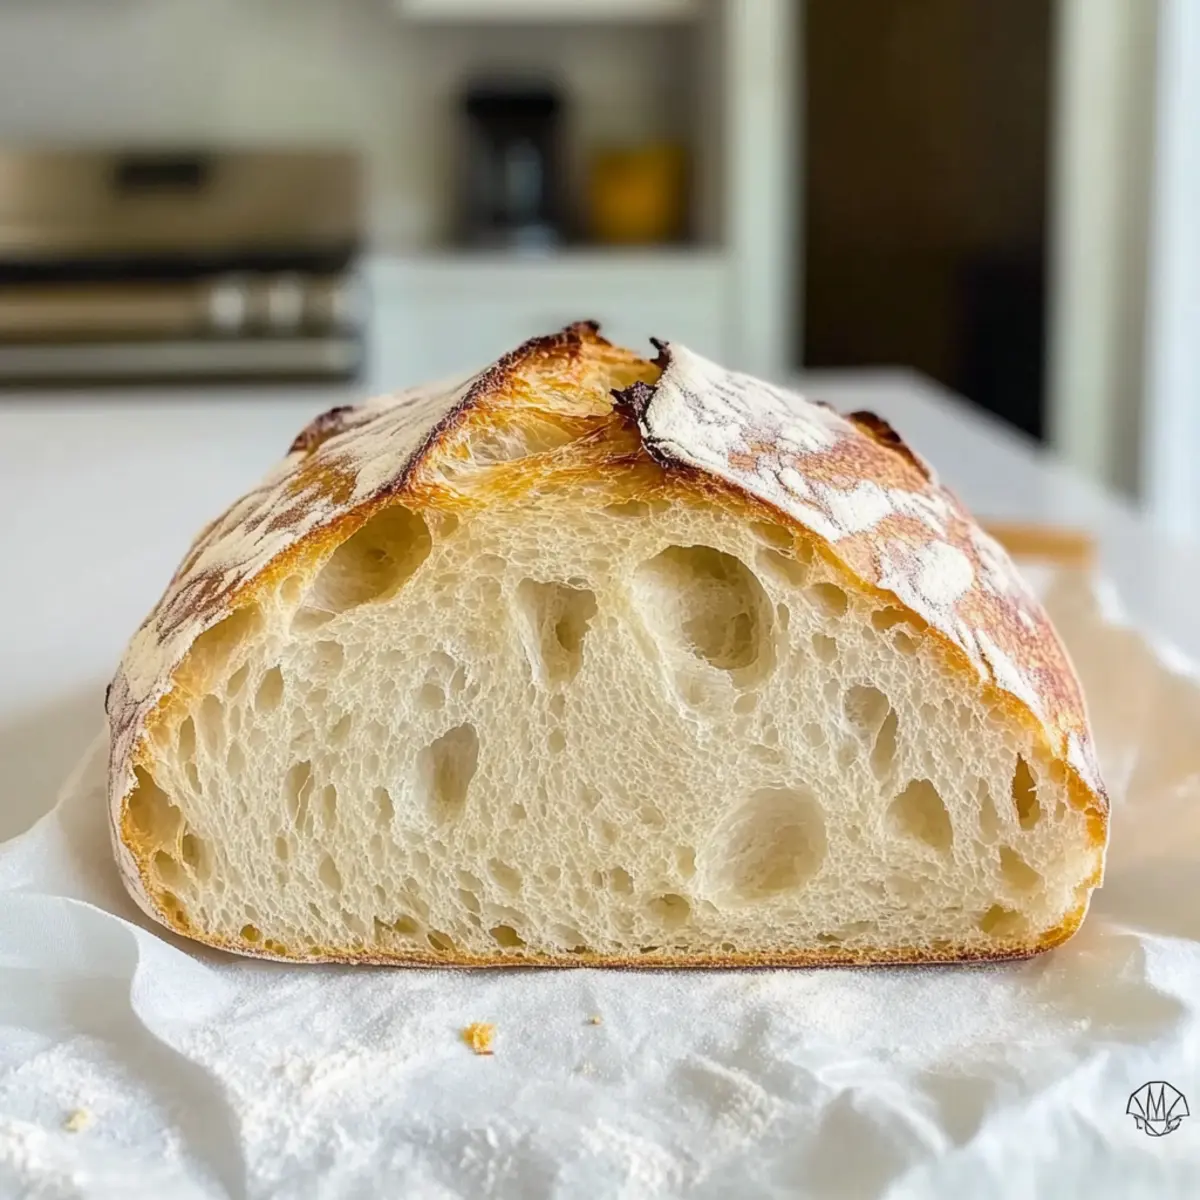
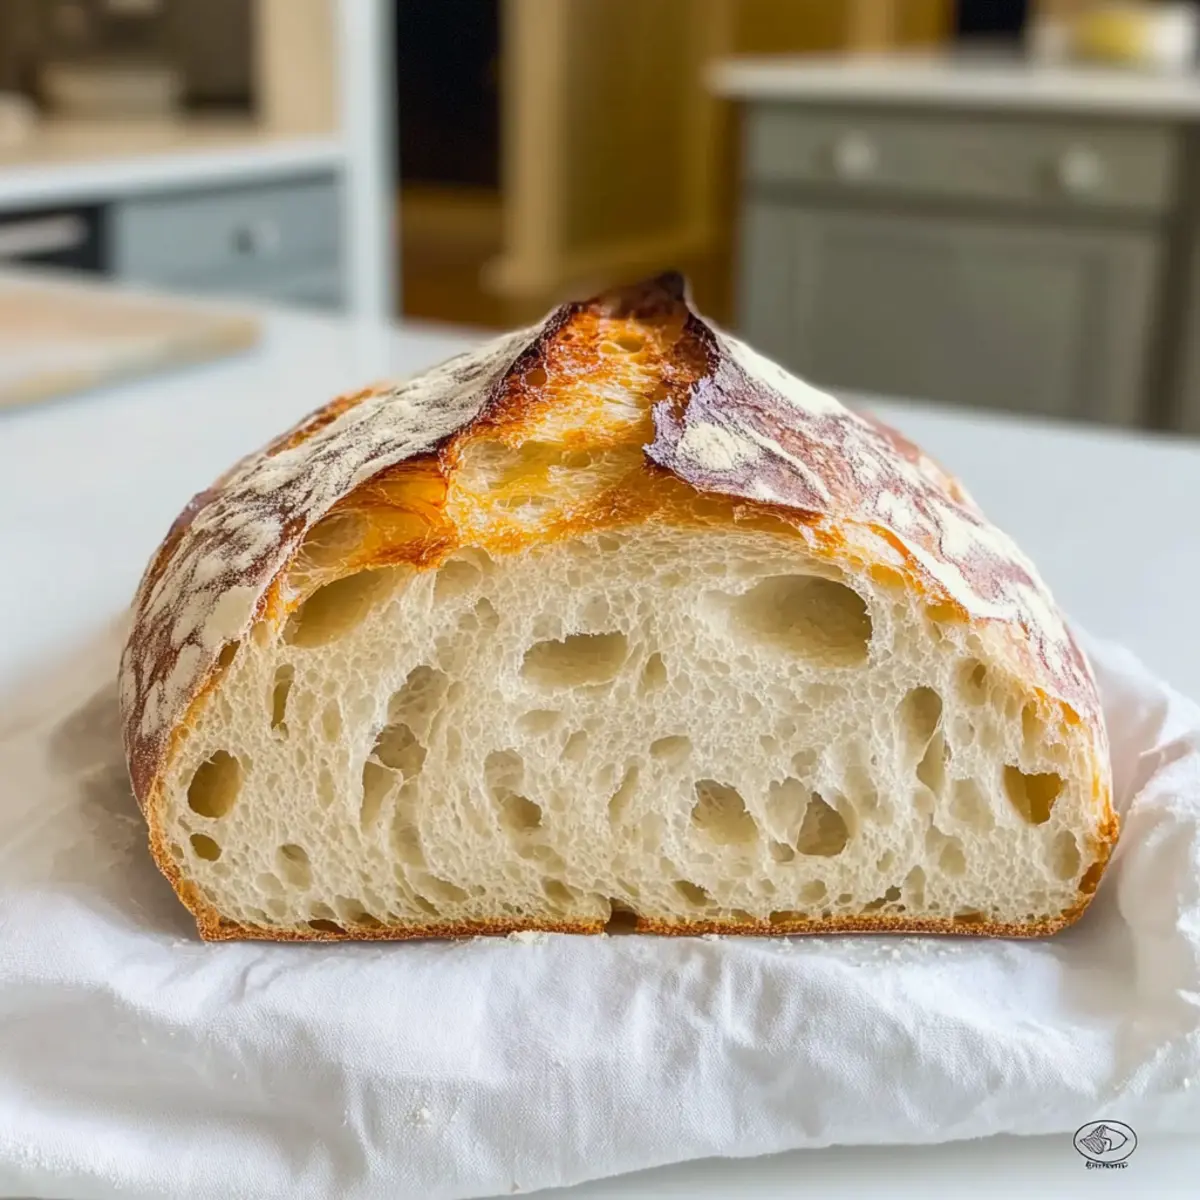
The aroma of freshly baked bread wafting through your home can make any day feel special. This Easy No-Knead Artisan Bread Recipe takes that experience to a whole new level, offering a beautiful loaf with a crusty exterior and a soft, tender crumb—perfect for beginners and seasoned bakers alike. With minimal hands-on time and a simple fermentation process that lets flavors develop naturally, this recipe is perfect for anyone looking to bring the comfort of homemade bread into their busy lives. Best of all, it requires no kneading—so it’s ideal for those who might feel a bit intimidated by traditional bread-making techniques. Are you ready to transform your kitchen into a bakery and impress your friends and family with artisan-quality bread? Let’s get started!
Why is No-Knead Bread a Game-Changer?
Simplicity at Its Best: This no-knead artisan bread requires minimal effort. Just mix, let it rise, and bake!
Flavorful Crust and Tender Crumb: Enjoy a crusty exterior paired with a soft, airy interior that rivals any bakery loaf.
Perfect for Busy Schedules: With long fermentation instead of kneading, you can set it and forget it, making it a breeze for anyone’s routine.
Endless Customization: Add herbs, nuts, or even cheese to the dough for your own unique twist! For more creative ideas, check out our Cranberry Zucchini Bread or Pumpkin Banana Bread recipes.
Crowd-Pleasing Aroma: The delightful scent of fresh bread wafting through your home is sure to impress family and friends.
Bake today, and let the magic of homemade artisan bread transform your mealtime!
Artisan Bread Recipe Ingredients
• Get ready to bake!
For the Dough
- All-Purpose Flour (or Bread Flour) – Provides structure and texture; whole wheat flour can substitute for a heartier loaf.
- Kosher Salt – Enhances flavor and regulates yeast activity; use regular salt if you prefer but adjust to taste.
- Instant or Active Dry Yeast – Leavens the bread; either works well—instant can be added directly to dry ingredients without pre-proofing.
- Warm Water (105°F) – Activates the yeast and hydrates the flour, creating a sticky dough essential for your artisan bread recipe.
Optional Add-Ins
- Dried Herbs (e.g., rosemary, thyme) – Adds fragrant flavor; experiment with your favorites for a unique twist.
- Seeds (sunflower, flax) or Nuts – Incorporate for added texture and nutrition; they give your loaf an excellent crunch.
- Shredded Cheese or Chopped Olives – Fold into the dough for a delicious Mediterranean version of your artisan bread.
Gather these ingredients and let’s get ready to bake the loaf that will make your kitchen the heart of your home!
Step‑by‑Step Instructions for Easy No-Knead Artisan Bread Recipe
Step 1: Make Dough
In a large mixing bowl, combine 4 cups of all-purpose flour, 2 teaspoons of kosher salt, and 2 teaspoons of instant dry yeast. Gradually mix in 1 and ½ cups of warm water (105°F) until a sticky, cohesive dough forms. Avoid over-mixing; just ensure all ingredients are combined. This will be the base for your artisan bread recipe.
Step 2: First Rise
Cover the bowl tightly with a kitchen towel or plastic wrap and let it rest at room temperature for 2 hours, or up to 10 hours for maximum flavor development. The dough will rise significantly and is ready when it’s bubbly on the surface and has roughly doubled in size, indicating a successful fermentation process.
Step 3: Shape Loaf
Lightly flour a clean surface and gently turn the risen dough onto it. Wet your hands to avoid sticking, and fold the edges of the dough towards the center to form a round loaf without kneading it. Place the shaped loaf on a sheet of parchment paper to help with later transferring to the oven.
Step 4: Second Rise
Dust the top of the loaf lightly with flour and use a sharp knife to score a shallow cross or an “X” on the dough’s surface; this helps with expansion while baking. Allow the loaf to rest for an additional 20 to 30 minutes, covered lightly with a towel. Watch as it puffs up slightly, a sign it’s ready for baking.
Step 5: Pre-bake Setup
While the loaf is resting, preheat your oven to 450°F. If you have a baking stone or Dutch oven, place it in the oven to heat, which will enhance the crustiness of your artisan bread. Make sure everything is ready before placing the dough in to maintain the oven’s high temperature.
Step 6: Create Steam
Carefully slide the dough on the parchment paper into the preheated baking stone or Dutch oven. To create steam, quickly add a cup of hot water or a few ice cubes to a pan at the bottom of the oven, then quickly close the oven door. This steam will help give your bread a crisp crust.
Step 7: Bake
Bake your artisan bread for 25 to 30 minutes, or until the crust turns a deep golden-brown and sounds hollow when tapped on the bottom. The high temperature and steam will create a nice crust while keeping the inside moist and airy. Once baked, transfer the loaf to a rack and let it cool for at least 30 minutes before slicing.
Artisan Bread Recipe Variations & Substitutions
Feel free to get creative with this artisan bread recipe; it’s all about making it your own!
- Whole Wheat: Substitute some or all of the all-purpose flour with whole wheat flour for a nuttier flavor and heartier texture. Just remember to adjust the liquid as needed.
- Seeds and Nuts: Fold in sunflower seeds, flaxseeds, or chopped walnuts to add a delightful crunch and nutritious twist. These additions not only elevate the flavor but also provide added heartiness to every slice.
- Herbed Loaf: Enhance the flavor by mixing in dried herbs like rosemary or thyme. The aroma while baking will make your home feel like a cozy Italian bakery!
- Cheese Enriched: Add shredded cheese, like cheddar or parmesan, to your dough for an extra savory touch. This melted goodness will create flavor pockets that you and your guests will absolutely love.
- Mediterranean Mix: Toss in chopped olives or sun-dried tomatoes for a burst of flavor reminiscent of sunny Mediterranean afternoons. These ingredients will transform your bread into a table centerpiece.
- Sweet Twist: Add a handful of chopped dried fruits such as cranberries or apricots for a subtly sweet flavor. Pair it with a cream cheese spread, and you have an irresistible treat!
- Spiced Up: For a hint of warmth, consider mixing in a pinch of crushed red pepper flakes. This will give your bread a gentle heat, making it a perfect accompaniment to soups or stews.
- Zucchini or Carrot Bread: Try adding grated zucchini or carrots for a moisture-rich, veggie-packed version of your artisan bread. For a more advanced spin, you can check out our Cranberry Zucchini Bread which is also a delightful alternative!
Whether you stick to the classic recipe or venture into these exciting variations, your homemade artisan bread is bound to impress everyone at the table!
Make Ahead Options
These Easy No-Knead Artisan Bread Recipe components can be prepared in advance, making it a fantastic option for busy home cooks! You can mix the dough and let it rise for the first time up to 10 hours (or overnight) at room temperature to deepen the flavor. After shaping the loaf, it can rest in the fridge for up to 3 days! This allows you to maximize your schedule without compromising on taste. When you’re ready to bake, simply preheat your oven, place the dough in the preheated stone or Dutch oven, and bake as instructed. This will ensure that your artisan bread is just as delicious and crusty, providing fresh, homemade goodness with minimal effort!
Expert Tips for Artisan Bread Recipe
Longer Fermentation: Allow the dough to rise for up to 10 hours to develop deeper flavors and a more textured crumb.
Water is Key: Remember to create steam with hot water or ice cubes in the oven to achieve that golden, crusty exterior.
Gentle Handling: Avoid punching or kneading the dough; gentle shaping retains the air bubbles, ensuring your artisan bread has an airy crumb.
Check for Doneness: Tap the bottom of the loaf; a hollow sound indicates it’s perfectly baked!
Ingredient Substitutions: If using whole wheat flour, consider adding a bit more water to maintain the dough’s hydration level for your artisan bread recipe.
Storage Tips for Artisan Bread Recipe
Room Temperature: Store the bread in a paper bag to maintain its crustiness for up to 2 days, allowing it to breathe and prevent sogginess.
Fridge: While refrigeration can extend shelf life, it may result in a stale texture. If necessary, wrap tightly in foil or plastic wrap for up to 5 days.
Freezer: For longer storage, slice and freeze your artisan bread in an airtight bag for up to 3 months. This way, you always have fresh bread on hand!
Reheating: To revive the crust, reheat frozen slices in a toaster or bake at 350°F for about 10 minutes until warmed through and crispy.
What to Serve with Easy No-Knead Artisan Bread
The warmth and aroma of freshly baked bread beckon for delightful pairings that elevate your mealtime experience.
-
Creamy Tomato Soup: This classic combination offers a warm, comforting contrast to the crusty loaf, creating a perfect bite. The acidity of the tomatoes complements the rich flavor of the bread beautifully.
-
Garlic Herb Butter: Spread this flavorful butter on warm slices for added richness and a savory twist. As it melts into the warm bread, it creates an irresistible combination!
-
Fresh Green Salad: Light and refreshing, a crisp salad with a tangy vinaigrette balances out the hearty bread. Adding ingredients like cherry tomatoes and cucumbers enhances the sensory experience.
-
Cheese Platter: Pair your artisan bread with a selection of bold cheeses. The combination of textures and flavors invites your guests to enjoy a delightful charcuterie experience.
-
Roasted Vegetables: Earthy roasted veggies bring a depth of flavor that pairs harmoniously with the bread. Especially those with sweet notes like carrots or potatoes are perfect for a comforting side.
-
Fruit Preserve: A sweet, fruity jam or preserves can elevate your bread as a delightful brunch option. The sweetness provides a lovely contrast to the artisan bread’s savory crust.
-
Pasta Dishes: Serve your artisan bread as a side to hearty pasta dishes, where it can soak up flavorful sauces and enhance the overall meal experience.
-
Sparkling Wine: A glass of bubbly complements the crusty texture of the bread while adding a celebratory touch to your dining table.
Indulge your senses and create a memorable meal with these delicious pairings that complement your artisan bread perfectly!
Easy No-Knead Artisan Bread Recipe FAQs
What type of flour should I use for my artisan bread?
You can use all-purpose flour or bread flour, both yielding excellent results. If you’re looking for a heartier loaf, feel free to substitute whole wheat flour either partially or fully. Just keep in mind that whole wheat requires a bit more water for hydration.
How long does homemade artisan bread stay fresh?
For short-term storage, keep your bread in a paper bag at room temperature for up to 2 days. For longer-lasting freshness, slice the bread and store it in an airtight bag in the freezer, where it will be good for up to 3 months. When you’re ready to enjoy it again, toaster or bake slices at 350°F for about 10 minutes to revitalize that crustiness!
Can I freeze the dough for later use?
Absolutely! To freeze the dough, follow these steps: after your first rise, shape the dough into a ball and wrap it tightly in plastic wrap or place it in a freezer-safe bag. Ensure to label it with the date. Freeze for up to 3 months. When you’re ready to bake, defrost the dough in the refrigerator overnight, allowing it to come to room temperature before proceeding with the second rise and baking process.
What if my dough doesn’t rise properly?
First, ensure that your yeast is fresh and active. If you’ve mixed your dough but it doesn’t rise, it might be due to too cool a temperature—give it a warmer spot (around 75-80°F) for the first rise. If your dough is still dense and heavy, it may have over-proofed: next time, try a shorter rising time, closer to 2 hours. Remember, patience is key; with bread, small adjustments can make a big difference!
Are there any dietary concerns I should be aware of with this artisan bread recipe?
While this recipe doesn’t specifically cater to gluten-free or keto diets, you can substitute ingredients to accommodate different needs. For gluten-free options, try a cup-for-cup gluten-free flour blend along with a binding agent, like xanthan gum. Keep in mind that the texture may vary from traditional artisan bread. If allergies are a concern, always double-check ingredient labels, especially pre-mixed or specialty flours!
Artisan Bread Recipe: Effortless, Crusty Delight at Home
Ingredients
Equipment
Method
- In a large mixing bowl, combine 4 cups of all-purpose flour, 2 teaspoons of kosher salt, and 2 teaspoons of instant dry yeast. Gradually mix in 1 and ½ cups of warm water (105°F) until a sticky, cohesive dough forms.
- Cover the bowl tightly and let it rest at room temperature for 2 hours, or up to 10 hours for maximum flavor development.
- Lightly flour a clean surface and gently turn the risen dough onto it. Fold the edges of the dough towards the center to form a round loaf.
- Dust the top of the loaf lightly with flour and score a shallow cross or 'X' on the dough’s surface. Allow the loaf to rest for an additional 20 to 30 minutes.
- Preheat your oven to 450°F. Place a baking stone or Dutch oven in the oven to heat.
- Slide the dough on the parchment paper into the preheated baking stone or Dutch oven. Add a cup of hot water to a pan at the bottom of the oven to create steam.
- Bake your artisan bread for 25 to 30 minutes, or until the crust turns golden brown and sounds hollow when tapped on the bottom. Let it cool for 30 minutes before slicing.
Leave a Reply