
As I stood in my kitchen, the sweet aroma of melting butter began to weave its way through the air, instantly transporting me back to childhood memories of festive gatherings. Today, I’m thrilled to share my favorite recipe for Classic Melt-in-Your-Mouth Butter Cookies, a delightful treat perfect for holiday baking or simply indulging with a warm cup of tea. This easy recipe uses just a handful of pantry staples, ensuring that anyone can whip up these delectable cookies in no time. Not only do they deliver a buttery, crisp texture that outshines anything from the store, but they also make for thoughtful gifts or show-stopping additions to any dessert platter. Ready to dive in and create a batch of these irresistible cookies? Let’s get started!
Why are Butter Cookies a Baker’s Favorite?
Melt-in-your-mouth goodness: These butter cookies are indulgent, with a tender texture that simply melts on your tongue. Quick and easy: In just a few simple steps, you can create these delicious treats, perfect for anyone, whether you’re an experienced chef or just beginning in the kitchen. Holiday staple: They’re ideal for festive occasions, making them a delightful addition to holiday gatherings or as gifts in decorative tins. Flavor enhancer: The rich taste of pure vanilla and quality butter elevates your baking game, ensuring these cookies are more than just a treat; they are a celebration in every bite. For more classic baking inspiration, check out my Butter Ghost Cookies or enjoy the sweetness of Brown Butter Peach desserts.
Butter Cookies Ingredients
For the Dough
• Unsalted Butter – This key ingredient provides richness and moisture; for a salted version, simply reduce the added salt.
• Granulated Sugar – A must for sweetness and achieving that crispy texture that we all love in butter cookies.
• Salt – Enhances the flavor; can be omitted if you’re using salted butter to maintain balance.
• Pure Vanilla Extract – Gives a warm, aromatic flavor; always opt for pure for the best results.
• Egg Yolk – Contributes to the cookies’ moistness and richness; do not substitute with a whole egg for the best texture.
• All-Purpose Flour – Forms the cookie’s structure; remember not to overmix to keep them delightfully tender.
Baking Essentials
• Parchment Paper – Lining your baking sheets with this ensures easy removal of the cookies and helps prevent sticking.
These classic butter cookies are a wonderful way to indulge in baking and create sweet memories in your kitchen. Happy baking!
Step‑by‑Step Instructions for Classic Melt-in-Your-Mouth Butter Cookies
Step 1: Mix Wet Ingredients
In a large mixing bowl, use an electric mixer to beat 1 cup of softened unsalted butter and ¾ cup of granulated sugar together on medium speed until the mixture is creamy and lightened in color, about 2-3 minutes. Add ½ teaspoon of salt and 1 teaspoon of pure vanilla extract, mixing until fully combined. Finally, incorporate 1 large egg yolk until the mixture is smooth and seamless.
Step 2: Incorporate Flour
Gradually sift in 2 cups of all-purpose flour into the butter mixture, mixing on low speed until just combined. Be cautious not to overmix; you want the dough to be soft and slightly crumbly. As you work, a delightful buttery aroma will start to fill your kitchen, signaling that it’s almost time to shape the dough.
Step 3: Shape Dough
Turn the dough out onto a lightly floured surface and gently knead it just until it comes together. Shape the dough into a log about 2 inches in diameter, then wrap it tightly in plastic wrap. Refrigerate the dough for at least 2 hours to firm up, or you can freeze it for later use—this step ensures that your Classic Melt-in-Your-Mouth Butter Cookies hold their shape while baking.
Step 4: Preheat Oven
Once your dough is chilled, preheat the oven to 325°F (160°C). While the oven heats up, prepare your baking sheets by lining them with parchment paper, which will help prevent the cookies from sticking and make for easy cleanup after baking.
Step 5: Slice Cookies
Remove the chilled dough from the refrigerator and, using a sharp knife, slice it into ⅛-inch rounds. As you place the cookies on the prepared baking sheets, ensure they are spaced about 1 inch apart. This allows the cookies to expand slightly without touching each other as they bake.
Step 6: Bake
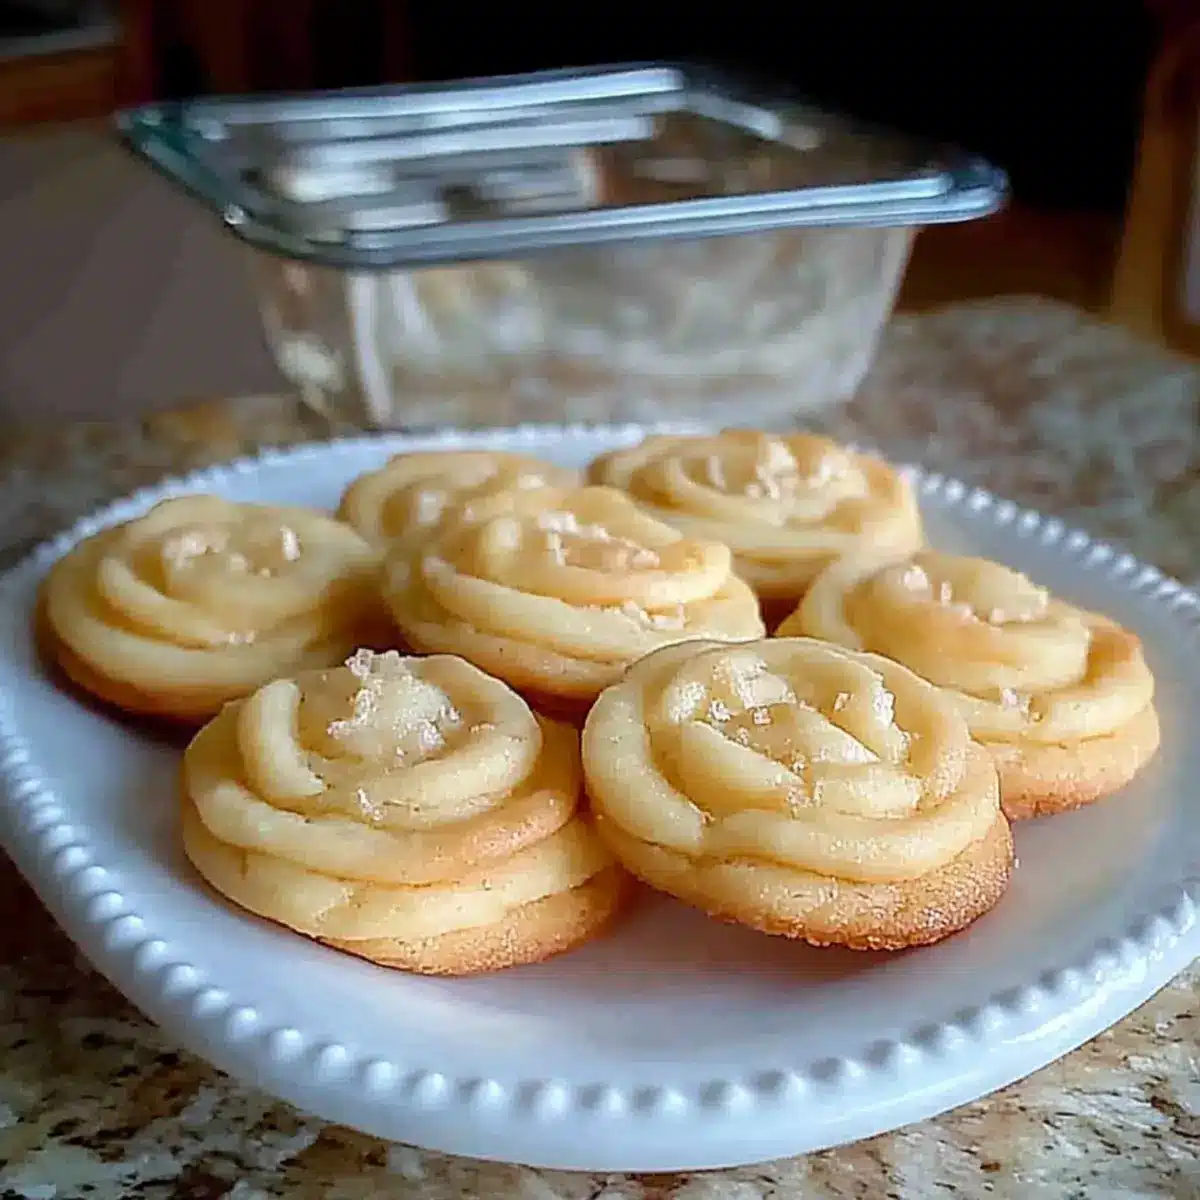
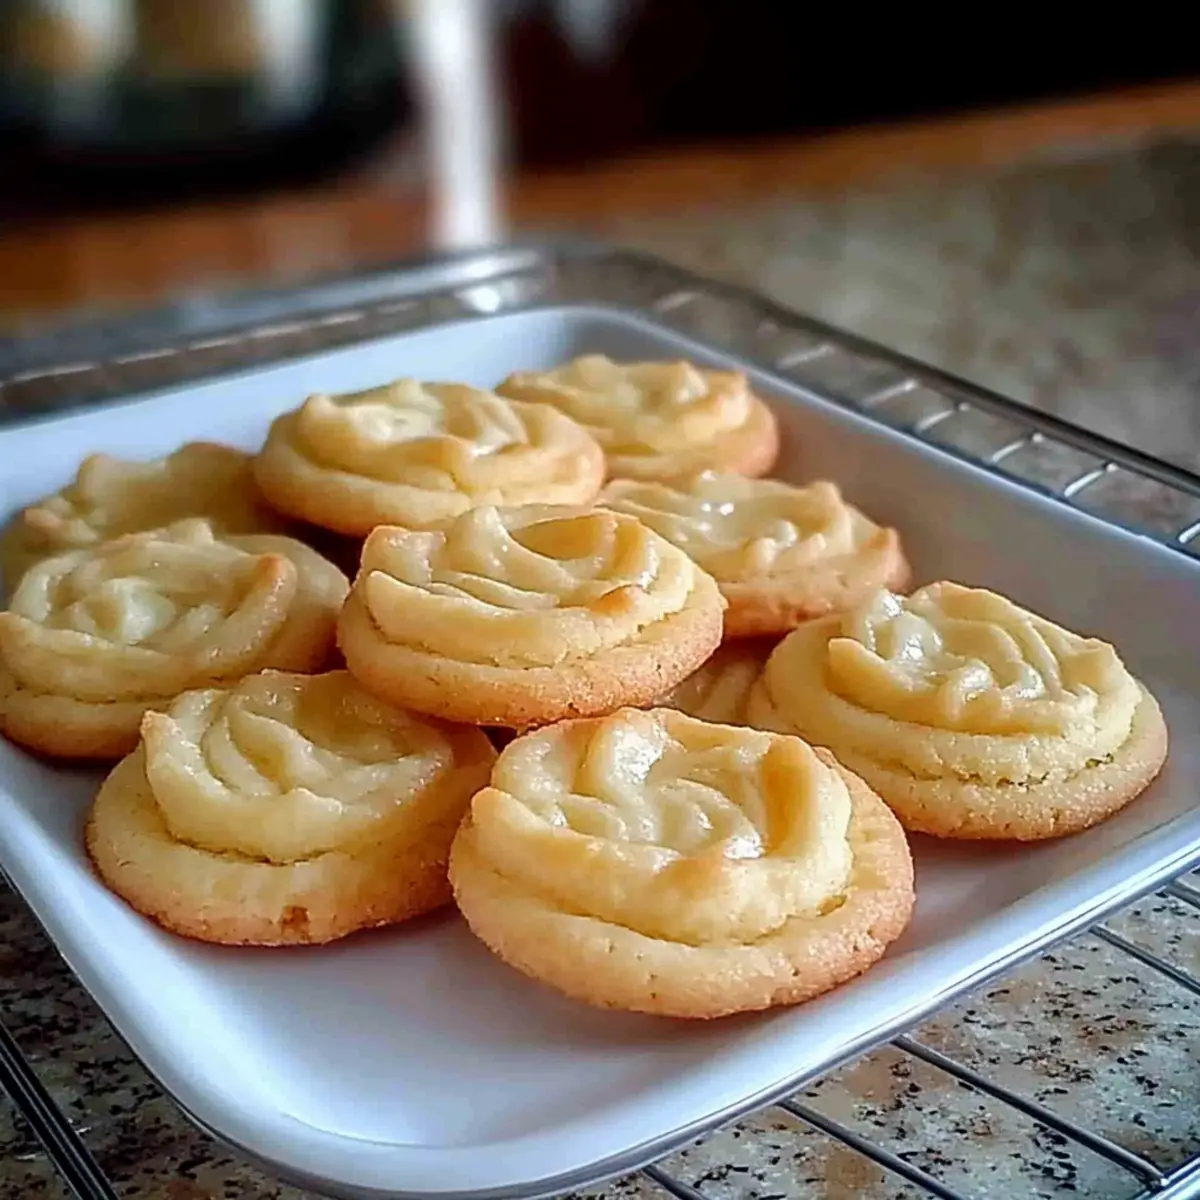
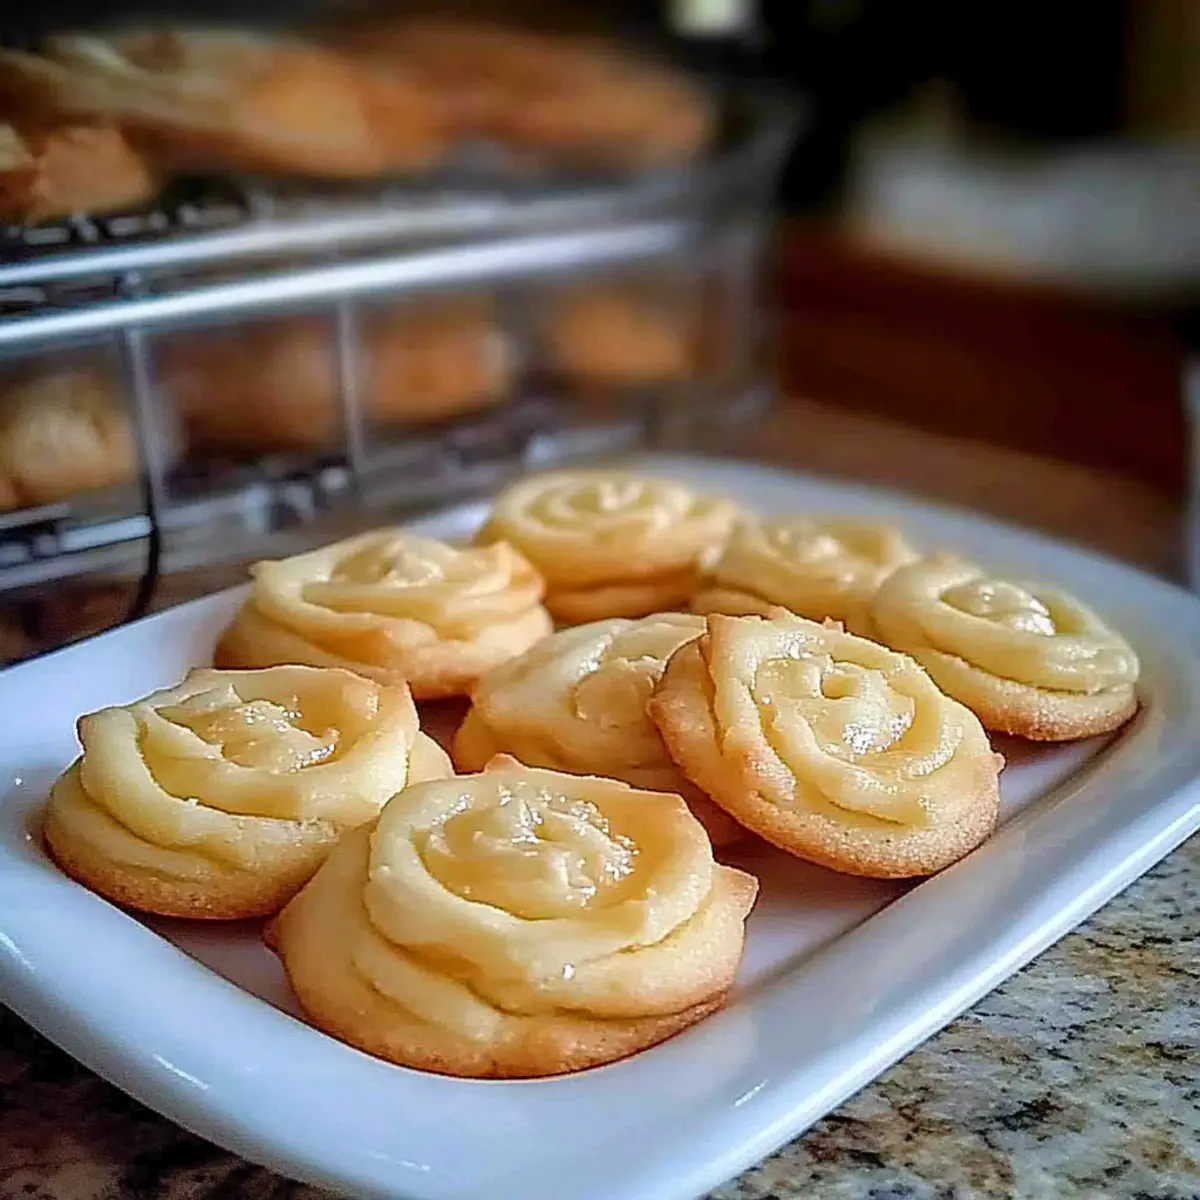
Bake the butter cookies in the preheated oven for 16-18 minutes, or until the edges are just golden brown. Keep a close eye on them towards the end, as they can quickly bake beyond perfection. The golden edges will contrast beautifully with the pale centers, indicating that they are done.
Step 7: Cool
Carefully transfer the freshly baked cookies to a wire rack using a spatula to cool completely. This cooling process is essential as the cookies will continue to firm up a bit. Once cooled, your Classic Melt-in-Your-Mouth Butter Cookies will be ready to serve, share, or store for later indulgence!
What to Serve with Classic Melt-in-Your-Mouth Butter Cookies
Indulging in these buttery delights opens the door to a world of delightful pairings that will enhance your baking experience.
-
Fresh Berries: The tartness of raspberries or strawberries contrasts beautifully with the sweetness of the cookies, adding a fresh, vibrant touch to your plate.
-
Creamy Whipped Cream: A dollop of light, airy whipped cream carries the cookies’ buttery richness, creating a luxurious dessert experience that feels like a hug in a bite.
-
Iced Coffee: The smooth, robust flavor of iced coffee amplifies the buttery taste, offering a refreshing counterbalance that’s perfect for afternoon tea time.
-
Chocolate Ganache: Drizzle warm chocolate ganache over your cookies for an indulgent twist. The rich chocolate pairs exceptionally well with the buttery base for an unforgettable treat.
-
Herbal Tea: A soothing cup of chamomile or mint tea invites cozy moments while perfectly complementing the cookies’ delicate sweetness and rich texture.
-
Milk: Classic and comforting, a glass of chilled milk enhances the buttery notes, making each bite feel like a nostalgic journey back to childhood.
-
Ice Cream: Serve these cookies with a scoop of vanilla or caramel ice cream. The warm cookie melting into the cold ice cream creates a heavenly texture that’s simply irresistible.
-
Cocoa: Rich hot cocoa brings warmth and nostalgia, making every bite of cookie a meaningful experience as you sip and savor the moment together.
Butter Cookies Variations & Substitutions
Embrace the joy of creativity in the kitchen by customizing your butter cookies to suit your taste buds!
- Chocolate Chip: Add 1 cup of semi-sweet chocolate chips for a classic twist that complements the buttery flavor perfectly.
- Nuts Galore: Incorporate ½ cup of finely chopped walnuts or pecans to introduce a delightful crunch that elevates every bite.
- Citrus Zest: For a refreshing twist, mix in 1 tablespoon of lemon or orange zest, adding a brightness that dances on your palate.
- Almond Extract: Substitute vanilla with almond extract for a distinct nutty aroma and flavor that will tantalize your senses.
- Spiced Delight: Blend in ½ teaspoon of ground cinnamon or nutmeg to create a warm, cozy flavor that’s perfect for the holidays.
- Dipped in Chocolate: After baking, dip half of each cookie in melted chocolate for a decadent finish that makes these cookies extra special.
- Sprinkle Love: Top your cookies with edible glitter or colorful sprinkles before baking for a festive treat that looks as good as it tastes.
For more sweet inspirations, consider whipping up some delightful Soft Pumpkin Cookies with Cinnamon Frosting or the rich Cowboy Butter Chicken for savory accompaniment to those cookies! Each variation is an opportunity to bring your unique touch to this beloved classic. Happy baking!
Storage Tips for Butter Cookies
Room Temperature: Store cooled butter cookies in an airtight container at room temperature for up to 1 week. This keeps them fresh and ready to enjoy with a cup of tea or coffee.
Refrigeration: If you’ve made the dough ahead of time, it can be refrigerated for up to 3 days. Wrap it tightly in plastic wrap to prevent it from drying out.
Freezer: To enjoy your butter cookies later, freeze them in a single layer on a baking sheet, then transfer to an airtight container for up to 3 months. Bake from frozen, adding a minute or two to the baking time.
Reheating: If you prefer your cookies warm, briefly reheat them in a 300°F (150°C) oven for 5 minutes. This refreshes their texture, making them feel freshly baked.
Make Ahead Options
These Classic Melt-in-Your-Mouth Butter Cookies are perfect for meal prep enthusiasts! You can prepare the cookie dough up to 3 days in advance by following the initial steps and wrapping the formed dough log tightly in plastic wrap. Just refrigerate it until you’re ready to bake. Alternatively, for longer storage, the dough can be frozen for up to 3 months—just ensure it’s wrapped well to prevent freezer burn. When you’re ready to bake, slice the chilled dough into rounds and bake them straight from the fridge, following the original baking instructions. This way, you’ll have homemade cookies ready to enjoy with minimal effort after a busy day!
Expert Tips for Perfect Butter Cookies
• Quality Ingredients: Always use high-quality unsalted butter and pure vanilla extract for the best flavor in your butter cookies.
• Chill Dough: Ensure the dough is well-chilled before baking to prevent spreading, which helps maintain the lovely shape and texture.
• Avoid Overbaking: Keep an eye on the cookies in the final minutes. They should have golden edges but remain pale in the center for that melt-in-your-mouth quality.
• Proper Slicing: When slicing the dough, aim for even thickness to ensure uniform baking and avoid any cookies being too soft or too crispy.
• Storage Tips: Store your cooled butter cookies in an airtight container at room temperature to keep them fresh and crisp for up to a week.
Butter Cookies Recipe FAQs
What type of butter should I use for butter cookies?
Absolutely! For the best results, use unsalted butter. This allows you to control the salt levels in your recipe. If you prefer a salted version, simply reduce the added salt to balance the flavors.
How should I store my butter cookies?
Store cooled butter cookies in an airtight container at room temperature for up to 1 week to maintain their crisp texture. For longer storage, place them in the fridge for up to 3 days, tightly wrapped in plastic wrap.
Can I freeze the butter cookie dough?
Very! To freeze the dough, shape it into a log, wrap it tightly in plastic wrap, and then place it in a freezer-safe bag. The dough can be frozen for up to 3 months. When you’re ready to bake, simply slice and bake the cookies straight from the freezer, adjusting the baking time by a minute or two.
What if my cookies spread too much while baking?
If your butter cookies spread too much, it could be because the dough wasn’t chilled long enough. Ensure you let the dough chill for at least 2 hours in the fridge. Additionally, make sure you’re using the right measurement of flour; too little flour can also cause excessive spreading.
Are butter cookies safe for pets?
Not at all! While the ingredients in butter cookies are generally safe for humans, they can be harmful to pets, especially chocolate add-ins or excessive sugar. It’s always best to keep your baked goods out of reach of animals to prevent any health issues.
Can I make variations of the butter cookie recipe?
Absolutely! You can personalize these classic butter cookies by folding in chocolate chips, nuts, or even citrus zest for a zesty twist. Just make sure to adjust the flour slightly if you’re adding in additional dry ingredients.

Melt-in-Your-Mouth Butter Cookies That You'll Love to Bake
Ingredients
Equipment
Method
- In a large mixing bowl, beat 1 cup of softened unsalted butter and ¾ cup of granulated sugar together on medium speed until creamy and lightened in color, about 2-3 minutes. Add ½ teaspoon of salt and 1 teaspoon of pure vanilla extract, mixing until combined. Incorporate 1 large egg yolk until smooth.
- Gradually sift in 2 cups of all-purpose flour into the butter mixture, mixing on low speed until just combined. Be cautious not to overmix; the dough should be soft and slightly crumbly.
- Turn the dough onto a lightly floured surface and gently knead it just until it comes together. Shape it into a log about 2 inches in diameter, wrap in plastic wrap, and refrigerate for at least 2 hours.
- Preheat the oven to 325°F (160°C) and prepare baking sheets with parchment paper.
- Remove the chilled dough and slice it into ⅛-inch rounds, spacing them 1 inch apart on the prepared sheets.
- Bake for 16-18 minutes until the edges are golden brown. Watch closely to prevent overbaking.
- Carefully transfer the cookies to a wire rack to cool completely.
Leave a Reply