
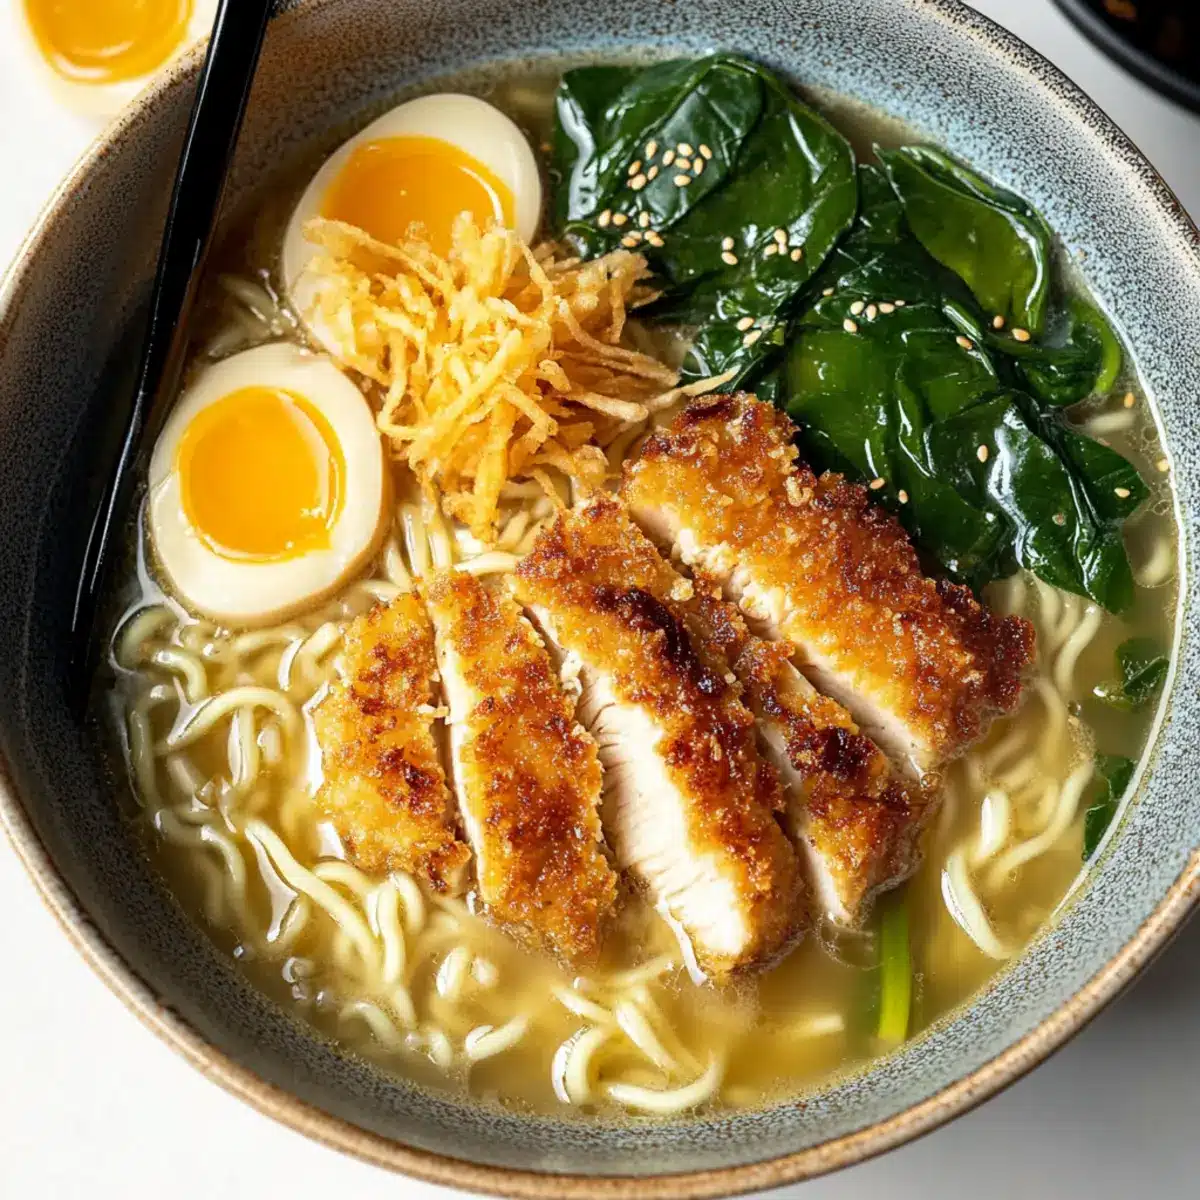
As the aroma of sizzling chicken fills the kitchen, a sense of warmth washes over me—it’s a signal that comfort is on the horizon. This Chicken Katsu Ramen recipe beautifully intertwines crispy fried chicken with a rich, umami-packed broth and tender noodles, creating a harmonious bowl that brings everyone to the table. Ready in under an hour, this dish is not only a time-saver, but it’s also a showstopper that promises to delight every palate. The delightful crunch of golden katsu paired with vibrant toppings will turn any weeknight into a memorable culinary experience. Are you ready to dive into this bite of comfort?
Why is Chicken Katsu Ramen a must-try?
Comforting Delight: This Chicken Katsu Ramen offers warmth and satisfaction in every bite, perfect for cozy nights.
Crispy & Creamy: Enjoy the crispy texture of the golden chicken katsu paired with a luscious broth that will have your taste buds dancing.
Family Favorite: Easy and approachable, this recipe is great for family meals, ensuring everyone is happy around the dinner table.
Quick Prep Time: Ready in under an hour, you’ll save time without sacrificing flavor, making it ideal for busy weeknights.
Flavorful Twists: Feel free to experiment with ingredients like spinach and special toppings, or try different proteins like pork for a fun twist—many love the Green Chile Chicken for its bold flavors too!
Chicken Katsu Ramen Ingredients
For the Chicken Katsu
- Chicken cutlets – Main protein that brings flavor and substance; swap with thinly sliced pork for a different twist.
- Panko breadcrumbs – Gives that irresistible crunch to the katsu; regular breadcrumbs can be used but won’t provide the same texture.
- Sesame seeds – Enhances flavor and adds a nutty touch to the crust; optional for a delightful twist.
- Salt – Key seasoning for the chicken; using kosher salt helps with better texture.
- Egg – Binds the breadcrumbs to the chicken for a crispy coating; no substitutes recommended for this purpose.
- Fry oil – Essential for frying the katsu; canola or vegetable oil has the best smoke point for frying.
For the Broth
- Bacon – Adds depth and smokiness to the ramen broth; turkey bacon can be a lighter alternative.
- Shallots – Provide sweetness and complement the broth; yellow onions work as a substitute if needed.
- Garlic – Elevates the broth flavor; fresh garlic yields the best taste experience.
- Fresh grated ginger – Infuses warmth and zest into the broth; ground ginger can substitute but use less.
- Instant chicken ramen noodles – Quick and effortless base that completes the dish; whole wheat ramen is a healthier option.
- Unsweetened coconut milk – Creamy element enriching the broth; cashew milk works for a dairy-free version.
- White miso paste – Imparts umami and depth to the broth; can swap with tahini for a creamy alternative.
- Water – The foundation of the broth; essential with no substitutions needed.
- Fresh spinach leaves – Adds vibrant freshness and nutrition; feel free to use kale for an added heartiness.
Optional Toppings
- Ramen eggs – Introduce richness and delicacy for an authentic touch.
- Fried onions – Impart delightful crunch to each bowl.
- Scallions – Freshness that brightens each bite.
- Furikake – Enhances umami flavor for additional depth.
- Nori sheets – Offers a hint of sea flavor to the dish.
- Sriracha or gochujang sauce – Add heat and spice for those who enjoy a fiery kick.
This assembly of Chicken Katsu Ramen ingredients is designed to bring comfort and joy to your dining experience!
Step‑by‑Step Instructions for Chicken Katsu Ramen
Step 1: Prepare the Breading Station
Set up your breading station by placing two shallow bowls side by side. In one, whisk an egg until smooth. In the other, combine panko breadcrumbs, a sprinkle of salt, and sesame seeds; mix well. This will give your Chicken Katsu Ramen that deliciously crispy texture. Make sure your oil will be ready for frying soon!
Step 2: Heat the Oil
In a large skillet, pour in about 1 inch of frying oil and heat it over medium-high heat until shimmering, approximately 350°F. You can test the oil’s readiness by dropping in a small piece of breadcrumb; it should sizzle immediately. Properly heated oil is key to achieving the perfect golden color on your chicken.
Step 3: Coat the Chicken
Take the chicken cutlets and coat each one thoroughly in the beaten egg, ensuring every surface is covered. Then, dredge them into the panko mixture, pressing down lightly to adhere the breadcrumbs. This double-dipping method guarantees a crispy outer layer that makes Chicken Katsu Ramen irresistible.
Step 4: Fry the Chicken
Carefully place the breaded chicken cutlets into the hot oil, frying in batches if needed to avoid overcrowding. Fry for about 3-4 minutes on each side or until they turn golden brown and crispy. Use tongs to flip them gently, ensuring even cooking. Once browned, transfer the chicken to paper towels to drain excess oil.
Step 5: Start the Broth
In a medium-sized saucepot, cook the chopped bacon over medium heat until crispy, about 5-7 minutes, allowing its fat to render. Then, add finely chopped shallots, minced garlic, and freshly grated ginger to the pot. Sauté for an additional 3-5 minutes until the shallots are soft and fragrant, creating a rich base for your Chicken Katsu Ramen broth.
Step 6: Build the Broth
Next, pour in the unsweetened coconut milk and water into the pot and stir in the white miso paste until well combined. Bring the mixture to a gentle boil, allowing all the flavors to meld together beautifully. You’ll notice a lovely aroma filling your kitchen—this is a sign that your ramen broth is coming together perfectly!
Step 7: Cook the Noodles
Once the broth is boiling, add the instant chicken ramen noodles, stirring gently to separate them. Cook according to package instructions, usually about 2-3 minutes. Just before they are done, toss in fresh spinach leaves, allowing them to wilt slightly in the hot broth, adding delightful color and nutrition to your Chicken Katsu Ramen.
Step 8: Assemble and Serve
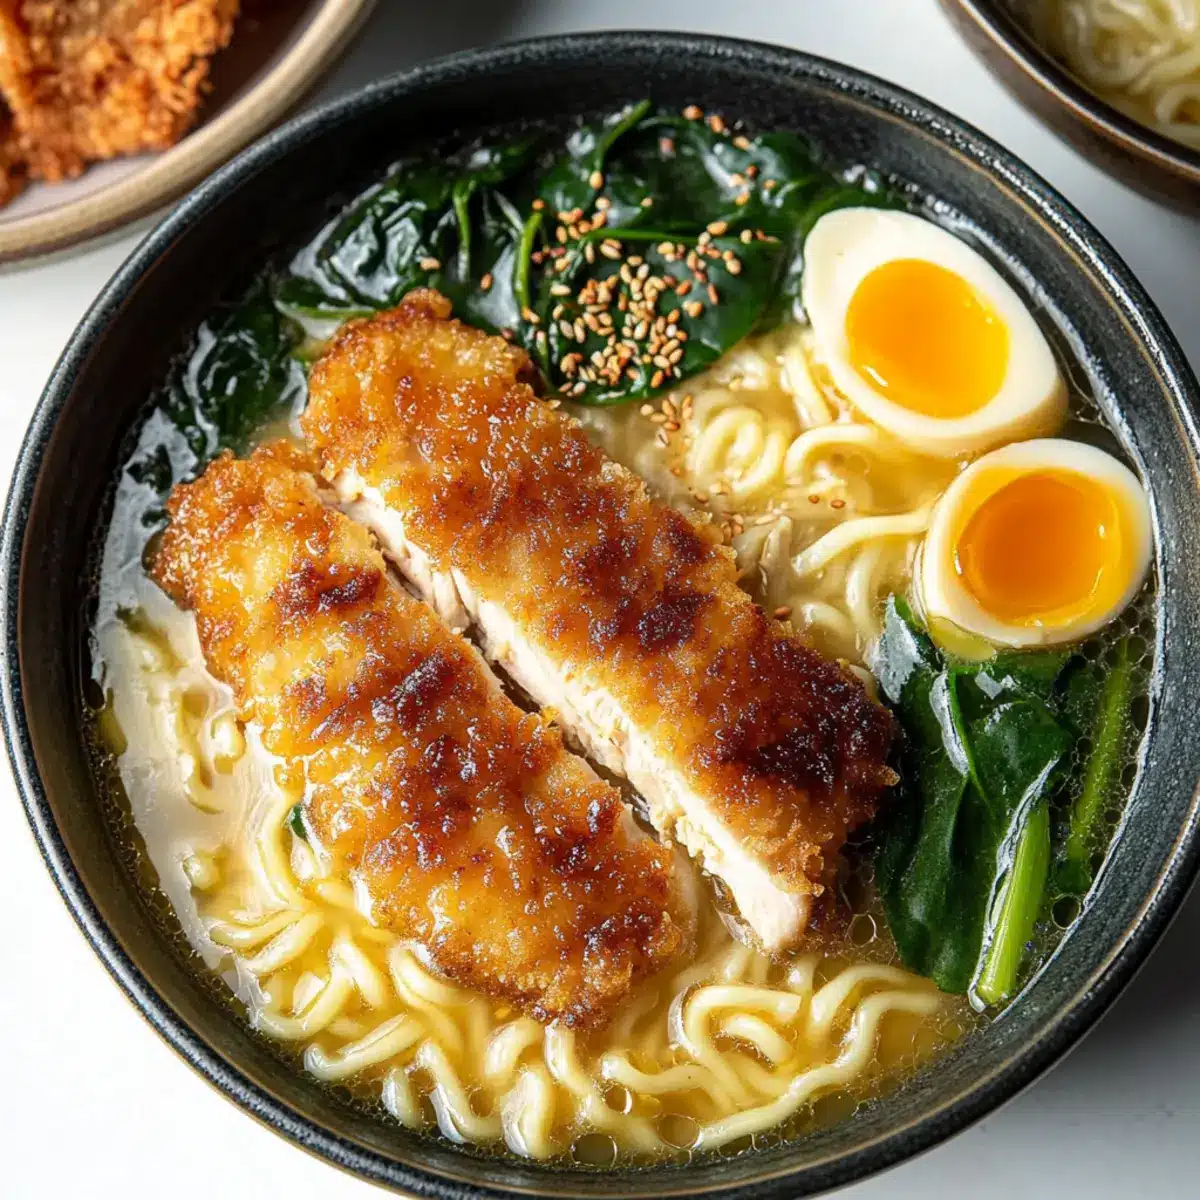
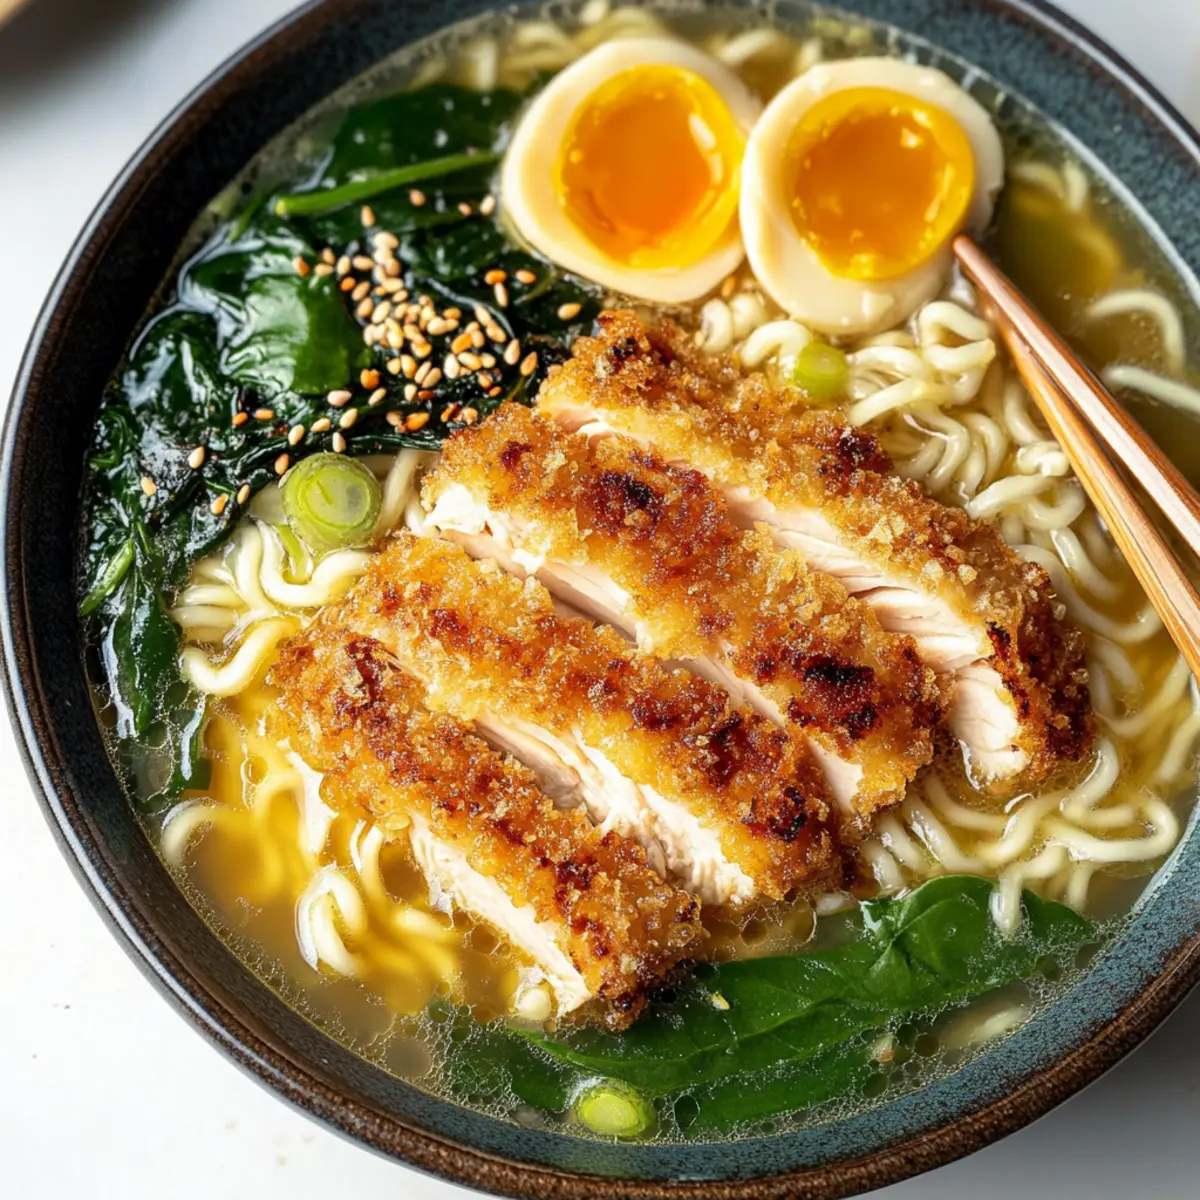
To serve, ladle the ramen broth with noodles into bowls. Slice the crispy chicken katsu into strips and lay them on top of the noodles. Finish your Chicken Katsu Ramen with optional toppings like ramen eggs, scallions, and a sprinkle of furikake for an extra layer of flavor.
What to Serve with Chicken Katsu Ramen
Experience a delightful meal that combines texture and flavors, complementing your Chicken Katsu Ramen perfectly.
- Energizing Edamame: These tender beans add a pop of freshness and protein, balancing the richness of the ramen.
- Crispy Vegetable Tempura: Light and crunchy, these coated and fried veggies bring a playful contrast to the savory broth.
- Refreshing Cucumber Salad: A tangy cucumber salad provides a cool, crunch that amplifies the warm comfort of your ramen.
- Classic Gyoza: These delightful dumplings are great for sharing; their savory filling perfectly pairs with the ramen’s umami notes.
- Pickled Vegetables: Adding a tangy side of pickled veggies enlightens every bite, cleansing the palate with each scrumptious spoonful.
- Chilled Green Tea: A soothing green tea enhances the meal with its earthy flavors, making for a perfect drink to accompany your ramen.
- Mochi Ice Cream: For dessert, a piece of mochi ice cream provides a sweet, chewy finish that leaves everyone content.
- Spicy Kimchi: If you love heat, a side of kimchi elevates your culinary adventure with its zesty kick and crunchy texture.
- Sesame Noodles: These cold noodles, tossed in sesame sauce, offer an entirely different texture and flavor that complements the warm meal beautifully.
Chicken Katsu Ramen Variations & Substitutions
Feel free to make this Chicken Katsu Ramen your own with some delightful twists and substitutions that will ignite your creativity in the kitchen!
-
Pork Katsu: Swap the chicken cutlets with thinly sliced pork for a deliciously different flavor. The juicy pork brings its own unique tenderness and enhances the overall experience.
-
Vegetable Boost: Add bok choy or carrots to the broth for an extra dose of nutrition. These veggies not only brighten the dish but also contribute fantastic crunch and flavor, making your ramen bowl even more satisfying.
-
Dairy-Free Option: Replace coconut milk with cashew milk to make the dish dairy-free. This maintains the creaminess while catering to those avoiding dairy products—everyone can indulge!
-
Gluten-Free Noodles: Use gluten-free ramen noodles to adapt the recipe for gluten sensitivities. It’s a simple swap that keeps the spirit of the dish intact without sacrificing taste.
-
Spicy Kick: Top your ramen with spicy kimchi or a drizzle of Sriracha to introduce a delightful heat. This flavor enhancement makes each bite exciting and enjoyable for spice enthusiasts.
-
Smoky Flavor: Incorporate smoked bacon instead of regular bacon for an even richer depth in the broth. The smokiness interplays beautifully with the sweetness of the shallots and balances all the flavors in your bowl.
-
Herb Infusion: Try adding fresh herbs like cilantro or Thai basil as a garnish for a burst of freshness. These herbs elevate the bowl with aromatic notes that enhance the overall taste experience.
-
Creamy Miso Variation: Experiment by blending in tahini in place of miso. This adds a nutty creaminess to the broth, making it unique and pleasantly creamy.
Whether you choose to swap proteins, add extra veggies, or spice things up, each variation lets you personalize your Chicken Katsu Ramen for every palate. And don’t forget to check out other delightful recipes like Buffalo Chicken Stuffed or Thai Peanut Chicken for more culinary inspiration!
Expert Tips for Chicken Katsu Ramen
Pre-Sliced Chicken: Use pre-sliced chicken cutlets to save time and ensure even cooking for your Chicken Katsu Ramen.
Egg Perfection: Make rich ramen eggs by boiling for six minutes, then soaking in soy sauce for that authentic touch to enhance flavor.
Oil Temperature: Ensure your frying oil is hot enough before adding chicken; test with a breadcrumb, which should sizzle to maintain a crispy texture.
Salt Wisely: Season each layer properly. Use kosher salt for the chicken and broth; it enhances flavor without overpowering your dish.
Customizable Toppings: Don’t hesitate to experiment with toppings like fried onions or pickled ginger—these add unique flavors and textures to your bowl of Chicken Katsu Ramen.
Keep Crispy: Store cooked chicken katsu separately from the broth to maintain its crunch, ensuring a perfect bite every time.
Make Ahead Options
Preparing Chicken Katsu Ramen ahead of time can save you valuable minutes on busy weeknights! You can bread and fry the chicken cutlets up to 24 hours in advance and store them in an airtight container in the refrigerator to maintain their crispiness. The broth can also be made up to 3 days ahead; simply let it cool before storing it in the fridge. To serve, just reheat the broth, cook the noodles directly in it, and then top with the crispy chicken katsu right before serving. This ensures every bite remains deliciously warm and satisfying, offering the ultimate comfort meal with minimal effort!
Storage Tips for Chicken Katsu Ramen
Room Temperature: Allow the chicken katsu to cool completely before storing, keeping it at room temperature for no longer than 2 hours to prevent bacterial growth.
Fridge: Store cooked chicken katsu separately from the broth in airtight containers; refrigerate for up to 3 days to maintain crispiness and flavor.
Freezer: You can freeze the chicken katsu for up to 2 months. Wrap it tightly in plastic wrap and then foil to prevent freezer burn. Reheat directly from frozen.
Reheating: Reheat the chicken in a preheated oven at 375°F for about 10-15 minutes for optimal crispiness. Warm the broth gently on the stove before serving your delicious Chicken Katsu Ramen.

Chicken Katsu Ramen Recipe FAQs
What is the best way to select ripe chicken cutlets?
Absolutely! When choosing chicken cutlets, look for a bright pink color with no noticeable dark spots or blemishes. The meat should feel firm and moist—if it’s sticky or discolored, it’s best to avoid those. Fresh chicken will also have a pleasant, non-fishy smell.
How should I store leftover Chicken Katsu Ramen?
For keeping your Chicken Katsu Ramen fresh, it’s essential to store the chicken katsu separately from the broth. Allow both to cool completely, then place the chicken in an airtight container and the broth in a separate container. Stored this way in the fridge, both can be enjoyed golden and crispy for up to 3 days.
Can I freeze Chicken Katsu Ramen?
Yes, you can freeze your chicken katsu! Wrap it tightly in plastic wrap and then in aluminum foil to protect it from freezer burn. You can freeze the katsu for up to 2 months. When you’re ready to enjoy it, just reheat in a preheated oven at 375°F for about 10-15 minutes until crispy again. For the broth, it’s best to freeze it in a freezer-safe bag and use it within 3 months.
What should I do if my chicken katsu isn’t crispy?
Very! If your chicken katsu isn’t turning out crispy, a few things may be at play: check that your oil is properly heated—you can test it with a breadcrumb. It should sizzle immediately upon contact. Also, ensure you’re using enough oil for frying, and avoid overcrowding the pan, which can lower the oil temperature and steam rather than fry the chicken.
Are there any dietary considerations I should keep in mind?
Absolutely! If you’re cooking for someone with soy allergies, it’s important to avoid miso paste in the broth; consider using tahini as a creamy alternative. For gluten-free options, try using gluten-free panko and whole wheat ramen noodles. Additionally, always consult with guests about any allergies they may have regarding ingredients like sesame seeds or specific toppings.
Chicken Katsu Ramen: Comfort in Every Crispy Bite
Ingredients
Equipment
Method
- Set up your breading station with beaten egg in one bowl and panko breadcrumbs mixed with salt and sesame seeds in another.
- Heat oil in a large skillet over medium-high heat until shimmering, around 350°F.
- Coat chicken cutlets in beaten egg, then dredge through panko mixture.
- Fry chicken cutlets in hot oil for 3-4 minutes per side until golden brown. Drain on paper towels.
- Cook chopped bacon in a medium-sized saucepot over medium heat until crispy.
- Add chopped shallots, minced garlic, and grated ginger. Sauté for 3-5 minutes until soft.
- Pour in coconut milk and water, stir in miso paste, and bring to a gentle boil.
- Add instant ramen noodles and cook according to package instructions, adding spinach in the last minute.
- Ladle ramen broth with noodles into bowls. Slice crispy chicken and lay on top.
- Finish with optional toppings like ramen eggs, scallions, and furikake.
Leave a Reply