
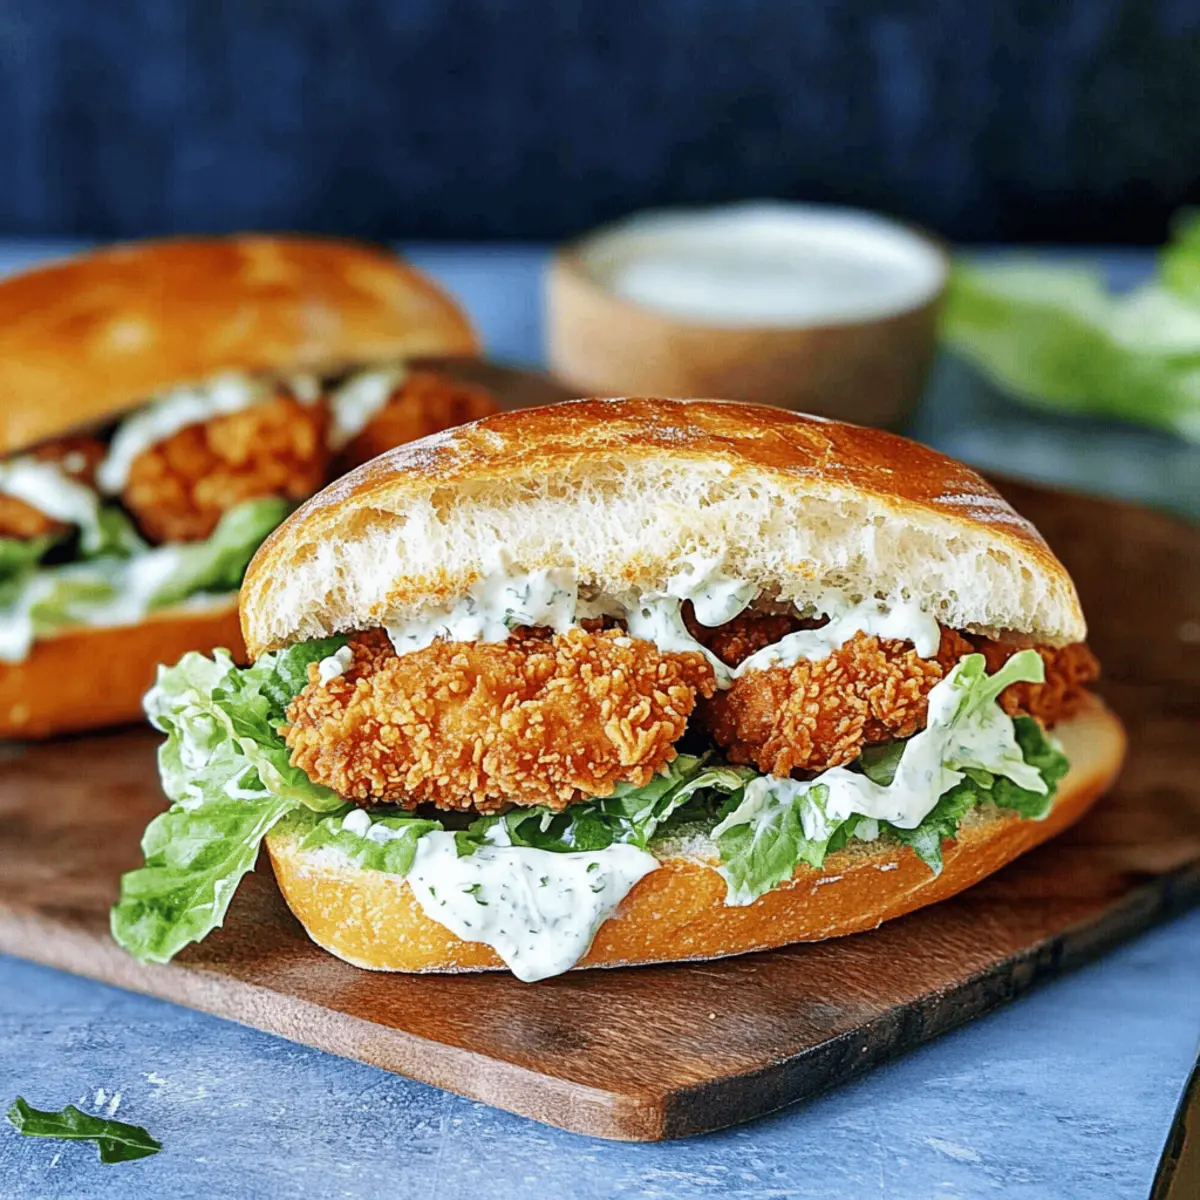
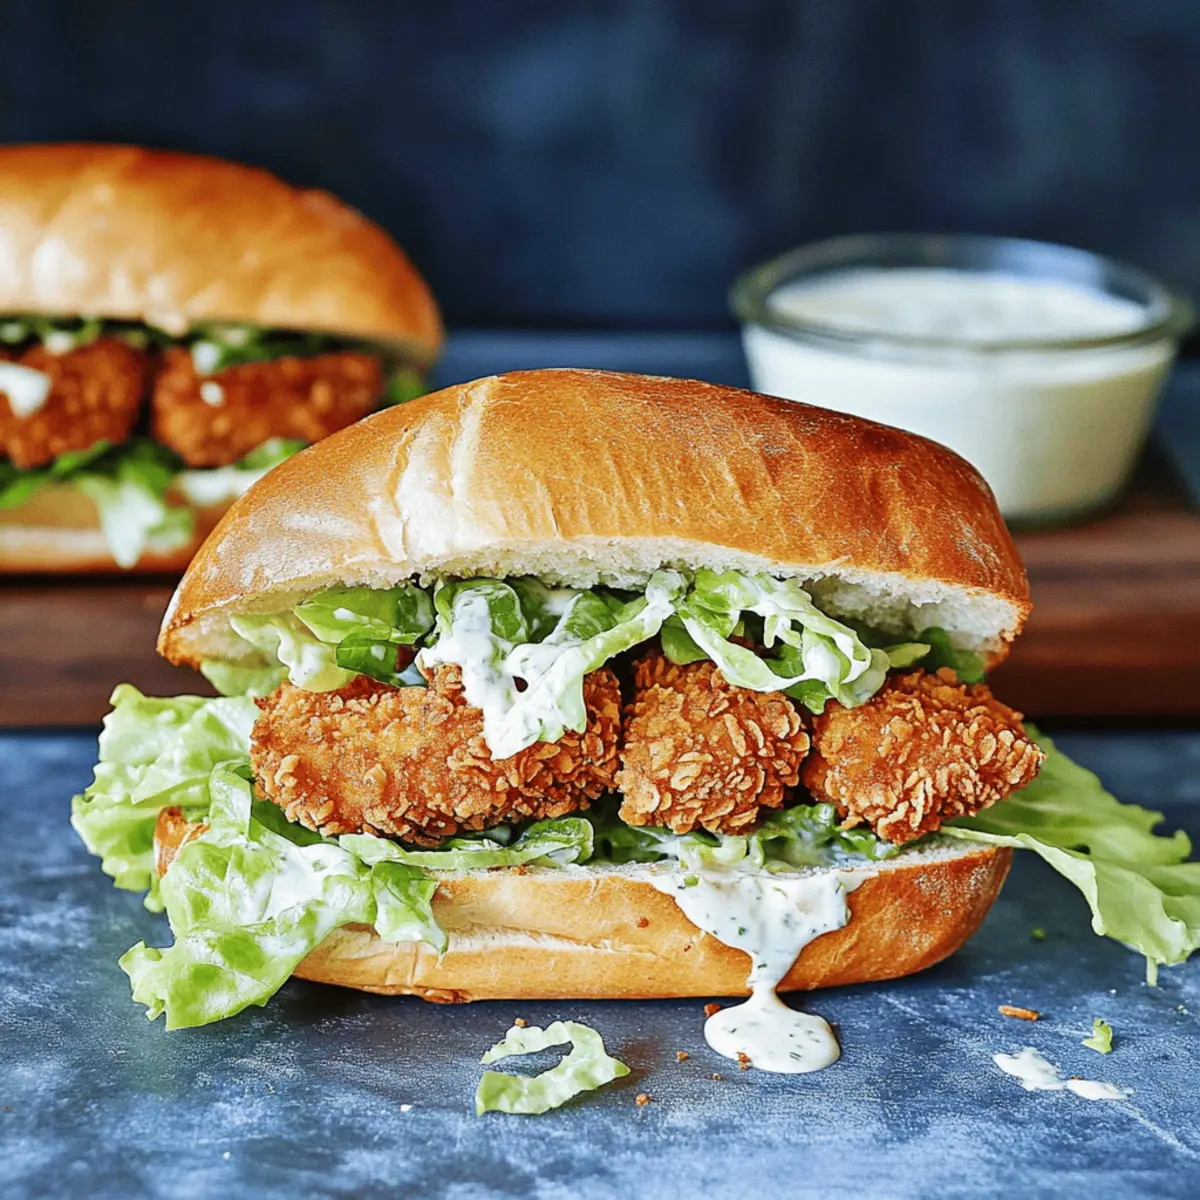
As I bit into the crispy golden chicken nestled between fresh romaine and tangy dressing, it hit me—this was no ordinary sandwich. The Crispy Chicken Caesar Sandwich transforms a beloved salad into a handheld delight, perfect for those of us who crave something satisfying without spending hours in the kitchen. With its quick prep and gourmet flair, this sandwich serves as a tasty reminder that homemade meals can be both easy and rewarding. The creamy homemade dressing brings the whole experience together, elevating a simple lunch or dinner into something special. Curious to know how to recreate this quick lunch favorite in your own kitchen? Let’s dive in!

Why is this sandwich a must-try?
Crispy Chicken: The star of this sandwich is undeniably the golden-fried chicken, creating a crunchy exterior that’s simply irresistible. Homemade Dressing: No need for store-bought; a creamy homemade Caesar dressing elevates the flavors. Quick Preparation: Perfect for busy days, this sandwich comes together in no time! Flavorful Layers: Each bite combines savory chicken with fresh romaine and rich dressing for a delightful experience. Perfect Pairing: Serve it with crispy fries or a refreshing salad, making it a meal that’s sure to please anyone at the table. Want more quick lunch ideas? Check out my Buffalo Chicken Stuffed shells or Thai Peanut Chicken.
Crispy Chicken Caesar Sandwich Ingredients
For the Dressing
- Full-fat mayonnaise – Adds creaminess to the dressing; substitute with Greek yogurt for a lighter version.
- Greek yogurt – Provides tanginess and creaminess; could replace with sour cream if needed.
- Dijon mustard – Adds a sharp flavor to the dressing; swap with yellow mustard for milder taste.
- Worcestershire sauce – Enhances umami flavor; use soy sauce for a vegetarian version.
- Lemon juice – Introduces acidity and freshness; fresh lime juice can be used for variation.
- Parmesan cheese – Contributes a nutty flavor; use Pecorino Romano for a stronger taste.
- Garlic cloves – Provide aromatic depth; garlic powder can be used if fresh is unavailable.
- Chili powder – Adds mild heat and flavor; omit for a milder version.
For the Chicken
- Chicken cutlets – The main protein, offering crispiness when breaded; use chicken thighs for a juicier option.
- All-purpose flour – Coats chicken for breading; gluten-free flour mix can be substituted.
- Eggs – Binds breading ingredients together; an egg substitute can be used for egg-free diets.
- Panko crumbs – Offers extra crispiness; regular breadcrumbs can be used but will yield less crunch.
For Assembly
- Fresh romaine lettuce – Adds crunch and freshness to the sandwich; iceberg lettuce can be used for similar texture.
- French baguettes – Provides a hearty base to hold the filling; ciabatta or sourdough are good alternatives.
Step‑by‑Step Instructions for Crispy Chicken Caesar Sandwich
Step 1: Make the Caesar Dressing
In a medium bowl, whisk together 1/2 cup of full-fat mayonnaise, 1/4 cup of Greek yogurt, 2 tablespoons Dijon mustard, 1 tablespoon Worcestershire sauce, and the juice of 1 lemon. Add 1/4 cup Parmesan cheese, 2 minced garlic cloves, and season with salt and pepper to taste. Blend until the dressing is smooth and creamy, then set aside some dressing for later to assemble the sandwich.
Step 2: Prepare the Romaine Salad
Chop about 2 cups of fresh romaine lettuce and mix it with 1/4 cup of the salad dressing from Step 1. Toss until the romaine is evenly coated, then cover and refrigerate to keep it fresh while you prepare the crispy chicken. This will add a refreshing crunch to your Crispy Chicken Caesar Sandwich when assembled.
Step 3: Season the Chicken
Take your chicken cutlets and season both sides generously with salt and pepper. For even cooking, pound any uneven pieces to achieve uniform thickness using a meat mallet or rolling pin. This step ensures that the chicken cooks perfectly while remaining juicy inside and crispy on the outside.
Step 4: Set Up the Breading Station
Create a breading station by placing 1 cup of all-purpose flour mixed with a pinch of salt in one bowl, whisking together 2 eggs and a little salt in another bowl, and combining 1.5 cups of panko crumbs with spices in a third bowl. Once you have everything ready, you’ll be set to coat the chicken cutlets for the Crispy Chicken Caesar Sandwich.
Step 5: Bread the Chicken Cutlets
Take each seasoned chicken cutlet and dredge it in the flour, shaking off any excess. Next, dip it in the egg mixture, ensuring it is well coated, then transfer it to the panko crumb mixture, pressing gently to adhere. Repeat with all cutlets; the crispy coating is key to achieving that delicious crunch in your sandwich.
Step 6: Fry the Chicken
Heat a large frying pan over medium heat and pour in enough oil to cover the bottom (about 1/4 inch deep). Once the oil is hot (around 350°F), carefully place the breaded chicken cutlets in the pan. Fry them for about 4-5 minutes per side, or until golden brown and cooked through, achieving that perfect crispy texture. Drain on paper towels once done.
Step 7: Assemble the Sandwiches
Slice your French baguettes in half lengthwise, then spread a layer of the reserved Caesar dressing on both sides. Layer each baguette with crispy chicken cutlets and top with the chilled, dressed romaine salad. Close the sandwich, pressing down slightly to hold everything together and making it easy to eat.
Step 8: Serve Immediately
Cut the Crispy Chicken Caesar Sandwiches in half for easier handling, and serve right away while the chicken is still warm and crispy. Pair with a side of fries or a refreshing salad for a complete meal that’s sure to delight your family or friends at any gathering.
What to Serve with Crispy Chicken Caesar Sandwich
To create a satisfying meal that pairs beautifully with this handheld delight, consider these tempting side dishes and treats.
-
Crispy French Fries: The classic companion, these golden fries add a delightful crunch that complements the sandwich’s texture. Enjoy them dipped in your leftover Caesar dressing for an added zing!
-
Jalapeño Cucumber Salad: This refreshing salad combines cool cucumbers with spicy jalapeños, balancing the richness of the sandwich and adding a fresh, zesty note.
-
Garlic Parmesan Potato Wedges: Seasoned with garlic and layered with Parmesan cheese, these wedges offer a savory twist and hearty satisfaction alongside the crispy chicken.
-
Coleslaw: A creamy or vinegar-based slaw introduces a crunchy texture and a tangy bite, making it an ideal counterpoint to the rich flavors in your Crispy Chicken Caesar Sandwich.
-
Iced Tea or Lemonade: A chilled beverage, like sweet iced tea or refreshing lemonade, cleanses the palate between bites, making each forkful of flavor more enjoyable.
-
Chocolate Chip Cookies: For a sweet finish, classic chocolate chip cookies provide a delightful contrast with their chewy softness after a crispy, savory sandwich.
Elevate your meal by selecting one or two of these options, turning your lunch or dinner into an unforgettable feast!
Expert Tips for the Best Crispy Chicken Caesar Sandwich
-
Even Thickness: Ensure chicken cutlets are of uniform thickness to achieve even cooking, preventing some parts from drying out while others remain undercooked.
-
Hot Oil: Maintain oil temperature between 175-180°C (350-360°F) for the crispiest chicken. Using too cool oil can result in soggy breading.
-
Serving Fresh: Assemble your Crispy Chicken Caesar Sandwich just before serving to avoid soggy bread from the dressing; keep components separate until ready to enjoy.
-
Breading Technique: Press the panko crumbs firmly onto the chicken for a thicker coating, which will yield an extra crunchy result when fried.
-
Adjusting Spice: For variation, consider adding a pinch of cayenne pepper to your breading mix or dressing for an extra kick that complements the flavors beautifully.
-
Storage Tips: If preparing ahead, store the fried chicken separately and reheat quickly in an oven for a few minutes to retain crispiness before assembling the sandwich.
Make Ahead Options
These Crispy Chicken Caesar Sandwiches are perfect for meal prep enthusiasts! You can prepare the creamy homemade dressing and the crispy chicken cutlets up to 3 days in advance, ensuring they’re ready when you’re short on time. Simply store the dressing in an airtight container in the refrigerator and fry the chicken to golden perfection, then refrigerate it as well. To maintain the quality, cover the chicken with foil to prevent any moisture loss. When it’s time to serve, reheat the chicken in the oven at 350°F for about 10-15 minutes until warm and crispy, then assemble the sandwich with chilled romaine and dressing for a delightful meal with minimal effort!
Variations & Substitutions for Crispy Chicken Caesar Sandwich
Feel free to make this crispy delight your own with these fun twists and delicious swaps!
-
Spicy Kick: Add sliced jalapeños or a dash of hot sauce to the dressing for some heat that beautifully complements the creamy flavors.
-
Lighter Option: Bake or air-fry the chicken instead of frying. You’ll still achieve a crispy exterior while cutting down on the oil.
-
Grilled Chicken: Swap crispy chicken cutlets for grilled chicken breast for a healthier, smoky alternative that’s just as satisfying.
-
Flavored Breading: Mix in a pinch of parmesan or Italian herbs into your panko crumbs to enhance the crunch with added flavor. The aroma while frying is simply irresistible!
-
Gluten-Free Swap: Use gluten-free flour and gluten-free panko for a delicious gluten-free version of this sandwich. It’s a great way to cater to dietary preferences without sacrificing taste.
-
Herbed Dressing: Infuse the dressing with fresh herbs like parsley or basil to add a burst of freshness. Your taste buds will dance with each bite!
-
Veggie Delight: Make it plant-based by substituting the chicken with crispy eggplant slices or tofu for a delicious vegetarian twist, while still enjoying those crunchy textures.
-
Different Bread: Instead of a French baguette, try using ciabatta or sourdough – their distinct flavors will elevate your Crispy Chicken Caesar Sandwich even more.
If you love sandwiches with a little flair, don’t miss out on my BBQ Chicken Coleslaw wraps or Green Chile Chicken. Enjoy customizing this recipe to fit your taste!
Storage Tips for Crispy Chicken Caesar Sandwich
Fridge: Store leftover components separately in airtight containers for up to 3 days to maintain freshness; keep the chicken crispy.
Freezer: Place breaded but uncooked chicken cutlets in an airtight container or freezer bag for up to 2 months; thaw in the fridge before frying.
Reheating: To reheat fried chicken and maintain crispiness, pop it in a preheated oven at 375°F (190°C) for about 10-15 minutes before assembling the sandwich.
Assemble Fresh: It’s best to assemble your Crispy Chicken Caesar Sandwich just before serving to prevent soggy bread from the dressing; enjoy it fresh!
Crispy Chicken Caesar Sandwich Recipe FAQs
What is the best way to choose ripe ingredients?
Absolutely! For the freshest flavors, look for romaine lettuce that is vibrant green with crisp leaves and no wilting. Select chicken cutlets that are firm and free of any discoloration. Your mayonnaise should be smooth and creamy with a good expiration date; using high-quality ingredients truly enhances your Crispy Chicken Caesar Sandwich!
How can I store leftover components effectively?
To keep your leftovers fresh, I recommend storing the chicken and romaine salad separately in airtight containers. The crispy chicken will last up to 3 days in the fridge, while the romaine should be consumed within 1 to 2 days to maintain its crunch. Ensuring they are stored apart can prevent the sandwich bread from becoming soggy.
Can I freeze the chicken cutlets?
Yes, indeed! You can freeze uncooked, breaded chicken cutlets. Simply place them in a single layer in an airtight container or freezer bag for up to 2 months. When you’re ready to enjoy your Crispy Chicken Caesar Sandwich, thaw the cutlets in the fridge overnight, then fry them directly for that crispy delight!
What can I do if my chicken isn’t crispy enough?
If your chicken cutlets aren’t getting that golden crunch, it could be due to the oil temperature being too low. Make sure the oil is hot (around 350°F/175°C) before adding the chicken. Also, ensure that you’re pressing the panko crumbs firmly onto the chicken—this technique helps create a thick, crunchy coating that’s simply irresistible!
Are there any dietary considerations I should be aware of?
Certainly! If anyone at your table has allergies, be cautious with ingredients like mayonnaise, eggs, and dairy. You can substitute these with alternatives like vegan mayo, egg replacer, or dairy-free cheese to cater to those dietary restrictions. It’s all about creating a delicious experience that everyone can enjoy!
Can I prepare the sandwich components ahead of time?
Very much so! You can make your homemade Caesar dressing and cook your chicken cutlets a day ahead. Store them separately in the fridge, and when you’re ready to assemble your Crispy Chicken Caesar Sandwich, simply put everything together fresh for the best taste and texture. Enjoy your delicious creation!

Crispy Chicken Caesar Sandwich: Crunchy Bliss in Every Bite
Ingredients
Equipment
Method
- In a medium bowl, whisk together the mayonnaise, Greek yogurt, Dijon mustard, Worcestershire sauce, lemon juice, Parmesan cheese, minced garlic, and season with salt and pepper to taste. Set aside some dressing for later.
- Chop the romaine lettuce and mix it with 1/4 cup of the dressing. Toss until evenly coated and refrigerate.
- Season chicken cutlets with salt and pepper. Pound uneven pieces for uniform thickness.
- Set up the breading station: prepare bowls for flour, whisked eggs, and panko crumbs with spices.
- Dredge each chicken cutlet in flour, then dip in the egg, and coat with panko crumbs. Repeat for all cutlets.
- Heat oil in a frying pan over medium heat. Fry the chicken for 4-5 minutes on each side until golden brown. Drain on paper towels.
- Slice the baguettes in half, spread the reserved Caesar dressing, layer with chicken cutlets, and top with dressed romaine salad. Press to hold.
- Cut sandwiches in half and serve immediately while warm with fries or a salad.
Leave a Reply