
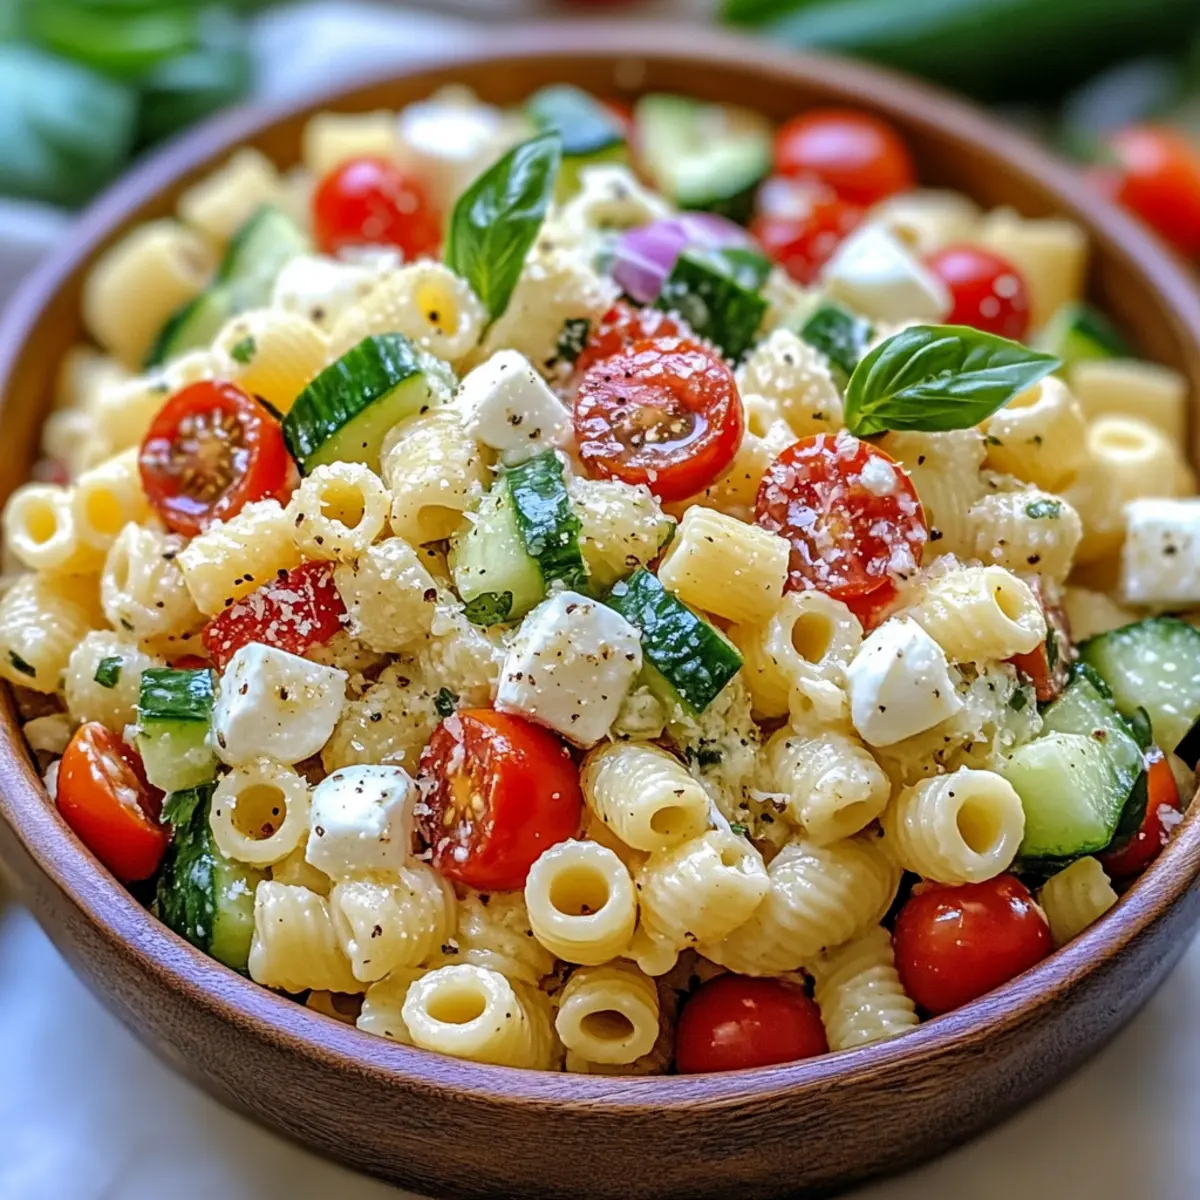
As I watched the vibrant colors of fresh vegetables dance together in a bowl, I felt that blissful moment when you know a meal will be something special. This Colorful Ditalini Pasta Salad has quickly become one of my favorite go-to recipes for summer gatherings. With its delightful mix of perfectly cooked ditalini pasta, crunchy cucumbers, juicy tomatoes, and creamy mozzarella, it’s a dish that effortlessly caters to varying tastes and dietary preferences. What I adore most about this salad is its ease of preparation—whip it up in mere minutes—and the fact that it’s incredibly customizable, allowing you to mix and match ingredients to your heart’s content. Whether you’re looking for a light lunch or a crowd-pleaser for your next potluck, this easy summer meal does it all. Are you ready to add some color to your table?
Why is Ditalini Pasta Salad a Must-Try?
Colorful and inviting, this Ditalini Pasta Salad is a feast for the eyes and the taste buds! Quick to prepare, you can whip it up in no time, making it perfect for those busy summer days. Highly customizable, feel free to switch out ingredients based on what’s in season or your dietary needs. Whether you’re a fan of tangy feta or prefer creamy mozzarella, this salad has you covered. And with its vibrant mix of veggies, it’s not only delicious but packed with nutrients—truly a win-win! If you love refreshing salads, you might also enjoy our Cucumber Pasta Salad or the delightful Italian Grinder Salad Sandwich for your next gathering!
Ditalini Pasta Salad Ingredients
For the Salad
• Ditalini Pasta – The essential base of this salad, providing delightful structure; if unavailable, small shapes like elbow macaroni or orzo work well.
• Cherry Tomatoes (1 cup, halved) – Adds a burst of sweetness; substitute with grape tomatoes or diced any ripe tomato for a similar flavor.
• Cucumber (1 cup, diced) – Offers a refreshing crunch; you can also use zucchini or snap peas as alternatives.
• Red Bell Pepper (1/2 cup, diced) – Contributes sweetness and vibrancy; feel free to replace it with orange or yellow bell peppers.
• Green Bell Pepper (1/2 cup, diced) – Adds a slight bitterness, balancing flavors; omit if you’d prefer a sweeter salad.
• Red Onion (1/4 cup, finely chopped) – Brings pungency and crunch; consider green onions for a milder flavor if preferred.
• Black Olives (1/2 cup, sliced) – Introduces a savory saltiness; green olives can be used instead, or omit for a milder option.
• Mozzarella Pearls (1/2 cup) or Diced Mozzarella – Adds a creamy, protein-rich layer; swap for feta for a tangy twist or a dairy-free cheese for vegan versions.
• Fresh Parsley (1/4 cup, chopped) – Brings herbal freshness; substitute it with cilantro if desired or leave it out altogether.
• Fresh Basil (1/4 cup, chopped) – Offers aromatic brightness; dried basil can be used in smaller amounts if fresh isn’t available.
For the Dressing
• Olive Oil (1/3 cup) – The base of the dressing, imparting richness; for a different flavor, avocado oil can be an excellent substitute.
• Red Wine Vinegar (3 tablespoons) – Provides the necessary acidity; feel free to use white wine vinegar or fresh lemon juice instead.
• Dijon Mustard (1 tablespoon) – Adds a welcome depth and tang; you can skip this if avoiding mustard altogether.
• Honey or Sugar (1 teaspoon) – Balances the dressing’s acidity; consider agave syrup or maple syrup as sweet substitutes.
• Garlic (1 clove, minced) – Enhances the overall flavor; garlic powder can stand in if necessary, or omit for a lighter note.
• Salt and Pepper – Essential for seasoning to taste; adjust according to your preference, especially for the splendid Ditalini Pasta Salad!
Step‑by‑Step Instructions for Ditalini Pasta Salad
Step 1: Cook the Ditalini Pasta
Begin by boiling a large pot of salted water over high heat. Add the ditalini pasta and cook according to package instructions until al dente, usually about 8–10 minutes. Once cooked, drain the pasta in a colander and rinse it under cold water for 1-2 minutes to cool it down and stop the cooking process. This cooling step prevents sticking and prepares the pasta for your refreshing Ditalini Pasta Salad.
Step 2: Prepare the Vegetables
While the pasta cools, gather a large mixing bowl and chop the fresh vegetables. Dice the cucumber, red and green bell peppers, and red onion into bite-sized pieces, ensuring even sizes for a beautiful presentation. Halve the cherry tomatoes and slice the black olives. After chopping, add all these colorful ingredients to your mixing bowl, creating a vibrant base for your Ditalini Pasta Salad.
Step 3: Make the Dressing
In a small bowl, whisk together the olive oil, red wine vinegar, Dijon mustard, honey, and minced garlic. Season with salt and pepper to taste, enhancing the dressing’s depth. Continue whisking until the ingredients are fully emulsified and the mixture is smooth. This herb-infused dressing brings all the flavors to life in your Ditalini Pasta Salad, ensuring each bite bursts with deliciousness.
Step 4: Combine Ingredients
Once the pasta has cooled and the vegetables are prepped, add the ditalini pasta to the mixing bowl containing the vegetables. Pour the dressing over the entire mixture. Gently toss with a large spoon or spatula, ensuring that every piece is evenly coated in the dressing. This step combines all the flavors harmoniously and brings a delightful texture to your Ditalini Pasta Salad.
Step 5: Chill and Serve
Cover the mixing bowl with plastic wrap and refrigerate your Ditalini Pasta Salad for at least 1 hour. This chilling time allows the flavors to meld beautifully, creating a more robust taste. After chilling, give the salad a good stir before serving. You may check the seasoning and adjust with additional salt or pepper if needed. Garnish with extra herbs for a fresh finish!
What to Serve with Ditalini Pasta Salad
As you prepare to delight your guests with a vibrant dish, consider these flavorful companions to elevate your summer meal.
-
Grilled Lemon Herb Chicken: Juicy and tender, this chicken brings a zingy contrast to the salad’s creamy notes, perfect for outdoor grilling. Each bite of chicken, dripping in citrusy marinade, pairs beautifully with the fresh pasta.
-
Garlic Breadsticks: Crispy on the outside and soft on the inside, these breadsticks complement the salad’s textures while offering a hint of garlic in every bite. Enjoy dipping them into any remaining dressing!
-
Caprese Skewers: These vibrant skewers of mozzarella, fresh basil, and ripe tomatoes are a perfect finger food that echoes the flavors of your Ditalini Pasta Salad in a delightful way. Plus, they add a touch of elegance to your table.
-
Roasted Vegetables: Colorful, caramelized veggies like zucchini, asparagus, and bell peppers not only enhance the meal’s presentation but also provide a satisfying crunch that complements the salad’s freshness.
-
Pesto Bruschetta: Topped with herbaceous pesto and fresh tomatoes, this appetizer brings a burst of flavor that aligns smoothly with the Ditalini Pasta Salad’s creamy goodness. Each toasted bite is a flavor explosion!
-
Sparkling Lemonade: Refreshing and citrusy, this thirst-quenching beverage will cleanse the palate and brighten the entire meal. The fizziness adds an exciting element to your dining experience.
-
Fruit Sorbet: Finish off your meal with a light and refreshing dessert. The fruity sorbet will cleanse your taste buds and provide a sweet contrast to the savory salad. Consider flavors like raspberry or lemon for an extra zing!
Let your imagination soar and mix these ideas with your favorite ingredients to create a delightful dining experience!
Storage Tips for Ditalini Pasta Salad
Fridge: Store your Ditalini Pasta Salad in an airtight container for up to 3 days. This keeps the veggies fresh and flavors intact, but it’s best enjoyed within the first couple of days!
Freezer: While not recommended for freezing due to texture changes, if you must, freeze in a sturdy container for up to 1 month. Thaw in the refrigerator overnight before serving, but expect some changes in texture.
Airtight Packing: Always use an airtight container to store leftovers. This prevents the salad from absorbing other odors in the fridge and keeps it tasting great!
Reheating: Ditalini Pasta Salad is best served cold or at room temperature. If you prefer it warm, gently reheat it in the microwave for a few seconds, but be careful not to overdo it. Enjoy the deliciousness!
Make Ahead Options
These Ditalini Pasta Salad ingredients are perfect for meal prep! You can chop your vegetables and prepare the dressing up to 24 hours in advance; simply store them in airtight containers in the refrigerator to keep them fresh and crisp. As for the pasta, cook it the night before and rinse with cold water to cool it down, preventing sticky clumps. When you’re ready to serve, toss the chilled pasta with the prepped veggies and dressing for a delicious dish that’s just as vibrant and flavorful as when freshly made. This strategy not only saves you time but ensures a fresh, delightful salad for those busy weeknights.
Ditalini Pasta Salad Variations
Feel free to get creative with your Ditalini Pasta Salad—customization is key to making it your own!
-
Protein Boost: Incorporate grilled chicken, shrimp, or chickpeas for a heartier salad. This not only enhances the dish but also adds satisfying protein, turning it into a full meal.
-
Cheese Alternatives: Swap mozzarella pearls for feta cheese for a tangy twist, or try a dairy-free cheese option for a vegan delight. The different textures and flavors create a delightful surprise in every bite.
-
Veggie Swaps: Replace or add ingredients like zucchini, artichoke hearts, roasted red peppers, or sweet corn. Each vegetable brings its own unique flavor profile and texture to the mix!
-
Herb Twists: Experiment with fresh oregano, thyme, or dill for a burst of herbal brightness. Herbs can elevate the taste, providing that garden-fresh essence that’s perfect for summer.
-
Dressing Variations: For a tangy brightness, try using lemon juice instead of vinegar. You can also add a sprinkle of chili flakes for a touch of warmth that’ll truly awaken your taste buds.
If you’ve enjoyed this salad, you’ll love trying out other variations like our colorful Cucumber Pasta Salad or the zesty Cajun Chicken Pasta. Feel free to mix and match until you find your favorite combination. Happy cooking!
Expert Tips for Ditalini Pasta Salad
-
Perfect Pasta Texture: Cook ditalini just until al dente; overcooking can result in mushiness after chilling, sacrificing texture in your Ditalini Pasta Salad.
-
Thorough Rinsing: Rinse the pasta under cold water until completely cool to eliminate stickiness, ensuring that each bite stays light and refreshing.
-
Flavor Meld Time: Allow the salad to chill for at least one hour before serving; this enhances flavor melding and makes each ingredient shine in the Ditalini Pasta Salad.
-
Fresh is Best: Use the freshest vegetables for optimal texture and taste. Wilted produce can dull the salad’s vibrant appeal and flavor.
-
Customizable Dressing: Feel free to tweak the dressing ingredients to your liking; adjust sweetness or acidity to make this Ditalini Pasta Salad truly your own!
Ditalini Pasta Salad Recipe FAQs
What kind of pasta should I use for Ditalini Pasta Salad?
Ditalini pasta is ideal as it provides a delightful structure and bite, but if you can’t find it, feel free to use small pasta shapes like elbow macaroni, orzo, or small shells. All of these options will work well and carry the flavors of the salad beautifully!
How do I store leftovers of my Ditalini Pasta Salad?
Absolutely! Store your Ditalini Pasta Salad in an airtight container in the refrigerator for up to 3 days. This helps maintain the freshness of the veggies and keeps the flavors intact. Be sure to consume it within the first couple of days for the best taste and texture.
Can I freeze Ditalini Pasta Salad?
While freezing isn’t recommended due to potential texture changes, you can freeze it in a sturdy container for up to 1 month if necessary. To thaw, place it in the refrigerator overnight. Keep in mind that the vegetables may lose their crunch, so it’s best enjoyed fresh whenever possible!
What should I do if my pasta salad is too dry?
If your Ditalini Pasta Salad turns out dry, don’t worry! Simply add a splash more of the dressing—olive oil mixed with a bit of red wine vinegar does wonders! Start with a tablespoon or two, gently toss, and adjust until you reach your desired creaminess.
Are there any allergy considerations for Ditalini Pasta Salad?
Yes! This salad is quite versatile, but it’s essential to be mindful of potential allergens. The most common ones in this recipe are dairy (from mozzarella), and gluten (from pasta). To make it gluten-friendly, opt for gluten-free pasta. For a dairy-free version, replace mozzarella with dairy-free cheese or simply omit it altogether. Always tailor it to fit your and your guests’ dietary requirements.
How do I choose the ripeness of my vegetables?
Choosing perfectly ripe vegetables is key to a delicious Ditalini Pasta Salad! Look for cherry tomatoes that are pliable but firm, with vibrant colors. Cucumbers should be fresh with no dark spots or shriveling. Bell peppers should be bright and shiny, free from blemishes. Ideally, the fresher and more colorful the vegetables, the more flavor they’ll bring to your salad!
Delicious Ditalini Pasta Salad: A Fresh & Flavorful Twist
Ingredients
Equipment
Method
- Boil a large pot of salted water over high heat. Add the ditalini pasta and cook according to package instructions until al dente, about 8–10 minutes. Drain and rinse under cold water for 1-2 minutes.
- Dice the cucumber, red and green bell peppers, and red onion into bite-sized pieces. Halve the cherry tomatoes and slice the black olives. Add all prepared vegetables to a mixing bowl.
- In a small bowl, whisk together the olive oil, red wine vinegar, Dijon mustard, honey, and minced garlic. Season with salt and pepper to taste and whisk until smooth.
- Add the cooled ditalini pasta to the mixing bowl with the vegetables. Pour the dressing over the mixture and gently toss to coat.
- Cover the bowl with plastic wrap and refrigerate for at least 1 hour. Stir before serving and adjust seasoning if necessary.
Leave a Reply