
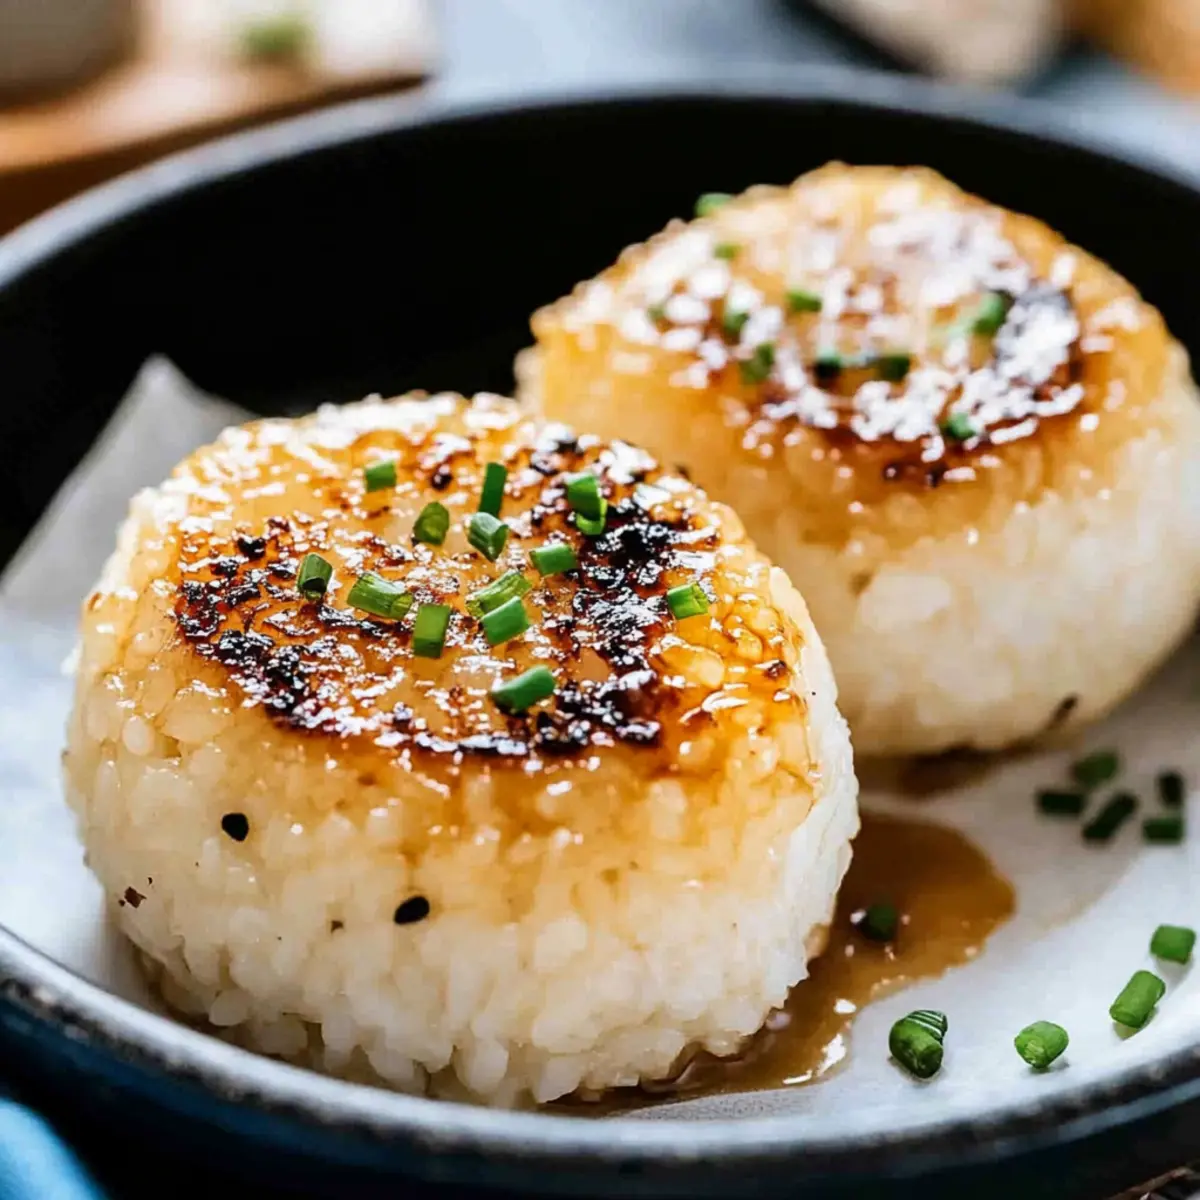
With a satisfying crunch and a warm, fluffy center, Yaki Onigiri—Japanese grilled rice balls—are a delightful treat that transports me right to the heart of a bustling Tokyo street market. These little beauties can be dressed up with either savory miso butter or rich soy sauce, making them a versatile option for any meal. One of the best parts? They’re perfect for quick, hassle-free snacking or as a charming side dish for your family dinners. Whether you’re meal prepping or just in need of a comforting bite, these grilled rice balls are bound to become a household favorite. Have you ever tried making grilled rice balls at home? Let’s dive into this delicious adventure together!
Why Are Grilled Rice Balls So Special?
Unique flavors: With a choice between savory miso butter and rich soy sauce, you can easily satisfy your taste buds.
Versatile snack: Perfect for lunch, dinner sides, or even as party appetizers, grilled rice balls adapt to any dining situation.
Ease of preparation: Just a few simple steps let you create these delightful treats, making them great for both cooking novices and seasoned chefs.
Crowd-pleaser: Their appealing texture and flavors are sure to impress family and friends, turning any meal into a memorable experience. If you love quick and tasty recipes, don’t miss our Ginger Lime Rice for an excellent side dish!
Freezer friendly: Make a batch, freeze them, and grill straight from frozen whenever hunger strikes. Embrace your inner chef with this delicious balance of crispy and fluffy goodness!
Grilled Rice Balls Ingredients
Here’s everything you need to create your very own Yaki Onigiri!
For the Rice
• Short-Grain Rice – Essential for a fluffy texture; opt for Japanese ‘Koshihikari’ if possible.
• Water – The key to cooking the rice perfectly.
For the Miso Butter Mixture
• Miso – Provides that delicious umami flavor; a must for the Miso Butter variant.
• Mirin – Sweet rice wine that enhances the overall taste; if unavailable, substitute with extra sugar and a splash of vinegar.
• Sake – Adds depth to the miso mixture; can be replaced with extra mirin if needed.
• Sugar – Balances flavors beautifully; feel free to use honey or agave syrup if desired.
• Butter – Richness comes from this ingredient; can be swapped for margarine or oil for a dairy-free option.
For Grilling and Garnishing
• Chives – Adds color and a slight onion flavor; consider green onions or sesame seeds as a substitute.
• Vegetable Oil – Prevents sticking during grilling; any neutral cooking oil will work well.
• Soy Sauce – Main flavor source for the Soy Sauce variant.
• Everything Bagel Seasoning – Great for an extra flavor kick on soy sauce Yaki Onigiri; you can use any rice seasoning blend instead.
Get ready to enjoy the delightful world of homemade grilled rice balls!
Step‑by‑Step Instructions for Miso Butter Yaki Onigiri
Step 1: Cook Rice
Rinse 2 cups of short-grain rice under cold water until the water runs clear. In a rice cooker or pot, combine the rinsed rice with 2 ½ cups of water. Cook according to your rice cooker’s instructions or bring to a boil, then reduce heat, cover, and simmer for about 18-20 minutes until the rice is fluffy and the water is absorbed. Once cooked, let it rest for 10 minutes before fluffing with a fork.
Step 2: Prepare Miso Mixture
In a medium mixing bowl, combine 2 tablespoons of miso paste, 1 tablespoon of mirin, and 1 tablespoon of sake. Add 1 tablespoon of sugar and 2 tablespoons of melted butter to the mixture. Whisk until the ingredients are smooth and well incorporated, creating a rich and flavorful miso butter paste. Set the mixture aside to allow the flavors to meld.
Step 3: Shape Rice
Once the rice has cooled slightly but is still warm, divide it into six equal portions. Using a piece of cling wrap, mold each portion into a triangle or oval shape by compressing the rice firmly together to avoid breakage. This step is essential to ensure your grilled rice balls maintain their shape during cooking.
Step 4: Grill Onigiri (Miso)
Heat a cast iron skillet over medium heat and add 2 tablespoons of butter. Once melted and bubbling, add the shaped rice balls to the pan. Grill for about 1 minute on each side, gently brushing with the miso mixture to develop a crispy, golden-brown crust. Keep an eye on the rice balls to prevent burning, flipping them as needed.
Step 5: Grill Onigiri (Soy Sauce)
For the soy sauce variant, heat a skillet over medium heat and add a tablespoon of vegetable oil. Place the shaped rice balls in the skillet and brush each side with soy sauce as they grill for about 2-3 minutes until they achieve a golden, crispy exterior. Turn the rice balls carefully to ensure even cooking, adding more oil if necessary.
Step 6: Finish and Serve
Once grilled to perfection, remove the rice balls from the skillet and place them on a serving platter. Top the warm Yaki Onigiri with additional butter, chopped chives, or a sprinkle of sesame seeds for added flavor and garnish. Serve hot as a delightful snack or side dish, embracing the crispy, fluffy perfection of these grilled rice balls!
Expert Tips for Grilled Rice Balls
Warm Rice: Ensure the rice is warm when shaping; it helps with molding and prevents the rice balls from falling apart.
Compress Firmly: Compress the rice well while shaping to maintain structure during grilling; loose rice may result in disintegration.
Monitor Heat: Keep a close eye when grilling, especially while brushing with miso or soy sauce, as sugars can burn quickly.
Experiment with Fillings: Don’t hesitate to get creative by adding fillings like cheese or using unique garnishes to elevate your grilled rice balls.
Storage Solutions: Shape and wrap any leftover rice balls tightly in plastic wrap; they can be stored in the freezer and grilled straight from frozen.
How to Store and Freeze Grilled Rice Balls
Room Temperature: Enjoy freshly grilled rice balls right away for the best flavor and texture; they should not be left out for more than 2 hours.
Fridge: If you have leftovers, wrap the grilled rice balls tightly in plastic wrap and store them in the refrigerator for up to 3 days to maintain freshness.
Freezer: For longer storage, freeze shaped rice balls wrapped securely in plastic wrap and place them in an airtight container for up to 1 month. Grill them straight from frozen whenever a craving strikes!
Reheating: To reheat, place grilled rice balls in a hot skillet on medium-low heat, flipping occasionally until warmed through and crispy. Enjoy your delicious grilled rice balls any time!
Grilled Rice Balls Variations & Substitutions
Feel free to personalize your grilled rice balls with these enticing twists and alternatives!
- Dairy-Free: Substitute butter with margarine or oil to create a rich and buttery flavor without the dairy. Enjoy the same crispy texture with a gentle dietary adjustment.
- Spicy Option: Add a dollop of sriracha to your miso butter mixture for a delightful kick that perfectly balances the umami flavors. The heat will elevate your snack to a whole new level!
- Cheese Stuffed: Introduce a morsel of cheese in the center of each rice ball before shaping for a gooey surprise. Try using mozzarella for a melty experience that will leave everyone wanting more.
- Crispy Toppings: After grilling, sprinkle on some furikake or use everything bagel seasoning for an extra flavor punch that adds both crunch and zest. It’s a simple yet impactful way to elevate the dish instantly!
- Sweet Twist: For dessert, try incorporating a bit of honey and cinnamon into the rice before shaping. Grill them until golden, then enjoy a sweet treat that beautifully contrasts the traditional savory versions.
- Herb & Garlic: Mix minced garlic and chopped herbs like parsley or scallions into the rice for a fragrant twist that adds depth to every bite. This variation brings a delightful freshness to your grilled rice balls.
- Substitute Rice: If you can’t find short-grain rice, sushi rice works wonderfully as a substitute without compromising texture. It maintains that fluffiness and allows for easy shaping.
- Rice Seasoning Blend: Use any rice seasoning blend you love, like furikake or even a spicy sesame blend, instead of the everything bagel seasoning, giving your rice balls a whole new personality.
As you get creative with your grilled rice balls, don’t forget to explore delicious pairings like Salsa Verde Chicken Rice Skillet or sweet treats like Chocolate Oat Cookies! Enjoy the culinary adventure!
What to Serve with Miso Butter Yaki Onigiri
Create a delicious and satisfying meal by pairing your grilled rice balls with complementary flavors and textures.
-
Miso Soup: This warm and savory staple brings a gentle saltiness that enhances the umami flavors of the rice balls. It’s a comforting match you won’t want to miss.
-
Pickled Vegetables: The tangy crunch of pickles adds brightness, cutting through the richness of the grilled rice balls and offering a refreshing contrast to their warm, fluffy texture.
-
Edamame: Lightly salted and steamed, this protein-packed snack provides a delightful chewiness that complements the crispy exterior of the onigiri.
-
Japanese Slaw: A crunchy cabbage salad dressed in sesame dressing offers a bright, refreshing balance that enhances the savory flavors of the rice balls.
-
Teriyaki Chicken: Sweet and savory, this dish provides a heartier protein option that harmonizes beautifully with the grilled rice balls, making for a satisfying meal.
-
Sake: A chilled glass of sake can elevate your dining experience by enhancing the flavor profiles of your meal while allowing the lightness of the rice balls to shine.
-
Green Tea Ice Cream: For a sweet finish, this creamy dessert infused with earthy matcha flavor provides a delightful contrast to the savory onigiri, wrapping up your meal on a perfect note.
Make Ahead Options
These Miso Butter Yaki Onigiri are perfect for meal prep, saving you time on busy weeknights! You can cook the rice and shape it into triangles up to 24 hours in advance, wrapping each rice ball tightly in plastic wrap to keep it fresh. Additionally, the miso mixture can be prepared and stored in the refrigerator for up to 3 days. When you’re ready to enjoy your grilled rice balls, simply heat a skillet, unwrapped the rice balls, and grill for about 2-3 minutes on each side while brushing with your prepared miso or soy sauce mixture. With these make-ahead steps, you’ll have delicious grilled rice balls that are just as satisfying as if you made them fresh on the spot!
Grilled Rice Balls Recipe FAQs
What type of rice should I use for grilled rice balls?
The best choice for these delightful grilled rice balls is short-grain rice, specifically the Japanese variety known as ‘Koshihikari.’ It ensures a fluffy texture that is crucial for the perfect Yaki Onigiri. If you can’t find Koshihikari, sushi rice is a great substitute that delivers similar results.
How should I store leftover grilled rice balls?
To enjoy your grilled rice balls at their best, wrap any leftovers tightly in plastic wrap and store them in the refrigerator for up to 3 days. For longer storage, they can be safely frozen. Make sure to wrap them well and place them in an airtight container to keep them from drying out.
Can I freeze grilled rice balls?
Absolutely! To freeze your grilled rice balls, shape them as instructed, then wrap each one securely in plastic wrap. Place them in an airtight container or a freezer bag, and they can last for up to 3 months. When you’re ready to enjoy them, grill them straight from frozen—no need to thaw!
What can I do if my grilled rice balls fall apart while grilling?
If your rice balls start to disintegrate during grilling, it usually means they weren’t compressed enough when shaping. Make sure you firmly mold the rice, ensuring it holds its shape well. Also, try to keep the rice warm while shaping, as this helps the grains stick together better.
Are grilled rice balls suitable for people with gluten sensitivities?
Yes! Grilled rice balls can be gluten-free, depending on the ingredients you choose. Be mindful of using gluten-free soy sauce and ensure any toppings, like cheese, are also gluten-free. Always check labels if you’re serving someone with gluten sensitivities.
How do I know when my grilled rice balls are perfectly cooked?
Look for a golden-brown crispy crust on the outside, which typically takes about 2-3 minutes per side over medium heat. Gently press down with a spatula to check that they feel firm. The inside should remain warm and fluffy. Enjoy the delightful contrast of textures!

Delicious Grilled Rice Balls: Crispy, Fluffy Perfection
Ingredients
Equipment
Method
- Rinse 2 cups of short-grain rice under cold water until clear. Combine rinsed rice with 2.5 cups water. Cook according to instructions or bring to boil, reduce heat, cover, and simmer for about 18-20 minutes until fluffy. Let rest for 10 minutes before fluffing.
- In a mixing bowl, combine 2 tablespoons of miso paste, 1 tablespoon of mirin, 1 tablespoon of sake, 1 tablespoon of sugar, and 2 tablespoons of melted butter. Whisk until smooth to create a rich miso butter paste.
- Divide slightly cooled rice into six portions. Using cling wrap, mold each portion into a triangle or oval shape, compressing firmly to maintain shape.
- Heat a skillet over medium heat, add 2 tablespoons butter. When melted, add rice balls and grill for about 1 minute on each side, brushing with miso mixture for a golden-brown crust.
- For the soy sauce variant, heat a skillet, add 1 tablespoon vegetable oil. Brush shaped rice balls with soy sauce while grilling for about 2-3 minutes until golden exterior, turning carefully.
- Remove grilled rice balls from skillet, place on platter, top with additional butter, chopped chives, or sesame seeds. Serve hot as a snack or side dish.
Leave a Reply