
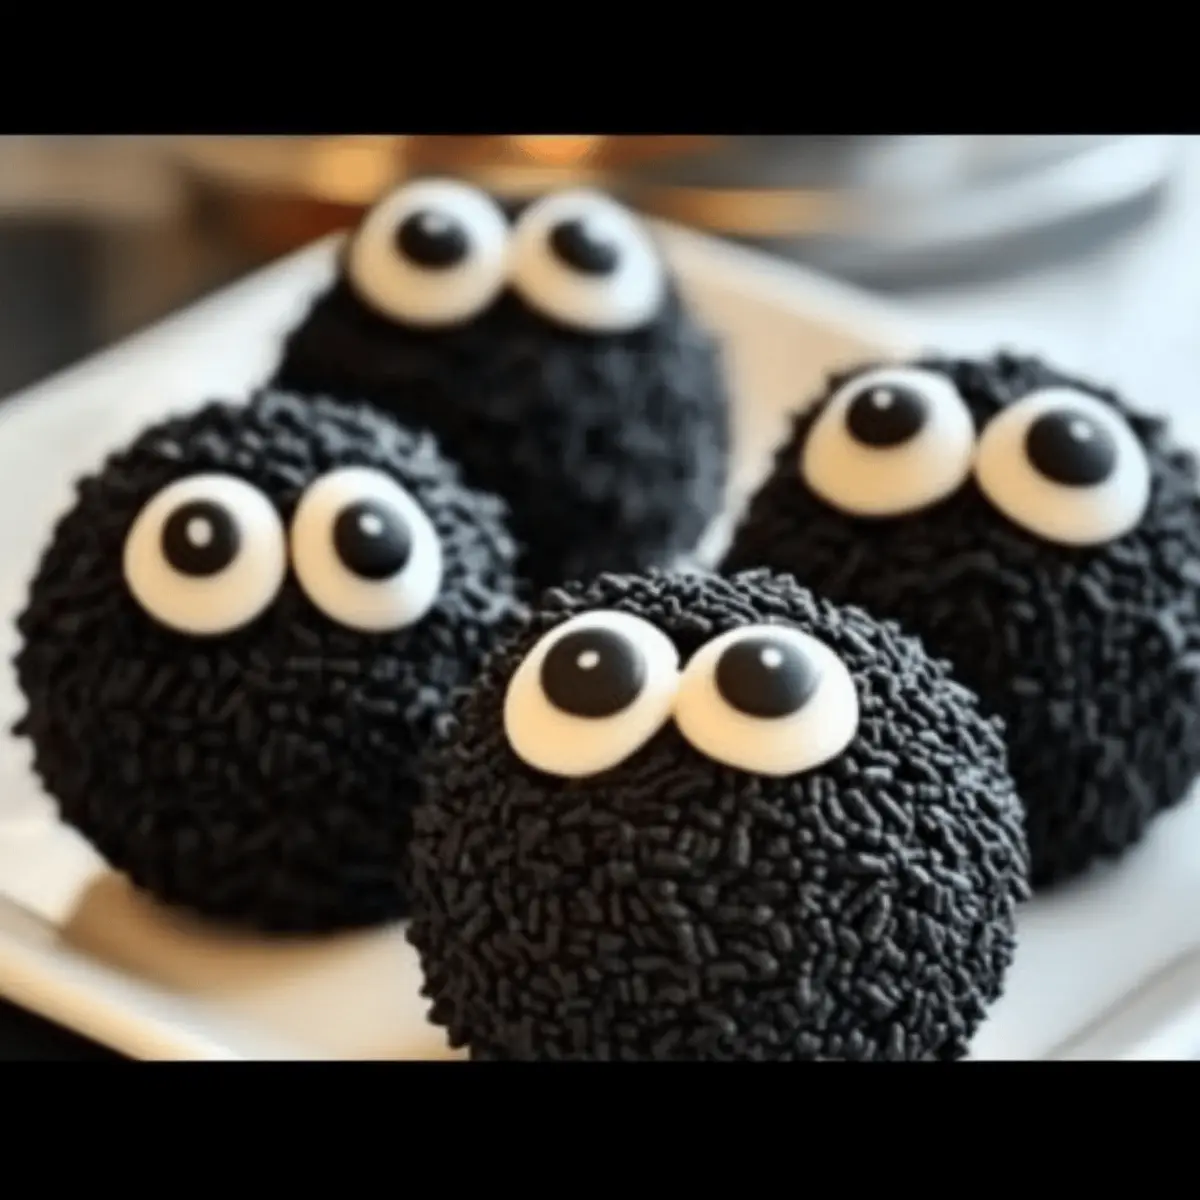
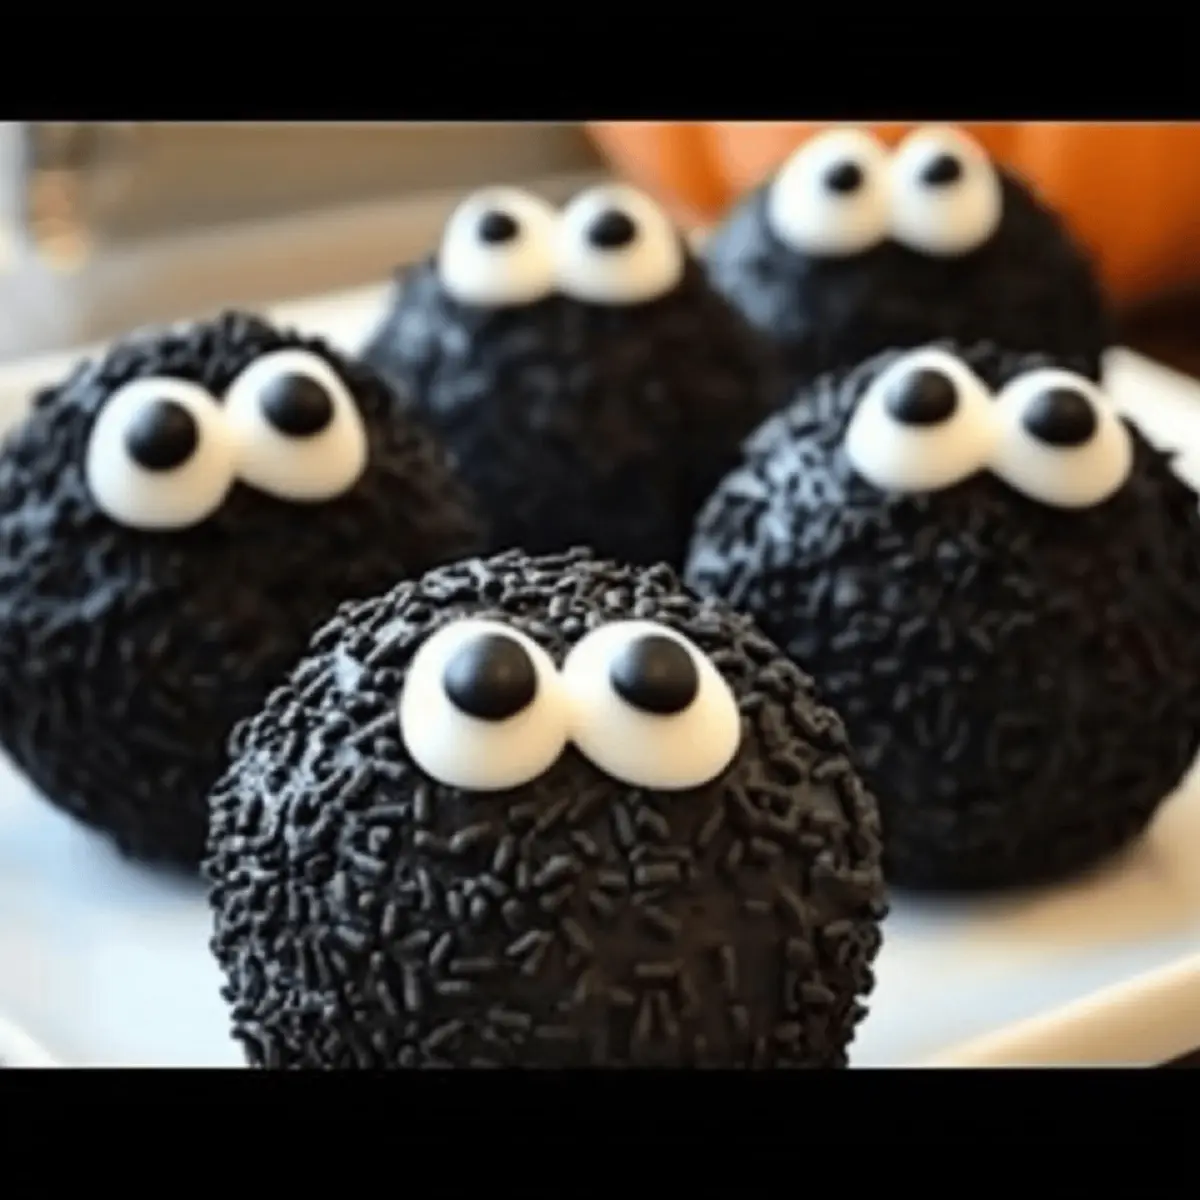
As I rummaged through my pantry in search of festive ingredients, a delightful little thought struck me: Halloween is the perfect excuse for some no-bake treats! That’s when I decided to whip up these Halloween Oreo Balls, an adorable twist on the classic cookie. With just a few ingredients—crushed Oreos, cream cheese, and a coating of melted chocolate—these treats are not only simple to create but also a total crowd-pleaser. Whether decorated as playful ghosts, friendly pumpkins, or mischievous mummies, they add a splash of creativity to any Halloween gathering. Plus, they make for fantastic last-minute party snacks since you can whip them up in no time! Curious about how to bring these delightful treats to life in your kitchen? Let’s get started!

Why Are Halloween Oreo Balls So Irresistible?
Simplicity at its core: Whipping up these no-bake treats takes minimal time and effort, making them perfect for busy bakers or last-minute gatherings. Endless creativity shines through as you can easily customize the decoration—think spooky ghosts or cheerful pumpkins. Decadent flavor comes from the rich, creamy filling and smooth chocolate coating that kids and adults alike will adore. Versatile variations mean you can switch up themes for different occasions, including fun styles for birthdays or holidays. Plus, these treats store well, allowing you to prepare them ahead of time. They’re the ultimate go-to snack for festive fun! Looking for more sweet inspiration? Check out these Chocolate Halloween Oreo and Halloween Chocolate Chip recipes!
Halloween Oreo Balls Ingredients
• Unleash your creativity in the kitchen with these simple ingredients!
For the Balls
- Oreo cookies – The star ingredient that gives these treats their signature sweet crunch; gluten-free versions work too!
- Cream cheese – This creamy binder brings everything together for a luscious filling; opt for full-fat for the best flavor.
For the Coating
- Candy melts or white chocolate chips – Melts beautifully to create a smooth, sweet coating; choose colors like orange for that festive Halloween touch!
- Gel food coloring – Optional but fun, adds vibrant shades to your coating for an extra pop of color.
For Decorating
- Candy eyes, sprinkles, or mini chocolate chips – Perfect for transforming your Oreo balls into spooky ghosts or playful pumpkins; let your imagination run wild!
- Parchment paper – Essential for preventing sticking while the balls chill and set.
These Halloween Oreo Balls are the ideal no-bake Halloween treats, ready to impress at any gathering!
Step‑by‑Step Instructions for Halloween Oreo Balls
Step 1: Crush Oreos
Begin by crushing your Oreo cookies into fine crumbs, using either a food processor or a sealed plastic bag. If using a bag, crush the cookies with a rolling pin until no large chunks remain. This should take about 2-3 minutes. The uniformity of the crumbs is crucial for the smooth texture of the Halloween Oreo Balls.
Step 2: Mix Filling
In a large mixing bowl, combine the crushed Oreos with softened cream cheese. Using a spatula or your hands, blend the ingredients until they form a smooth, cohesive dough. This should take about 2-3 minutes. Aim for a consistent mixture with no visible cream cheese or Oreo lumps, ensuring every bite of your Halloween Oreo Balls is rich and creamy.
Step 3: Roll Balls
Scoop out tablespoon-sized portions of the dough and roll them into 1-inch balls with your hands. Place each ball on a parchment-lined baking sheet, ensuring they are spaced apart to prevent sticking. This rolling process should take around 10 minutes, so stay patient and enjoy the process as your Halloween Oreo Balls start to take shape.
Step 4: Chill
Once all the balls are formed, place the baking sheet in the freezer for at least 20-30 minutes. This chilling step is essential, as it helps the balls firm up so they hold their shape during the coating. You’ll know they are ready when they feel solid to the touch, making the dipping process much easier.
Step 5: Melt Coating
While the Oreo balls chill, melt your candy melts or white chocolate chips in microwave-safe bowls. Heat in 30-second intervals, stirring well in between until completely smooth. This process should take about 1-2 minutes. Keep an eye on the chocolate to avoid overheating—perfectly melted coating will ensure a lovely finish for your Halloween Oreo Balls.
Step 6: Dip and Decorate
Using a fork or toothpick, dip each chilled Oreo ball into the melted coating, ensuring it is fully submerged. Gently tap to remove excess coating, then immediately add your chosen decorations, like candy eyes or sprinkles. This step should be done efficiently, as the coating sets quickly—make sure to get creative with your designs for a festive touch!
Step 7: Set
After all your Halloween Oreo Balls are dipped and decorated, allow them to sit at room temperature until the coating is completely hardened. For quicker results, you can refrigerate them for about 10 minutes. Once set, your Halloween Oreo Balls will be ready to serve, bringing smiles and delight to every Halloween gathering!

Make Ahead Options
These Halloween Oreo Balls are perfect for busy home cooks looking to save time during the festive season! You can easily prepare the Oreo ball mixture up to 24 hours in advance; simply make the balls and refrigerate them in an airtight container. This keeps them fresh and ready for coating later. If you’re short on time, you can also freeze the uncoated balls for up to two months. When you’re ready to serve, just thaw the frozen balls in the refrigerator overnight, dip them in melted chocolate or candy coating, and decorate them immediately for best results. This way, you can enjoy making these delightful treats without any last-minute stress!
Expert Tips for Halloween Oreo Balls
-
Keep It Chilled: After rolling, always chill the balls before dipping. This prevents them from losing shape when coated.
-
Use Quality Coating: Choose high-quality candy melts or chocolate for a smooth finish. Avoid overheating to keep the coating glossy and appealing.
-
Get Creative: Don’t shy away from experimenting with decorations! Use different toppings to match your Halloween theme—let your imagination run wild!
-
Efficient Dipping: Use a fork to dip the balls; it keeps your hands clean and allows for even coverage. Shake off excess coating gently for the best results.
-
Storage Strategy: Store finished Halloween Oreo Balls in an airtight container in the fridge for up to a week. They stay fresh and delicious!
Halloween Oreo Balls Variations & Substitutions
Feel free to get creative and make these Halloween Oreo Balls your own with these delightful twists!
-
Gluten-Free: Use gluten-free Oreo cookies to accommodate dietary restrictions. Everyone deserves a spooky treat!
-
Nut Butter Bliss: Swap cream cheese for your favorite nut butter for a nutty twist. This not only changes the flavor but also adds a delightful creaminess that pairs beautifully with chocolate.
-
Vegan Delight: For a completely vegan option, use dairy-free cream cheese and vegan chocolate. The result will be just as scrumptious without any animal products.
-
Spiced Pumpkin-Flavored: Mix in a teaspoon of pumpkin spice with the Oreo filling. It’s like bringing the essence of fall right into your treat!
-
Caramel Drizzle: After dipping, drizzle melted caramel on top for a rich, gooey flavor addition. It’s perfect for those who love an extra touch of sweetness.
-
Candy Coating: Rather than a chocolate coating, use colorful candy melts to make your treats pop with color. This makes for a festive presentation that will catch everyone’s eye!
-
Hot & Spicy Twist: Add a sprinkle of cayenne pepper to your melted chocolate for a uniquely spicy kick. It’s an adventurous twist that adventurous eaters will love!
-
Peanut Butter Cup Version: Incorporate crushed peanut butter cups into the filling for a delicious chocolate-peanut butter combination. This guarantees a rich, satisfying bite!
If you’re feeling festive, consider whipping up some of these ideas alongside your Halloween Oreo Balls! You could also explore delicious options for seasonal treats like Chocolate Halloween Oreo and Halloween Chocolate Chip cookies to sweeten your celebrations even further!
What to Serve with Halloween Oreo Balls
These delightful treats create a perfect festive atmosphere, inviting you to complete your Halloween gathering with sweet accompaniments.
-
Creamy Vanilla Ice Cream: A scoop of vanilla ice cream provides a smooth, cool contrast to the rich sweetness of the Oreo balls, making each bite heavenly.
-
Pumpkin Spice Latte: With its warm, spicy notes, this cozy drink pairs beautifully with the chocolatey goodness, bringing a seasonal flair to your dessert table.
-
Spooky Fruit Platter: Fresh fruits like orange slices and blackberries offer a refreshing crunch, balancing the sweetness and adding a colorful contrast for your guests.
-
Chocolate-Covered Pretzels: Combining sweet and salty flavors, these crunchy snacks add textural variety to your serving platter, enticing guests to indulge in more treats.
-
Mummy Dogs: Adorable and savory, these crescent-wrapped hotdogs are a fun savory counterpoint that complements the festive theme while keeping hunger at bay.
-
Hocus Pocus Punch: A festive, fruity punch can be a hit among guests of all ages. Its refreshing taste and vibrant colors make it a delightful pairing.
Let your creativity run wild as you mix and match these suggestions, ensuring your Halloween celebration is both spooky and scrumptious!
How to Store and Freeze Halloween Oreo Balls
Fridge: Store your Halloween Oreo Balls in an airtight container in the fridge for up to 1 week to maintain their delicious freshness and creamy texture.
Freezer: For long-term storage, freeze undipped Oreo balls for up to 2 months. Thaw in the fridge before coating and decorating for your next festive occasion.
Prepare Ahead: Feel free to make these treats a day in advance! Keeping them chilled in the fridge allows you to enjoy them during your Halloween gatherings without any last-minute hassle.
Reheating: There’s no need for reheating; simply serve them cold straight from the fridge for the best taste and texture!
Halloween Oreo Balls Recipe FAQs
What type of Oreos should I use?
You can use classic Oreo cookies, which provide the best flavor and texture. If you’re looking for a gluten-free option, simply swap in gluten-free Oreos without sacrificing taste!
How should I store leftover Halloween Oreo Balls?
Store your leftover Halloween Oreo Balls in an airtight container in the fridge for up to 1 week. Keeping them chilled ensures they maintain their creamy texture and won’t dry out, making every bite just as delightful as the first!
Can I freeze Halloween Oreo Balls?
Absolutely! For long-term storage, freeze the undipped Oreo balls for up to 2 months. To do this, simply form the balls and place them on a baking sheet lined with parchment paper. Freeze them until firm, then transfer to a freezer-safe bag or container. When you’re ready to use them, just thaw in the fridge before dipping and decorating.
What if my icing is too thick or too runny?
If your melted chocolate or candy melts are too thick, microwave them for an additional 10–15 seconds and stir until it reaches a smooth consistency. Conversely, if it’s too runny, let it sit for a minute to thicken up, or add a bit more melted chocolate to reach the desired texture for dipping.
Are Halloween Oreo Balls safe for kids with allergies?
When making Halloween Oreo Balls, keep in mind any allergies. The recipe contains dairy (cream cheese) and may use candy with allergens like nuts or gluten. Always check labels and consider alternative ingredients to suit dietary needs – there are plenty of tasty options available!
Halloween Oreo Balls: Easy No-Bake Treats Everyone Will Love
Ingredients
Equipment
Method
- Crush the Oreo cookies into fine crumbs using a food processor or a sealed plastic bag.
- In a large mixing bowl, combine the crushed Oreos with softened cream cheese and blend until smooth.
- Scoop out tablespoon-sized portions of the dough and roll them into 1-inch balls, placing them on a parchment-lined baking sheet.
- Place the baking sheet in the freezer for at least 20-30 minutes to firm up the balls.
- Melt the candy melts or white chocolate chips in microwave-safe bowls in 30-second intervals until smooth.
- Dip each chilled Oreo ball into the melted coating, tap to remove excess, and add decorations immediately.
- Allow the dipped and decorated Oreo balls to sit at room temperature until the coating hardens.
Leave a Reply