
As I strolled through a sun-drenched pumpkin patch recently, I was reminded of how deeply comforting those fall flavors are. This Halloween Pumpkin Tarts recipe brings that warm nostalgia to life, transforming simple ingredients into delightful little experiences. Perfect for anyone seeking a quick and easy Halloween treat, these tarts are not only a breeze to whip up but also celebrate the spirit of the season with adorable ghost decorations on top. Imagine serving these whimsical desserts at your next gathering, with everyone delighting in their scrumptious spiced filling and flaky crust. They pack a festive punch that’s bound to become a cherished favorite. So, are you ready to impress your friends and family with these cute treats? Let’s dive into the fun of baking!
Why Are These Tarts So Irresistible?
Convenient and Quick: With just a few simple ingredients and store-bought pie sheets, you can whip up these delightful Halloween Pumpkin Tarts in no time!
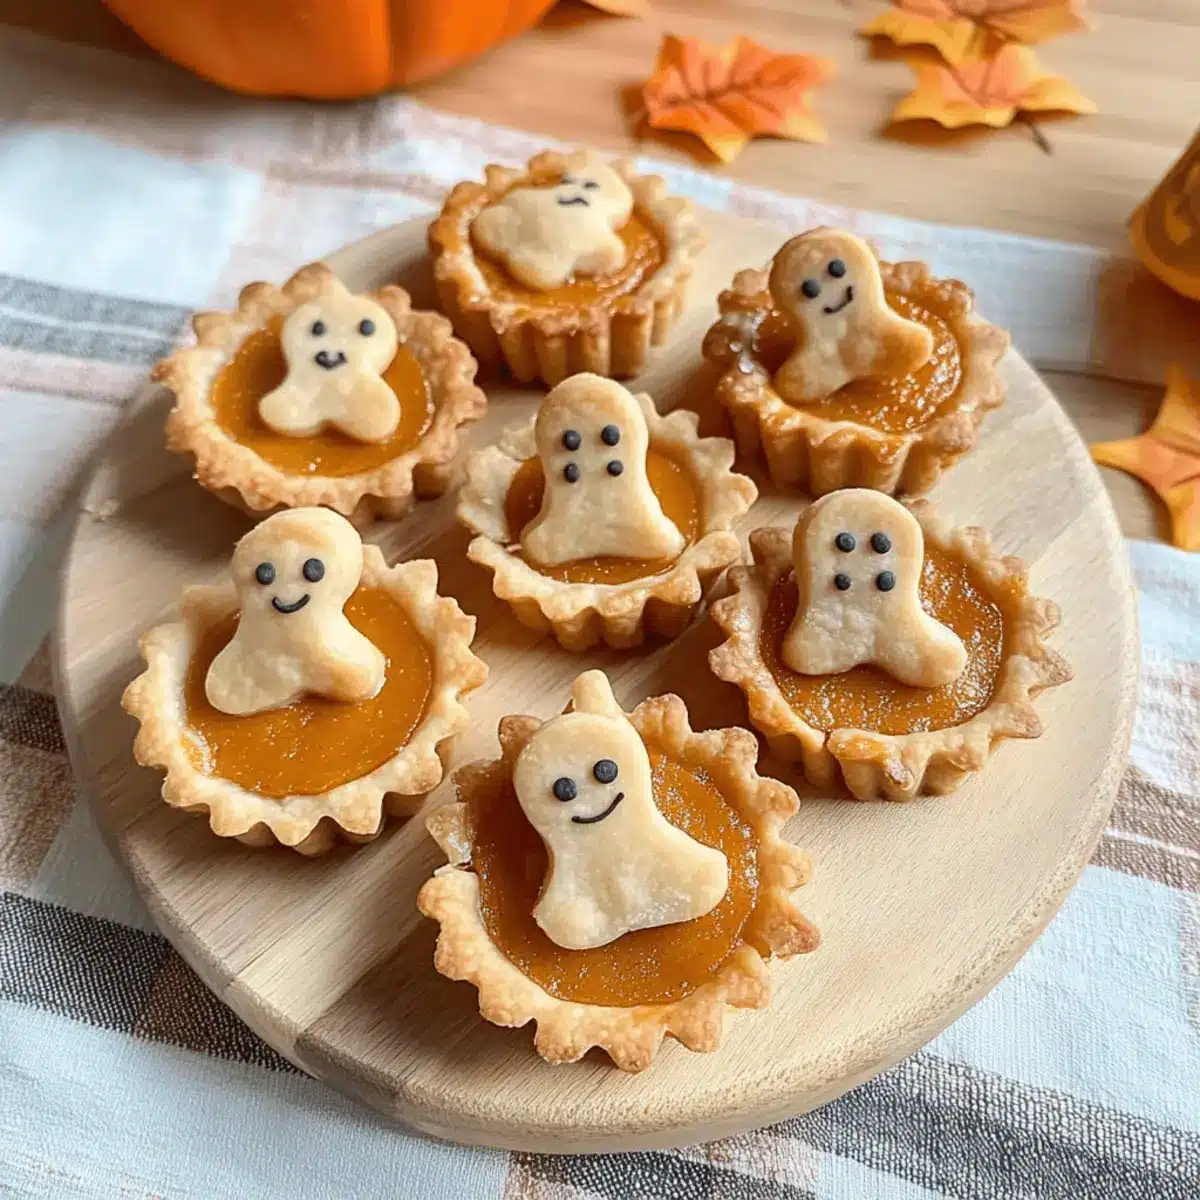
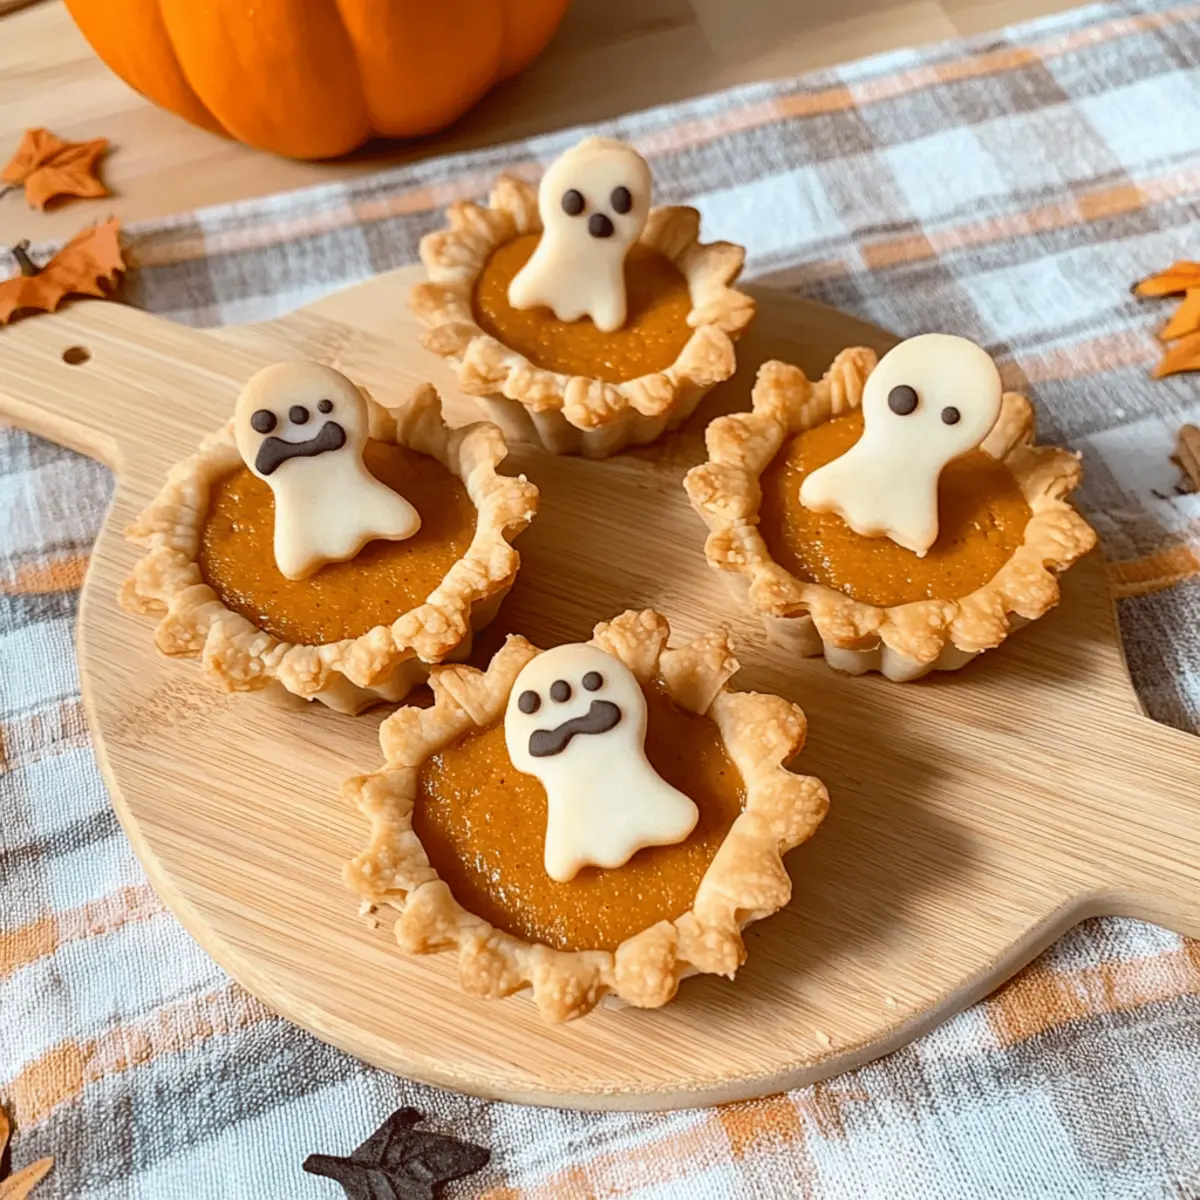
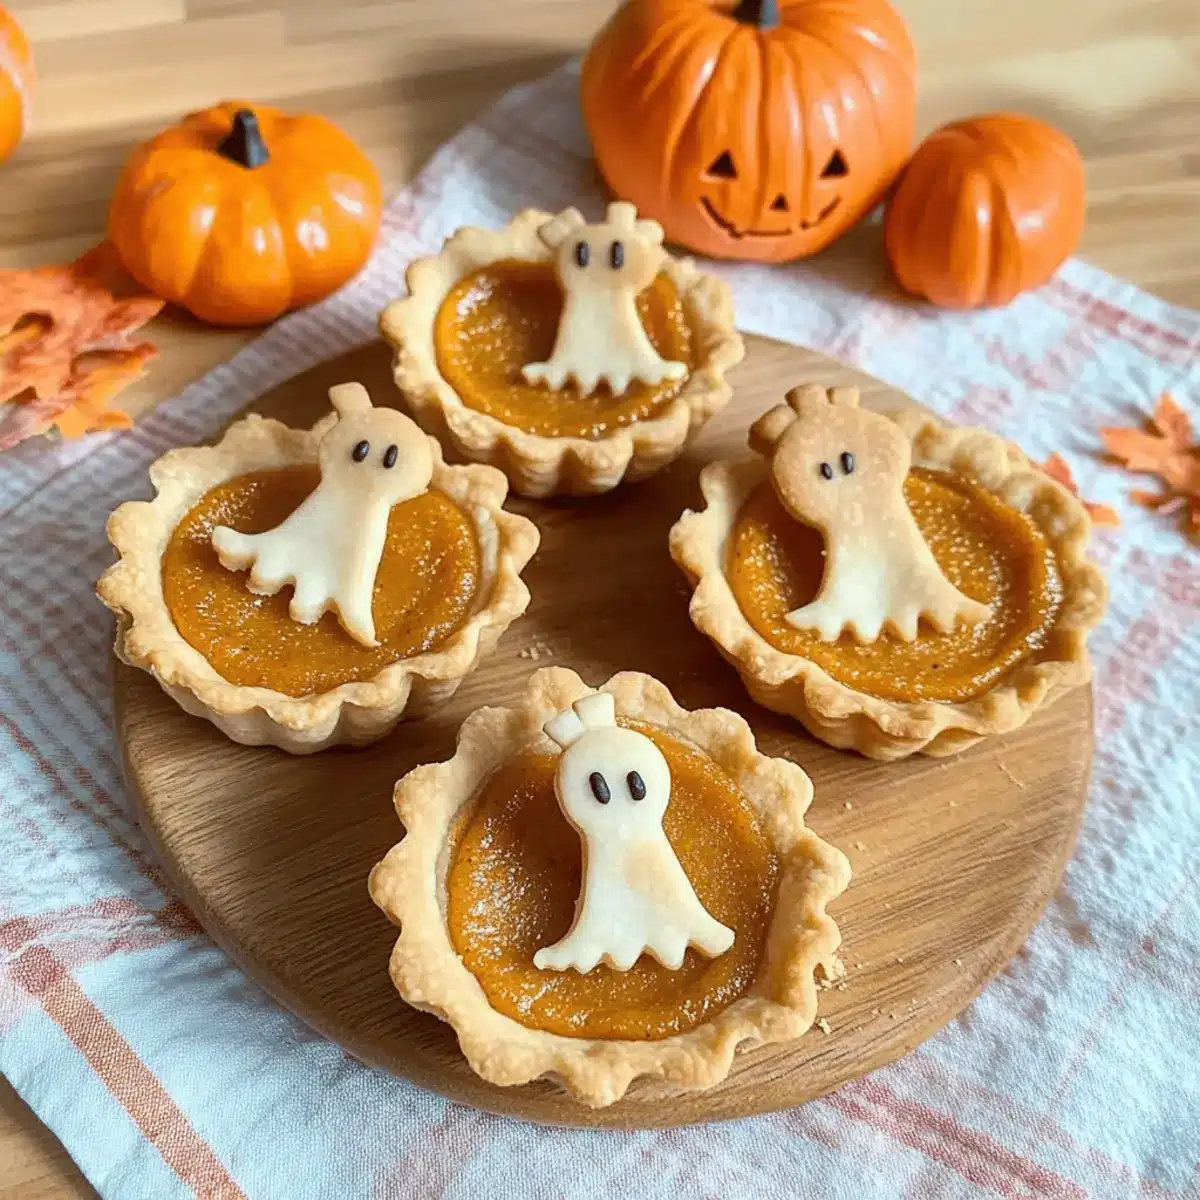
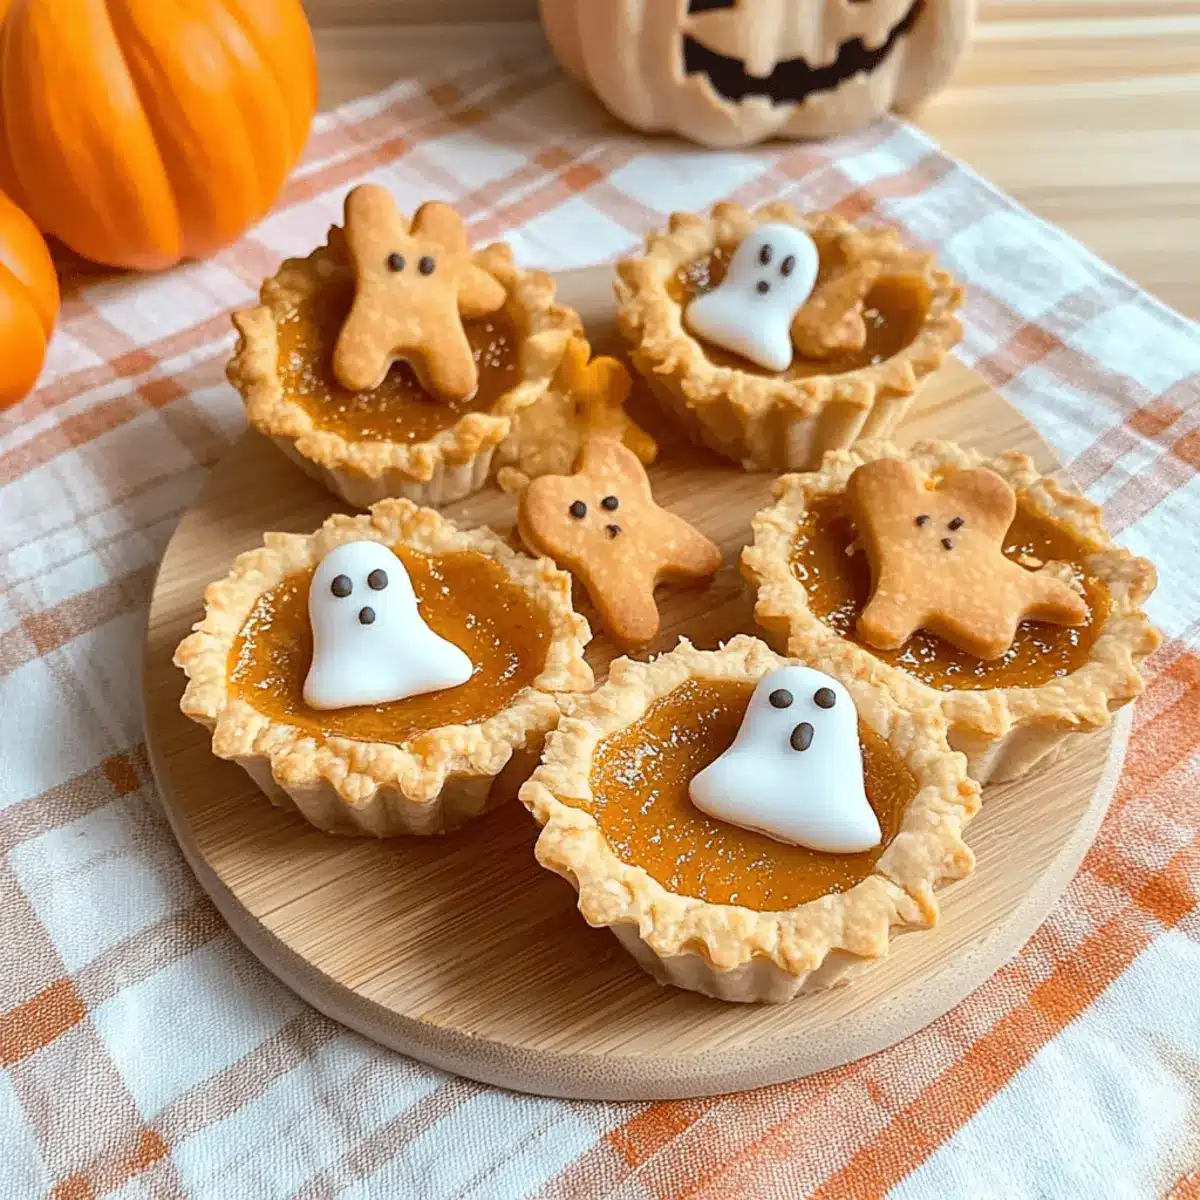
Festive Flair: Adorned with cute ghost decorations, these treats are a showstopper at any fall gathering, bringing joy to both kids and adults alike.
Rich, Creamy Filling: Bursting with the warm flavors of pumpkin puree and fall spices, each bite is a cozy hug of flavor that will have everyone asking for seconds.
Versatile Treat: Whether served warm or cold, these tarts shine in any setting, perfectly paired with a dollop of whipped cream or a scoop of vanilla ice cream.
Make-Ahead Option: You can prepare the filling and crust a day in advance, ensuring a seamless baking experience when your guests arrive. This gives you more time to enjoy the festivities!
So, if you’re looking for a crowd-pleaser this Halloween, these tarts are destined to become your go-to favorite!
Halloween Pumpkin Tarts Ingredients
-
For the Crust
• Pie Sheets – Essential for quick prep; store-bought saves you time.
• Unsalted Butter – Used for the butter wash on decorations; margarine can be a fine substitute. -
For the Filling
• Pumpkin Puree – The star of the show! Choose 100% pure pumpkin for the best flavor.
• Sweetened Condensed Milk – Adds creaminess and sweetness; evaporated milk works too if you adjust sugar.
• Egg – Binds everything together; you can omit it for a vegan option, but textures may vary.
• Pumpkin Pie Spice – Gives that classic fall flavor; you can mix your own with cinnamon, nutmeg, and ginger.
• Cinnamon – Elevates the flavor; adjust to suit your taste preferences.
• Salt – Balances out sweetness; feel free to leave it out for a low-sodium alternative.
• Sugar – Perfect for sprinkling on decorations; adjust based on desired sweetness. -
For the Decorations
• Leftover Crust – Repurpose extra dough into fun shapes like ghosts and leaves for a festive touch.
• Cinnamon Sugar – A delightful topping; mix sugar with cinnamon for extra charm on your decorations!
With these ingredients, you’re all set to create adorable Halloween Pumpkin Tarts that not only taste amazing but look hauntingly cute too!
Step‑by‑Step Instructions for Easy Halloween Pumpkin Tarts
Step 1: Prepare Crust
Preheat your oven to 425°F (220°C). Take the store-bought pie sheets and allow them to thaw slightly. Roll out the pie crust on a floured surface and cut into circles that fit your muffin tin holes. Carefully press each circle into the muffin tin, making sure they sit snugly in place, ready for their delicious filling.
Step 2: Mix Filling
In a large mixing bowl, combine the creamy pumpkin puree, sweetened condensed milk, and egg. Add in the pumpkin pie spice, cinnamon, and salt, then whisk until the mixture is smooth and well blended. This fragrant filling will be the heart of your Halloween Pumpkin Tarts, so mix until there are no lumps for a lovely texture.
Step 3: Fill Tarts
Spoon the prepared filling into each tart crust, filling them to the rim to ensure a generous serving. This ensures that each Halloween Pumpkin Tart is packed with flavor. Be careful not to overfill, as the filling will puff slightly while baking. With the tarts filled, it’s time to move on to baking!
Step 4: Bake
Place the muffin tin in the preheated oven and bake at 425°F (220°C) for 15 minutes. Then, reduce the oven temperature to 350°F (175°C) and continue baking for an additional 15 minutes. Check for doneness by inserting a toothpick into the center; it should emerge clean to signify perfectly baked tarts.
Step 5: Prepare Decorations
While the tarts are baking, use any leftover pie crust to create fun ghost and leaf shapes with cookie cutters. Brush each shape lightly with melted unsalted butter, then sprinkle a blend of cinnamon and sugar on top for extra sweetness. Pop these decorations into the oven at 450°F (232°C) for 6-8 minutes, or until they’re golden brown and delightful.
Step 6: Assemble
Once the tarts have cooled for a few minutes, carefully place the spooky ghost decorations on top of each pumpkin tart. This festive touch will not only enhance the visual appeal but also add extra flavor. These completed Halloween Pumpkin Tarts are now ready to be the star of your gathering, charming both kids and adults alike!
Expert Tips for Halloween Pumpkin Tarts
• Chill Dough: Keeping your pie dough chilled during prep helps maintain its shape when cutting decorations, leading to a perfect presentation.
• Watch Baking Times: Tarts vary in baking time depending on their size; individual tarts cook faster than larger ones. Confirm doneness with a toothpick test!
• Smooth Filling: To avoid lumps in your Halloween Pumpkin Tarts filling, mix thoroughly until completely smooth before filling the crusts.
• Substitution Savvy: If you’re out of certain ingredients, don’t worry! Evaporated milk can replace sweetened condensed milk, adjusting the sugar to taste.
• Creative Decorations: Use cookie cutters to craft themed shapes from leftover crust—these add a fun touch while ensuring every bite is delightful!
Storage Tips for Halloween Pumpkin Tarts
Room Temperature: Store leftover tarts at room temperature for up to 2 hours to keep their delightful texture, but avoid leaving them out longer to maintain freshness.
Fridge: Place the tarts in an airtight container in the refrigerator for up to 3 days, keeping the creamy filling from spoiling and maintaining their delightful flavor.
Freezer: For longer storage, wrap each tart tightly with plastic wrap and then aluminum foil, placing them in the freezer for up to 1 month. Thaw in the fridge before serving.
Reheating: To enjoy your Halloween Pumpkin Tarts warm, reheat them in a 350°F oven for about 10-15 minutes until warmed through, ensuring that each bite is just as tasty as the first!
What to Serve with Easy Halloween Pumpkin Tarts
These charming little tarts are not just a treat on their own; they can be complemented perfectly with a few delightful additions.
-
Whipped Cream: A dollop of lightly sweetened whipped cream adds a fluffy contrast to the creamy filling, enhancing every bite.
-
Vanilla Ice Cream: The creamy, vanilla flavor pairs wonderfully, providing a cool and rich complement to the spiced pumpkin.
-
Cinnamon Sugar Coated Apples: Crisp, tart apples dusted with cinnamon sugar bring a refreshing crunch that balances the tarts’ softness, making them a delightful pairing.
-
Spiced Apple Cider: This warm, fragrant drink echoes the fall flavors of the tarts, transforming your gathering into a cozy, autumnal experience.
-
Chai Tea: The aromatic spices in chai tea harmonize beautifully with the pumpkin tarts’ flavors, offering a warm and soothing beverage option.
-
Ginger Snap Cookies: Their crunchy texture and zesty flavor provide a fun contrast to the soft, creamy tarts, creating a playful dessert table.
-
Pumpkin Spice Latte: Celebrate the season by serving this classic drink alongside; its warm spices resonate with the flavors of your tarts, elevating the overall feast.
Halloween Pumpkin Tarts Variations & Substitutions
Feel free to get creative with these delightful pumpkin tarts and customize them to suit your taste and dietary needs!
-
Healthier Option: Swap sugar for a natural sweetener like maple syrup or honey; just adjust the liquid slightly.
-
Nutty Flavor: Mix in finely chopped nuts, like pecans or walnuts, for a delightful crunch that complements the creamy filling.
-
Vegan Version: Use plant-based butter, non-dairy milk, and a flax egg instead of a regular egg for a delicious vegan tart without compromising taste.
-
Gluten-Free: Substitute regular pie sheets with a gluten-free option; they can still deliver that flaky goodness everyone loves.
-
Chocolate Twist: Add mini chocolate chips to the filling for a rich, sweet surprise that contrasts beautifully with the pumpkin flavor.
-
Spicy Kick: Include a dash of cayenne pepper or a splash of hot sauce to the filling for those who enjoy a little heat in their desserts.
-
Fruit Infusion: Stir in some mashed banana or applesauce into the filling for an extra layer of moistness and natural sweetness.
-
Alternative Toppings: Instead of ghost decorations, try toasting coconut flakes or creating spooky chocolate drizzle designs for a fun twist.
These variations not only enhance your Halloween Pumpkin Tarts but also open up a world of flavors! If you want some more pumpkin inspiration, check out these Soft Pumpkin Cookies or maybe whip up some Chewy Pumpkin Snickerdoodle cookies for your fall festivities!
Make Ahead Options
These Halloween Pumpkin Tarts are fantastic for meal prep, making your festive baking easier during the busy holiday season! You can prepare the crust and filling up to 24 hours in advance. For the crust, simply prepare it as directed and store each tart shell in an airtight container in the refrigerator. For the filling, mix the pumpkin puree, sweetened condensed milk, egg, and spices, then refrigerate in a sealed bowl. When you’re ready to serve, fill the crusts with the chilled filling and bake as instructed. This way, you’ll enjoy fresh, delicious tarts without the last-minute rush, perfect for entertaining or simply indulging during the festivities!
Halloween Pumpkin Tarts Recipe FAQs
How do I know if my pumpkin puree is ripe enough?
Absolutely! When selecting pumpkin puree, always choose 100% pure pumpkin without added content. Look for a deep, rich color and a smooth texture—this indicates the puree is good quality and ripe for baking.
What is the best way to store Halloween pumpkin tarts?
Very good question! After your delicious pumpkin tarts have cooled, store them in an airtight container in the refrigerator for up to 3 days. This will keep the filling fresh and flavorful. If you want to keep them longer, consider freezing; they can be stored for up to 1 month wrapped tightly in plastic wrap and aluminum foil.
Can I freeze Halloween pumpkin tarts?
Of course! To freeze your pumpkin tarts, make sure they are completely cooled first. Wrap each tart individually in plastic wrap, then in aluminum foil. Store them in the freezer for up to 1 month. When you’re ready to enjoy them, simply thaw them in the fridge overnight and reheat in a preheated oven at 350°F for about 10-15 minutes.
What if my tarts overflow during baking?
No worries! If this happens, it usually indicates that the filling was overfilled. Next time, fill the tarts to just below the rim. But if it does overflow, carefully wipe up any spills with a damp cloth while the tarts are still warm to keep your muffin tin clean.
Are these tarts safe for pets?
Absolutely! It’s best to avoid giving your pets any part of these pumpkin tarts. Ingredients like sweetened condensed milk and spices, especially nutmeg, can be harmful to dogs and cats. If you’re looking for a pet-safe treat, consider plain, cooked pumpkin or pumpkin puree without additives instead.
Spooky Halloween Pumpkin Tarts That Will Wow Your Guests
Ingredients
Equipment
Method
- Preheat your oven to 425°F (220°C). Take the store-bought pie sheets and allow them to thaw slightly. Roll out the pie crust on a floured surface and cut into circles that fit your muffin tin holes. Carefully press each circle into the muffin tin, making sure they sit snugly in place, ready for their delicious filling.
- In a large mixing bowl, combine the creamy pumpkin puree, sweetened condensed milk, and egg. Add in the pumpkin pie spice, cinnamon, and salt, then whisk until the mixture is smooth and well blended.
- Spoon the prepared filling into each tart crust, filling them to the rim to ensure a generous serving. Be careful not to overfill, as the filling will puff slightly while baking.
- Place the muffin tin in the preheated oven and bake at 425°F (220°C) for 15 minutes. Then, reduce the oven temperature to 350°F (175°C) and continue baking for an additional 15 minutes.
- While the tarts are baking, use any leftover pie crust to create fun ghost and leaf shapes with cookie cutters. Brush each shape lightly with melted unsalted butter, then sprinkle a blend of cinnamon and sugar on top.
- Once the tarts have cooled for a few minutes, carefully place the spooky ghost decorations on top of each pumpkin tart. These completed Halloween Pumpkin Tarts are now ready to be the star of your gathering.
Leave a Reply