
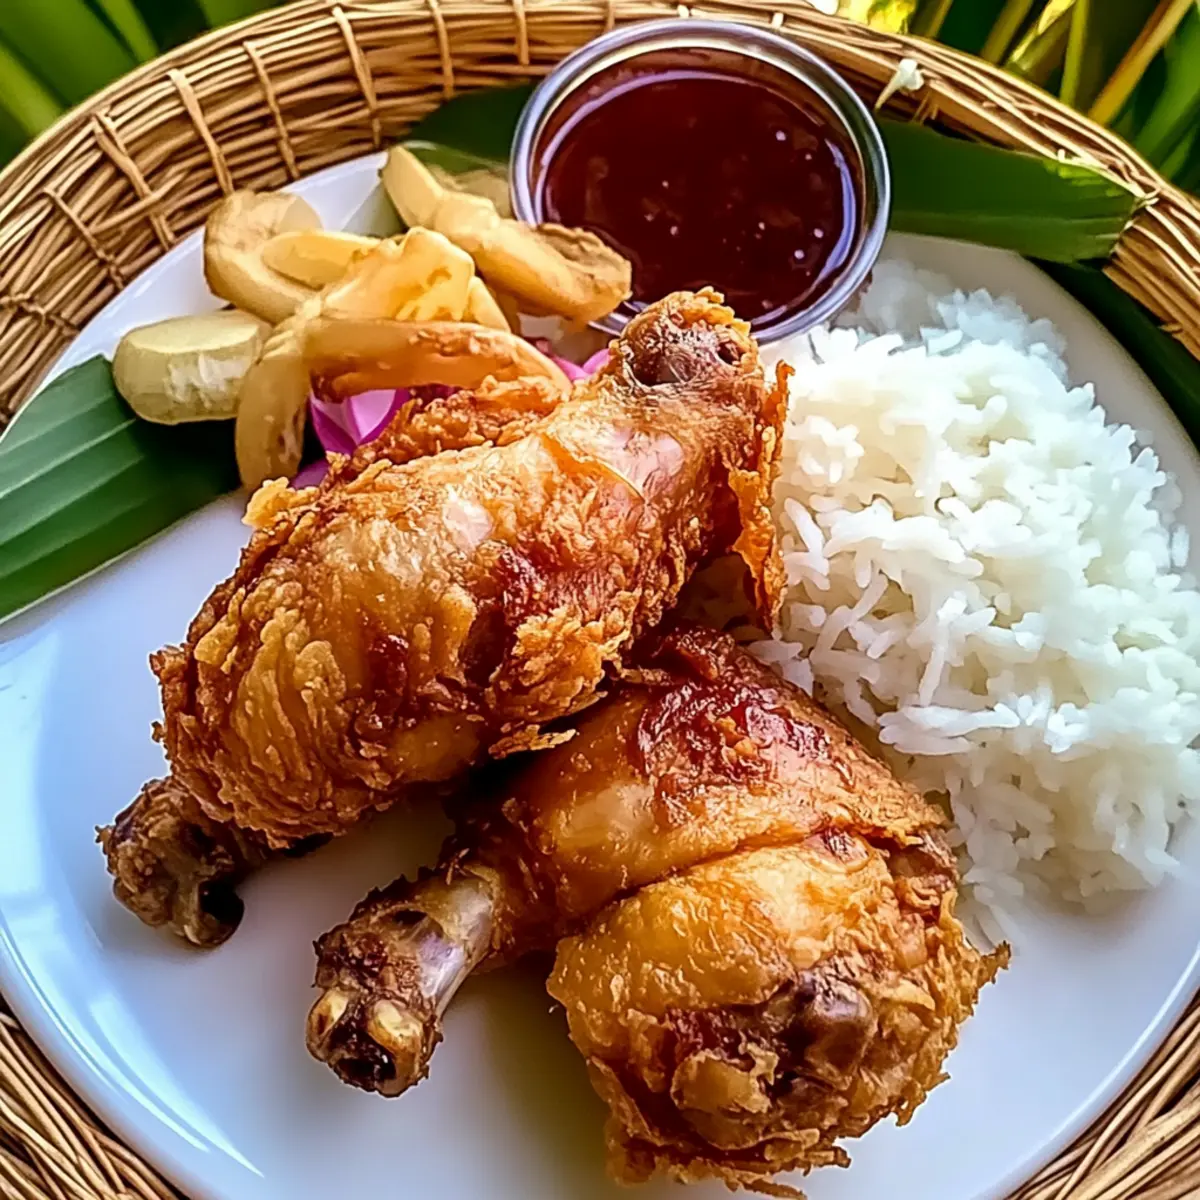
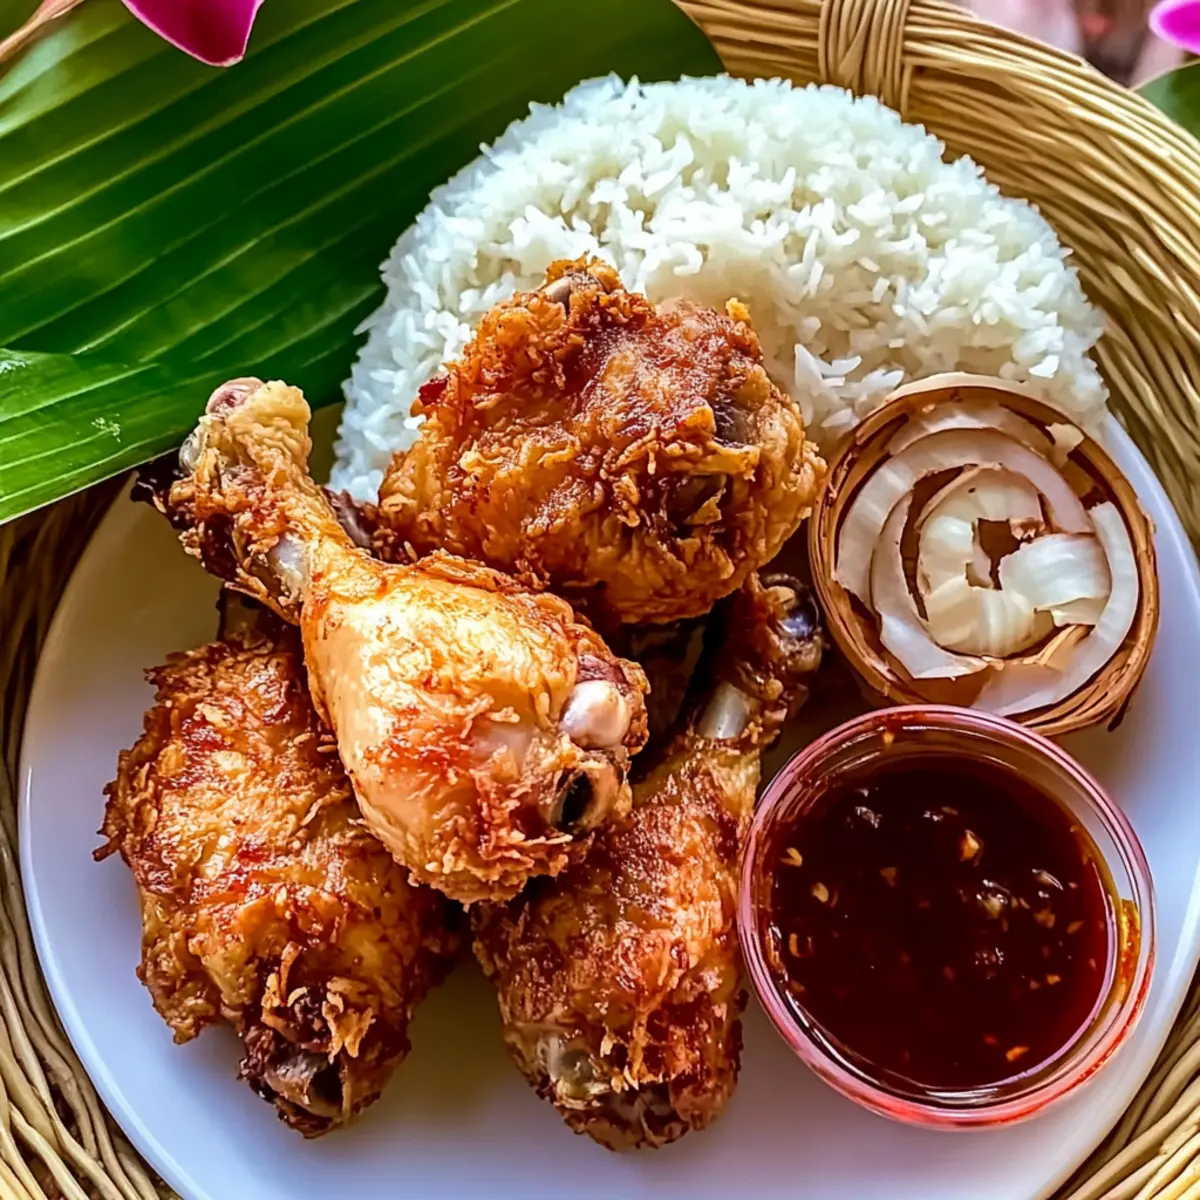
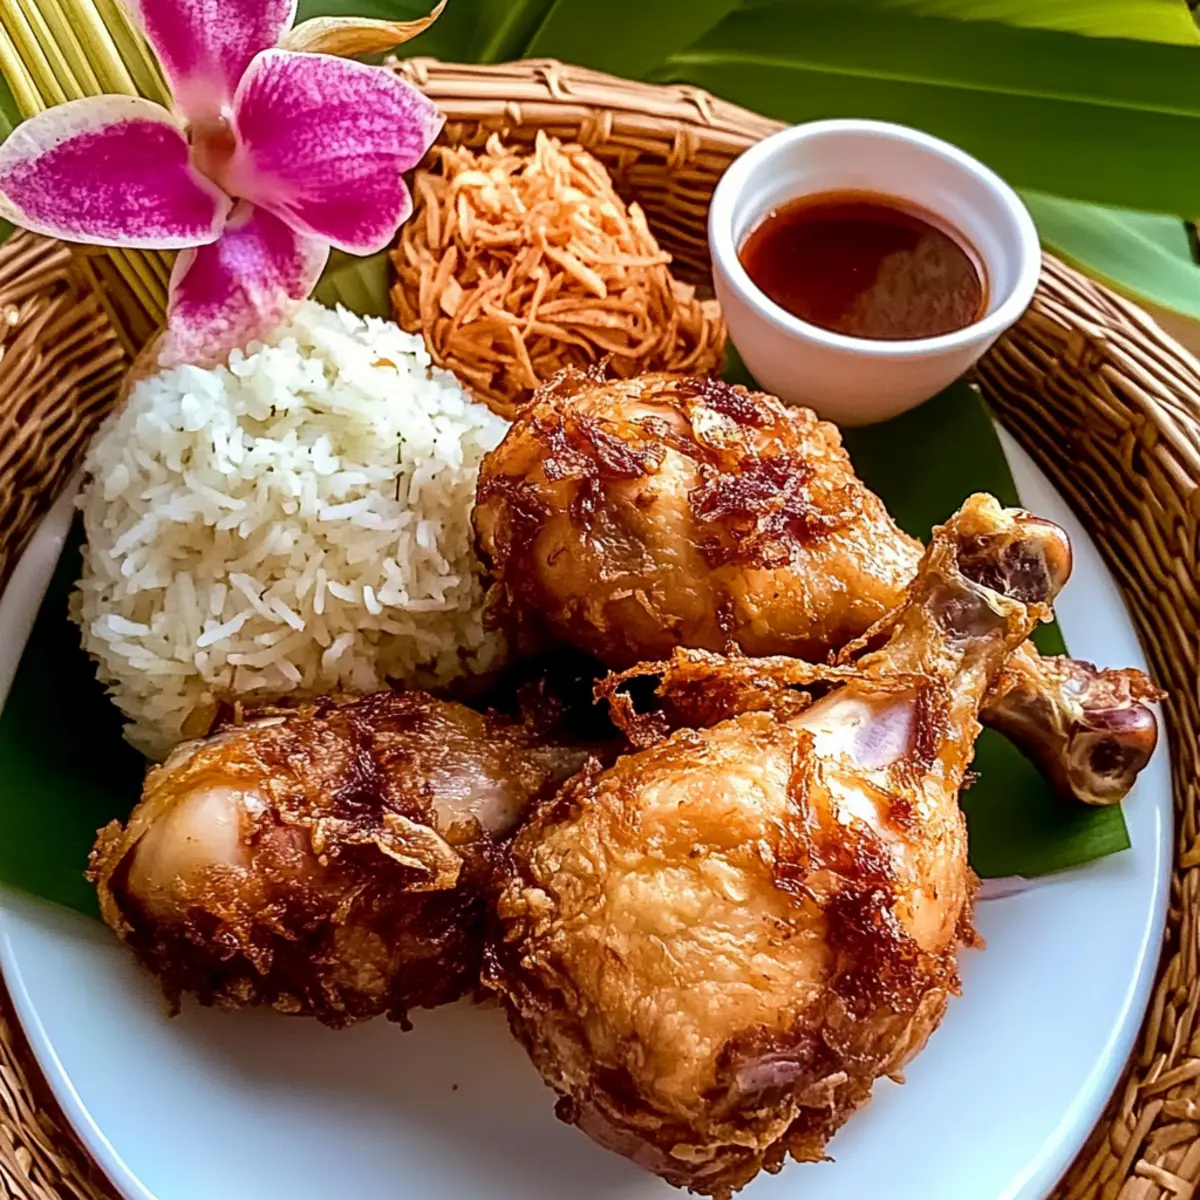
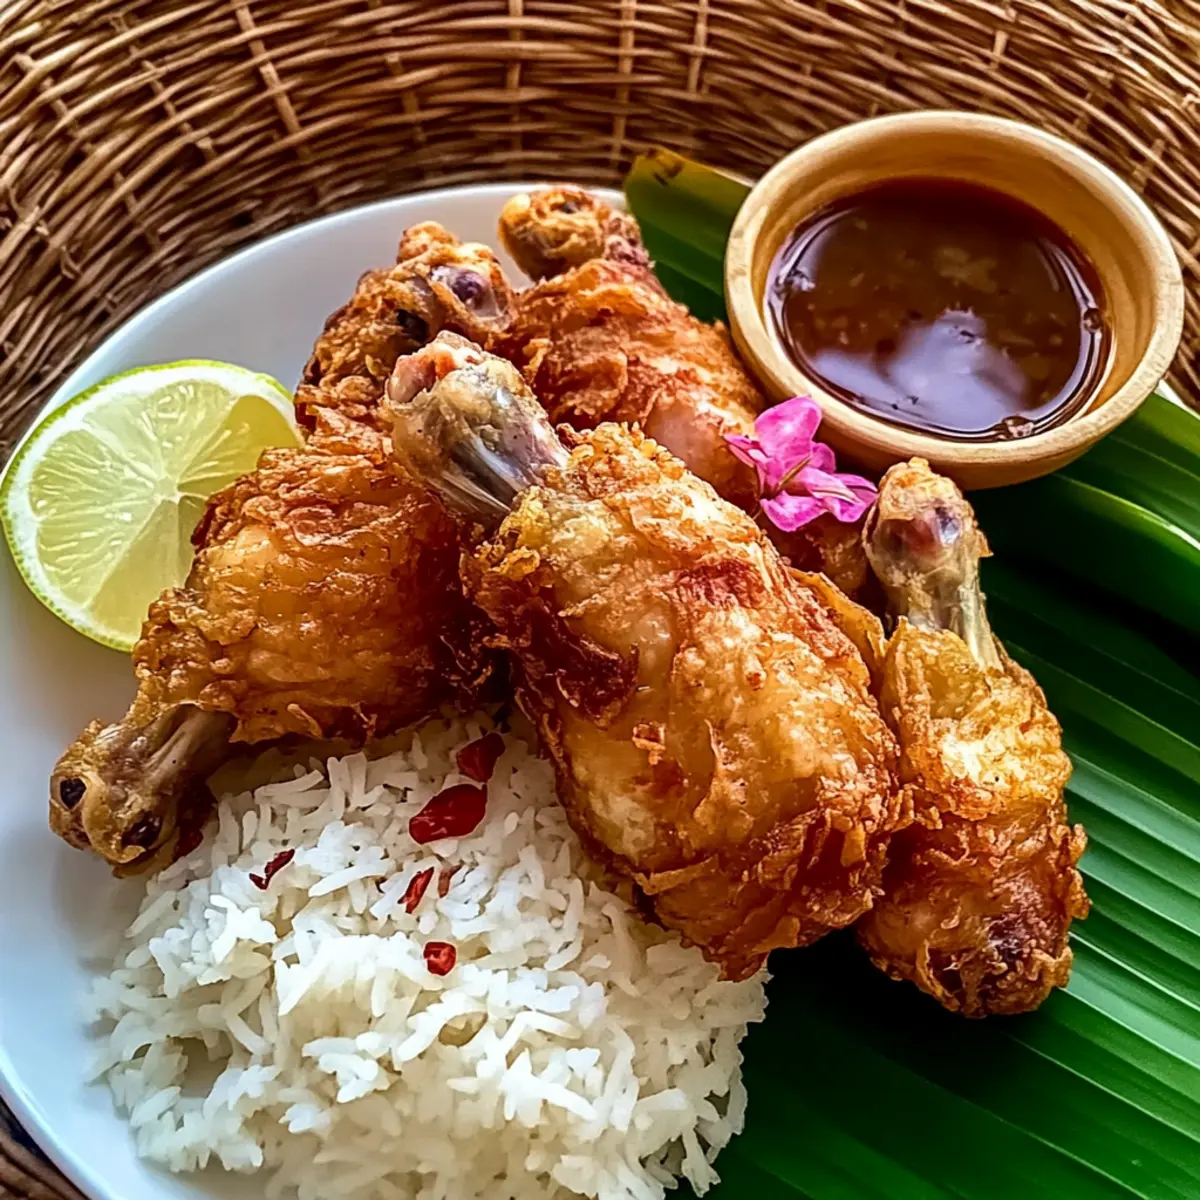
The sizzling sound of chicken hitting hot oil transports me straight to the bustling streets of Southern Thailand, where vendors serve mouthwatering delights to eager food lovers. This Hat Yai Fried Chicken recipe is an homage to those vibrant flavors, offering a perfect blend of spices and that irresistible crispy coating we all crave. Not only is this dish a sensational take on Thai cuisine, but it’s also incredibly approachable for home cooks, making it a fantastic option for your next gathering or casual dinner. With quick prep and the ability to easily adjust the spice levels, you’ll have everyone asking for seconds. Ready to bring a taste of Thailand to your kitchen? Let’s dive into this crispy deliciousness together!
Why Is Hat Yai Fried Chicken Unforgettable?
Crispy Texture: The light, airy crust is the true star of this dish, providing a delightful crunch to every bite, unlike any fried chicken you’ve tried before.
Flavor Explosion: The unique marinade blends traditional Thai spices and seasonings for a rich, savory experience that transports you straight to Southern Thailand.
Easy to Make: You’ll appreciate that this simple recipe requires minimal prep and cooking skills, allowing home cooks of all levels to shine.
Crowd-Pleaser: Perfect for gatherings, serve these crispy delights alongside Garlic Parmesan Chicken or with sticky rice for an unforgettable feast!
Versatile Variations: Customize the heat and flavors by experimenting with different herbs or marinades, ensuring each spoonful is just how you like it!
Hat Yai Fried Chicken Ingredients
For the Marinade
- Thai shallots – These provide sweetness and crunch; use yellow onions in a pinch.
- Cumin seeds – Adds warm, earthy flavors; ground cumin can be a substitute.
- Coriander seeds – Imparts a citrusy, floral note; coriander powder works too.
- Black peppercorns – Provides heat and depth; pre-ground black pepper is an alternative.
- Coriander root – Essential for authentic flavor; if unavailable, use stems or leaves sparingly.
- Garlic – Adds savory depth; fresh garlic is highly recommended for the best taste.
- Palm sugar – Balances flavor with sweetness; light brown sugar can be a substitute.
- Fish sauce – Adds umami richness; soy sauce is a vegetarian alternative.
- Salt – Enhances all flavors.
For the Chicken
- Chicken (3 lbs, preferably drumsticks) – The base of the dish, offering juicy meat; thighs or wings can also be used.
- Tempura flour (6 tablespoons) – Creates a crisp exterior; for gluten-free, use gluten-free flour alternatives.
- Ice-cold water (1 cup) – Helps achieve a tender marinade and crispy texture.
For Frying
- Oil – Necessary for deep-frying and should be a high smoke point oil like peanut or canola oil.
This Hat Yai Fried Chicken recipe is the perfect way to bring Southern Thai flavors into your kitchen. The combination of crispy, flavorful chicken with homemade dipping sauces will delight your family and friends!
Step‑by‑Step Instructions for Hat Yai Fried Chicken Recipe
Step 1: Prepare Shallots
Thinly slice the Thai shallots and sprinkle with a pinch of salt. Allow them to sit for about 10 minutes to extract moisture. Heat oil in a frying pan over medium heat and fry the shallots until they are golden brown and crispy, about 3–5 minutes. Remove them from the pan and drain on paper towels to absorb excess oil.
Step 2: Spice Toasting
In a dry skillet over medium heat, toast 1 tablespoon each of cumin seeds, coriander seeds, and black peppercorns. Keep them moving for about 2–3 minutes until aromatic. Once toasted, transfer to a mortar and pestle and grind with 3 cloves of garlic and 1–2 coriander roots until you achieve a fine paste, releasing all the bold flavors for your Hat Yai Fried Chicken.
Step 3: Make Marinade
In a large bowl, combine the ground spice mixture with 2 tablespoons of palm sugar, 3 tablespoons of fish sauce, and 1 teaspoon of salt. Next, add 6 tablespoons of tempura flour and gradually pour in 1 cup of ice-cold water. Whisk until smooth and well-combined, creating a rich marinade to coat the chicken thoroughly.
Step 4: Marinate Chicken
Make two cuts around the bones of the chicken drumsticks to help the flavors penetrate better. Take your chicken and coat it generously with the marinade, ensuring every piece is covered. Place the marinated chicken in the refrigerator and let it sit for at least 4 hours, or preferably overnight, to allow the Thai flavors to develop beautifully.
Step 5: Deep-Fry Chicken
Heat oil in a deep pot or wok to 350°F to 375°F, maintaining a steady temperature for even cooking. Carefully lower the marinated chicken into the oil in batches, frying for about 8–10 minutes until golden brown and cooked through. Use a slotted spoon to transfer the chicken to a wire rack or paper towels to drain excess oil, ensuring a perfectly crispy Hat Yai Fried Chicken.
Expert Tips for Hat Yai Fried Chicken
-
Avoid Overcrowding: Frying too many pieces at once can lower the oil temperature, resulting in soggy chicken. Fry in batches for that perfect crispy coating.
-
Marinate Longer: For the most flavorful Hat Yai Fried Chicken, marinate the chicken overnight. This allows the spices to penetrate deeply and enhance the overall taste.
-
Test Oil Temperature: Use a kitchen thermometer to ensure your oil is between 350°F to 375°F before frying. If the oil is too cold, the chicken will absorb more grease and become less crispy.
-
Crisp Residue Care: After frying, make sure you transfer the chicken to a wire rack instead of a plate. This helps keep the chicken crispy by preventing steam buildup.
-
Customize Spice Levels: If you prefer a bit of heat, add fresh chilies to the marinade or serve with a spicy dipping sauce to elevate your Hat Yai Fried Chicken experience!
Hat Yai Fried Chicken Variations
Feel free to explore and personalize this delightful recipe to your liking—there’s no limit to the delicious possibilities!
- Different Chicken Cuts: Opt for thighs or wings instead of drumsticks for juicy alternatives; each part brings its unique tenderness and flavor.
- Sweetness Swap: Replace palm sugar with honey or agave for a different sweetness profile; both will add a lovely caramelized touch when fried.
- Spice It Up: Add sliced fresh chilies into the marinade for a spicy kick; you can make it as hot as your taste buds can handle!
- Herb Variation: Add Thai basil or mint to the marinade for an aromatic lift; each herb enhances the dish’s freshness and complexity.
- Crispy Coating Upgrade: Mix panko breadcrumbs with the tempura flour for an extra-crunchy texture; the delightful crunch will make it even more irresistible.
- Unique Marinade Flavors: Experiment with coconut milk in the marinade for a creamy texture and slight sweetness; it adds a lovely depth to the finished chicken.
- Gluten-Free Option: This recipe can easily be made gluten-free by using gluten-free flour alternatives; just ensure the tempura flour is suitable.
- Serve it Thai-style: Pair your Hat Yai Fried Chicken with sticky rice and a side of Poblano Chicken Tortilla for an authentic meal that celebrates Thai and Southern flavors wonderfully.
Enjoy creating a version of Hat Yai Fried Chicken that reflects your unique tastes and brings everyone to the table!
Make Ahead Options
These Hat Yai Fried Chicken pieces are perfect for meal prep enthusiasts! You can marinate the chicken up to 24 hours in advance, allowing the flavors to deeply penetrate the meat, making it just as delicious as when made fresh. Simply coat the chicken thoroughly with the marinade and refrigerate it until you’re ready to cook. For an even smoother process, you can prep the spice mixture (toasting and grinding) up to 3 days ahead and store it in an airtight container. When it’s time to serve, just heat the oil and fry the marinated chicken until golden brown and crispy for a delectable dish with minimal effort on busy weeknights!
What to Serve with Hat Yai Fried Chicken
A sumptuous spread that pairs beautifully with crispy chicken will make your meal unforgettable.
-
Thai Sticky Rice: The sweet, chewy texture of sticky rice balances the crispy chicken and soaks up the flavors of any dipping sauces. It’s the perfect companion for this delightful dish!
-
Sweet Chili Sauce: This tangy sauce adds a delightful kick and an irresistible sweetness that complements the savory flavors of Hat Yai Fried Chicken, enhancing each crunchy bite.
-
Fresh Vegetable Salad: A light salad of cucumbers, carrots, and herbs refreshes the palate and adds a beautiful crunch, making it a perfect contrast to the rich chicken.
-
Coconut Rice: Creamy coconut rice offers a unique flavor profile that pairs wonderfully with the spices in the chicken, bringing a touch of tropical bliss to your plate.
-
Cold Thai Iced Tea: This sweet, creamy drink cools the palate and complements the spices wonderfully, creating a harmonious blend with the fried chicken’s flavors.
-
Mango Sticky Rice: For dessert, the combination of sweet mango and creamy coconut-laden sticky rice rounds off the meal perfectly, leaving everyone with a satisfied smile.
How to Store and Freeze Hat Yai Fried Chicken
Room Temperature: Store fried chicken uncovered in a cool, dry place for up to 2 hours to maintain its crispiness.
Fridge: Place leftover Hat Yai Fried Chicken in an airtight container, and it can be refrigerated for up to 3 days. To maintain its texture, avoid stacking pieces.
Freezer: Freeze the cooled, cooked chicken in a freezer-safe bag for up to 3 months. For best results, separate pieces with parchment paper to prevent sticking.
Reheating: To reheat, place the chicken in an oven preheated to 375°F for about 10-15 minutes until heated through and crispy again.
Hat Yai Fried Chicken Recipe FAQs
What type of chicken is best for Hat Yai Fried Chicken?
I recommend using chicken drumsticks for the best flavor and juiciness, as they hold moisture well during frying. However, thighs and wings are also great options. Just avoid chicken breasts; they tend to dry out in this recipe.
How long can I store leftover Hat Yai Fried Chicken?
Leftover fried chicken can be refrigerated in an airtight container for up to 3 days. To maintain the crispiness, avoid stacking the pieces and try to consume within the first day for the best texture.
Can I freeze Hat Yai Fried Chicken?
Absolutely! After cooling, you can freeze the cooked chicken in a single layer on a baking sheet, then transfer to a freezer-safe bag within 2 hours of frying. It can be stored for up to 3 months. I recommend separating the pieces with parchment paper to prevent them from sticking together.
Why is my fried chicken not crispy?
If your fried chicken isn’t getting crispy, it might be due to oil temperature being too low. Make sure your oil is heated between 350°F to 375°F before frying. Another tip: avoid overcrowding the pan, as this can drop the temperature and result in soggy chicken.
What should I do if I have food allergies?
For those with allergies, ensure that the fish sauce is either omitted or substituted with a gluten-free soy sauce if you have gluten sensitivities. Additionally, you can use coconut sugar in place of palm sugar if you have specific dietary restrictions. Always double-check your other ingredients for any potential allergens.
How do I achieve the perfect texture?
To get that coveted crispy crust, make sure to marinate the chicken overnight. Also, when frying, maintain the oil temperature and avoid adding too many pieces at once. Once your fried chicken is done, place it on a wire rack instead of paper towels; this will help keep the moisture away, ensuring that crispy finish you desire!
Irresistibly Crispy Hat Yai Fried Chicken Recipe You’ll Love
Ingredients
Equipment
Method
- Thinly slice the Thai shallots and sprinkle with a pinch of salt. Allow them to sit for about 10 minutes to extract moisture. Heat oil in a frying pan over medium heat and fry the shallots until golden brown and crispy, about 3–5 minutes. Remove and drain on paper towels.
- In a dry skillet over medium heat, toast cumin seeds, coriander seeds, and black peppercorns for about 2–3 minutes until aromatic. Transfer to mortar and pestle and grind with garlic and coriander roots until fine paste.
- In a large bowl, combine ground spice mixture with palm sugar, fish sauce, and salt. Add tempura flour and gradually pour in ice-cold water. Whisk until smooth.
- Make two cuts around the bones of the chicken drumsticks. Coat chicken with the marinade and refrigerate for at least 4 hours, preferably overnight.
- Heat oil in a deep pot or wok to 350°F to 375°F. Fry marinated chicken in batches for about 8–10 minutes until golden brown. Transfer to a wire rack or paper towels to drain excess oil.
Leave a Reply