
As the spooky season approaches, I find myself reminiscing about the countless Halloween parties filled with laughter, costumes, and, of course, delicious treats. One of my all-time favorites are these delightful Meringue Ghost Cookies, which not only capture the essence of Halloween but are an absolute thrill to make. They are fun, easy to whip up, and promise that magical melt-in-your-mouth experience everyone loves. Plus, their adorable ghostly shapes ensure they’ll be a hit with kids, making them a perfect treat for your festive gatherings. Whether you’re an experienced baker or just starting out, these cookies are sure to spark joy in your kitchen. Ready to summon some sweet spirits? Let’s dive in!
Why are Meringue Ghost Cookies so special?
Super Fun Shapes: These ghostly meringue cookies aren’t just treats; they’re creative Halloween decorations that kids will love helping to make. Easy to Master: Even if you’re new to baking, this recipe is simple enough to ensure your success. Melt-in-Your-Mouth Delight: The airy texture makes for a unique snacking experience, reminiscent of cotton candy. Versatile Treat: Want a change? Shape them into nests for Easter or add lemon zest for a delightful twist. Pair these cookies with festive snacks like Pumpkin Sugar Cookies for a spooky spread. Crowd-Pleaser: Perfect for parties, they’re sure to enchant both children and adults!
Meringue Ghost Cookies Ingredients
• Here’s what you need to create these delightful treats!
For the Meringue
- Egg Whites – Essential for creating that light, airy structure needed for perfect meringue ghost cookies. Fresh ones yield the best results.
- Granulated Sugar – Provides sweetness and stability; add it gradually to ensure a great texture without collapsing.
- Vanilla Extract – Enhances flavor; can be switched out for almond extract if you’re looking for a different taste twist.
- Vinegar or Lemon Juice – Stabilizes the meringue and is crucial for achieving the desired texture; cream of tartar can serve as a substitute if needed.
For Decoration
- Edible Black Marker – Perfect for adding spooky eyes and mouths on your ghost cookies, bringing them to life for Halloween fun!
Step‑by‑Step Instructions for Meringue Ghost Cookies
Step 1: Beat the Egg Whites
In a stand mixer or using a hand mixer, beat 3 large egg whites at medium speed until they become foamy, about 1-2 minutes. Gradually increase the speed to high and whip until stiff peaks form, which should take another 3-5 minutes. You want a glossy and firm texture; the egg whites should hold their shape without collapsing when you lift the whisk out.
Step 2: Add the Sugar
Once you have stiff peaks, slowly add 1 cup of granulated sugar, about 2 tablespoons at a time, while continuing to beat on high. This step is crucial for the stability of your Meringue Ghost Cookies, so ensure the sugar is fully dissolved before adding more. The mixture should become glossy and smooth, and when rubbed between your fingers, you should feel no graininess.
Step 3: Incorporate Flavoring and Stabilizer
Next, gently fold in 1 teaspoon of vanilla extract and 1 teaspoon of vinegar or lemon juice with a spatula. This mixture adds delightful flavor while also stabilizing the meringue. Be careful to maintain the airiness of the meringue—fold until just combined, ensuring the mixture remains fluffy and light.
Step 4: Preheat the Oven
Preheat your oven to 95°C (200°F). This low temperature is key for drying out the cookies without browning them. Make sure to thoroughly preheat your oven, as an even temperature is essential for achieving perfectly crunchy Meringue Ghost Cookies.
Step 5: Pipe the Ghost Shapes
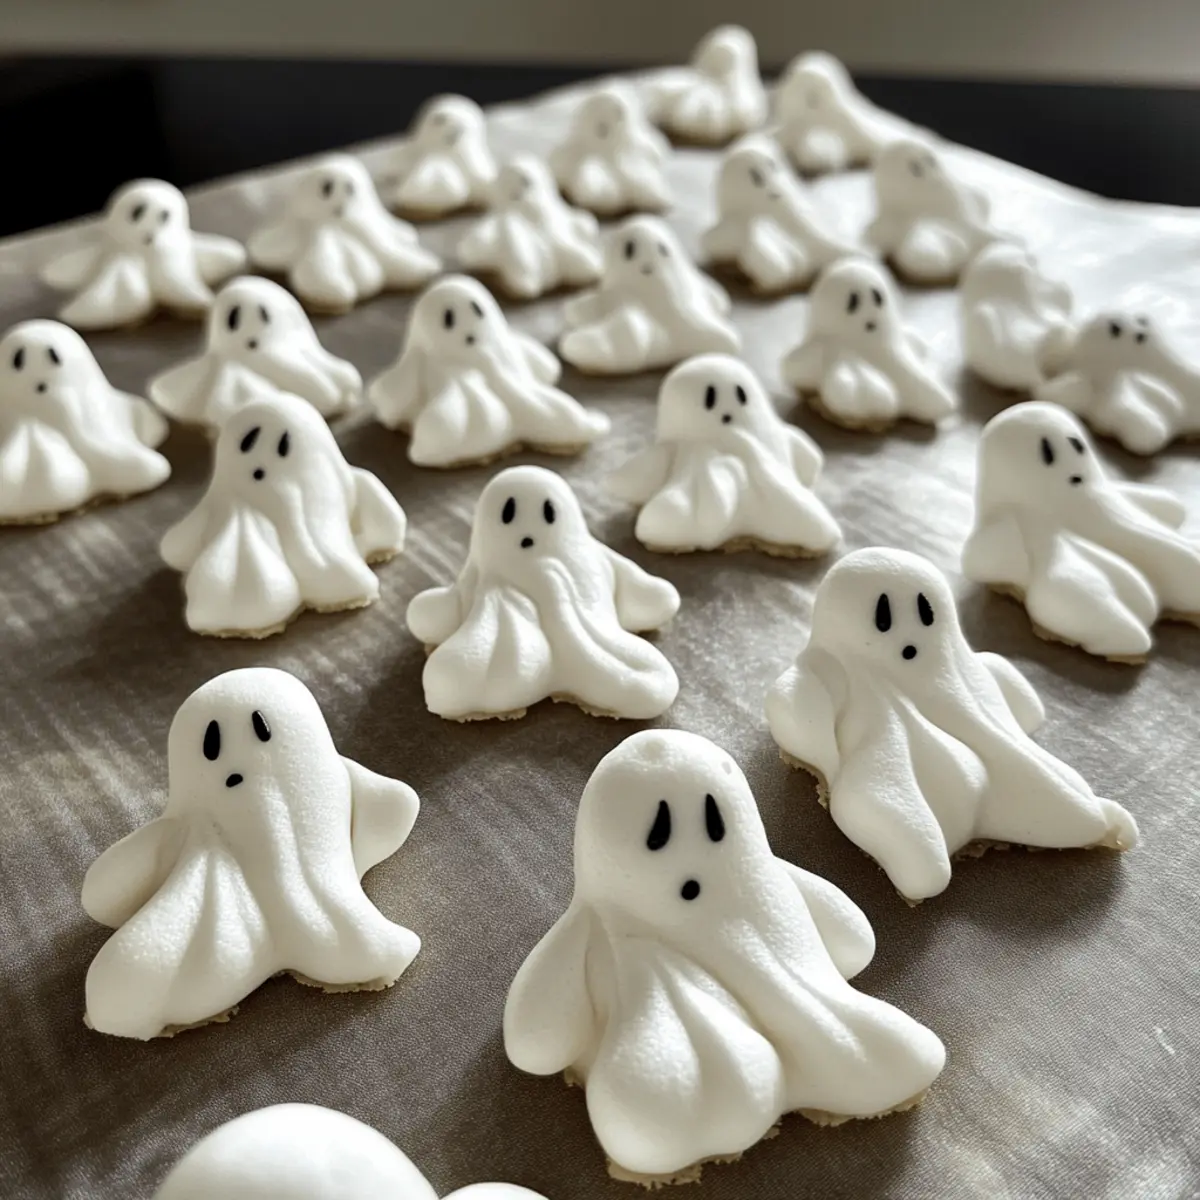
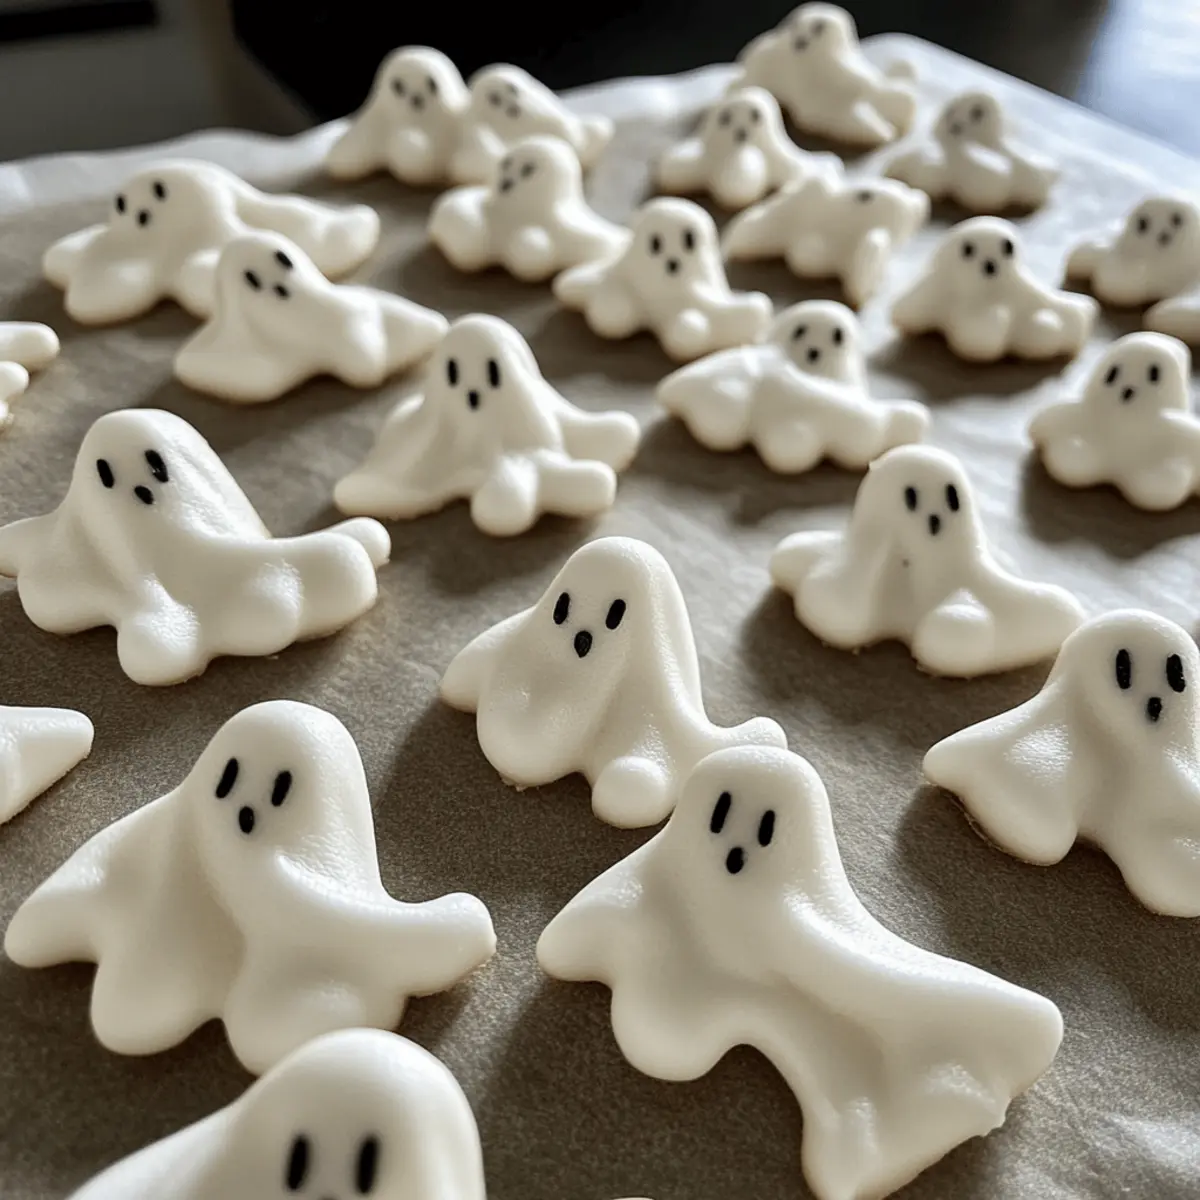
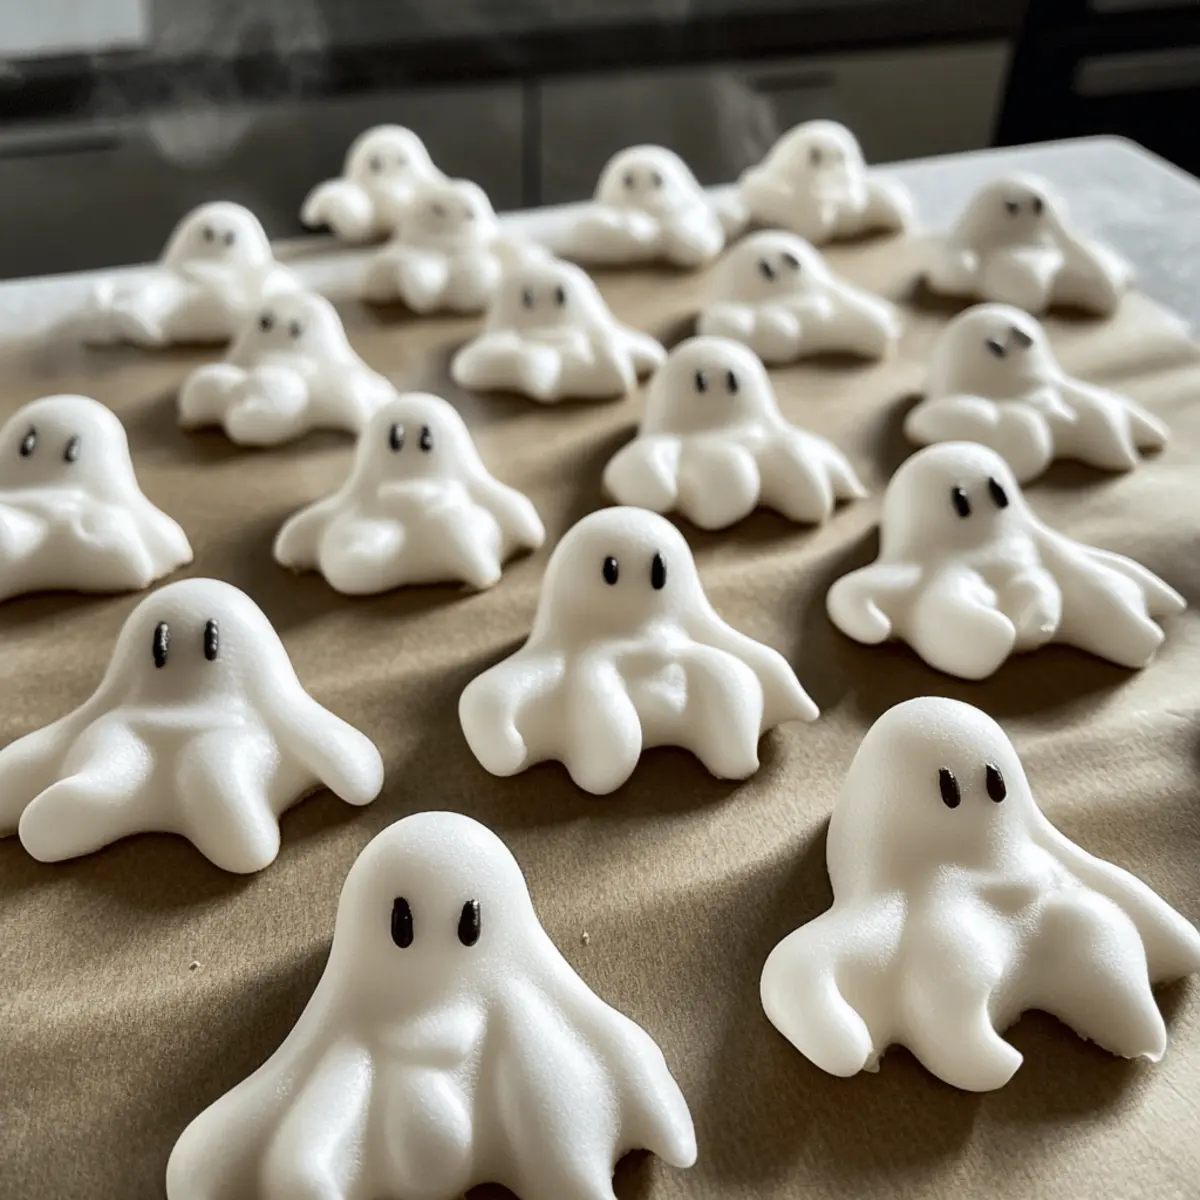
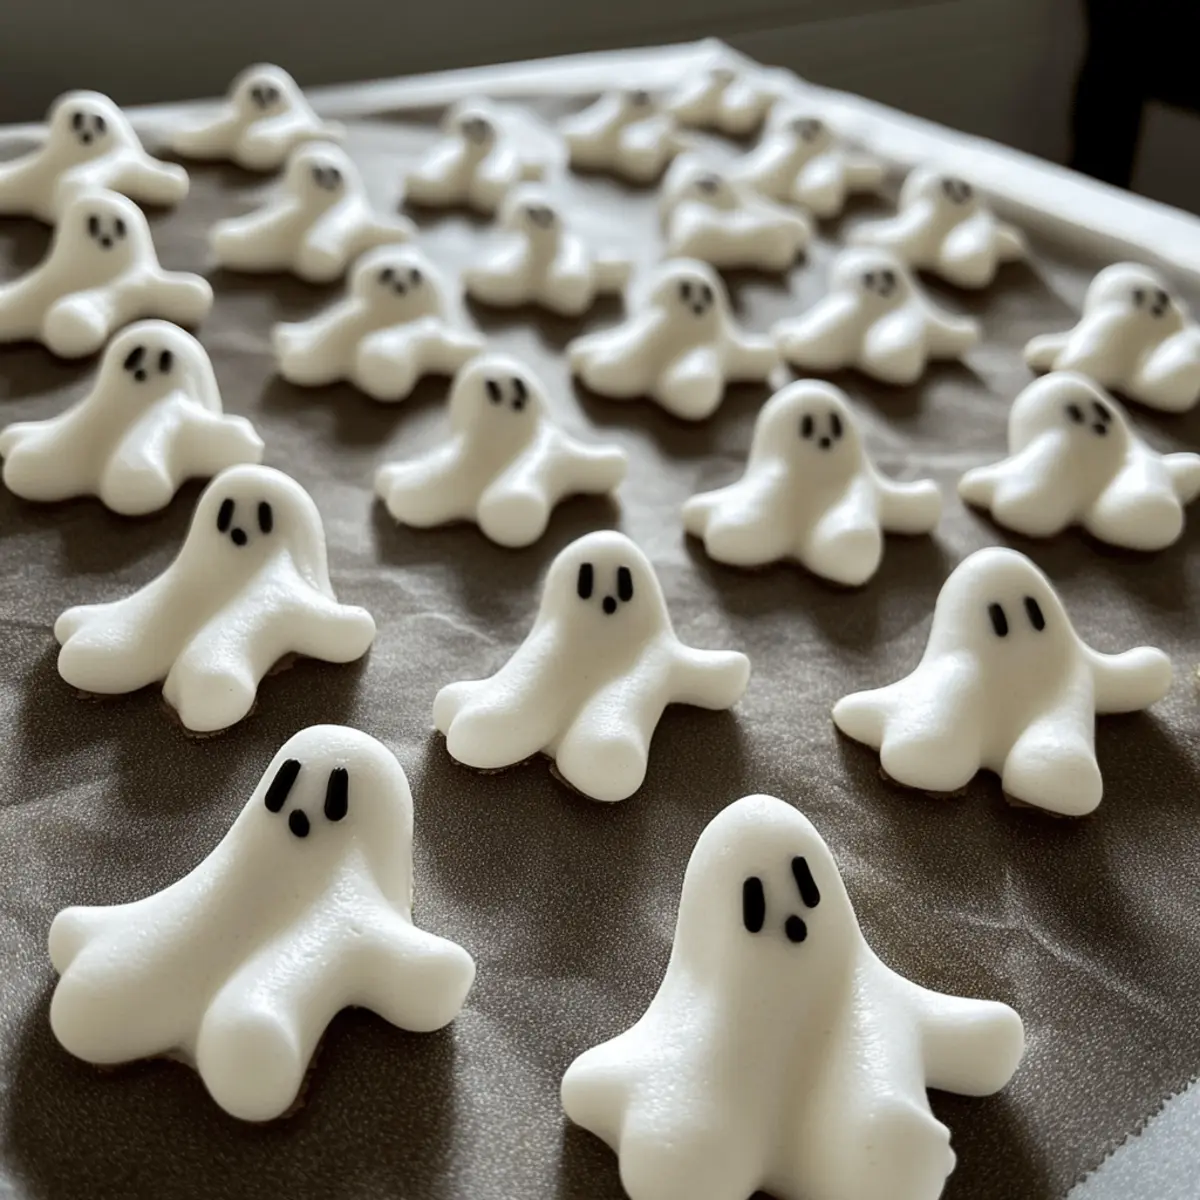
Prepare a baking sheet lined with parchment paper. Using a piping bag fitted with a round tip, pipe small ghost shapes onto the parchment, leaving enough space between each one to allow for puffing. Aim for the classic ghostly look—tall and with a slight swoop to resemble floating spirits.
Step 6: Bake the Meringues
Place the baking sheet in the preheated oven and bake for 90-120 minutes. You’ll know they are done when they easily peel away from the parchment without sticking. They should be dry to the touch and not browned, maintaining their white color for that spooky ghost effect.
Step 7: Cool the Cookies
Once baked, turn off the oven and leave the Meringue Ghost Cookies inside to cool completely for about an hour. This helps them firm up while gradually lowering the temperature, ensuring they stay crispy and don’t crack.
Step 8: Decorate Your Ghosts
Once fully cooled, take an edible black marker to draw little eyes and mouths on your Meringue Ghost Cookies. Get creative and personalize each ghost; they’ll look adorable and spooky, adding a festive touch to your Halloween festivities!
What to Serve with Meringue Ghost Cookies?
Bring your Halloween gathering to life with delightful pairings that will enchant your guests and satisfy their taste buds.
-
Spooky Hot Chocolate: The perfect warm treat to complement the cool crunch of meringues, a rich hot chocolate keeps everyone cozy and festive.
-
Pumpkin Spice Cake: This soft and moist cake offers a delightful contrast to the airy texture of the meringue cookies, creating a beautifully balanced dessert table.
-
Candy Corn Popcorn: A fun, festive snack that adds a crunchy texture and sweet treat to your spread, it pairs wonderfully with the lightness of the meringue ghosts.
-
Apple Cider: Warm spiced apple cider is a seasonal favorite that enhances the cozy fall vibe, making it an excellent drink pairing with your meringue ghost cookies.
-
Caramel Apples: The chewy sweetness of caramel apples counterpoints the light crispiness of meringues, creating a delightful contrast in flavors.
-
Ghostly Fruit Salad: Combine seasonal fruits like oranges, apples, and grapes to bring a refreshing, vibrant splash to your Halloween spread, making it even more inviting.
Enjoy crafting a magical haunted feast where each bite tells a sweet story!
Make Ahead Options
These Meringue Ghost Cookies are perfect for meal prep enthusiasts! You can beat the egg whites and sugar mixture up to 24 hours in advance; just make sure to store it in an airtight container in the refrigerator to maintain its stability and prevent any collapse. Additionally, you can pipe the ghost shapes onto parchment-lined baking sheets and refrigerate them for up to 3 days before baking; this helps save precious time on busy days! When you’re ready to enjoy these spooky treats, simply preheat your oven to 95°C (200°F) and bake as instructed, ensuring that your cookies come out just as delicious and airy as if made fresh!
Meringue Ghost Cookies Variations
Feel free to add your own twist to these delightful meringue cookies, sparking creativity in your kitchen!
- Different Shapes: Pipe other seasonal shapes, like nests for Easter. Kids will love decorating those too!
- Citrusy Zest: Swap vanilla extract for lemon zest to brighten the flavor and add a refreshing twist.
- Chocolate Drizzle: Once cooled, drizzle melted dark chocolate over the ghosts for a rich, decadent touch.
- Nuts for Texture: Fold in finely chopped nuts, like almonds or hazelnuts, for a delightful crunch that contrasts the airy meringue.
- Colorful Spooks: Add a few drops of food coloring to the meringue mixture for spooky-colored ghosts, making them even more festive.
- Spiced Up: Incorporate a pinch of cinnamon or pumpkin spice for a seasonal flavor that pairs beautifully with Halloween.
- Nut-Free Alternative: Replace egg whites with aquafaba for a delightful vegan twist on your favorite Meringue Ghost Cookies.
- Pairing Suggestions: Serve alongside other sweet treats like Pumpkin White Cookies or Chewy Pumpkin Snickerdoodle Cookies to create a spooktacular dessert spread!
Expert Tips for Meringue Ghost Cookies
- Stiff Peaks Needed: Make sure to whip the egg whites to stiff peaks for the best meringue texture. Any fat or yolk will prevent the whites from whipping properly.
- Gradual Sugar Addition: Add granulated sugar gradually while beating to ensure the sugar dissolves completely, providing stability for your Meringue Ghost Cookies.
- Low-Bake Temperature: Keep the oven at a low temperature to dry out the meringue without browning; this is key for achieving that melt-in-your-mouth effect.
- Piping Technique: Pipe smaller ghost shapes for easier baking. Larger shapes might not cook evenly and can collapse.
- Cooling Time: Allow cookies to cool in the oven after baking to ensure they firm up properly, preventing cracks.
How to Store and Freeze Meringue Ghost Cookies
Airtight Container: Store your Meringue Ghost Cookies in an airtight container at room temperature for up to 3 days to maintain their crispness and delightful texture.
Avoid Humidity: Keep cookies away from humid environments, as moisture can cause them to become soggy and lose their lightness; a cool, dry place is ideal.
Freezing: If you want to store them longer, freeze the meringue cookies in a single layer on a baking sheet before transferring to an airtight container, where they can last up to 1 month.
Reheating: When ready to enjoy, allow the cookies to thaw at room temperature. Avoid reheating in the oven as it can change their texture.
Meringue Ghost Cookies Recipe FAQs
How do I choose the best egg whites for meringue?
Absolutely! For the best meringue, use fresh, large egg whites. You’ll want to ensure there are no traces of yolk, as even a small amount of fat can prevent your egg whites from whipping to stiff peaks. If you can, buy organic eggs for the best flavor and results, as they often produce better whites.
What’s the best way to store Meringue Ghost Cookies?
To maintain their delicate texture, store your Meringue Ghost Cookies in an airtight container at room temperature for up to 3 days. Make sure to keep them in a cool, dry place away from humidity, as moisture can make them soft and chewy, losing that lovely crunch.
Can I freeze these cookies, and if so, how?
Yes, you can freeze your Meringue Ghost Cookies! Start by placing them in a single layer on a baking sheet and freeze them for about 1-2 hours until they’re firm. Once they’ve hardened, transfer them to an airtight container or a resealable freezer bag, where they’ll stay fresh for up to 1 month. When you’re ready to enjoy them, simply thaw them at room temperature; avoid reheating in the oven to keep their perfect texture.
What should I do if my meringue is too runny?
If your meringue is too runny, there are a couple of things to check. First, ensure that your egg whites were whipped to stiff peaks; if they weren’t, they won’t hold shape. Also, make sure to add the sugar gradually and beat until fully dissolved before adding more. If the meringue still doesn’t hold, it’s best to start over with new egg whites, ensuring they’re clean and free of yolk.
Can I make Meringue Ghost Cookies egg-free?
While traditional meringues rely heavily on egg whites, there is a vegan alternative! You can use aquafaba, the liquid from canned chickpeas, in place of egg whites. Use the same whipping guidelines, and you can create lovely, airy meringue-like cookies that are just as delicious!
Are there any allergies I should be aware of with meringue cookies?
Meringue cookies primarily contain egg whites and sugar, so they contain egg allergens. If you or your guests are allergic to eggs, I recommend looking into the aquafaba option as a safe, egg-free alternative. However, always check ingredients for other potential allergens, particularly with flavorings, as some extracts might have nut traces.
Meringue Ghost Cookies: Spooky Sweetness for Halloween Fun
Ingredients
Equipment
Method
- Beat the egg whites until foamy, then increase to high speed and whip until stiff peaks form.
- Slowly add granulated sugar, about 2 tablespoons at a time, until fully dissolved and mixture is glossy.
- Gently fold in vanilla extract and vinegar or lemon juice, maintaining airiness.
- Preheat oven to 95°C (200°F) for drying cookies without browning.
- Pipe ghost shapes onto lined baking sheet using a piping bag.
- Bake in preheated oven for 90-120 minutes until dry and easily peel away from parchment.
- Cool cookies in oven for about an hour to firm up.
- Once cool, decorate with edible black marker to add spooky faces.
Leave a Reply