
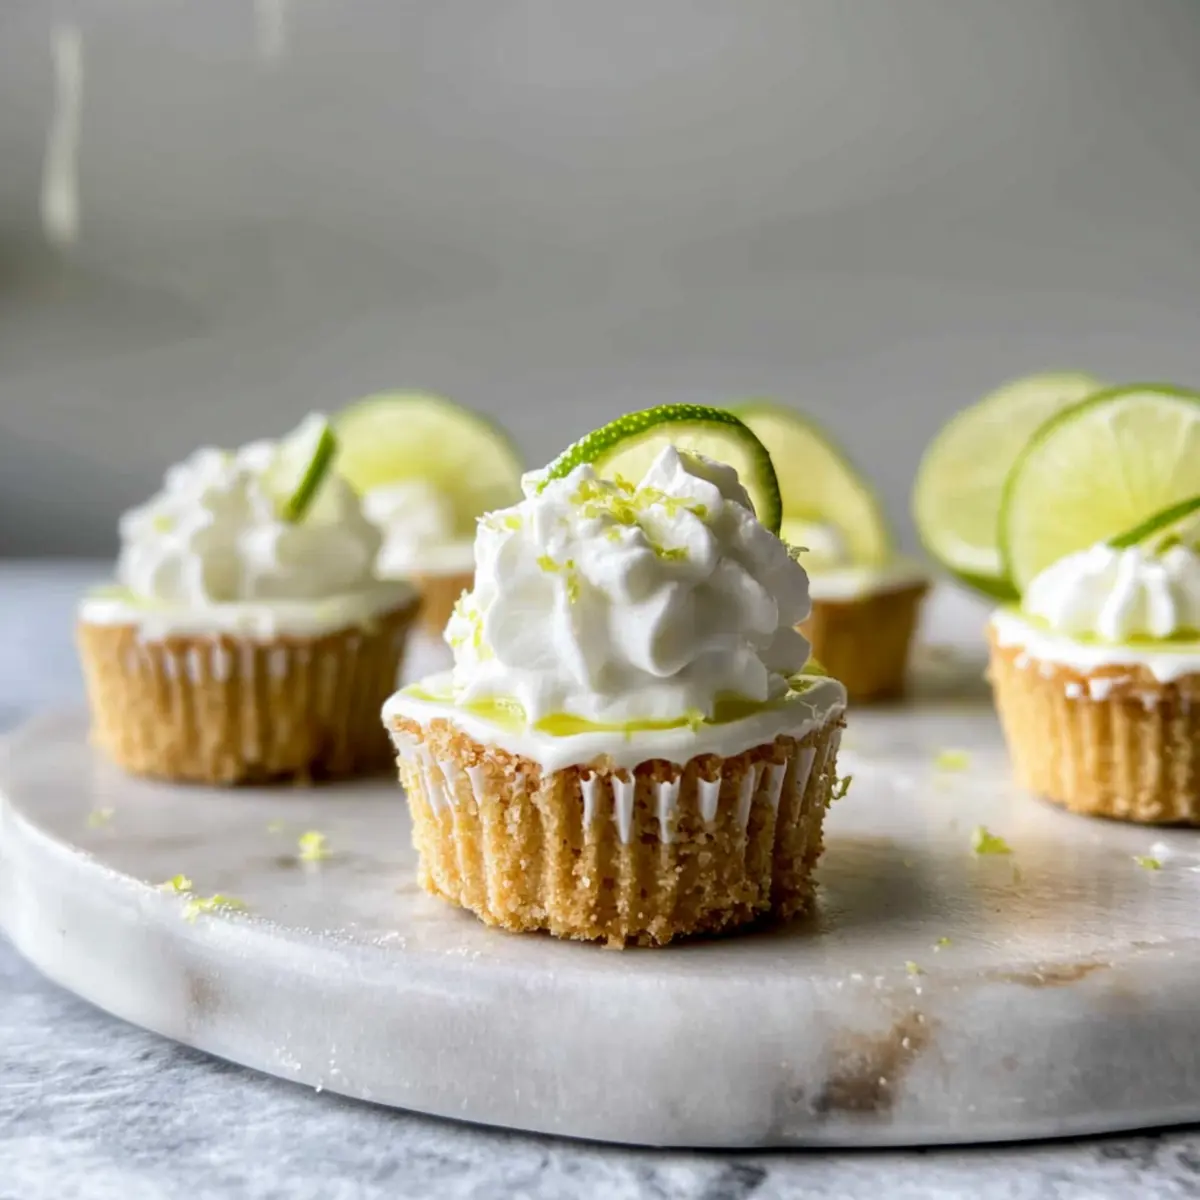
Stepping into my kitchen feels like traveling on a zesty adventure when I whip up these mini key lime cheesecakes. With their creamy texture and tangy lime flavor, they bring a refreshing twist to dessert that’s hard to resist. What I love the most? These adorable bites are gluten-free, low-calorie, and quick to prepare, making them the perfect choice for those moments when you want to impress without the fuss. Whether you’re hosting a gathering or treating yourself after a long day, these mini key lime cheesecakes offer an irresistible way to indulge without the guilt. Ready to discover how to make these delightful treats with just a handful of ingredients? Let’s dive in!
Why are Mini Key Lime Cheesecakes a must-try?
Irresistibly Delicious: Each bite bursts with a zesty lime flavor, perfectly balanced by the creamy filling.
Healthier Delight: Crafted with Greek yogurt, these cheesecakes are a low-calorie treat, making dessert guilt-free!
Quick to Prepare: With only seven ingredients, you can whip these up in no time, perfect for unexpected guests.
Customizable Crust: Adjust the crust to filling ratio to fit your preference, catering to everyone’s taste.
Perfect for Any Occasion: These mini delights shine at gatherings or as a sweet ending to a quiet dinner, reminiscent of the popular Honey Lime Cucumber for a fresh twist.
Indulge in this guilt-free sweet escape that wins hearts at any setting!
Mini Key Lime Cheesecake Ingredients
• Gather your ingredients to create these delightful Mini Key Lime Cheesecakes that are sure to impress!
For the Crust
- Graham Cracker Crumbs – Provides a sweet, crunchy base; opt for gluten-free versions to keep it entirely gluten-free.
- Butter (or Ghee) – Binds the crust mixture together; for a dairy-free alternative, use coconut oil.
For the Filling
- Cream Cheese – Gives the cheesecake its rich texture; make sure it’s softened for easy mixing.
- Plain Greek Yogurt – Adds creaminess and tanginess while keeping calories low; feel free to swap with your favorite yogurt.
- Granulated Sugar – Sweetens the cheesecakes perfectly; for a sugar-free option, try a low-calorie sweetener like Swerve.
- Egg – Helps set the filling; using a room temperature egg ensures better mixing results.
- Egg White – Offers a lighter texture compared to two whole eggs alone.
- Lime Juice – Provides that signature tartness, about 3 tablespoons needed; lemon juice can be a great substitute.
- Lime Zest – Enhances the lime flavor with an aromatic touch; always opt for fresh zest for the best results.
Enjoy preparing these Mini Key Lime Cheesecakes that satisfy your sweet tooth while keeping it guilt-free!
Step‑by‑Step Instructions for Mini Key Lime Cheesecakes
Step 1: Preheat and Prepare Muffin Tins
Begin by preheating your oven to 325ºF (160ºC). While the oven warms up, line 12 muffin tins with foil liners, then lightly grease them to prevent sticking. This step ensures that your mini key lime cheesecakes release easily after baking, making them perfect for serving later.
Step 2: Make the Crust
In a food processor, combine graham cracker crumbs with melted butter until evenly mixed. Press this mixture firmly into the bottom of each muffin liner, creating a nice, even layer. Pop the crusts into the preheated oven and bake for about 8-10 minutes, just until they’re golden and fragrant. Once baked, allow them to cool completely.
Step 3: Prepare the Filling
In a mixing bowl, beat the softened cream cheese with an electric mixer until it’s fluffy and smooth. Gradually add in the Greek yogurt and sugar, continuing to mix until the mixture is velvety and without lumps. This creamy base is essential for your mini key lime cheesecakes, so take your time ensuring it’s well combined.
Step 4: Incorporate Eggs and Flavorings
Gently add the egg and egg white into the creamy mixture, followed by the lime juice and lime zest. Mix until just combined; be careful not to overbeat, as this can lead to cracks in your cheesecakes. The luscious batter should have a light green color from the lime zest, signaling it’s ready for the next step.
Step 5: Fill the Muffin Tins
Evenly distribute the cheesecake batter over each cooled crust, filling them almost to the top but leaving a little room for expansion. This ensures that each mini key lime cheesecake has a balance of crust and filling, creating a delightful texture contrast in every bite.
Step 6: Bake and Check for Doneness
Place the filled muffin tin in the oven and bake for 15-20 minutes. You’ll know they’re ready when the edges are set, and the centers still jiggle slightly when you give the pan a gentle shake. This slight jiggle is key to achieving the perfect creamy texture in your mini key lime cheesecakes.
Step 7: Cool and Chill
Once baked, remove the cheesecakes from the oven and allow them to cool to room temperature. After they’ve cooled, transfer them to the refrigerator, cover them lightly, and allow them to chill for at least 2 hours. This step not only firms them up but enhances their refreshing flavor, making these mini key lime cheesecakes even more delightful when served.
How to Store and Freeze Mini Key Lime Cheesecakes
Fridge: Keep your mini key lime cheesecakes covered in an airtight container; they can be stored in the fridge for up to 3 days while staying fresh and delicious.
Freezer: To freeze, wrap each cheesecake tightly in plastic wrap and then place them in a freezer-safe container. They will last for up to 2 months, ready for a sweet treat anytime!
Thawing: When you’re ready to enjoy, simply transfer them from the freezer to the fridge and let them thaw overnight. This gentle method preserves their creamy texture.
Reheating: These cheesecakes are best enjoyed cold; however, if you prefer them slightly warm, warm them in the microwave for just a few seconds to take the chill off.
Make Ahead Options
These Mini Key Lime Cheesecakes are a fantastic choice for meal prep, allowing you to enjoy a delightful dessert without the last-minute rush! You can prepare the crust and filling up to 24 hours in advance. Simply bake the crust and, once cooled, refrigerate it tightly wrapped. For the filling, combine all ingredients and store it in an airtight container in the fridge. When ready to bake, pour the filling over the prepped crust, then bake for 15-20 minutes as instructed. This method ensures your cheesecakes remain just as delicious while saving you time on busy days, letting you indulge in homemade goodness with minimal effort!
Mini Key Lime Cheesecakes Variations
Feel free to let your creativity shine with these delightful twists that will make these mini key lime cheesecakes uniquely yours!
-
Yogurt Swap: Use key lime yogurt instead of plain Greek yogurt for a flavor boost. This will enhance the tartness and add a touch of sweetness, making every bite even more zesty.
-
Dairy-Free Delight: Replace cream cheese and yogurt with cashew cream for a completely dairy-free version. Blend soaked cashews with lime juice, sweetener, and nutritional yeast for a creamy texture that doesn’t skimp on flavor.
-
Nutty Crust: Experiment with almond flour or pecan crumbs for the crust. This adds a unique nutty flavor and crunch, elevating the classic recipe to something truly special.
-
Sugar-Free Option: Swap granulated sugar for a sugar alternative like monk fruit or erythritol. This allows you to enjoy these treats without the added calories while still retaining sweetness.
-
Thicker Cheesecake: Reduce the number of servings to 9 by adjusting the crust ingredients. This will give you thicker and richer cheesecakes, perfect for those who love a generous slice.
-
Coconut Twist: Incorporate toasted coconut flakes into the crust for a delightful texture and tropical vibe. Pair it with a dollop of coconut whipped cream on top for an extra touch of decadence.
-
Zesty Lemon Replace: If you want to change things up a bit, lemon juice can replace lime juice. This will offer a different citrus flavor while keeping that tangy zing intact.
-
Heat it Up: Add a touch of cayenne pepper or finely grated ginger to the batter for a warm kick. This unexpected heat pairs beautifully with the refreshing tartness, creating a sophisticated flavor profile.
For an extra punch in your dessert lineup, consider enjoying these mesmerizing treats alongside a refreshing Honey Lime Cucumber salad for a burst of contrasting flavors. With these variations, you can create a mini key lime cheesecake that truly reflects your taste!
What to Serve with Mini Key Lime Cheesecakes?
Indulging in a mini key lime cheesecake is just the beginning; let’s build a delightful meal around this refreshing treat!
-
Fresh Berries: Juicy strawberries or blueberries add a burst of color and sweetness, enhancing the tartness of the cheesecakes with a delightful contrast.
-
Whipped Cream: A dollop of homemade whipped cream creates a luxurious, creamy layer that complements the tangy flavors beautifully. Just a sprinkle of lime zest on top elevates the presentation!
-
Coconut Macaroons: These chewy, sweet coconut cookies bring a tropical flair, resonating with the lime flavor while adding a delightful chewy texture.
-
Minty Salad: A light salad with mixed greens, cucumber, and a mint vinaigrette introduces a refreshing crunch that balances the richness of the cheesecakes.
-
Sparkling Water: Pair with a glass of sparkling water infused with lime or mint. The effervescence refreshes the palate and complements the zesty notes of the dessert.
-
Lime Sorbet: For an extra zesty treat, scoop some lime sorbet on the side. Its icy texture enhances the cheesecakes while keeping the flavor profile consistent.
-
Chocolate-Dipped Strawberries: For an added indulgence, serve chocolate-dipped strawberries. The rich chocolate brings a decadent touch without overshadowing the zesty main star.
-
Mango Mousse: Serve a small cup of light mango mousse alongside the cheesecakes for a summery, tropical twist that pairs seamlessly with lime.
-
Herbal Tea: A warm cup of chamomile or green tea cleanses the palate and provides a calming end to your dessert experience.
-
Pistachio Biscotti: Crunchy yet light, these biscotti add a satisfying texture and nutty flavor that pairs wonderfully with the creamy cheesecakes.
Expert Tips for Mini Key Lime Cheesecakes
-
Room Temperature Ingredients: Ensure all ingredients, especially cream cheese and eggs, are at room temperature for a smooth, creamy filling.
-
Avoid Overmixing: Once the eggs are added, mix gently to prevent incorporating too much air, which can lead to cracks in your cheesecakes.
-
Perfect Baking Time: Watch closely as they bake; you want the edges set and the centers slightly jiggly. Overbaking will result in a dense texture instead of the creamy finish you desire.
-
Cool Gradually: After baking, let the cheesecakes cool at room temperature before refrigerating. This helps maintain their creamy texture and enhances flavor.
-
Chill Time Is Key: Don’t skip chilling for at least 2 hours; this helps the mini key lime cheesecakes firm up and develop their refreshing flavor.
Mini Key Lime Cheesecakes Recipe FAQs
How do I choose ripe limes for the best flavor?
Absolutely! When selecting limes, look for ones that are firm and slightly heavy for their size. A vibrant green color and smooth skin indicate freshness. If they have a slight give when squeezed, are juicy, and have no dark spots, they’re ripe and ready to add that zesty flavor to your mini key lime cheesecakes.
What is the best way to store leftover mini key lime cheesecakes?
Very! Store your mini key lime cheesecakes in the fridge in an airtight container for up to 3 days. If you don’t plan to eat them right away, I recommend wrapping each cheesecake tightly in plastic wrap to prevent any drying out or flavor loss.
Can I freeze mini key lime cheesecakes for later?
Absolutely! To freeze, wrap each cheesecake tightly in plastic wrap and place them in a freezer-safe container or zip-top bag. They can stay frozen for up to 2 months. When you’re ready to enjoy them, just move them to the fridge to thaw overnight. This ensures they retain their delicious texture!
What if my cheesecakes crack while baking?
Don’t worry, it happens! Cracks can occur if the batter is overmixed or if the cheesecakes are overbaked. To minimize cracking, mix only until everything is just combined once the eggs are added, and watch them closely in the oven, removing them when the edges are set and the center still jiggles slightly.
Are these mini key lime cheesecakes suitable for people with dietary restrictions?
Very! They’re a great option for a gluten-free dessert if you use gluten-free graham crackers. Additionally, you can replace regular sugar with a low-calorie sweetener like Swerve for a sugar-free variation, and substitute coconut oil for butter to make them dairy-free. Always check ingredient labels to ensure they meet your dietary needs!
How should I serve mini key lime cheesecakes at a gathering?
Perfect! These mini key lime cheesecakes pair wonderfully with fresh berries or a dollop of whipped cream. For an added flourish, you can sprinkle some extra lime zest on top for presentation. They’re sure to be a hit as a refreshing dessert that excites everyone’s taste buds!
Mini Key Lime Cheesecakes: Your Guilt-Free Sweet Escape
Ingredients
Equipment
Method
- Preheat your oven to 325ºF (160ºC) and line 12 muffin tins with foil liners; lightly grease them.
- In a food processor, combine graham cracker crumbs with melted butter until evenly mixed. Press mixture into muffin liners and bake for about 8-10 minutes until golden.
- In a mixing bowl, beat softened cream cheese until fluffy. Gradually mix in Greek yogurt and sugar until smooth without lumps.
- Add egg, egg white, lime juice, and lime zest; mix until just combined to avoid overbeating.
- Evenly distribute the cheesecake batter over each cooled crust.
- Bake for 15-20 minutes, until edges are set and centers jiggle slightly.
- Cool to room temperature, then refrigerate for at least 2 hours before serving.
Leave a Reply