
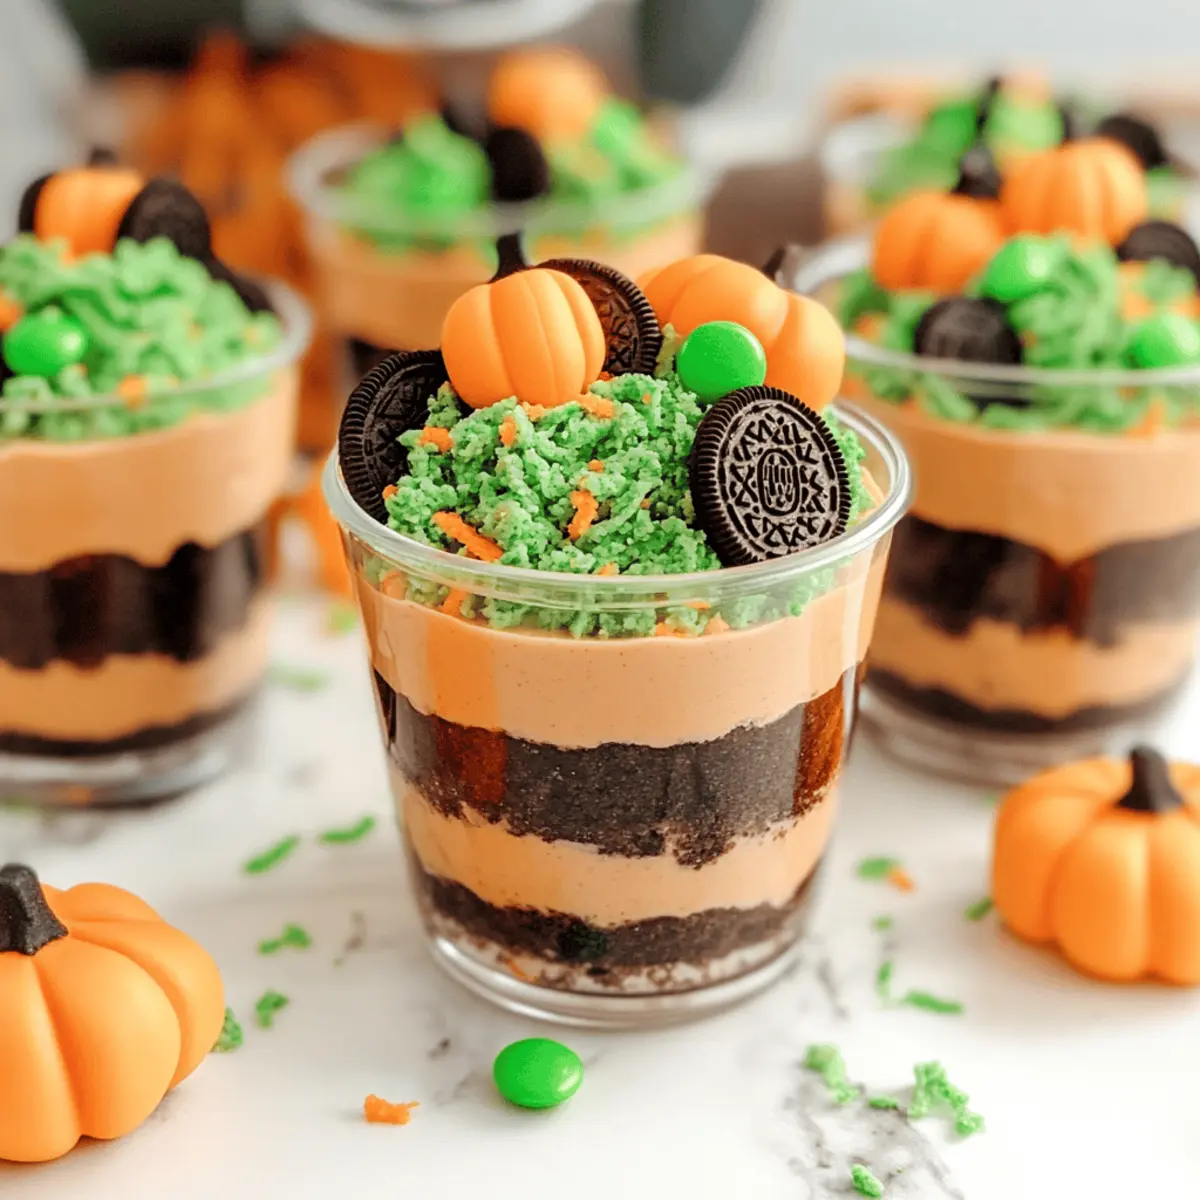
As I stood in my kitchen, the scent of autumn filled the air. It’s that enchanting season when pumpkins appear everywhere, and I couldn’t resist the urge to create something special. Enter these delightful Pumpkin Dirt Cups! This fun recipe is not only a visual treat, resembling a whimsical pumpkin patch, but it’s also incredibly easy to whip up, making it the perfect activity to enjoy with kids. Whether you choose chocolate or vanilla pudding, and regular or Golden Oreos, customization is a breeze. Plus, these scrumptious cups are a guaranteed crowd-pleaser at fall gatherings and Halloween celebrations. Are you ready to bring a taste of fall to your table with these adorable Pumpkin Dirt Cups? Let’s dive in!
Why Are Pumpkin Dirt Cups So Appealing?
Kid-Friendly Fun: These delicious Pumpkin Dirt Cups invite creativity in the kitchen, making them a perfect activity for little hands to participate in.
Endless Customization: Whether you prefer chocolate or vanilla pudding, this recipe adapts effortlessly to suit your taste. Swap in Golden Oreos for a twist on flavor without sacrificing enjoyment!
Perfect for Celebrations: These cups are ideal for Halloween parties and fall festivals, capturing the seasonal spirit while delighting guests of all ages.
No-Bake Ease: With a straightforward preparation that requires no baking, these treats can be enjoyed within hours—perfect for when you’re short on time!
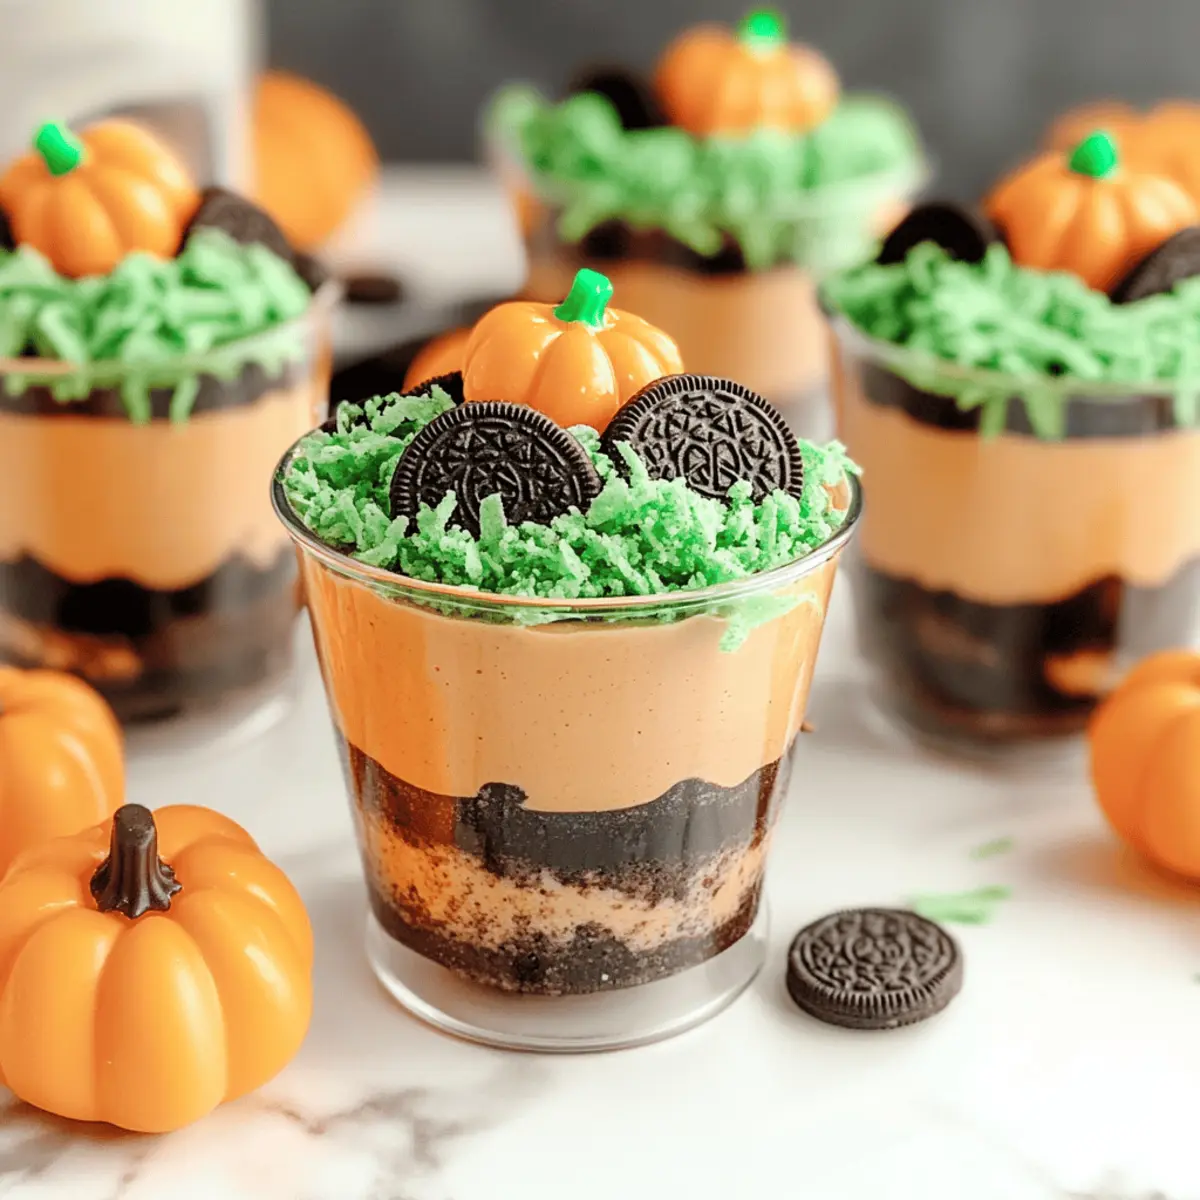
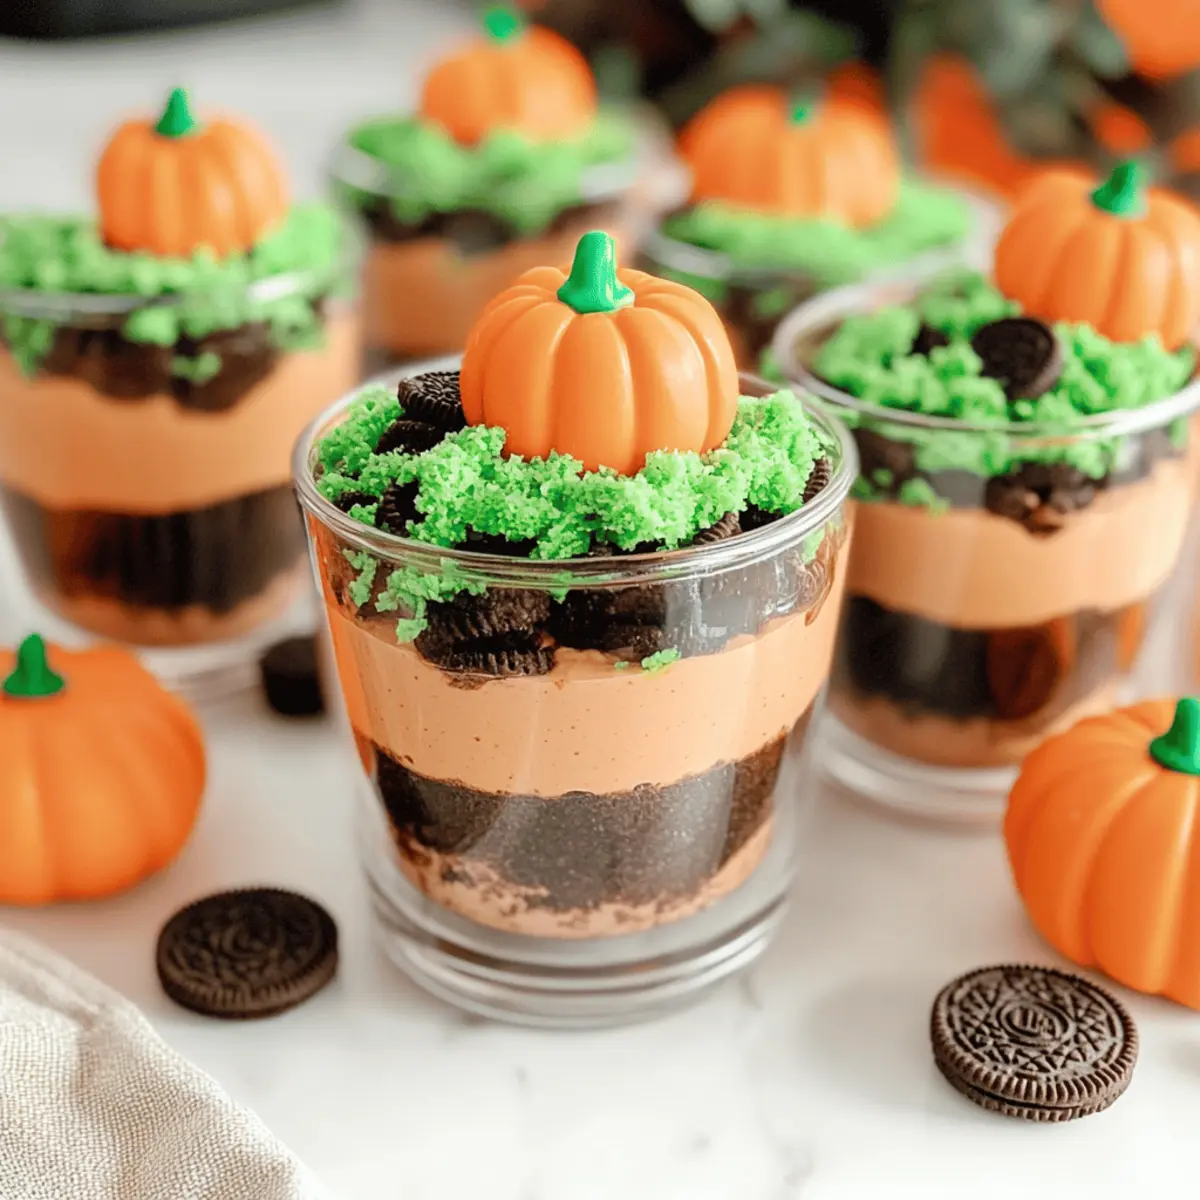
Visually Stunning: The layered presentation mimics a charming pumpkin patch, enhancing your dessert table’s allure at gatherings. Top with bright candy pumpkins for a festive pop of color!
Make sure to check out other seasonal delights like Soft Pumpkin Cookies and Chewy Pumpkin Snickerdoodle for more ways to celebrate fall.
Pumpkin Dirt Cups Ingredients
For the Pudding
• Chocolate Instant Pudding – Adds rich chocolate flavor; easily swapped with vanilla pudding for a lighter taste.
• Milk – Essential for mixing with pudding to achieve a creamy consistency.
• Cool Whip – Provides that light, fluffy texture; can be replaced with whipped cream if preferred.
For the Layers
• Oreo Cookies – Serves as the “dirt” layer, giving both flavor and crunch; Golden Oreos can be used for a sweeter profile.
• Candy Pumpkins – Perfect for decoration, enhancing the Halloween aesthetic.
For the Garnish
• Shredded Coconut – Can be dyed green to simulate grass; this is a fun way to elevate the visual appeal!
• Green Food Coloring – Used for coloring coconut, creating a thematic touch to your Pumpkin Dirt Cups.
Next, let’s dive into the step-by-step guide to crafting these delightful treats!
Step‑by‑Step Instructions for Pumpkin Dirt Cups
Step 1: Crush Oreos
Begin by crushing Oreo cookies, which will create the “dirt” layer for your Pumpkin Dirt Cups. Place the Oreos in a food processor and pulse until you achieve fine crumbs, about 30 seconds. Alternatively, you can put them in a Ziploc bag and use a rolling pin for crushing. Set aside the crushed Oreos for layering.
Step 2: Mix Pudding
In a mixing bowl, whisk together the chocolate instant pudding mix and 2 cups of cold milk. Continue whisking for about 2 minutes until the mixture thickens. Let it sit for 5 minutes to fully set as per the package instructions. You should see a creamy consistency that’s perfect for your layered dessert.
Step 3: Fold in Cool Whip
Once the pudding has set, gently fold in 2 cups of Cool Whip to the pudding mixture using a spatula. Be careful not to overmix; you want to maintain that light, fluffy texture. This lovely combination will create the creamy layer of your Pumpkin Dirt Cups, making it rich and delectable.
Step 4: Layer Dessert
In clear cups, start layering your Pumpkin Dirt Cups. Add 1 tablespoon of the crushed Oreos to the bottom of each cup, followed by a layer of the pudding mixture. Repeat the layers, alternating between Oreo crumbs and pudding, finishing with a generous sprinkle of crushed Oreos on top for that “dirt” look.
Step 5: Prepare Garnish
In a small bowl, combine shredded coconut with a few drops of green food coloring until it is evenly dyed. This colorful coconut will represent grass and add a whimsical touch to your Pumpkin Dirt Cups. Stir well and set aside for the final decorative flourish.
Step 6: Chill and Serve
Cover the cups with plastic wrap and refrigerate them for at least 1 hour. This chilling time allows the flavors to meld and the dessert to firm up slightly. Just before serving, top each cup with the green coconut and a couple of candy pumpkins for that festive pumpkin patch finish.
What to Serve with Pumpkin Dirt Cups?
These delightful treats are perfect for creating a festive and satisfying fall feast that everyone will love!
-
Creamy Mashed Potatoes: Whipped to perfection, these buttery potatoes add a comforting and rich contrast to the sweet dessert.
-
Roasted Sweet Potatoes: Their natural sweetness complements the pumpkin theme while providing a nutritious touch to the meal.
-
Apple Cider: A warm glass of spiced apple cider enhances the autumn atmosphere and pairs beautifully with the flavors of pumpkin.
-
Caramel Corn: This crunchy and sweet snack adds a playful texture and a delicious burst of flavor, perfect for gatherings.
-
Pumpkin Spice Muffins: Reinforce the pumpkin theme with these moist and aromatic muffins, creating an inviting, seasonal vibe.
-
Chocolate Chip Cookies: Classic and beloved, these cookies provide a familiar comfort that everyone enjoys after a fun fall dessert.
-
Warm Cinnamon Rolls: The soft, gooey goodness of freshly baked cinnamon rolls brings a sweet warmth that pairs perfectly with the cozy feel of the season.
-
Pecan Pie: This rich and nutty dessert offers a delightful ending to your meal, balancing out the sweetness of the Pumpkin Dirt Cups.
Expert Tips for Pumpkin Dirt Cups
-
Fluffy Consistency: Be careful not to overmix the Cool Whip. Gently fold it in to keep that light and airy texture in your Pumpkin Dirt Cups.
-
Showcase Layers: Use clear cups or glasses to serve your treats. This way, the beautiful layered effect is visible, making them more appealing.
-
Crushed Oreos: If you find yourself short on Oreos, adjust the amount of crumbs per cup. A little goes a long way for that delightful “dirt” look!
-
Creative Garnish: Get playful with your toppings! Consider using edible grass or other seasonal sweets to enhance the theme of your Pumpkin Dirt Cups.
-
Make Ahead: Prepare these delightful cups in advance! They can be refrigerated for up to 24 hours, allowing you to reduce last-minute stress before your gathering.
Storage Tips for Pumpkin Dirt Cups
- Fridge: Keep the Pumpkin Dirt Cups in the refrigerator, covered, for up to 24 hours. This allows the flavors to meld while ensuring freshness and creaminess.
- Freezer: It’s best not to freeze the assembled cups, as the textures may change upon thawing; however, individual layers can be frozen separately for future use.
- Reheating: These cups are served cold, so there’s no need for reheating; simply serve directly from the fridge to enjoy the delightful layers!
- Make-Ahead: You can prepare the Pumpkin Dirt Cups a day in advance, making them an ideal choice for hassle-free entertaining. Store them properly covered in the fridge until you’re ready to serve.
Make Ahead Options
These Pumpkin Dirt Cups are ideal for busy home cooks looking to save time without sacrificing flavor! You can prepare the pudding mixture and layer the cups up to 24 hours in advance. Simply crush the Oreos and mix the pudding and Cool Whip, then layer them in your cups, covering them tightly with plastic wrap to keep them fresh. For the best quality, avoid adding the garnishes until just before serving; refrigerate the cups to maintain their delightful textures. When you’re ready to serve, simply adorn them with the green-dyed coconut and candy pumpkins. This way, you’ll have a stunning dessert ready with minimal effort at the last minute!
Pumpkin Dirt Cups: Customize to Your Taste
Feel free to let your imagination run wild as you make these delightful treats uniquely yours!
-
Flavor Swap: Replace chocolate pudding with vanilla pudding for a lighter twist that’s equally delicious. This subtle change opens up a whole new flavor profile without losing the spirit of the dessert!
-
Cookie Variety: Choose Golden Oreos instead of regular ones for a fun twist on flavor. While you’ll lose the classic dirt effect, the sweetness they bring can create a delightful contrast.
-
Gummy Worms: Add gummy worms between the layers for a playful touch! Kids will love discovering these squiggly treats nestled in their Pumpkin Dirt Cups, adding an element of surprise to each bite.
-
Nutty Crunch: Incorporate crushed nuts, like walnuts or pecans, in the layers for added texture and a delightful crunch. This brings a nutty flavor that elevates the classic recipe, making it even more special.
-
Spiced Kick: Mix in a sprinkle of pumpkin spice or cinnamon to the pudding for an extra burst of autumn flavor. The warm spices can transform your dessert into a cozy delight, perfect for the season.
-
Healthier Option: Consider using low-fat pudding and whipped topping for a lighter version that doesn’t compromise on taste. You can still enjoy these wondrous treats without any guilt!
-
Fruity Surprise: Layer in fresh or canned pumpkin puree for added moisture and an extra pumpkin punch. It blends beautifully with the pudding and adds nutritional value while staying aligned with the fall theme.
-
Choco-Boost: Mix in mini chocolate chips throughout the layers for a little chocolaty surprise! This added texture complements the creamy layers and indulgent toppings just right.
Feeling inspired? Check out other scrumptious recipes like Pumpkin White Chocolate and Oatmilk Pumpkin Spice for more delicious ways to celebrate this pumpkin season!

Pumpkin Dirt Cups Recipe FAQs
What type of Oreos should I use for the Pumpkin Dirt Cups?
You can choose between regular Oreos or Golden Oreos depending on your flavor preference. Regular Oreos enhance the “dirt” effect, while Golden Oreos offer a sweeter, lighter taste. Both options will make your cups delicious, so it’s really about what you enjoy!
How long can I store Pumpkin Dirt Cups in the fridge?
You can comfortably store the Pumpkin Dirt Cups in the refrigerator for up to 24 hours. Just make sure they are covered tightly, which helps to preserve their flavor and creamy texture. Beyond that timeframe, you might notice some texture changes, particularly in the whipped topping.
Can I freeze Pumpkin Dirt Cups?
While freezing the assembled Pumpkin Dirt Cups isn’t recommended due to potential texture changes, you can freeze the individual components. For instance, both the pudding mixture and the crushed Oreos can be frozen separately in airtight containers. Just remember to use them within 2 to 3 months for best results!
What if my Cool Whip isn’t fluffy?
If your Cool Whip isn’t fluffy or seems to be runny, it may be due to overmixing. When folding it into the pudding, use a gentle motion with a spatula instead of vigorous stirring. If things go awry, consider starting over with a new batch of Cool Whip, ensuring it is chilled before you use it.
Are there any dietary considerations for Pumpkin Dirt Cups?
Absolutely! If you need to accommodate dietary restrictions, you can substitute the chocolate pudding with a dairy-free option and use alternatives for the Cool Whip, such as coconut whipped cream. Always double-check the ingredient labels for potential allergens, especially with the cookies and pudding mixes.
Pumpkin Dirt Cups: A Fun and Easy Fall Dessert for Everyone
Ingredients
Equipment
Method
- Begin by crushing Oreo cookies to create the 'dirt' layer for your Pumpkin Dirt Cups. Set aside.
- In a mixing bowl, whisk together the chocolate pudding mix and cold milk until thickened.
- Gently fold in Cool Whip to create a creamy layer for your cups.
- In clear cups, layer crushed Oreos and pudding mixture, finishing with Oreo crumbs on top.
- Combine shredded coconut with green food coloring until evenly dyed, then set aside.
- Cover and refrigerate for at least 1 hour. Top with green coconut and candy pumpkins before serving.
Leave a Reply