
As the sun begins to set and I can smell the tantalizing aroma of bread baking, I can’t help but feel a wave of nostalgia wash over me. This Rustic French Bread, crafted easily in a Dutch oven, has a charm that elevates it from mere sustenance to a comforting slice of home. With its crackling crust cradling a tender, airy interior, it’s a perfect canvas for melting butter or for crafting the ultimate sandwich. What I love most about this recipe is how simple it is—minimal ingredients and a straightforward approach mean even beginner bakers can rise to the occasion. Plus, it’s a delightful way to impress family and friends with homemade goodness that far surpasses anything from the store. Ready to roll up your sleeves and get that dough going? Let’s dive in!
Why is Rustic French Bread irresistible?
Homemade Delight: Nothing compares to the aroma of freshly baked bread wafting through your home! This Rustic French Bread recipe offers an easy method that turns your kitchen into a cozy bakery.
Crunchy Crust: The unique Dutch oven technique creates a perfectly crispy exterior that locks in moisture, giving you that artisanal touch.
Tasty Versatility: Enjoy it as a side with your favorite meals or transform it into a stellar sandwich bread—perfect for any occasion!
Minimal Ingredients: With just a handful of pantry staples, you can whip up this delight with ease.
If you love baking bread, you might also enjoy my recipes for Pumpkin Banana Bread or Cranberry Zucchini Bread as delicious alternatives.
Rustic French Bread Ingredients
• Bake your own rustic French bread with these simple ingredients!
For the Bread
- All-Purpose Flour – Provides structure and body; can substitute with bread flour for a chewier texture.
- Sugar – Activates yeast for a good rise; granulated white sugar works best in this rustic French bread recipe.
- Salt – Enhances flavor and regulates yeast activity; sea salt is preferred, but any type can also be used.
- Active-Dry Yeast – Essential for leavening the bread; avoid substituting with other types of yeast for best results.
- Warm Water (105-115°F) – Hydrates the flour and activates the yeast, crucial for dough development.
Step‑by‑Step Instructions for Rustic French Bread
Step 1: Activate the Yeast
In a stand mixer bowl, combine warm water (105-115°F), active-dry yeast, and a pinch of sugar. Stir gently and let it sit for 5 minutes until foamy. This step is crucial for ensuring your rustic French bread rises beautifully, indicating that the yeast is alive and ready to work its magic.
Step 2: Mix the Dough
Add half of the all-purpose flour and salt to the activated yeast mixture. Using a dough hook, mix on medium-low speed until just combined. Gradually add the remaining flour until the dough begins to pull away from the sides. It should be slightly sticky but maintain a cohesive texture, perfect for shaping your bread.
Step 3: Knead the Dough
Continue kneading the dough in the stand mixer for about 5-7 minutes, or until it becomes smooth and elastic. If the dough sticks too much, avoid adding extra flour. The goal is to achieve a slightly tacky consistency that will create a soft crumb in your rustic French bread after baking.
Step 4: First Rise
Transfer the kneaded dough into a floured bowl and cover it with a clean kitchen towel. Let it rise in a warm spot for about 2 hours, or until it doubles in size. Keep an eye on it, as the dough should appear puffy and have a dome shape, indicating it’s ready for the next step.
Step 5: Shape the Dough
Once the dough has risen, turn it out onto a floured surface. Shape it gently into a ball, being careful not to deflate it fully. Cover it again with a bowl or towel and let it rise for an additional 30 minutes. This second rise allows your rustic French bread to develop deeper flavors and a lighter texture.
Step 6: Preheat the Oven
About 20 minutes before baking, preheat your oven to 425°F and place your Dutch oven inside to heat up. This step is essential for creating that perfect crispy crust on your rustic French bread while helping it rise beautifully. The oven should be hot enough to give the bread a great initial burst of steam.
Step 7: Score the Dough
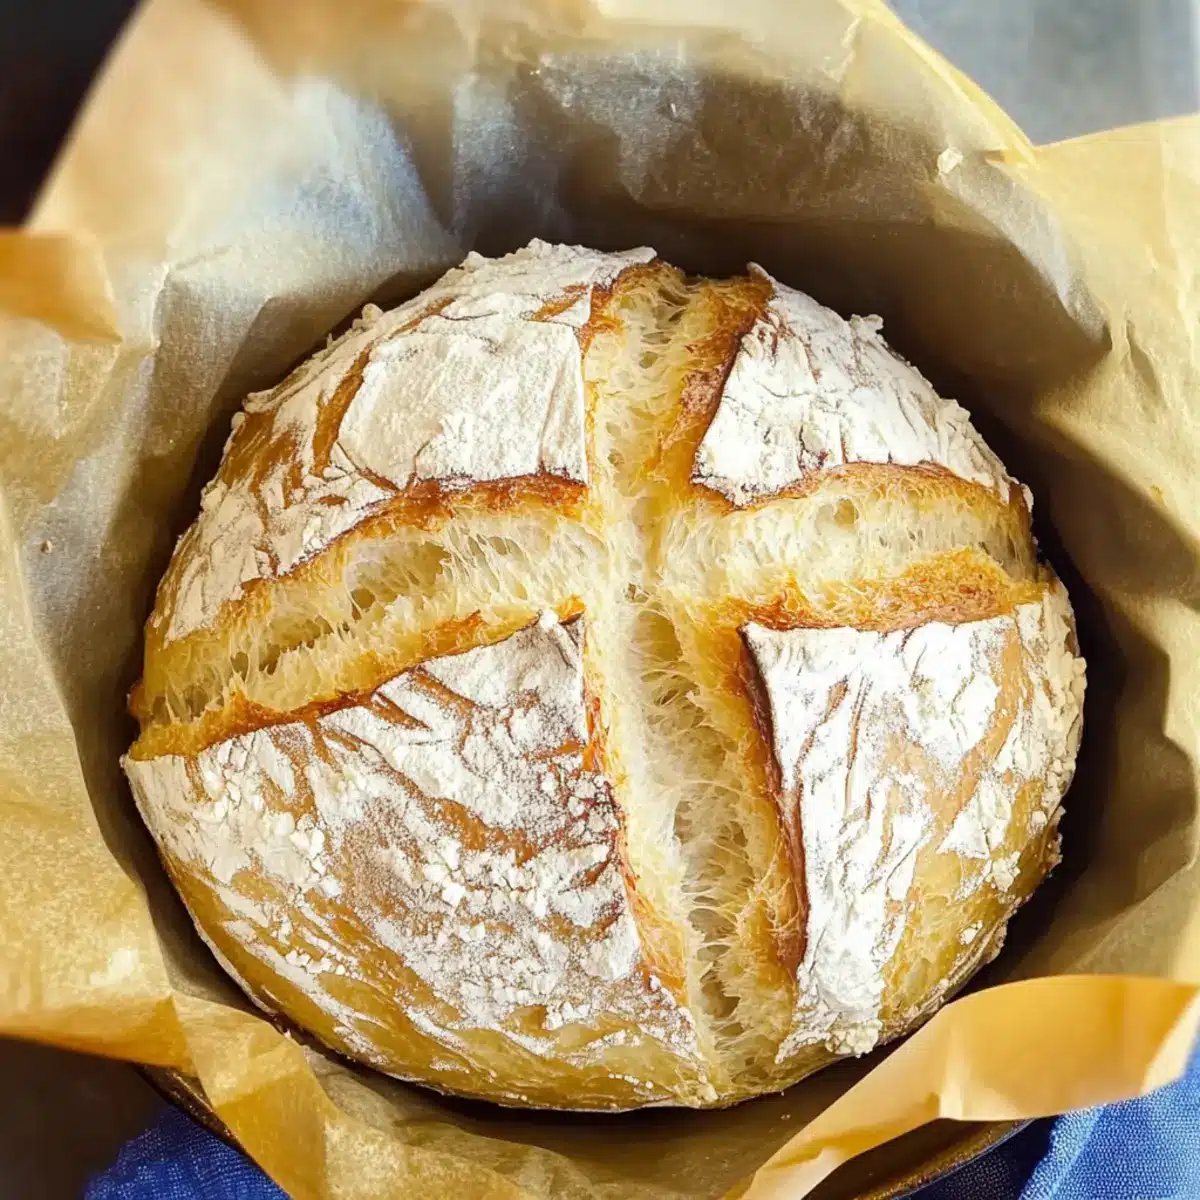
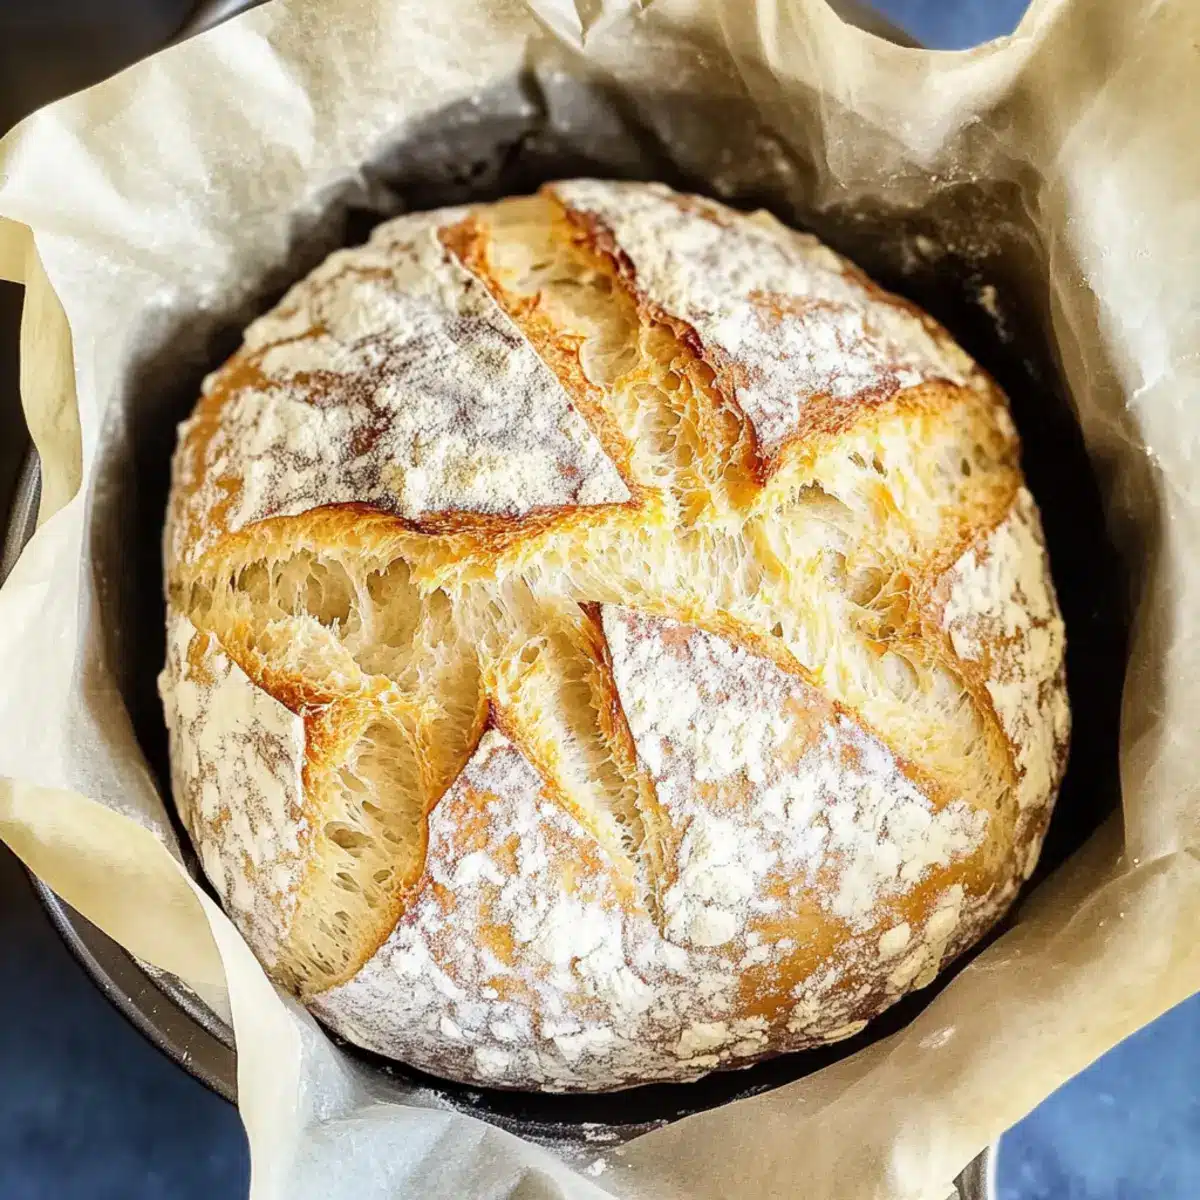
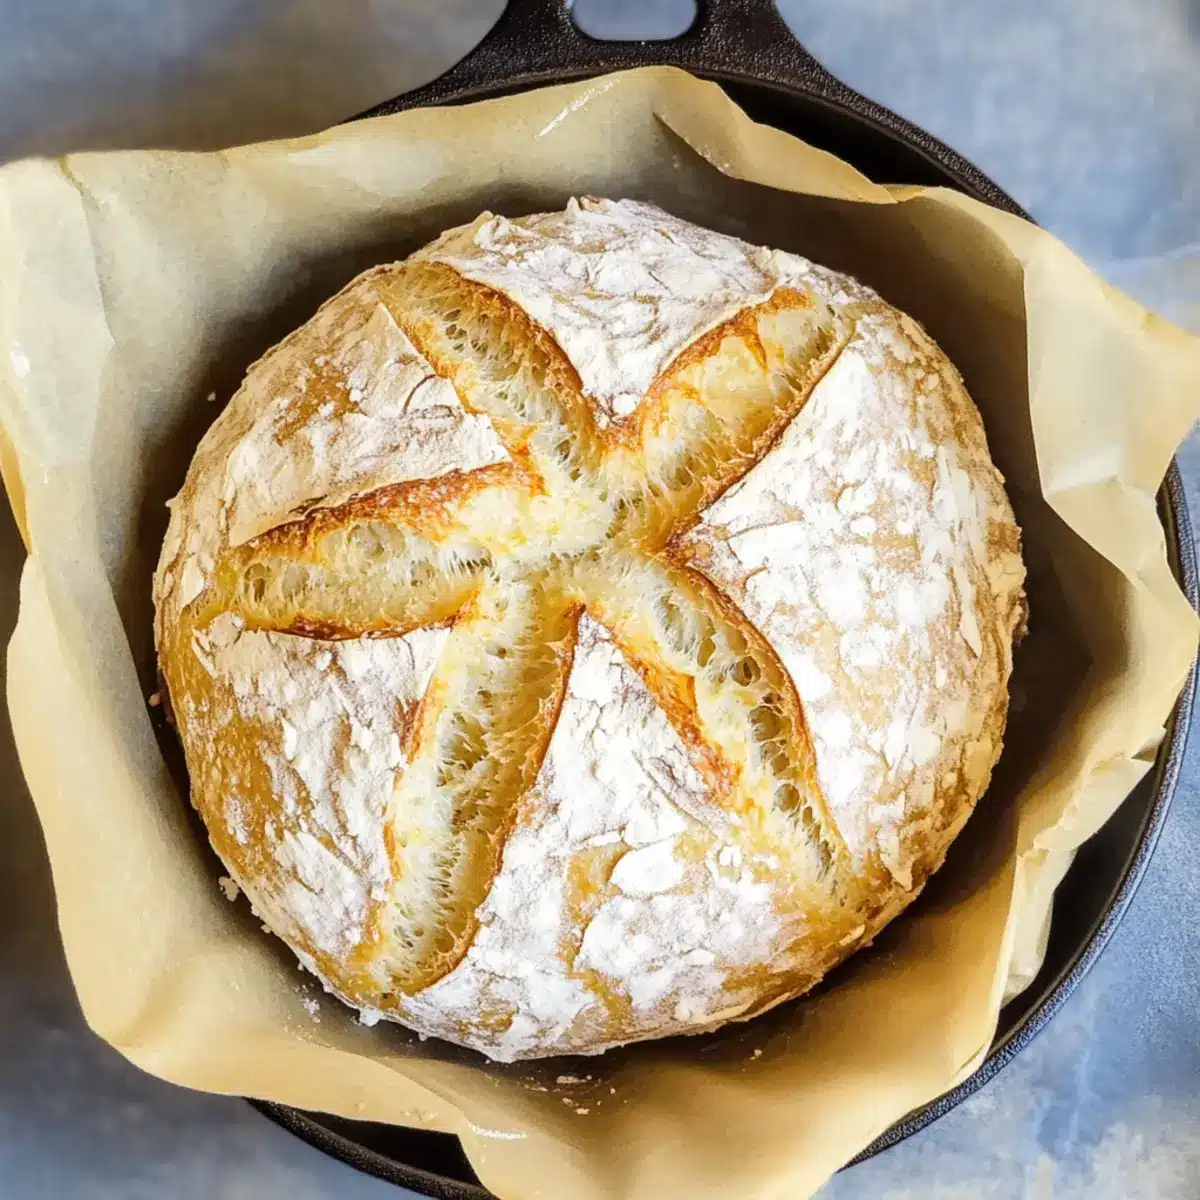
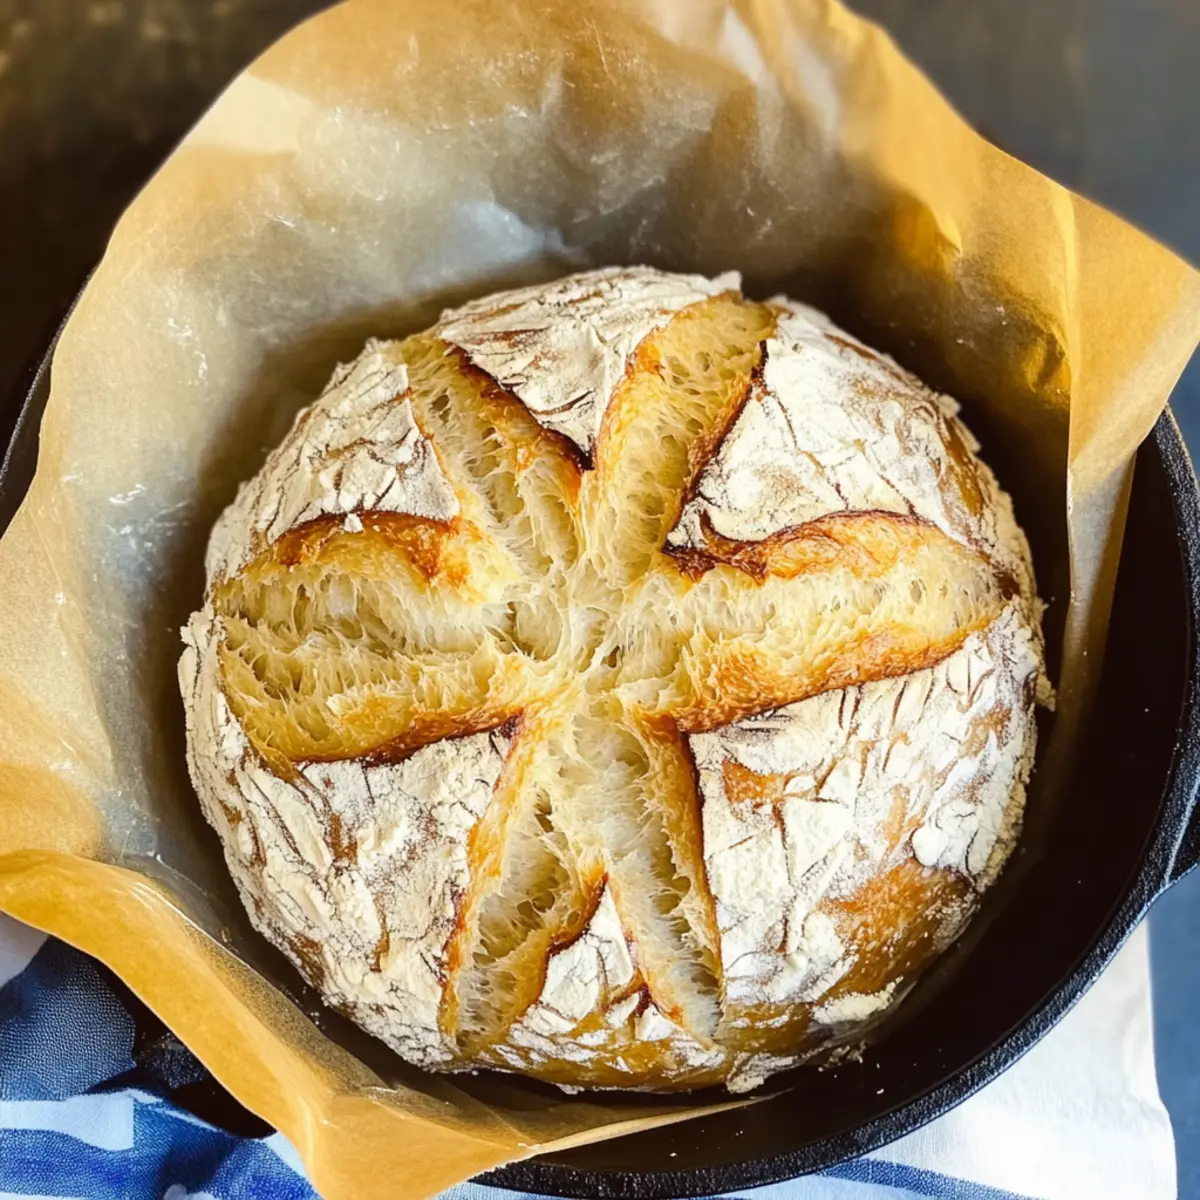
Carefully transfer the risen dough to a piece of parchment paper. Use a sharp knife to score an “X” or a few slashes across the top. This step not only adds a rustic look but also controls how the bread expands during baking, ensuring a gorgeous shape for your rustic French bread.
Step 8: Bake the Bread
Gently lift the parchment paper with the dough and place it into the hot Dutch oven. Cover with the lid and bake for 30 minutes. This traps moisture and creates that iconic texture. After 30 minutes, remove the lid and bake for another 10 minutes until golden brown. The internal temperature should reach about 210°F, signifying it’s done.
Step 9: Cool and Slice
Once baked, carefully remove the rustic French bread from the Dutch oven and transfer it to a cooling rack. Allow it to cool completely before slicing, as this will help solidify the crust and improve the texture. The delicious aroma will fill your kitchen, inviting everyone to enjoy your homemade loaf!
Rustic French Bread Variations & Substitutions
Customize your rustic French bread by experimenting with delightful twists and swaps that embrace your taste preferences!
- Herb-Infused: Add fresh herbs like rosemary or thyme to the dough for an aromatic flavor boost that complements any dish.
- Garlic Lover’s Delight: Mix in minced garlic or garlic powder for a rich, savory twist that elevates your bread experience.
- Whole Wheat Wonder: Substitute half of the all-purpose flour with whole wheat flour to create a heartier, nuttier version of your rustic loaf.
- Sweet Twist: Incorporate a tablespoon of honey or maple syrup into the dough for a subtle sweetness that pairs perfectly with butter.
- Seeded Crust: Before baking, spritz the loaf with water, then sprinkle a medley of seeds (like sesame or poppy) on top for added texture and flavor.
- Bold and Spicy: If you’re craving heat, add some crushed red pepper flakes directly to the dough for a zesty kick that awakens the senses.
- Cheesy Goodness: Fold in shredded cheese, like Gruyère or cheddar, into the dough for an indulgent addition that’s perfect for sandwiches or snacking.
- Double the Fun: If you have a crowd to feed, consider doubling the recipe and baking two loaves in separate Dutch ovens—perfect for sharing and meal prep!
For inspiration on the delicious side dishes that complement your rustic French bread, check out my recipes for Cranberry Zucchini Bread or Pumpkin French Toast. Enjoy the joy of baking and savoring your amazing creations!
Make Ahead Options
These Rustic French Bread loaves are ideal for busy weeknights and meal prep! You can prepare the dough up to 24 hours in advance by following the initial steps, allowing it to rise for about 2 hours, then instead of shaping it right away, cover the bowl tightly and refrigerate the dough. This slower rise enhances the flavor and texture of your rustic French bread. When you’re ready to bake, simply shape the dough and let it rest for 30 minutes at room temperature before preheating your oven. With these make-ahead tips, you’ll have the joy of freshly baked bread with minimal last-minute effort!
Storage Tips for Rustic French Bread
Room Temperature: Store your rustic French bread in a bread box or an airtight container at room temperature for up to 3 days to maintain its freshness.
Freezer: Wrap the cooled loaf tightly in plastic wrap and then in aluminum foil before freezing. This way, it can be preserved for up to 6 months without losing flavor.
Thawing: To enjoy your frozen rustic French bread, remove it from the freezer and let it thaw at room temperature. For a crispy crust, reheat it in the oven at 350°F for about 10-15 minutes.
Reheating: If you’ve stored cut slices, pop them in a toaster or warm them in the oven. This will revive their original warmth and crustiness, making every slice a treat!
Expert Tips for Rustic French Bread
-
Check Your Yeast: Always ensure your yeast is fresh and active. If it doesn’t foam in warm water, it’s no good for making rustic French bread.
-
Kneading Consistency: Don’t be tempted to add extra flour during kneading. A slightly sticky dough yields the best results for a soft crumb in your bread.
-
Proper Scoring: Use a sharp knife to score the dough; this helps control expansion and creates a beautiful crust on your rustic French bread.
-
Temperature Matters: Make sure your water is the right temperature (105-115°F) for activating yeast. Too hot can kill it, while too cool won’t activate it properly.
-
Cold Rise Option: For a more developed flavor, let the dough rise overnight in the fridge. Just remember to bring it to room temperature before baking!
What to Serve with Rustic French Bread?
The warm, crusty goodness of your freshly baked bread opens up a world of delicious possibilities for pairing and enhancing your meal.
-
Savory Olive Oil Dip: Drizzle high-quality olive oil onto a plate, sprinkle with salt and herbs for aromatic dipping. It enhances the bread’s flavors and offers an Italian twist.
-
Creamy Tomato Basil Soup: A classic match, this comforting soup perfectly contrasts the crusty bread, making for a warm, satisfying meal. Dip the bread into the soup for every last drop of flavor!
-
Fresh Herb Butter: Whip up soft butter mixed with fresh herbs like chives or thyme. This adds a burst of flavor to each slice, melting into every nook and cranny of the rustic French bread.
-
Seasoned Roasted Vegetables: Pair with colorful, roasted vegetables such as bell peppers, zucchini, or carrots. Their sweetness complements the bread’s crustiness, creating a heartier meal.
-
Classic Charcuterie Board: Load a board with cured meats, cheeses, nuts, and fruits. The bread serves as the perfect base for creating your favorite bites, balancing flavors and textures.
Feel free to experiment with these pairings to make each meal special! Enjoy your rustic French bread as a delightful centerpiece to your dining experience.
Rustic French Bread Recipe FAQs
What type of flour is best for Rustic French Bread?
For the best results, I recommend using all-purpose flour, which provides excellent structure. However, if you prefer a chewier texture, feel free to substitute half or all of the flour with bread flour. Just remember that bread flour has a higher protein content, which will contribute to that delightful chewiness we all love!
How should I store my Rustic French Bread?
To keep your rustic French bread fresh, store it at room temperature in a bread box or an airtight container for up to 3 days. If you want to extend its life even further, wrap it tightly in plastic wrap followed by aluminum foil and freeze it. It can safely last for up to 6 months, ensuring you have your homemade goodness on hand whenever you crave it!
Can I freeze Rustic French Bread?
Absolutely! Wrap your cooled rustic French bread in plastic wrap to protect it from freezer burn, then cover it in aluminum foil for extra insulation. When you’re ready to enjoy it, let it thaw at room temperature. If you want to restore its crispy crust, reheat it in a preheated oven at 350°F for about 10-15 minutes—trust me, it will taste as fresh as the day you baked it!
What should I do if the dough doesn’t rise?
If your dough hasn’t risen, the first thing to check is the freshness of your yeast. If it didn’t foam when combined with warm water, it may be inactive. Make sure that your water temperature is between 105-115°F; too hot can kill the yeast, and too cold won’t activate it. If your dough is still not rising after troubleshooting, try placing it in a warm area, like an oven that’s been preheated for a few minutes and then turned off.
Is there a way to make Rustic French Bread gluten-free?
Yes, but it requires some adjustments! I recommend using a store-bought gluten-free flour blend that you trust, ensuring it’s designed for baking. Keep in mind that the dough may behave differently, so add an extra egg, or substitute with a flax egg for binding. The texture will vary from traditional Rustic French Bread, but with the right blend, you can still enjoy delicious results!
Rustic French Bread: Bake Perfectly Crusty Loaves at Home
Ingredients
Equipment
Method
- In a stand mixer bowl, combine warm water, active-dry yeast, and a pinch of sugar. Stir gently and let it sit for 5 minutes until foamy.
- Add half of the all-purpose flour and salt to the activated yeast mixture. Mix on medium-low speed until just combined. Gradually add the remaining flour until the dough begins to pull away from the sides.
- Continue kneading the dough in the stand mixer for about 5-7 minutes, or until it becomes smooth and elastic.
- Transfer the kneaded dough into a floured bowl and cover it with a clean kitchen towel. Let it rise for about 2 hours until it doubles in size.
- Turn the dough out onto a floured surface. Shape it gently into a ball and let it rise for an additional 30 minutes.
- About 20 minutes before baking, preheat your oven to 425°F and place your Dutch oven inside to heat up.
- Carefully transfer the risen dough to a piece of parchment paper. Use a sharp knife to score an “X” or a few slashes across the top.
- Lift the parchment paper with the dough and place it into the hot Dutch oven. Cover with the lid and bake for 30 minutes.
- After 30 minutes, remove the lid and bake for another 10 minutes until golden brown.
- Once baked, carefully remove the rustic French bread from the Dutch oven and transfer it to a cooling rack. Allow it to cool completely before slicing.
Leave a Reply