
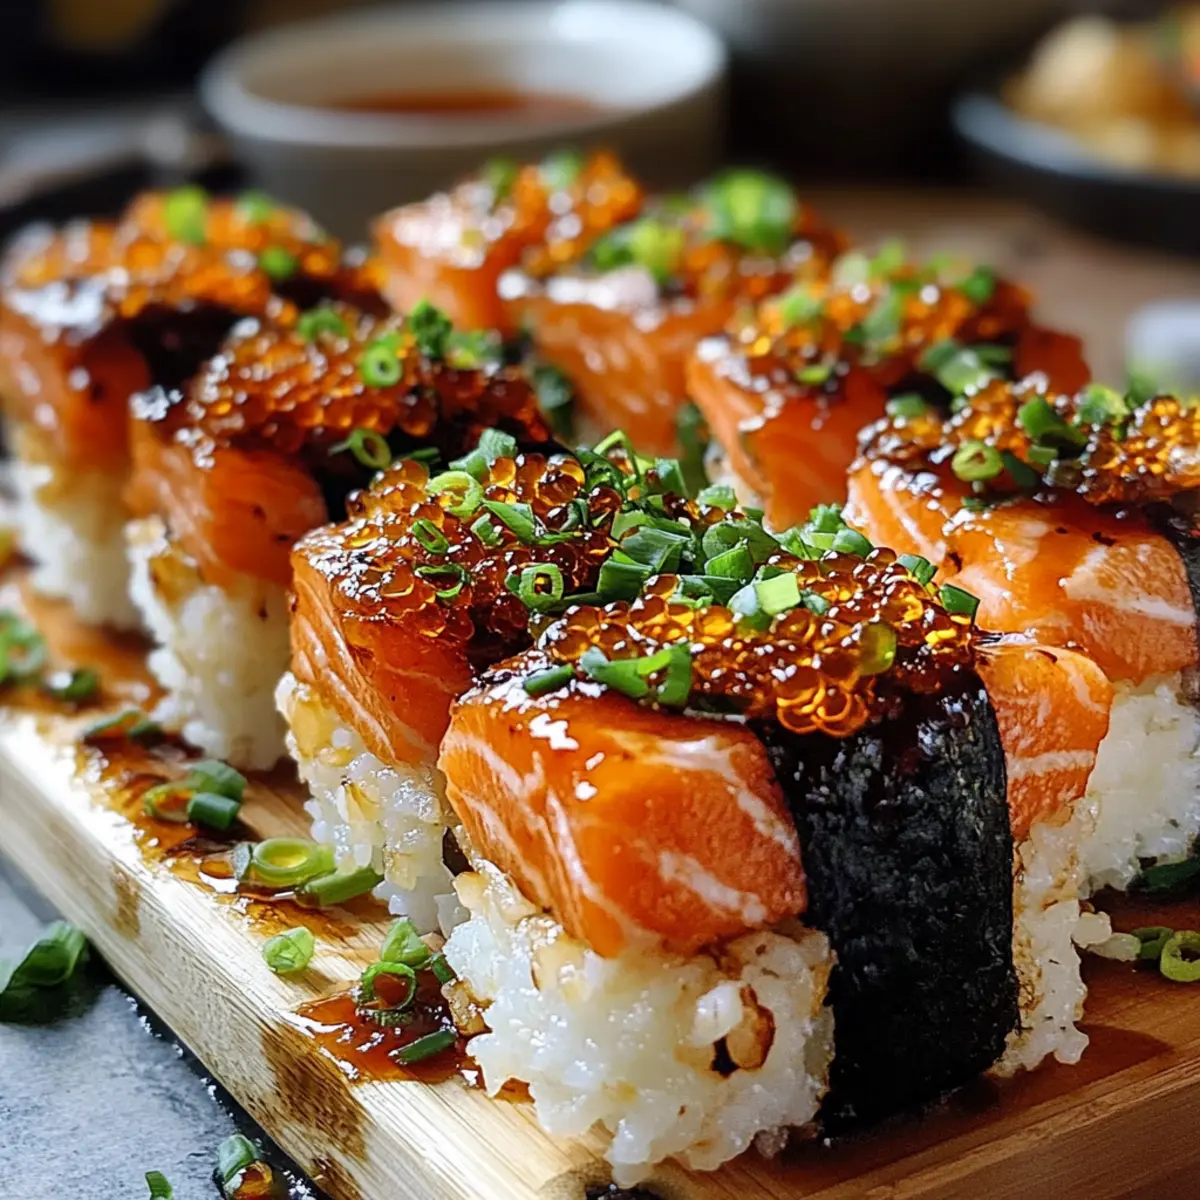
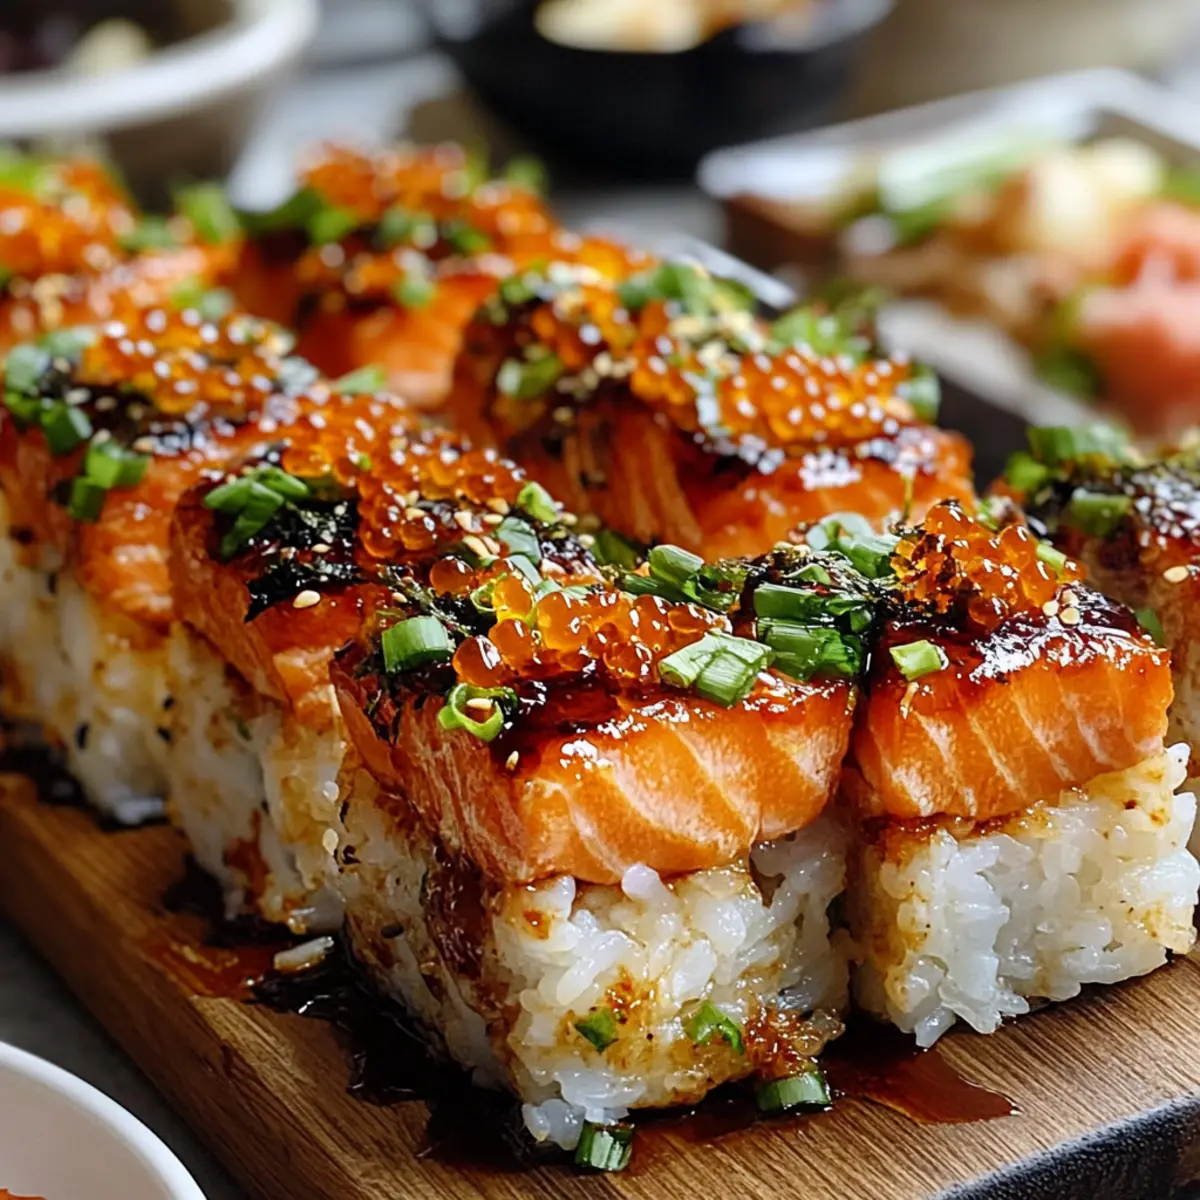
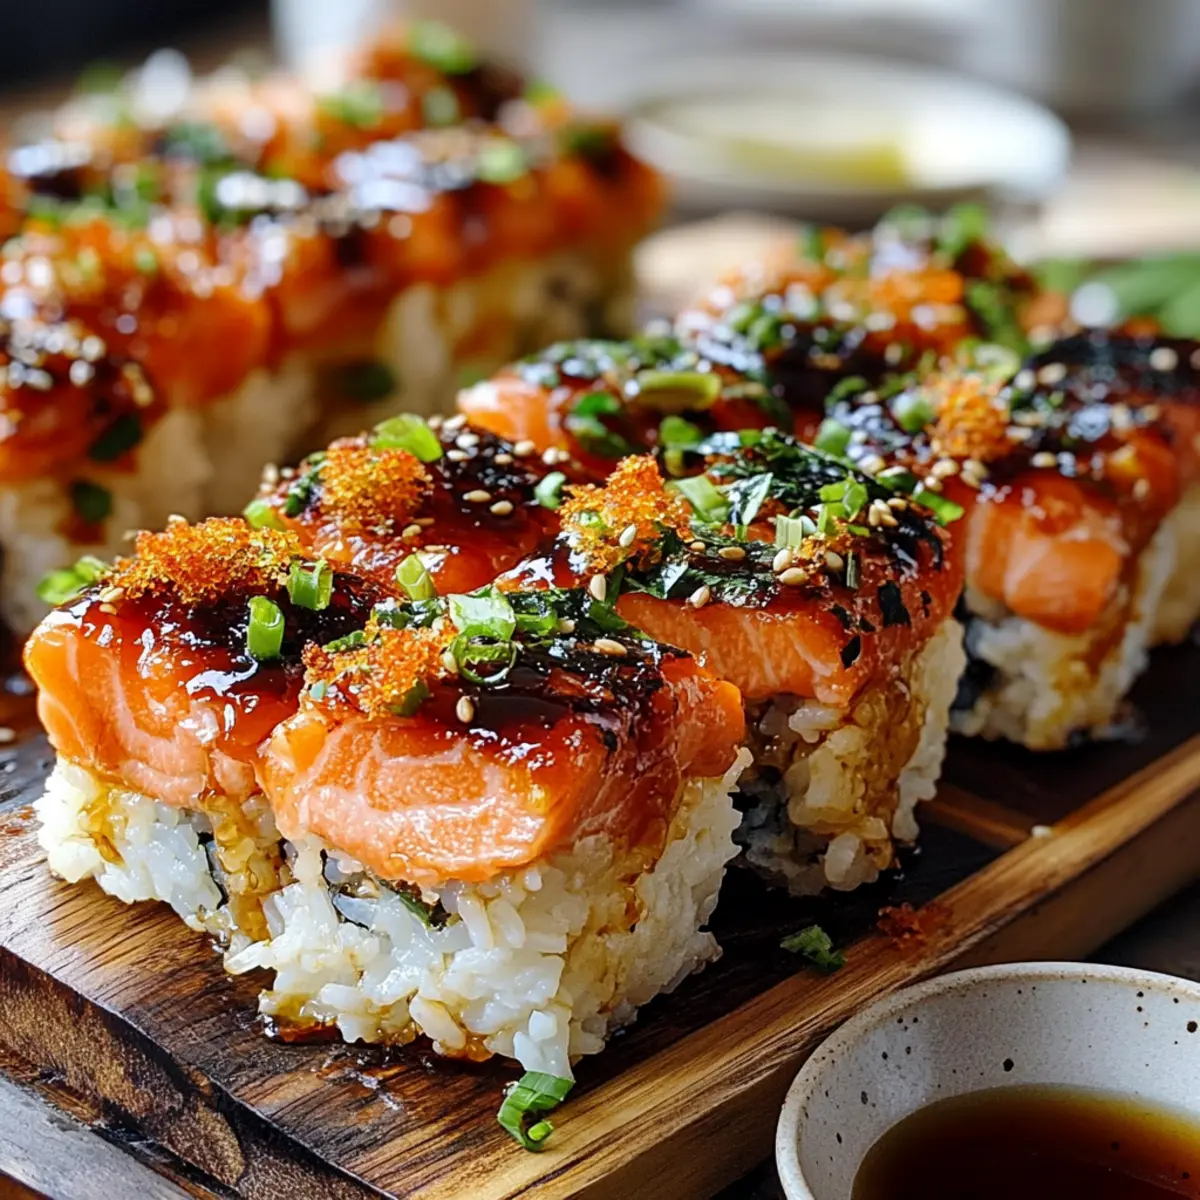
As I pulled the warm, aromatic Spicy Salmon Sushi Bake from the oven, I couldn’t help but smile at how it transformed my kitchen into a lively sushi bar, inviting friends and family to gather around the table. This dish is a delightful fusion of creamy, spicy flavors with flaky fish, making it a perfect alternative to traditional sushi rolls that can sometimes feel daunting to prepare. Not only is this bake a quick and easy recipe to whip up, but it’s also a wonderfully shareable crowd-pleaser, ideal for those cozy weeknight dinners or lively weekend get-togethers. Plus, it’s versatile—feel free to switch out the salmon for crab or shrimp, depending on your mood! Are you ready to embark on this delicious culinary adventure?

Why is this Spicy Salmon Sushi Bake special?
Easy to Make: This recipe requires minimal prep, making it perfect for busy evenings or last-minute gatherings.
Flavor Explosion: The combination of creamy mayo, spicy Sriracha, and fresh salmon delivers a taste that’s both bold and comforting.
Crowd-Pleasing: It’s a shared dish that invites everyone to dig in, fostering a warm, communal dining experience.
Customizable: Whether you opt for salmon, crab, or shrimp, each version offers a unique twist that keeps the meal exciting.
Quick Bake Time: In just 25-30 minutes, you can enjoy a home-cooked sushi experience, quicker than traditional sushi methods.
This unique take on sushi is sure to impress your guests, much like my delightful Lemon Salmon Piccata or the flavorful Hot Honey Salmon. Dive in and enjoy!
Spicy Salmon Sushi Bake Ingredients
Your culinary journey starts here! Gather these essentials for a mouthwatering Spicy Salmon Sushi Bake.
For the Rice Base
- Sushi Rice – This is crucial for the right texture; rinse well to remove excess starch.
- Water – Use the precise amount to ensure perfectly cooked rice; typically, a 1:1 ratio works best.
- Rice Vinegar – Vital for that authentic flavor; don’t skip this essential ingredient.
- Sugar – Balances the acidity from the vinegar, enhancing the overall taste; essential for seasoning.
- Salt – Adds depth to your rice; feel free to adjust based on your preference.
For the Topping
- Fresh Salmon Fillet – The star of the show! Skinless and diced for even cooking; any fresh fish works as a substitute.
- Mayonnaise – Adds creaminess and binds ingredients well; opt for low-fat if you prefer.
- Sriracha Sauce – Infuses heat into the dish; tweak the amount to suit your spice tolerance.
- Sesame Oil – Provides a delightful nutty flavor; can be substituted or omitted if needed.
- Green Onions – Adds lovely freshness and crunch; don’t forget to garnish with extra on top!
For Garnish
- Nori – Offers a crispy texture; it’s optional but adds that authentic touch.
- Tobiko – A decorative and flavorful garnish that enhances presentation; totally optional but recommended.
Get these ingredients ready, and you’re on your way to creating a fabulous Spicy Salmon Sushi Bake that will have everyone asking for seconds!
Step‑by‑Step Instructions for Spicy Salmon Sushi Bake
Step 1: Prep Rice
Start by rinsing the sushi rice under cold water in a fine mesh strainer until the water runs clear, which removes excess starch. Then, cook the rice according to package instructions, usually in a rice cooker or a pot on the stove. Once cooked, allow it to rest off heat for 10 minutes with the lid on to ensure perfectly fluffy rice for your Spicy Salmon Sushi Bake.
Step 2: Make Vinegar Mixture
In a small bowl, combine the rice vinegar, sugar, and salt. Stir until the sugar and salt are fully dissolved to create a flavorful seasoning for your rice. Gently fold this mixture into the warm, rested rice using a wooden spatula, making sure to fluff it up without mashing the grains. This step is crucial for adding that authentic sushi flavor to your Spicy Salmon Sushi Bake.
Step 3: Prepare Topping
In a separate mixing bowl, combine the diced fresh salmon fillet, mayonnaise, Sriracha sauce, sesame oil, and chopped green onions. Mix everything thoroughly until well combined, ensuring the salmon is evenly coated with the creamy, spicy sauce. This flavorful topping is what makes your Spicy Salmon Sushi Bake truly irresistible, so taste and adjust the spice level according to your preference.
Step 4: Assemble Dish
Spread the prepared sushi rice evenly across the bottom of a greased baking dish, pressing it down gently to form a solid base. Next, spoon the salmon topping mixture over the rice, spreading it evenly to cover the entire surface. This layering creates the perfect foundation for your Spicy Salmon Sushi Bake, ensuring that every bite is packed with flavor.
Step 5: Bake
Preheat your oven to 375°F (190°C). Once the oven is ready, place the baking dish inside and bake for 25 to 30 minutes. You’ll know it’s done when the salmon is cooked through and the top is golden brown and bubbly, creating a delightful contrast with the tender rice below. This step transforms the Spicy Salmon Sushi Bake into a warm, comforting dish.
Step 6: Garnish & Serve
Once baked, remove the dish from the oven and allow it to cool for a few minutes. Then, garnish your Spicy Salmon Sushi Bake with additional chopped green onions, nori strips, and a sprinkle of tobiko for presentation. Serve it warm along with soy sauce and pickled ginger on the side for dipping, inviting everyone to share this delicious culinary creation.
How to Store and Freeze Spicy Salmon Sushi Bake
Fridge: Store any leftover Spicy Salmon Sushi Bake in an airtight container for up to 2 days. Reheat in the oven for best texture, covering with foil to maintain moisture.
Freezer: If you plan to freeze, let the bake cool completely before dividing into portions and wrapping tightly in plastic wrap. It can be frozen for up to 3 months, but it’s best enjoyed fresh.
Thawing: To thaw, place it in the fridge overnight before reheating. This gentle method helps maintain flavor and texture.
Reheating: Reheat the thawed bake in the oven at 350°F (175°C) for about 15-20 minutes, or until warmed through, ensuring it’s hot all the way to the center.
Spicy Salmon Sushi Bake Variations
Feel free to let your creativity shine and explore these exciting twists on the classic Spicy Salmon Sushi Bake!
-
Seafood Swap: Substitute salmon with fresh crab or shrimp for a different flavor profile. Each option brings a delectable taste twist that will surprise your palate!
-
Low-Calorie Option: Use low-fat mayonnaise to reduce calories without compromising creaminess. It’s a small change that makes a big difference for lighter meal prep.
-
Enhanced Spice: If you crave more heat, add some diced jalapeños or chili flakes to the topping. This will fire up the flavor, creating an exciting kick that spice lovers will adore.
-
Fresh Herb Kick: Incorporate chopped fresh cilantro or basil into the topping mixture for a burst of freshness. The vibrant herbs will elevate the dish and add an aromatic flair.
-
Veggie Boost: Mix in diced bell peppers or shredded carrots to the topping for added crunch and color. These veggies not only enhance texture but also add nutrients to your meal. You may find yourself enjoying it as a full veggie-packed feast!
-
Noodle Layer: For a heartier dish, layer cooked soba or udon noodles beneath the rice. This addition creates a carbohydrate trio that makes every bite even more satisfying.
-
Sushi Roll Bowl: Transform any leftovers into a sushi roll-inspired bowl topped with your favorite veggies. This is a fantastic way to repurpose the bake into something entirely new and just as delicious!
For another delightful seafood option, consider preparing my Creamy Chicken Bacon Ranch Pasta Bake or indulge in the comforting flavors of Coconut Curry Salmon. Dive into these delicious variations and make them your own!
What to Serve with Spicy Salmon Sushi Bake?
Imagine a cozy gathering where every bite takes you on a delightful culinary journey, perfectly complementing the warmth and aromatic flavors of the sushi bake.
-
Sesame Edamame: These lightly salted, tender soybeans provide a satisfying crunch that contrasts beautifully with the creamy salmon topping. A perfect appetizer to keep your guests engaged.
-
Crispy Seaweed Salad: The refreshing flavors and slightly chewy texture of this salad enhance the umami notes of your bake, making it a vibrant side option that everyone will enjoy.
-
Kimchi Fried Rice: Spicy, tangy, and packed with flavor, kimchi fried rice completes the meal with a kick that pairs wonderfully with the richness of the sushi bake. Plus, it’s a great way to use leftovers creatively!
-
Pickled Ginger: Often served with sushi, this zesty and sweet condiment cleanses the palate between bites, enhancing your overall dining experience with each flavor-packed morsel.
-
Sushi Rolls: For a more traditional option, serve simple cucumber or avocado sushi rolls as a side offering. Their freshness rounds out the meal, giving both taste and texture balance.
-
Green Tea: This warm beverage is a calming companion to your savory dish, enhancing the flavors and adding an authentic Japanese touch to your dining experience.
-
Mango Sorbet: As a light dessert, this refreshing sorbet provides a sweet contrast to the spicy notes of the sushi bake while cooling down the palate after a savory meal.
-
Craft Beer: A light, crisp beer or even a fruity ale pairs well with the spicy notes, making it a fantastic choice for those who enjoy a bubbly complement to the dish’s bold flavors.
-
Japanese Sake: For a more traditional experience, serve chilled sake which beautifully enhances the rich flavors while inviting everyone into a warm and convivial atmosphere.
These pairings will turn your Spicy Salmon Sushi Bake into a delightful feast, perfect for creating memorable moments at your table.
Expert Tips for Spicy Salmon Sushi Bake
-
Pat Dry Salmon: Before mixing with other ingredients, always pat the salmon dry to prevent excess moisture, which ensures better browning and flavor.
-
Rice Resting Time: Allow the sushi rice to rest after cooking. This crucial step helps maintain its structure and prevents it from becoming too mushy under the topping.
-
Oven Monitoring: Keep a close eye on the bake during the last few minutes. If the topping is browning too quickly, lowering the oven rack can prevent burning while still achieving that golden perfection.
-
Spice Adjustment: Taste the topping mixture before assembling; if you’re uncertain about spice levels, add Sriracha gradually to suit your preferences without overwhelming the dish.
-
Garnish Generously: Don’t skimp on the garnishes like green onions and tobiko; they add essential freshness and visual appeal that enhance the overall experience of your Spicy Salmon Sushi Bake.
Make Ahead Options
These Spicy Salmon Sushi Bake preparations are perfect for busy weeknights and help streamline your meal planning! You can cook the sushi rice and prepare the vinegar mixture up to 24 hours in advance, storing them in the refrigerator separately to maintain quality. Additionally, you can mix the salmon topping and refrigerate it for up to 3 days; just ensure it’s sealed tightly to prevent any fishy odor. When you’re ready to enjoy your dish, simply assemble the layers and bake as directed. This way, you’ll have a delicious, comforting meal with minimal effort—just as flavorful and satisfying as if you made it all at once!
Spicy Salmon Sushi Bake Recipe FAQs
What type of sushi rice should I use?
For the best results, opt for short-grain sushi rice, as it has the right amount of starch to create that sticky texture essential for your Spicy Salmon Sushi Bake. Brands like Nishiki or Koshihikari are great options, and remember to rinse the rice well under cold water until the water runs clear to remove excess starch before cooking!
How should I store leftovers?
Absolutely! You can store any leftover Spicy Salmon Sushi Bake in an airtight container in the refrigerator for up to 2 days. To reheat it, I recommend covering the dish with aluminum foil in the oven to retain moisture, which helps prevent the rice from drying out while ensuring it stays flavorful.
Can I freeze the Spicy Salmon Sushi Bake?
Yes, you can! Allow your Spicy Salmon Sushi Bake to cool completely after baking, then slice it into portions. Wrap each portion tightly in plastic wrap and place them in a freezer-safe container. It can be frozen for up to 3 months. When you’re ready to enjoy, simply thaw it overnight in the fridge and reheat in the oven.
What if my salmon isn’t browning properly?
If the topping of your Spicy Salmon Sushi Bake isn’t browning as you’d like, try keeping an eye on the oven temperature during baking. If the salmon starts to cook without golden color, you can switch to the broiler for the last few minutes—just watch closely to prevent burning! If the skillet looks dry, drizzle a bit of sesame oil or mayonnaise to help it crisp up.
Is there a gluten-free alternative for Sriracha?
Certainly! Sriracha can contain gluten due to certain added ingredients. Look for brands labeled gluten-free or try using chili paste or a homemade blend of crushed red pepper and vinegar for that spicy kick in your Spicy Salmon Sushi Bake without the gluten concerns.
Can my pet eat the leftovers?
While pets may enjoy salmon, it’s best to avoid sharing the leftovers with them, especially because ingredients like mayonnaise and Sriracha are not suitable for animals. If you’d like to treat your furry friend, prioritize plain, cooked salmon without additives or seasoning!
Spicy Salmon Sushi Bake: A Cozy, Flavor-Loaded Delight
Ingredients
Equipment
Method
- Rinse sushi rice under cold water until water runs clear. Cook rice according to package instructions and let rest off heat for 10 minutes.
- Combine rice vinegar, sugar, and salt in a small bowl; stir until dissolved. Fold into the warm rice gently.
- In another bowl, combine salmon, mayonnaise, Sriracha, sesame oil, and green onions. Mix thoroughly until well combined.
- Spread sushi rice evenly in a greased baking dish. Spoon the salmon topping over the rice evenly.
- Preheat oven to 375°F (190°C) and bake dish for 25-30 minutes until the salmon is cooked and the top is golden.
- Allow to cool slightly, garnish with green onions, nori, and tobiko. Serve warm with soy sauce and pickled ginger.
Leave a Reply