
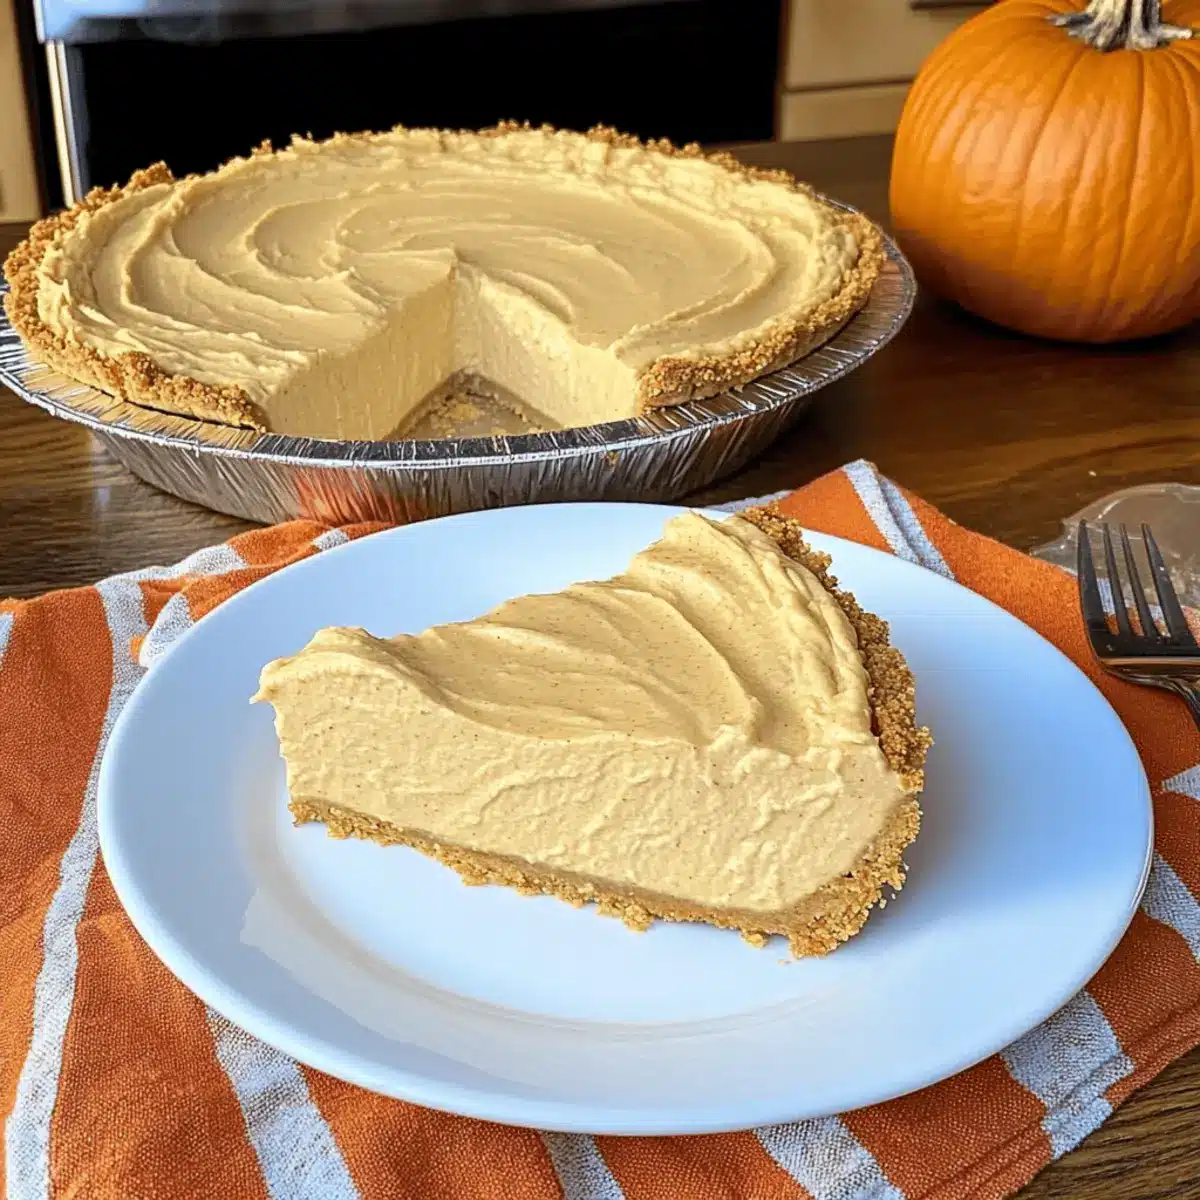
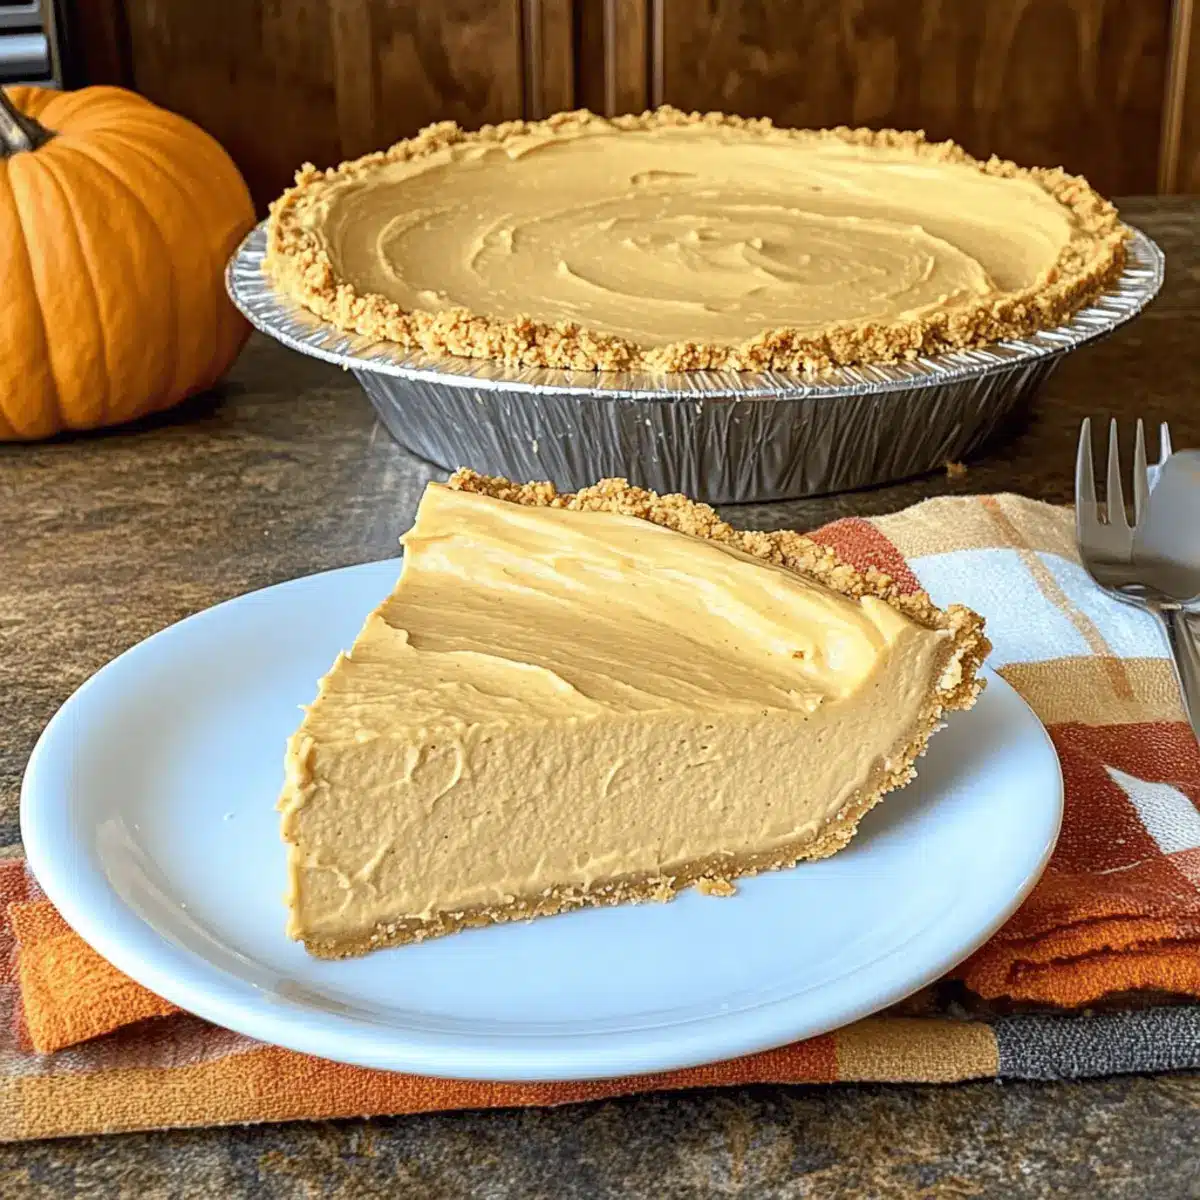
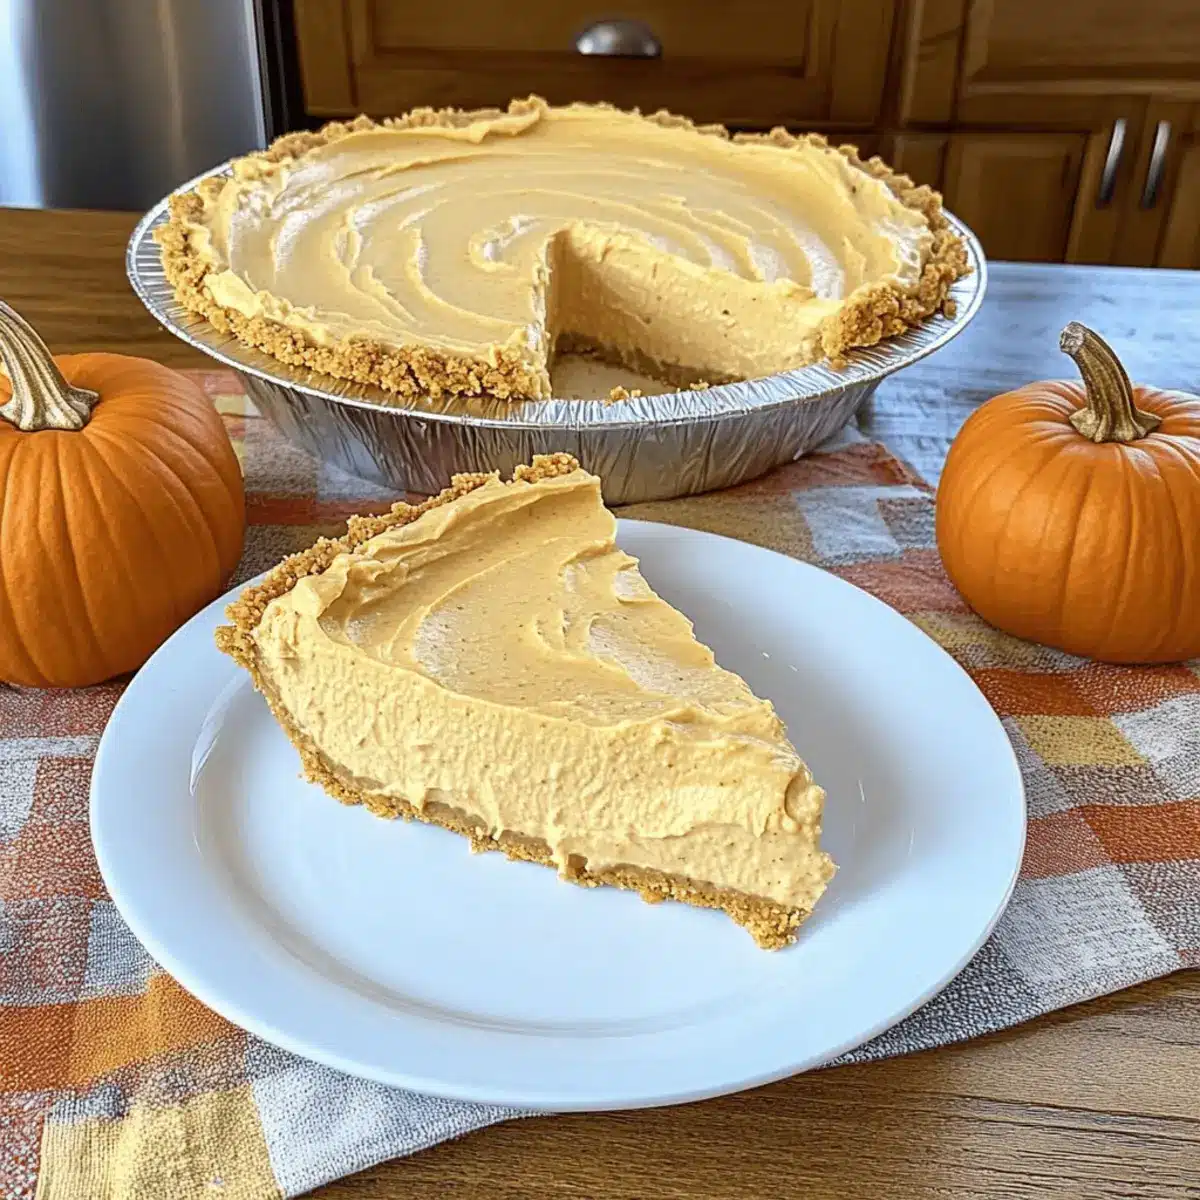
As I flipped through my recipe box, the crisp autumn air outside drew me back to the warmth of holiday gatherings. There’s something magical about fall desserts, especially when they require no baking at all! This Easy No-Bake Pumpkin Pie has quickly become a staple in my kitchen. In just five minutes, you can whip up a creamy, luscious pie that will dazzle your guests without breaking a sweat. The harmonious blend of pumpkin and the airy Cool Whip creates a delightful experience, perfect for sharing with family and friends. Plus, it’s a wonderful way to embrace the flavors of the season while saving valuable time. Are you ready to discover how easy it is to create this fall favorite? Let’s dive in!

Why is No-Bake Pumpkin Pie a Must-Try?
Simplicity at Its Best: Making this delightful pie takes just 5 minutes, making it perfect for busy home cooks and chefs alike.
Rich Pumpkin Flavor: The sweet blend of pumpkin puree and spices creates an incredibly satisfying taste that captures the essence of fall.
Kid-Friendly Dessert: This creamy pie is a hit with kids and adults, ensuring it will vanish at any gathering!
Versatile Base Options: Don’t hesitate to explore variations, like using chocolate wafer crusts or swapping pumpkin for sweet potato puree.
Make-Ahead Convenience: Prepare it a day in advance, allowing the flavors to meld while you focus on other holiday preparations.
Treat yourself to this no-bake pie and consider pairing it with a drizzle of homemade whipped cream for extra indulgence!
No-Bake Pumpkin Pie Ingredients
For the Filling
- Pumpkin Puree – This provides the core flavor of the pie; use canned or homemade for the best results.
- Instant Vanilla Pudding Mix – Acts as a thickener while enhancing the creaminess; choose a regular-sized box (5 oz) for optimal texture.
- Pumpkin Pie Spice – Adds warmth and those aromatic flavors you love; feel free to adjust based on your taste preference.
- Cool Whip (thawed) – Gives the pie its light and airy texture; for a homemade twist, consider using whipped cream, but results may vary.
For the Crust
- Graham Cracker Crust – Offers a sweet and crunchy base; a store-bought crust is convenient, but a homemade one can elevate the flavor profile.
This No-Bake Pumpkin Pie is not only effortless to whip up but also embodies the spirit of fall with its delicious combination of ingredients!
Step‑by‑Step Instructions for No-Bake Pumpkin Pie
Step 1: Combine the Base Ingredients
In a large mixing bowl, add 15 ounces of pumpkin puree, 5 ounces of instant vanilla pudding mix, and 1 teaspoon of pumpkin pie spice. Use an electric mixer on low speed to blend these ingredients together for about 1–2 minutes, or until the mixture is completely smooth and uniform in color, with no lumps remaining.
Step 2: Fold in the Cool Whip
Once the pumpkin mixture is ready, gently fold in 16 ounces of thawed Cool Whip using a spatula. Be careful not to overmix; the goal is to create a light, airy texture in your filling. Continue folding until there are no streaks of Cool Whip visible, and you achieve a creamy consistency that captures the essence of this no-bake pumpkin pie.
Step 3: Prepare the Crust
Take a prepared graham cracker crust, either store-bought or homemade, and place it on a flat surface. Carefully pour the creamy pumpkin filling into the crust, using a butter knife or spatula to smooth the surface evenly. This step is vital for ensuring a well-presented pie that will be easy to slice and serve.
Step 4: Chill to Set
Cover the pie loosely with plastic wrap and place it in the refrigerator. Allow it to chill for at least 2 hours, which allows the filling to firm up and enhances the flavors. You’ll know it’s ready when the filling is set to a sliceable consistency, making it perfect for your holiday gathering.
Step 5: Serve and Enjoy
Once chilled, remove the pie from the refrigerator and slice it into generous pieces. You may consider topping with additional Cool Whip or a sprinkle of cinnamon for a festive touch. This no-bake pumpkin pie is not only simple to make but also a delightful centerpiece for your fall festivities!
What to Serve with Easy No-Bake Pumpkin Pie
As the crisp autumn air settles in, pairing this delightful no-bake dessert with complementary side dishes creates the perfect fall feast.
- Ginger Snap Cookies: The spicy sweetness of these cookies brings a festive crunch that complements the creamy pie beautifully.
- Whipped Cream: A dollop of freshly whipped cream on top adds an extra layer of lightness and a hint of sweetness, enhancing each slice.
- Cranberry Sauce: The tartness of cranberry sauce cuts through the richness, offering a delightful contrast that brightens every bite.
- Apple Cider: A warm mug of spiced apple cider adds cozy vibes, making it a perfect drink to enjoy with your pumpkin pie.
- Harvest Salad: Toss together greens, walnuts, and dried cranberries for a fresh and crunchy side that complements the creaminess of the pie beautifully.
- Vanilla Ice Cream: A scoop of vanilla ice cream melting on a slice of pumpkin pie introduces a delightful temperature contrast and richness.
- Pumpkin Spice Latte: Embrace the season with a creamy pumpkin spice latte, echoing the flavors of the pie while warming you from the inside out.
- Maple Pecan Tart: As a decadent dessert option, a slice of maple pecan tart brings caramelized nutty flavors, creating a harmonious pairing with the pie.
How to Store and Freeze No-Bake Pumpkin Pie
Fridge: Keep leftover no-bake pumpkin pie in an airtight container for up to 3 days for the best flavor and texture.
Freezer: If you need to store it longer, you can freeze the pie for up to 1 month. Wrap it tightly in plastic wrap and then in aluminum foil to prevent freezer burn.
Thawing: To enjoy your pie, thaw it overnight in the fridge before serving. This way, it will retain its creamy consistency without compromising taste.
Reheating: As this is a no-bake recipe, there’s no need to reheat; simply enjoy chilled or at room temperature for a refreshing fall dessert!
Make Ahead Options
Preparing this Easy No-Bake Pumpkin Pie ahead of time is a fantastic way to save precious minutes on busy fall days! You can make the pie up to 24 hours in advance—just follow the initial instructions to mix the filling and pour it into the graham cracker crust. Cover the pie with plastic wrap and refrigerate it, allowing the flavors to meld beautifully overnight while keeping the filling fresh and airy. When it’s time to serve, simply slice the pie, and if desired, top it with more Cool Whip or a sprinkle of cinnamon for an extra touch. This way, you’ll have a delightful dessert ready to impress with minimal effort!
Expert Tips for No-Bake Pumpkin Pie
-
Mixing Essentials: Use a large bowl for mixing; this prevents overflow and makes it easier to create your creamy filling for the no-bake pumpkin pie.
-
Cool Whip Care: Always ensure your Cool Whip is completely thawed before folding it in. This step is crucial for achieving that light, airy texture.
-
Customize Sweetness: Start with 8 ounces of Cool Whip, then taste the filling. You can add more if desired for a sweeter, fluffier pie perfect for fall gatherings.
-
Avoiding Lumps: When adding the instant pudding mix, whisk it thoroughly with the pumpkin puree to avoid lumps, ensuring your filling is perfectly smooth.
-
Chilling Time Matters: Don’t rush the chilling process; allowing the pie to chill for at least 2 hours helps the flavors meld beautifully, giving you the best results.
No-Bake Pumpkin Pie Variations
Feel free to explore these delightful twists that will make your no-bake pumpkin pie even more unique and personalized!
-
Sweet Potato Swap: Replace pumpkin puree with sweet potato puree for a slightly different, yet equally delicious flavor profile. It adds a subtle sweetness to your pie!
-
Chocolate Wafer Crust: Experiment by using a chocolate wafer crust instead of graham crackers for a rich, indulgent taste that complements the pumpkin beautifully. This combination is sure to impress chocolate lovers!
-
Maple Syrup Boost: Stir in a splash of maple syrup to the filling for extra depth and warmth. It pairs wonderfully with pumpkin and brings a hint of fall’s sweetest essence.
-
Spiced Rum Flavor: Add a teaspoon of spiced rum extract to elevate the flavor with warm, inviting notes that dance on the palate. It’s a festive touch that adults will appreciate!
-
Nutty Crunch Topping: For added texture, sprinkle crushed pecans or walnuts on top before serving. This delightful crunch juxtaposes the creamy filling and enhances flavor.
-
Dairy-Free Option: Substitute Cool Whip with a dairy-free whipped topping to make this pie suitable for lactose-intolerant guests or vegans. Everyone can enjoy this delightful treat!
-
Mini Pie Servings: Pour your filling into mini graham cracker cups for individual servings. They’re perfect for gatherings and make delightful, bite-sized desserts!
For additional inspiration, check out my recipes for Chewy Pumpkin Snickerdoodle cookies or Soft Pumpkin Cookies with cinnamon for more ways to enjoy that rich pumpkin flavor this season!
No-Bake Pumpkin Pie Recipe FAQs
What kind of pumpkin puree should I use?
You can use either canned or homemade pumpkin puree. Canned pumpkin is the most convenient option and usually offers the best flavor. Look for pure pumpkin puree, avoiding any products that contain added spices or sugar, as those can alter the taste and texture of your no-bake pumpkin pie.
How long can I store no-bake pumpkin pie in the fridge?
Absolutely! You can store leftover no-bake pumpkin pie in an airtight container in the refrigerator for up to 3 days. Just make sure to cover it well to keep the pie fresh and prevent it from absorbing any lingering odors from other foods in the fridge.
Can I freeze my no-bake pumpkin pie?
Yes! To freeze your no-bake pumpkin pie, wrap it tightly in plastic wrap first, then cover it with aluminum foil to prevent freezer burn. It can be stored in the freezer for up to 1 month. When you’re ready to enjoy it, simply thaw it overnight in the refrigerator for the best texture and flavor retention.
What if my filling is lumpy?
No worries! If your no-bake pumpkin pie filling ends up lumpy, it could be due to the instant pudding mix not being blended well with the pumpkin puree. To fix this, try using an electric mixer to combine the pumpkin and pudding mix thoroughly before folding in the Cool Whip. If you’re still encountering lumps, you can strain the mixture through a fine sieve to achieve a smooth consistency.
Is there a dairy-free alternative for Cool Whip?
Yes! If you’re looking for a dairy-free option, you can use whipped coconut cream or a dairy-free whipped topping available in stores. It may give a slightly different flavor, but it works wonderfully as a substitute in your no-bake pumpkin pie, allowing everyone to enjoy this fall delight!
Can pets eat pumpkin?
Absolutely! Plain pumpkin is safe for pets in moderation. It’s great for digestive health and can be a tasty treat for dogs and cats alike. However, be sure not to include any added spices or sugars, as those can be harmful. Always consult your vet before introducing new foods into your pet’s diet.
Creamy No-Bake Pumpkin Pie That's Perfect for Fall Gatherings
Ingredients
Equipment
Method
- In a large mixing bowl, add pumpkin puree, instant vanilla pudding mix, and pumpkin pie spice. Blend with an electric mixer on low speed for about 1–2 minutes until smooth.
- Gently fold in the Cool Whip using a spatula until no streaks are visible and the mixture is creamy.
- Pour the pumpkin filling into the graham cracker crust and smooth the surface.
- Cover the pie loosely with plastic wrap and refrigerate for at least 2 hours until set.
- Once chilled, slice the pie and serve, optionally topping with more Cool Whip or cinnamon.
Leave a Reply