
As I stood in my kitchen, the delicious scent of caramel and spices wafting through the air, I couldn’t help but feel a wave of nostalgia flood over me. There’s something magical about caramel apple cheesecake bars that takes me back to fall family gatherings, where laughter filled the room and dessert was the grand finale. This recipe for Caramel Apple Cheesecake Bars is not just a treat; it’s a warm embrace of rich flavors and comforting textures, combining velvety cheesecake with the tartness of fresh apples and a drizzle of sweet caramel. With only a handful of ingredients, it’s a quick and easy dessert that transforms any occasion into something special—perfect for impressing guests or satisfying your sweet tooth after a long day. Ready to indulge in a slice of heaven that captures the essence of autumn? Let’s dive into this delightful recipe!
Why Is This Recipe a Must-Try?
Simplicity at Its Best: This recipe only requires four ingredients, making it a perfect choice for both novice bakers and busy home cooks.
Chewy and Crunchy: The cookies achieve a delightful balance of crispy edges and chewy centers, ensuring every bite is satisfying.
Kid-Friendly Enjoyment: With their sweet chocolate flavor, these cookies are sure to please children and adults alike, making them a hit for family gatherings or casual get-togethers.
Quick and Easy: From mixing to baking, these cookies come together in under 30 minutes, allowing you to enjoy freshly baked treats without the lengthy prep.
Versatile Indulgence: You can easily customize your cookies by swapping in dark chocolate chips or even adding dried fruits for a unique twist. If you love the taste of apples, pair these with some delicious Apple Cider Caramel for a scrumptious fall-inspired snack!
Once you try these cookies, you’ll understand why they’re perfect for satisfying any chocolate craving!
Crispy Chocolate Oat Cookies Ingredients
For the Cookie Base
• Oats – Use rolled oats for a chewy texture that holds the cookie together.
• Chocolate Chips – Opt for dark chocolate chips if you prefer a richer, semi-sweet flavor.
For the Binder
• Peanut Butter (or alternative nut/seed butter) – This acts as the essential binder; almond butter makes a great alternative.
For Sweetness
• Sweetener (e.g., honey or maple syrup) – Choose pure maple syrup for a natural sweetness that complements the chocolate.
These simple ingredients come together to create a delightful indulgence you won’t forget, making these Crispy Chocolate Oat Cookies the perfect treat for any occasion!
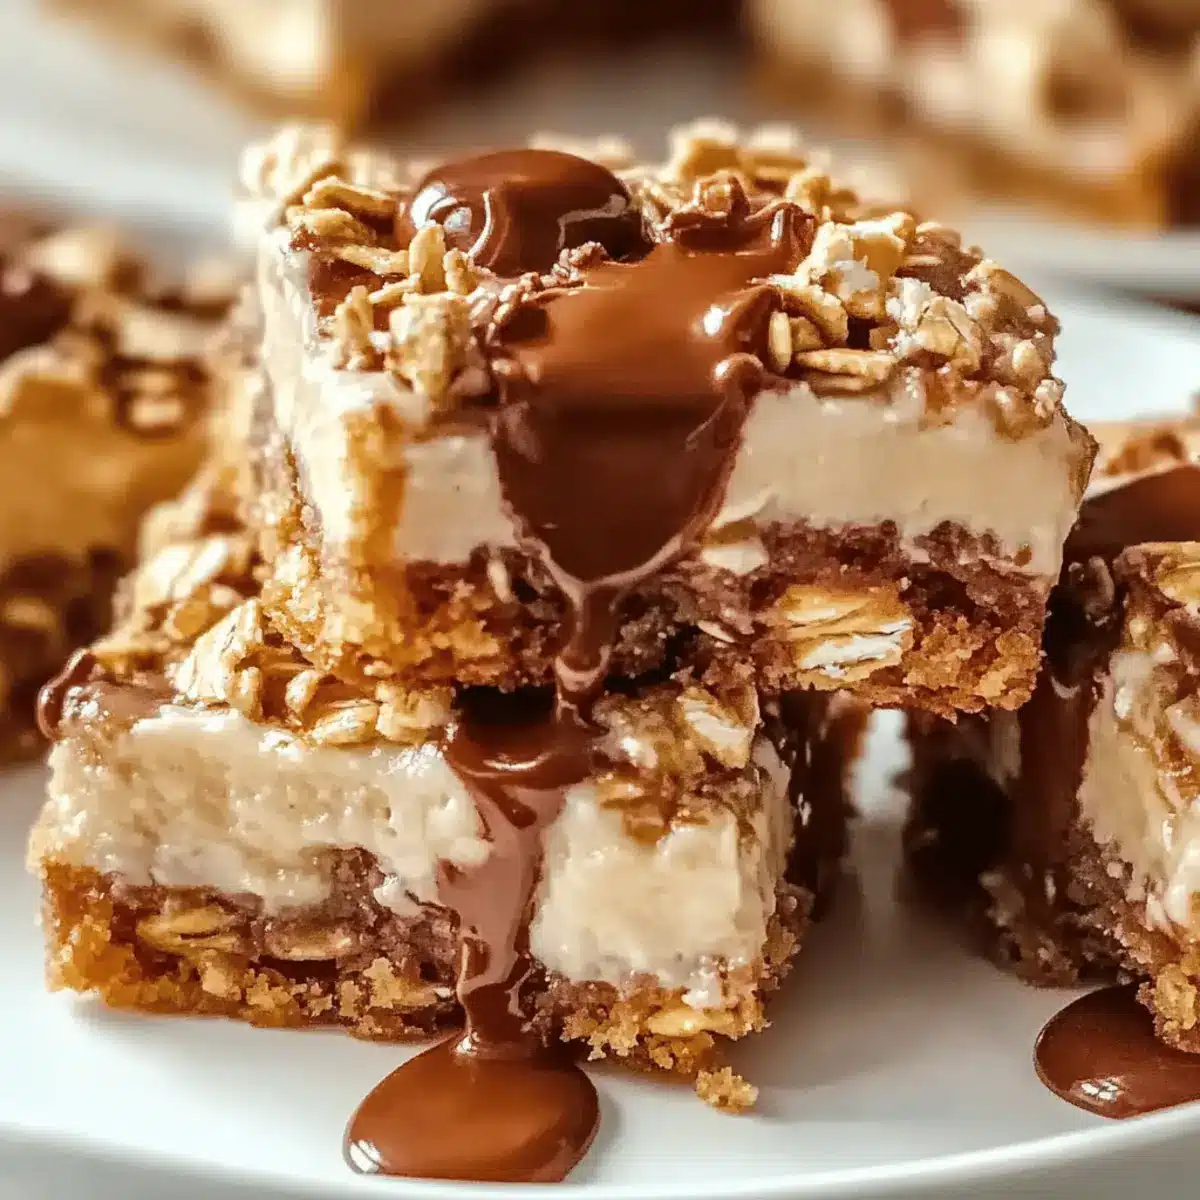
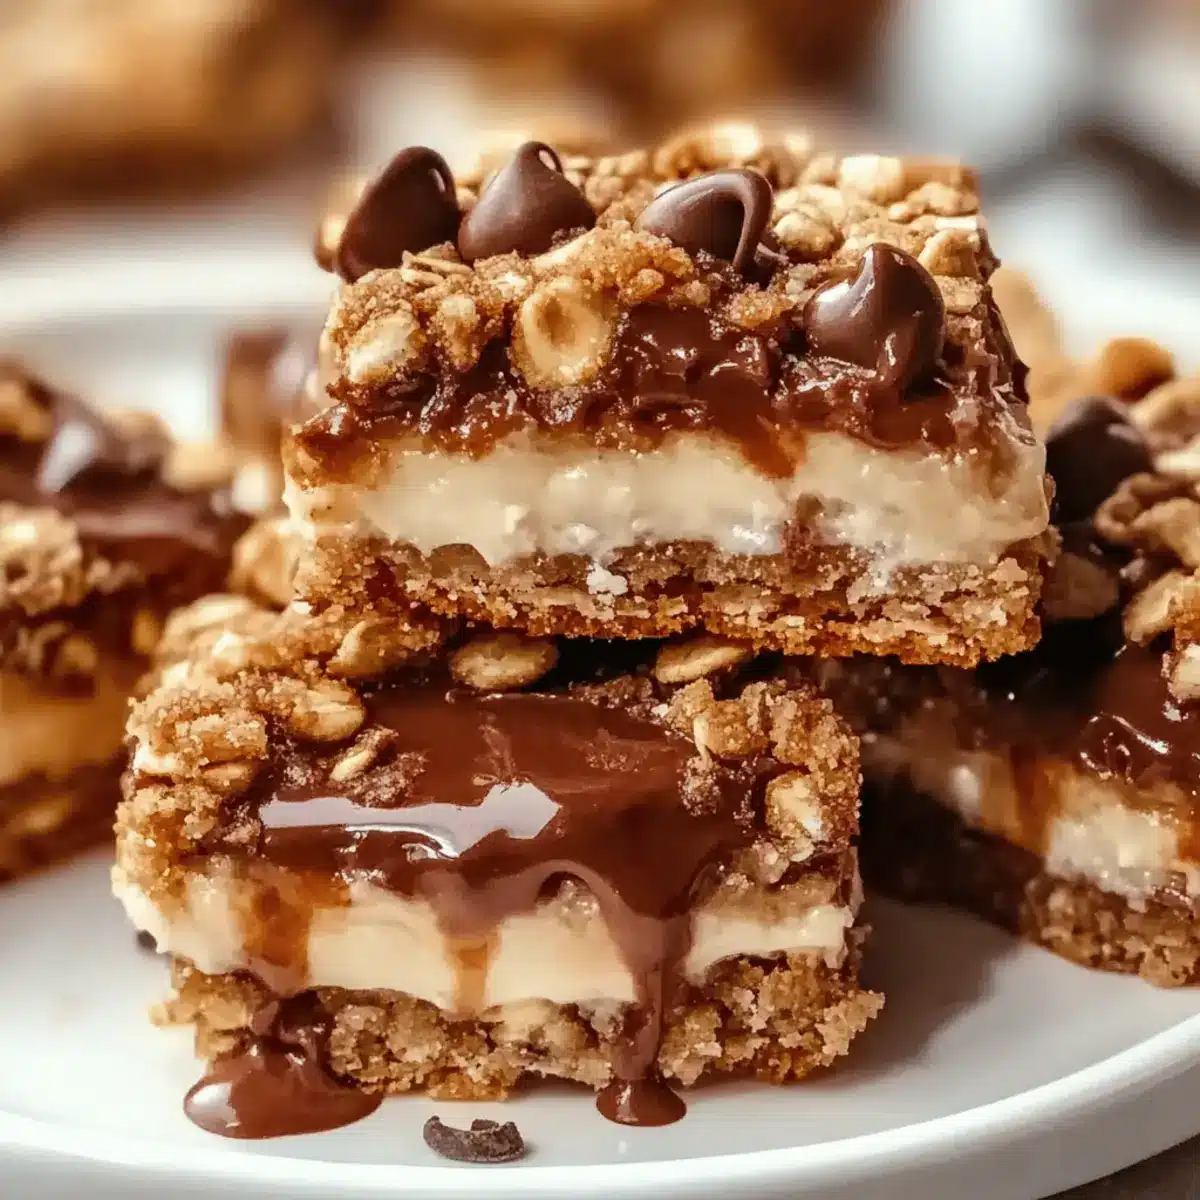
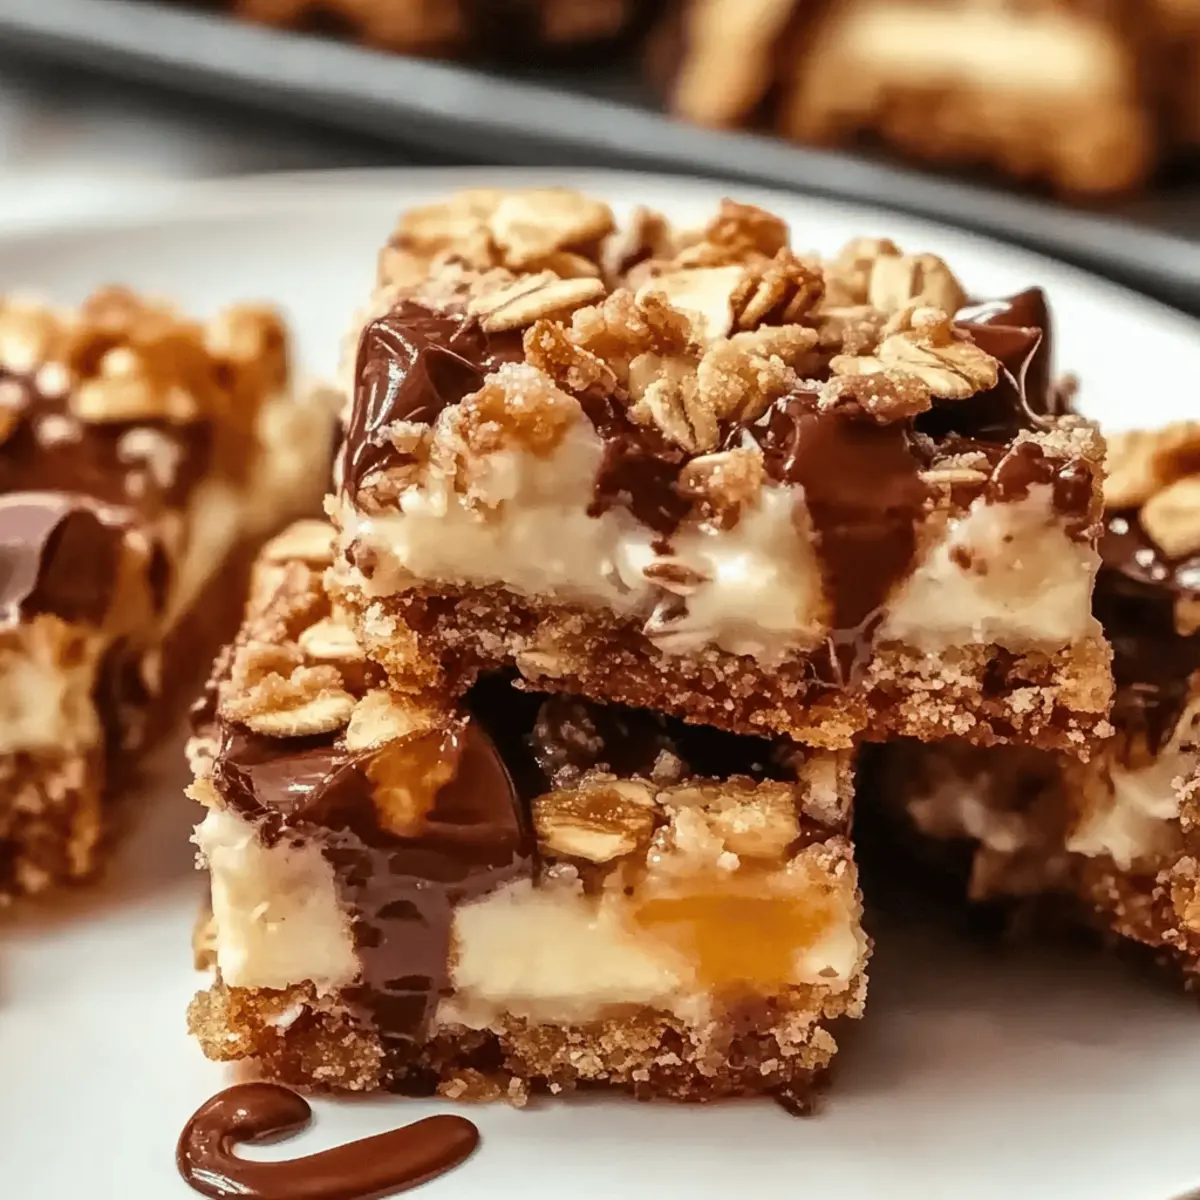
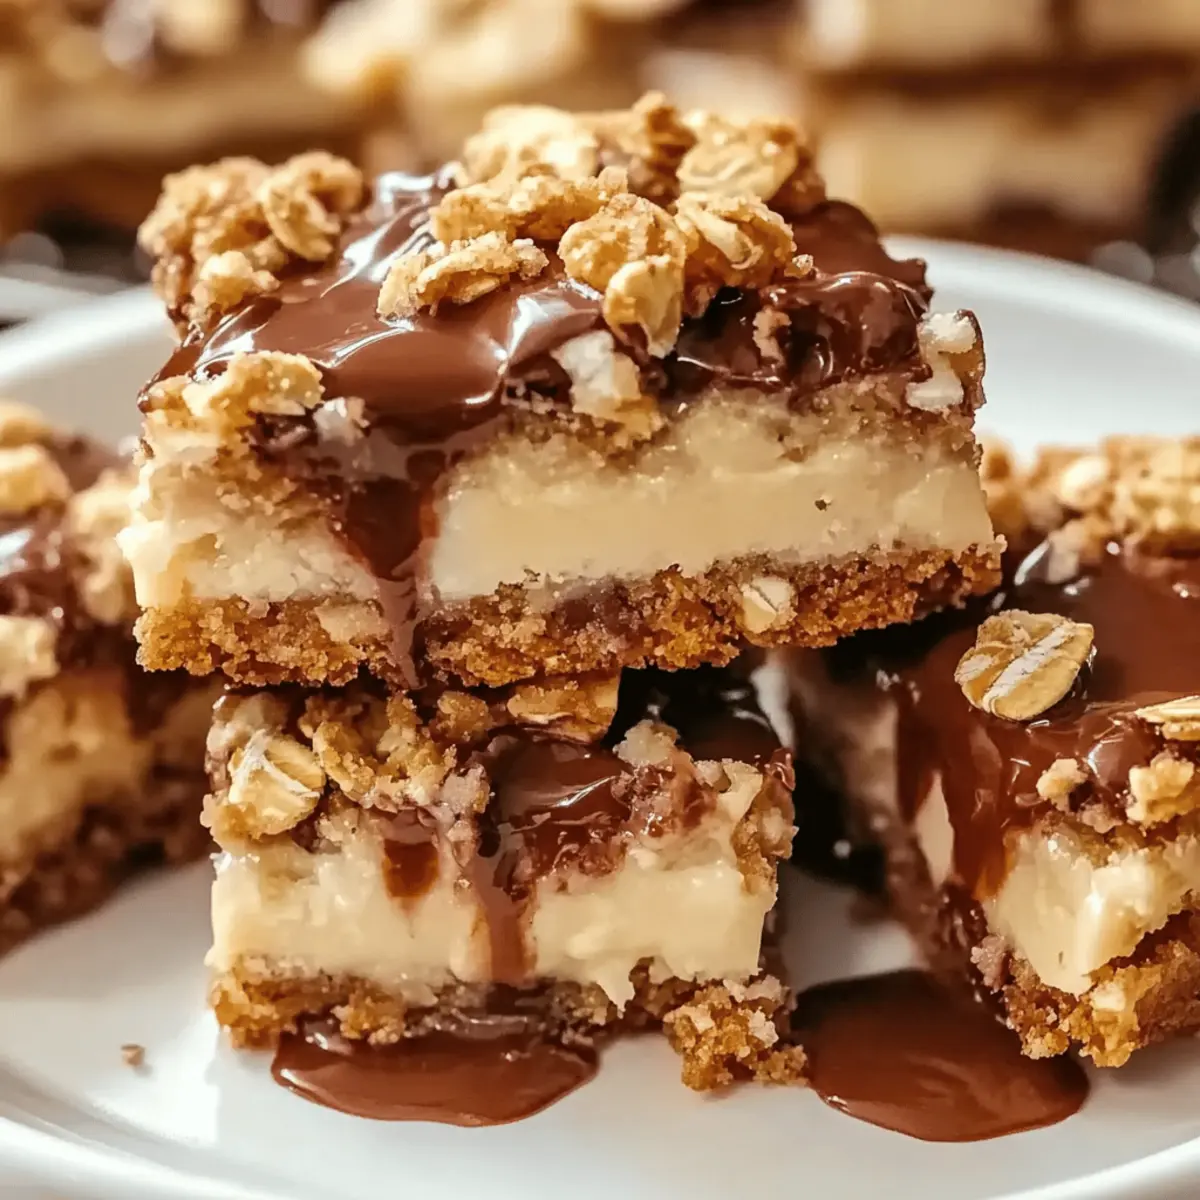
Step‑by‑Step Instructions for Caramel Apple Cheesecake Bars
Step 1: Preheat the Oven
Begin by preheating your oven to 350°F (175°C). As the oven warms, line a 9×9-inch baking pan with parchment paper, allowing some excess to hang over the edges for easy removal later. This setup creates a non-stick environment for your Caramel Apple Cheesecake Bars, ensuring they come out beautifully.
Step 2: Prepare the Cheesecake Mixture
In a mixing bowl, combine 8 ounces of softened cream cheese with 1/2 cup of granulated sugar and 1 teaspoon of vanilla extract. Beat the mixture with a hand mixer on medium speed until it’s creamy and smooth, taking about 2-3 minutes. This delightful blend forms the rich cheesecake base that will pair perfectly with the caramel and apple flavors.
Step 3: Add the Apples
Now, fold in 1 cup of diced apples into the cheesecake mixture, ensuring they are evenly distributed throughout. The apples add natural sweetness and a pop of freshness, enhancing the overall flavor. Be gentle to avoid breaking down the apples too much; you want to maintain some texture in your Caramel Apple Cheesecake Bars.
Step 4: Create the Crust
In a separate bowl, combine 1 cup of graham cracker crumbs, 1/4 cup of melted butter, and 2 tablespoons of sugar. Mix them until the crumbs are coated and the mixture resembles wet sand. Press this mixture firmly into the bottom of the lined baking pan to form a solid crust that will support the luscious cheesecake layer on top.
Step 5: Assemble the Bars
Spread the cheesecake mixture evenly over the graham cracker crust. Use a spatula to smooth the surface, ensuring a nice, level layer. This will set the stage for the beautiful layers in your Caramel Apple Cheesecake Bars, making them as appealing to the eyes as they are to the palate.
Step 6: Bake the Bars
Place the assembled pan in the preheated oven and bake for 25-30 minutes, or until the edges are set and the center has a slight jiggle. You should see a golden hue around the edges, indicating that your Caramel Apple Cheesecake Bars are cooked but still creamy in the middle.
Step 7: Cool and Drizzle
After baking, remove the pan from the oven and allow it to cool to room temperature, about 1 hour. Once cooled, drizzle 1/2 cup of caramel sauce over the top, allowing it to flow into the cheesecake. This sweet finishing touch will make your Caramel Apple Cheesecake Bars even more irresistible.
Step 8: Chill and Slice
Cover the pan with plastic wrap and refrigerate for at least 4 hours, or preferably overnight. This chilling time allows the flavors to meld together beautifully and helps the bars set. Once ready, lift the bars from the pan using the parchment paper, slice into squares, and serve. Enjoy the delightful burst of flavors in every bite!
What to Serve with Crispy Chocolate Oat Cookies
There’s a special kind of magic that happens when you pair these delightful cookies with the perfect accompaniments.
-
Cold Milk: Nothing beats a classic pairing! The creamy sweetness of milk perfectly complements the chocolatey richness of the cookies.
-
Nutty Granola Bar: For a crunchy contrast, try serving the cookies alongside nutty granola bars. This creates a satisfying blend of textures and flavors that kids will love.
-
Fresh Berries: Bright, juicy berries like strawberries or raspberries not only add a refreshing burst of flavor but also create a beautiful color contrast on your plate.
-
Vanilla Ice Cream: Elevate the indulgence by serving a scoop of silky vanilla ice cream with the cookies. The melty goodness makes for a decadent treat any time of day.
-
Hot Chocolate: Cozy up with a warm cup of homemade hot chocolate. The delightful combination of chocolate and oats will bring comforting memories flooding back.
-
Chai Latte: For a unique twist, a spiced chai latte offers a lovely contrast, enhancing the rich flavors of the cookies while providing a soothing drink option.
Indulging in these combinations will surely take your crispy chocolate oat cookie experience to new heights—a feast for both your taste buds and your heart!
Variations & Substitutions for Crispy Chocolate Oat Cookies
Feel free to explore these delicious twists that cater to different tastes and preferences!
- Nut-Free: Substitute peanut or almond butter with sunbutter for a safe option that’s still creamy and tasty.
- Sweetener Swap: Use agave syrup instead of honey for a vegan option that adds sweetness without overpowering.
- Chocolate Options: Try using white chocolate chips for a different flavor profile, offering a sweeter cookie experience.
- Vanilla Boost: Add a teaspoon of vanilla extract to the mixture to deepen the flavor—it pairs wonderfully with chocolate.
- Fruit Mix-In: Incorporate 1/2 cup of dried cranberries or raisins in place of chocolate chips for a healthier twist. They add a delightful chewiness!
- Oat Texture: For a crunchier bite, replace some oats with chopped nuts like pecans or walnuts, which lend a crunchy texture and nutty flavor.
- Decadent Drizzle: Drizzle melted chocolate over the cooled cookies for an extra touch of indulgence—perfect for chocolate lovers.
- Warm Spices: Enhance the flavor by adding a pinch of cinnamon or nutmeg to the dough to invoke warming, cozy vibes.
With these variations, you can make your Crispy Chocolate Oat Cookies truly your own. If you’re feeling adventurous, why not pair them with a slice of Apple Cinnamon Streusel for a delightful dessert duo? Enjoy!
Storage Tips for Crispy Chocolate Oat Cookies
Room Temperature: Keep your cookies in an airtight container at room temperature for up to 3 days. This ensures they remain fresh and chewy.
Fridge: For longer freshness, store in the refrigerator for up to 1 week. Just be sure to let them come to room temperature before indulging!
Freezer: Freeze your cookies in a single layer on a baking sheet, then transfer them to a freezer bag. They can last up to 3 months without losing flavor.
Reheating: To enjoy warm cookies again, pop them in the microwave for 10-15 seconds or warm them in the oven at 350°F (175°C) for a few minutes. Treat yourself to these delightful crispy chocolate oat cookies anytime!
Make Ahead Options
These Crispy Chocolate Oat Cookies are perfect for meal prep enthusiasts looking to save time during busy weeks! You can prepare the dough up to 24 hours in advance by mixing all the ingredients together and storing the dough in an airtight container in the refrigerator. This not only helps meld the flavors but also keeps the cookies fresh and delicious. When you’re ready to bake, simply scoop and shape the cookies onto a baking sheet and proceed with baking as directed. To maintain their quality, make sure to keep the dough covered tightly, preventing it from drying out. Enjoy freshly baked cookies with minimal effort!
Expert Tips for Crispy Chocolate Oat Cookies
-
Mix Gently: Avoid overmixing the dough by stirring just until ingredients are combined. This ensures your cookies remain chewy and tender.
-
Watch the Oven: Keep a close eye on the baking cookies; ovens can vary. Remove them when the edges are golden, as they continue to firm up upon cooling.
-
Space It Out: Make sure to leave ample space between cookie scoops on the baking sheet to allow for spreading, preventing them from merging into one giant cookie.
-
Peanut Butter Consistency: Use creamy peanut butter for smoother mixing and a better texture. If it’s too thick, your cookies may turn out dry.
-
Taste Variations: Consider adding a pinch of sea salt on top before baking to enhance the chocolate flavor in your Crispy Chocolate Oat Cookies.
-
Storing Secrets: To maintain freshness, store your cookies in an airtight container with a slice of bread. This keeps them chewy and delightful!
Crispy Chocolate Oat Cookies Recipe FAQs
What kind of oats should I use?
Absolutely! Rolled oats are the best choice for this recipe as they provide the perfect texture and chewiness. Avoid instant oats, as they can make the cookies overly mushy.
How should I store the cookies for maximum freshness?
You can store your cookies in an airtight container at room temperature for up to 3 days. If you want them to last longer, refrigerate them for up to 1 week. Just remember to let them come to room temperature before enjoying!
Can I freeze the cookies?
Yes, you can! To freeze your cookies, place them in a single layer on a baking sheet and freeze until solid, about 2 hours. Then, transfer them to a freezer bag or an airtight container. They can be stored in the freezer for up to 3 months. When you’re ready to enjoy, simply thaw them at room temperature or warm them in the oven at 350°F (175°C) for a few minutes.
What if my cookies turn out too dry?
If your cookies are dry, it could be due to overmixing the dough. Make sure to mix just until combined. Additionally, ensure that your peanut butter is creamy and not too thick, as this can affect the consistency. You can also try adding a splash of milk to the dough for extra moisture!
Are these cookies suitable for kids with nut allergies?
Absolutely! If you need a nut-free option, simply substitute the peanut butter with sunbutter or a similar seed-based butter. This way, everyone can enjoy these delicious crispy chocolate oat cookies without any concern!
Caramel Apple Cheesecake Bars a Cozy Fall Favorite
Ingredients
Equipment
Method
- Preheat your oven to 350°F (175°C) and line a 9x9-inch baking pan with parchment paper.
- In a mixing bowl, combine cream cheese, sugar, and vanilla extract. Beat until creamy and smooth.
- Fold in the diced apples into the cheesecake mixture carefully.
- In a separate bowl, mix graham cracker crumbs, melted butter, and sugar until it resembles wet sand. Press into the baking pan.
- Spread the cheesecake mixture evenly over the crust.
- Bake for 25-30 minutes until the edges are set and the center has a slight jiggle.
- Allow to cool to room temperature, then drizzle caramel sauce on top.
- Cover and refrigerate for at least 4 hours before serving.
Leave a Reply