
As I flipped through recipe books on a lazy Sunday afternoon, a glorious idea struck me: what if I could marry the beloved smashburger with the comforting embrace of a quesadilla? Enter my Juicy Grilled Smashburger Quesadillas, a fun twist that brings together savory, seasoned beef with melty cheese and crunchy veggies. This recipe isn’t just a quick solution for weeknight dinners—it’s a customizable comfort food that can please even the pickiest of eaters. With under an hour of prep time, you’ll find these quesadillas are the perfect blend of easy to make and wonderfully satisfying. So why stick with fast food when you can whip up this delightful fusion in your own kitchen? Get ready to discover a delicious new favorite!
Why Are Smashburger Quesadillas So Irresistible?
Unmatched Flavor: The fusion of juicy beef, gooey cheese, and vibrant veggies creates an irresistible taste experience that will keep you coming back for seconds.
Easy Prep: With a simple recipe that can be mastered by beginners, you’ll have a delicious meal ready in under an hour—perfect for busy weeknights!
Customizable: Feel free to make it your own! Substitute proteins or try different cheese blends, like pepper jack for a spicy kick.
Crowd-Pleaser: Whether you’re hosting family or friends, these quesadillas are sure to satisfy everyone’s cravings!
Quick Weeknight Wonder: Ditch the drive-thru—and enjoy homemade comfort food that’s better than any takeout option. Pair your quesadillas with a fresh salad or guacamole for an extra touch!
Smashburger Quesadillas Ingredients
For the Beef Mixture
- Ground Beef (80/20 blend) – Adds maximum juiciness and flavor with crispy edges; you can substitute with ground turkey or chicken if desired.
- Worcestershire Sauce – Provides a tangy umami boost that’s essential for flavor depth.
- Garlic Powder – Adds consistent mellow garlicky warmth without the risk of burning fresh garlic.
- Onion Powder – Offers sweet and savory flavors, seamlessly blending into the beef mix.
- Salt and Pepper – Enhances the natural flavors; adjust to taste for your preferred seasoning.
For the Quesadilla Assembly
- Large Flour Tortillas – Forms the base; ensure they are pliable for easy folding and you can use whole wheat or gluten-free alternatives.
- Sharp Cheddar Cheese – Delivers bold flavor and meltability; feel free to experiment with your favorite cheese blends.
- Monterey Jack Cheese – Adds a creamy texture that perfectly complements cheddar; try pepper jack for a spicy twist.
- Diced Onions – Provide a crispy texture and mild pungency; these can be omitted for a milder taste.
- Pickles – Add brightness and tangy contrast to the rich filling.
- Diced Tomatoes – Introduce a pop of color and sweetness, balancing out the savory ingredients.
- Unsalted Butter (melted) – Creates a golden-brown crust on tortillas; olive oil is a lighter substitute option.
- Olive Oil – Prevents sticking while grilling, ensuring a perfect cook every time.
- Lettuce Leaves (optional) – Adds crunch and freshness when served as a garnish.
- Ketchup and Mustard – Classic condiments that elevate the smashburger flavor profile.
Step‑by‑Step Instructions for Smashburger Quesadillas
Step 1: Prepare the Beef Mixture
In a large bowl, combine ground beef, Worcestershire sauce, garlic powder, onion powder, salt, and pepper. Using your hands, mix gently to avoid overworking the meat, ensuring it stays tender. This mixture will form the juicy filling for your smashburger quesadillas, so aim for an even consistency without large lumps.
Step 2: Preheat the Grill or Skillet
Set your grill or a large skillet over medium-high heat and allow it to preheat for about 5 minutes. This step is crucial to achieve a perfect sear on your beef patties, which will enhance the flavor and texture of your smashburger quesadillas. You want that sizzle when the patties hit the heat!
Step 3: Form the Beef Patties
Once your grill or skillet is ready, divide the beef mixture into 8 equal portions and roll them into balls. This will make it easier to smash them down into patties later. Keep things even to ensure that all the patties cook uniformly, leading to delicious smashburger quesadillas.
Step 4: Cook the Beef Patties
Brush the cooking surface with olive oil to prevent sticking, then place each beef ball onto the hot grill or skillet. Smash each ball down with a spatula to form a patty, cooking for about 2-3 minutes until the edges are crispy and browned. Flip and cook for an additional 2-3 minutes, aiming for your desired doneness.
Step 5: Let the Patties Rest
Remove the cooked patties from the grill or skillet and let them rest on a plate. This allows the juices to redistribute, keeping them flavorful and moist inside your smashburger quesadillas. While they rest, you can prepare the tortillas for assembly.
Step 6: Prepare the Tortillas
Brush one side of each large flour tortilla with melted butter, then place the buttered side down on the grill or skillet. This will create a golden-brown crust once the quesadillas are grilled. Make sure your cooking surface is still at medium heat to maintain a nice grilling temperature.
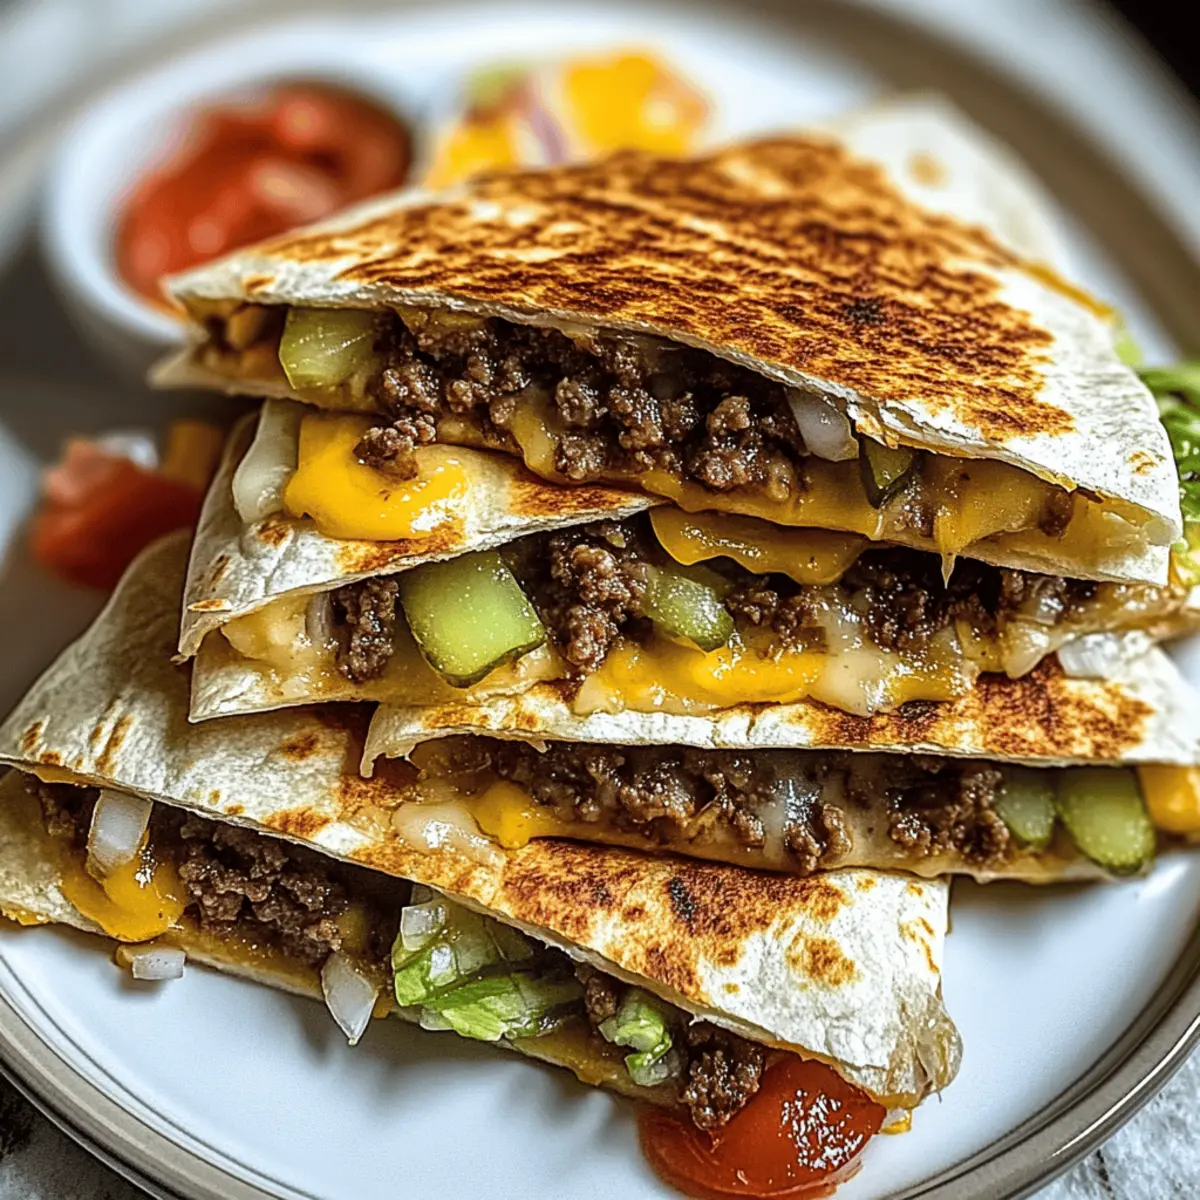
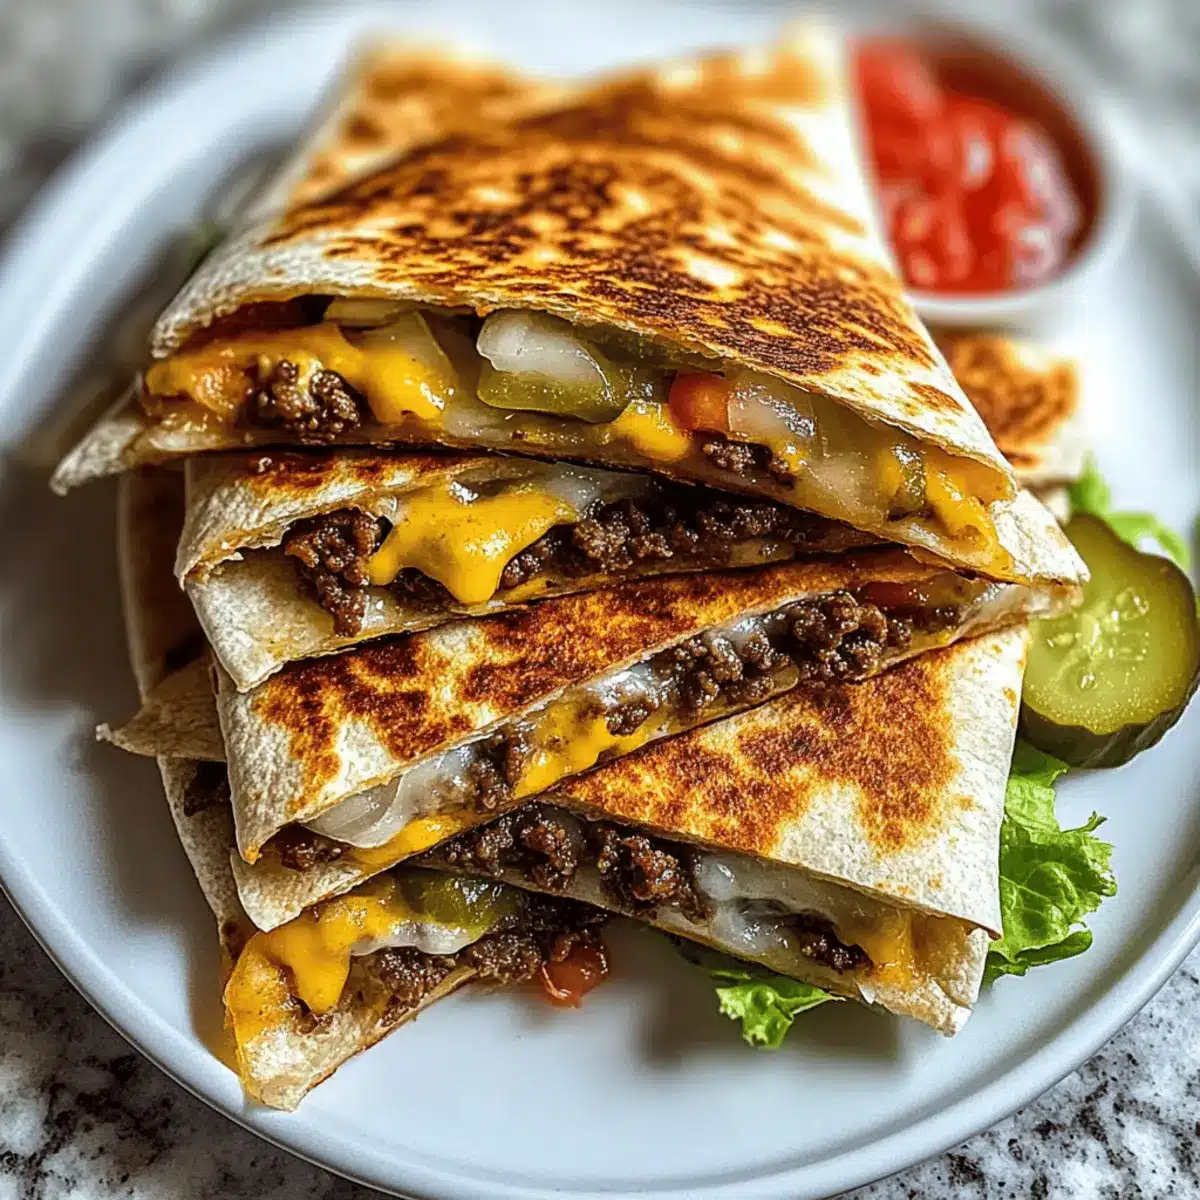
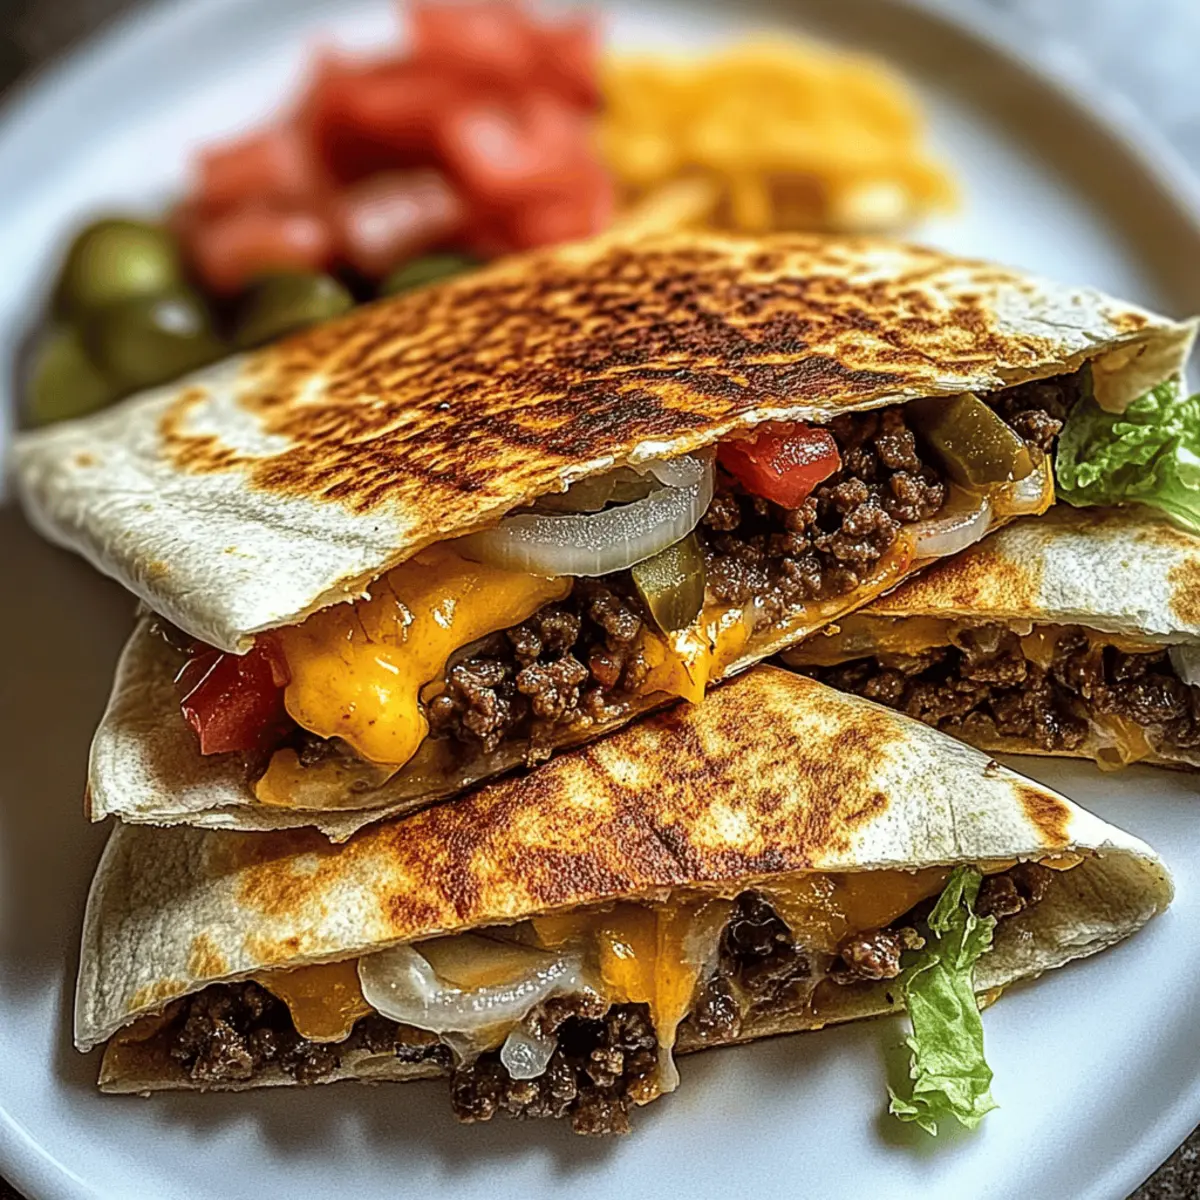
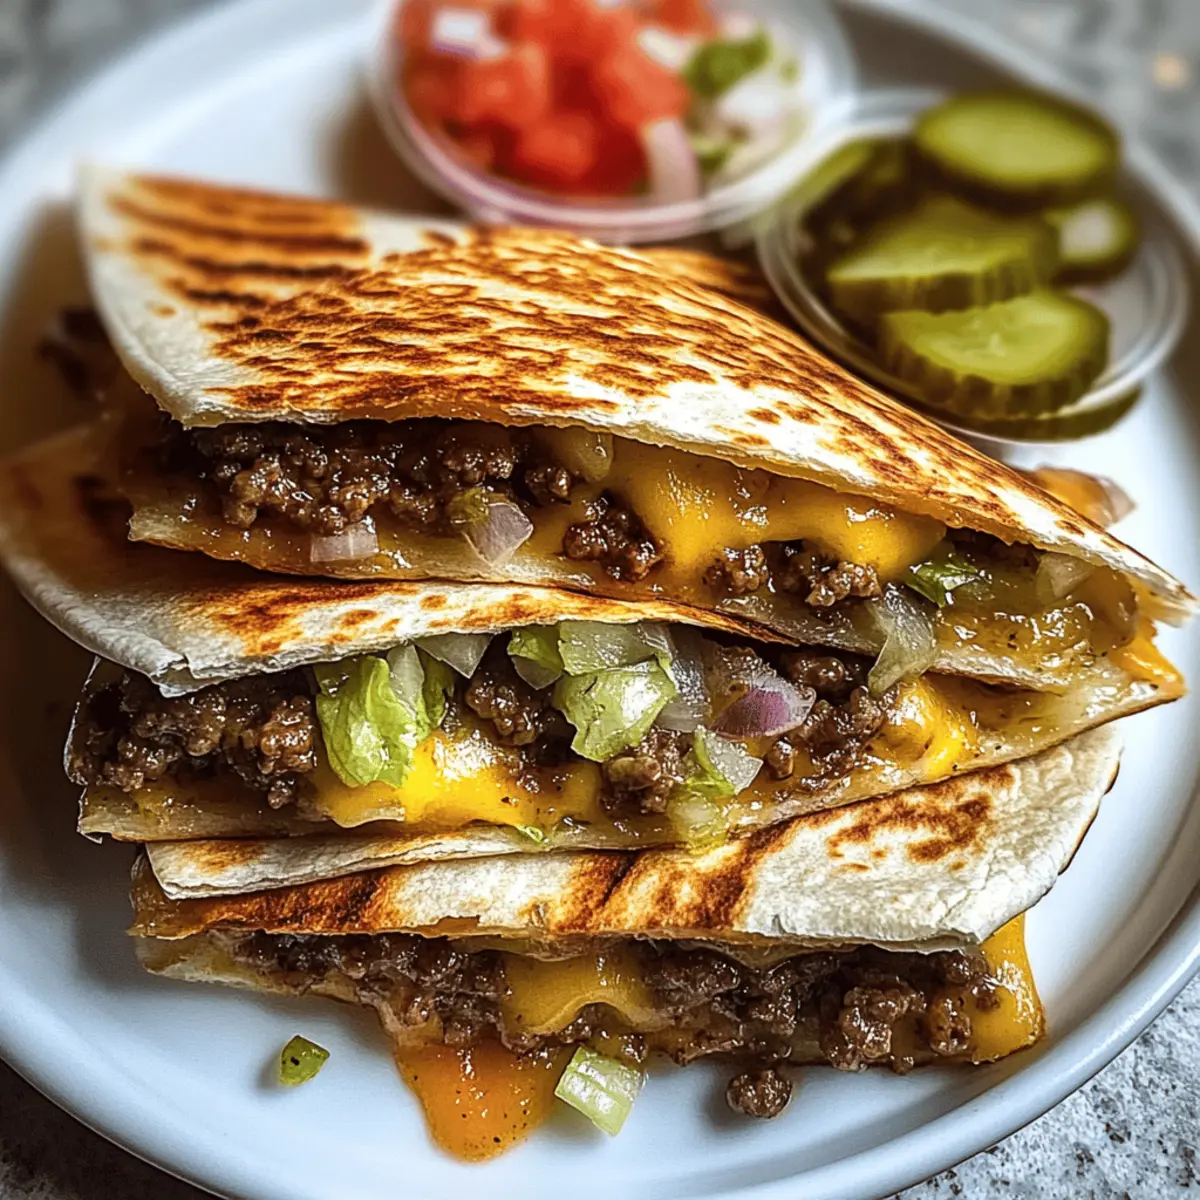
Step 7: Assemble the Quesadillas
On one half of each tortilla, layer with a slice of sharp cheddar cheese, followed by the beef patties, diced onions, pickles, and tomatoes. Add more cheese on top to ensure a gooey, melted filling. Remember, the cheese not only enhances flavor but also helps hold the quesadilla together when grilled.
Step 8: Grill the Quesadillas
Fold the tortilla over the filling to create a half-moon shape. Grill for 2-3 minutes per side, pressing down gently with a spatula to ensure even browning. You’ll know the quesadillas are done when they are golden brown and the cheese has melted beautifully within.
Step 9: Repeat with Remaining Ingredients
Continue the process with the remaining tortillas and fillings until you’ve cooked all your smashburger quesadillas. Keep them warm in a low oven if needed, so everyone can enjoy them hot and fresh together. The crispy texture and melty filling will be a sure crowd-pleaser.
Step 10: Serve and Enjoy
Once grilled to perfection, slice the quesadillas into wedges for easy serving. Optionally, garnish with fresh lettuce leaves, and serve with ketchup and mustard on the side for that classic smashburger experience. These smashburger quesadillas are best enjoyed straight off the grill, sharing the joy of homemade comfort food.
Smashburger Quesadillas Variations & Substitutions
Feel free to explore the journey of flavors as you customize these delightful quesadillas to suit your taste!
-
Protein Swaps: Use ground turkey or chicken for a lighter option while keeping the savory essence intact.
-
Spicy Kick: Incorporate pepper jack cheese in place of cheddar for an exciting burst of heat and flavor.
-
Veggie Power: Add roasted red peppers or sautéed bell peppers for a sweet and smoky undertone, enhancing both texture and taste.
-
Herb Infusion: Toss in fresh herbs like cilantro or basil for a vibrant freshness that elevates the flavor profile of your quesadillas.
-
Creamy Avocado: Top your quesadillas with sliced avocado or substitute with guacamole for a creamy sophistication that pairs beautifully.
-
Crispy Texture: Experiment with adding crushed tortilla chips inside for an unexpected crunch that will surprise your guests and enhance every bite.
-
Unique Dipping Sauces: Create a zesty chipotle mayo or rich avocado sauce for dipping—these can transform your plate into a party!
-
Play with Heat Levels: If you’re feeling adventurous, include jalapeños or green chiles for an extra spicy kick that complements the savory beef beautifully.
By tailoring these smashburger quesadillas, you invite a world of flavor possibilities into your kitchen—don’t hesitate to enjoy the creative process! If you’re looking for other mouthwatering combinations, check out the delicious options in our guacamole and salsa recipes.
Make Ahead Options
These Juicy Grilled Smashburger Quesadillas are perfect for meal prep, allowing you to enjoy a flavorful homemade dinner any night of the week! You can prepare the beef mixture and shape it into patties up to 24 hours in advance; simply cover and refrigerate them to lock in freshness. Additionally, you can slice the veggies and cheese a day ahead, keeping them stored in airtight containers. When you’re ready to enjoy, just grill the patties and assemble your quesadillas as per the recipe instructions—this ensures they’re just as delicious and satisfying as if made fresh. With these make-ahead tips, you can save valuable time during busy weeknights!
What to Serve with Juicy Grilled Smashburger Quesadillas
Nothing rounds out a meal like the perfect pairing, and these quesadillas invite a variety of delightful accompaniments for an unforgettable dining experience.
-
Creamy Guacamole: The cool, velvety texture of guacamole complements the warmth of the quesadillas, bringing a refreshing contrast.
-
Zesty Salsa: A chunky tomato salsa adds vibrant flavor and acidity, balancing the richness of the beef and cheese. It’s a great way to introduce fresh herbs too!
-
Crisp Green Salad: A light, crisp salad with mixed greens and a tangy vinaigrette adds a refreshing crunch, enhancing the overall meal experience.
-
Homemade French Fries: The golden, crispy potatoes create a satisfying contrast to the quesadillas, perfect for dipping in ketchup or enjoying alongside.
-
Sweet Corn on the Cob: Grilled or boiled corn brings a touch of sweetness and texture, complementing the savory notes in the quesadillas.
-
Chilled Lemonade: A glass of refreshing lemonade offers a tart and sweet balance, quenching your thirst while enhancing the meal’s flavor profile.
Enhancing your smashburger quesadillas with these companions creates a delicious, comforting feast that will delight family and friends!
Expert Tips for Smashburger Quesadillas
-
Keep it Tender: Avoid overworking the beef mixture; mix just enough for even seasoning and flavor without toughening the meat.
-
Perfectly Preheated: Make sure your grill or skillet is hot enough before adding the patties. This ensures a delightful sear and enhances the overall flavor of your smashburger quesadillas.
-
Avoid Sogginess: Stick to the recommended amounts of fillings. Overstuffing can lead to soggy quesadillas, so it’s better to keep a balanced filling to tortilla ratio.
-
Rest the Patties: Let your cooked patties rest for a few minutes before assembling to lock in juices and maintain meat moisture throughout the quesadilla.
-
Golden Brown Crust: Brush tortillas with melted butter before grilling to achieve that perfect crispy, golden-brown crust. You can also use olive oil for a lighter alternative.
How to Store and Freeze Smashburger Quesadillas
Fridge: Store leftover smashburger quesadillas in an airtight container for up to 3 days to maintain their flavor and texture.
Freezer: For longer storage, wrap each quesadilla tightly in plastic wrap and place in a freezer-safe bag. They can be frozen for up to 3 months—great for quick meals!
Reheating: To reheat, thaw in the fridge overnight, then place in a hot skillet for a few minutes on each side until crispy and heated through.
Cooling: Allow quesadillas to cool slightly before storing to prevent condensation and sogginess, ensuring they remain delicious for your next meal.
Smashburger Quesadillas Recipe FAQs
What type of ground beef should I use for smashburger quesadillas?
I recommend using an 80/20 blend of ground beef for maximum juiciness and flavor. This fat content gives you that delightful crispy edge while maintaining moisture. You can also use ground turkey or chicken as substitutions; just make sure to adjust the seasonings accordingly for the best taste!
How should I store leftover smashburger quesadillas?
After enjoying your delicious quesadillas, store any leftovers in an airtight container in the refrigerator for up to 3 days. This helps retain their flavor and texture. If you prefer them crispy, reheating them in the oven rather than the microwave is best, as it preserves that golden exterior!
Can I freeze smashburger quesadillas, and if so, how?
Absolutely! To freeze, wrap each quesadilla tightly in plastic wrap and place them in a freezer-safe bag. They can be frozen for up to 3 months. When you’re ready to enjoy, thaw them in the fridge overnight. Then, reheat in a hot skillet for a few minutes on each side until they’re crispy and heated through—just like fresh!
What should I do if my quesadillas are soggy?
To prevent sogginess, avoid overstuffing your quesadillas with too many fillings. Stick to the recommended amounts of cheese and toppings. If you have leftovers, allow them to cool completely before storing to prevent condensation. If your quesadillas do turn out soggy, simply reheat them in a skillet to help re-crisp the tortillas.
Are smashburger quesadillas suitable for special diets?
Yes, smashburger quesadillas can easily be customized for dietary considerations! For gluten-free diets, substitute large flour tortillas with gluten-free options. If you’re watching your calories, opt for leaner meats, such as ground turkey, and use less cheese for a lighter meal. Always check ingredients for allergens, especially in sauces and toppings!
Savory Smashburger Quesadillas That’ll Delight Your Taste Buds
Ingredients
Equipment
Method
- In a large bowl, combine ground beef, Worcestershire sauce, garlic powder, onion powder, salt, and pepper. Mix gently to maintain the tender texture.
- Preheat your grill or skillet over medium-high heat for about 5 minutes.
- Divide the beef mixture into 8 equal portions and roll them into balls.
- Brush the cooking surface with olive oil, then smash each ball down into patties, cooking for 2-3 minutes per side.
- Remove the cooked patties and let them rest on a plate.
- Brush one side of each tortilla with melted butter and place butter-side down on the grill.
- On one half of each tortilla, layer with cheddar cheese, beef patties, onions, pickles, and tomatoes. Add more cheese on top.
- Fold the tortilla over the filling and grill for 2-3 minutes per side.
- Continue the process with the remaining tortillas and fillings.
- Once grilled, slice the quesadillas into wedges and serve with lettuce, ketchup, and mustard.
Leave a Reply