
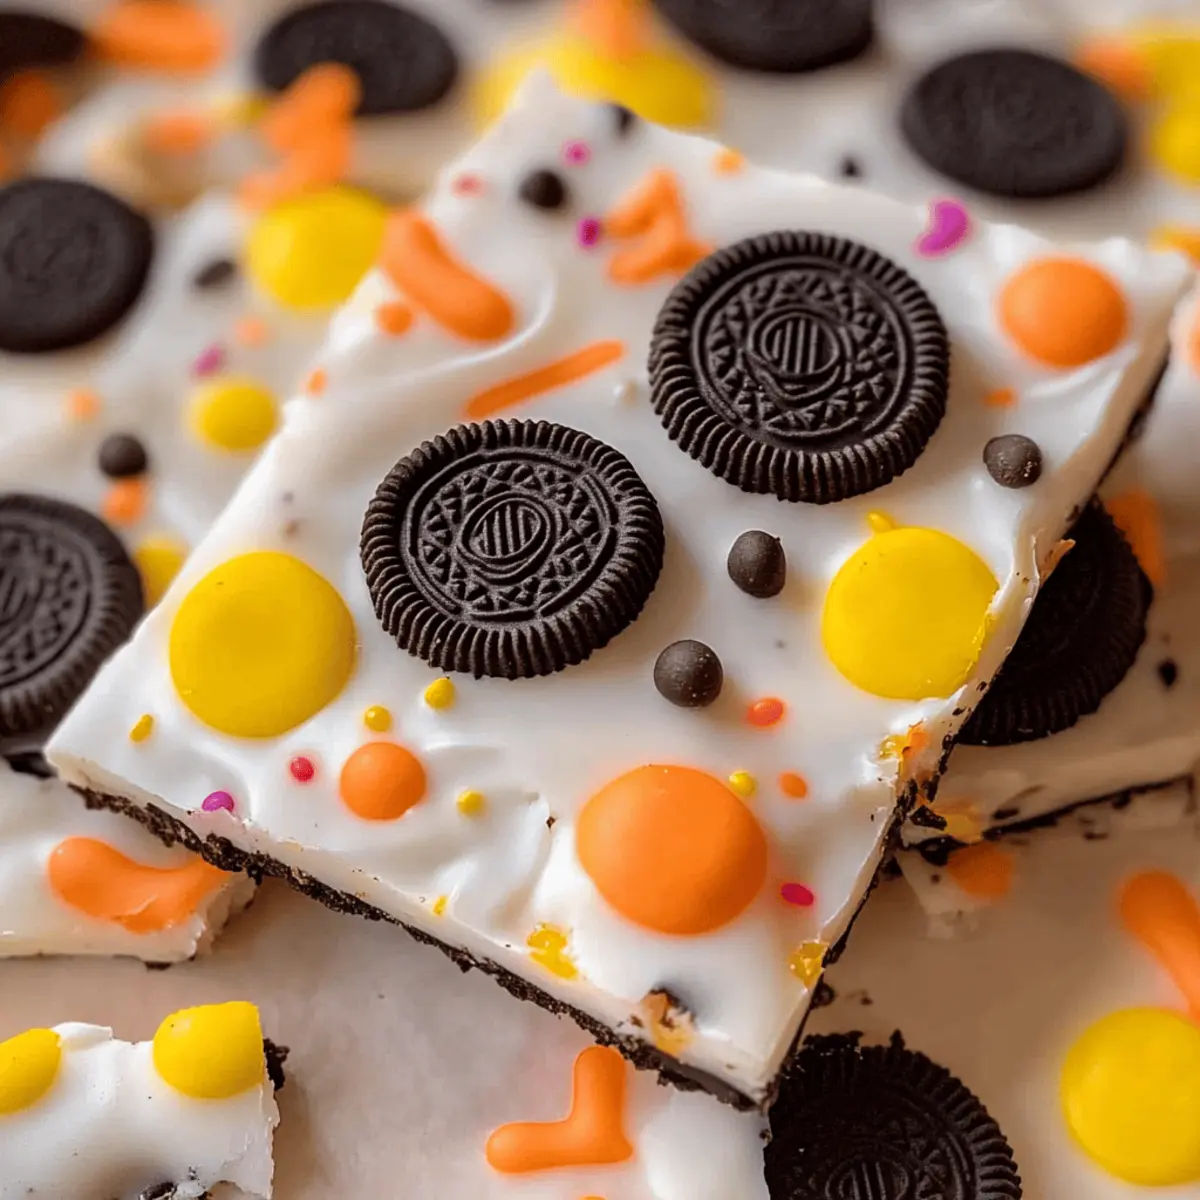
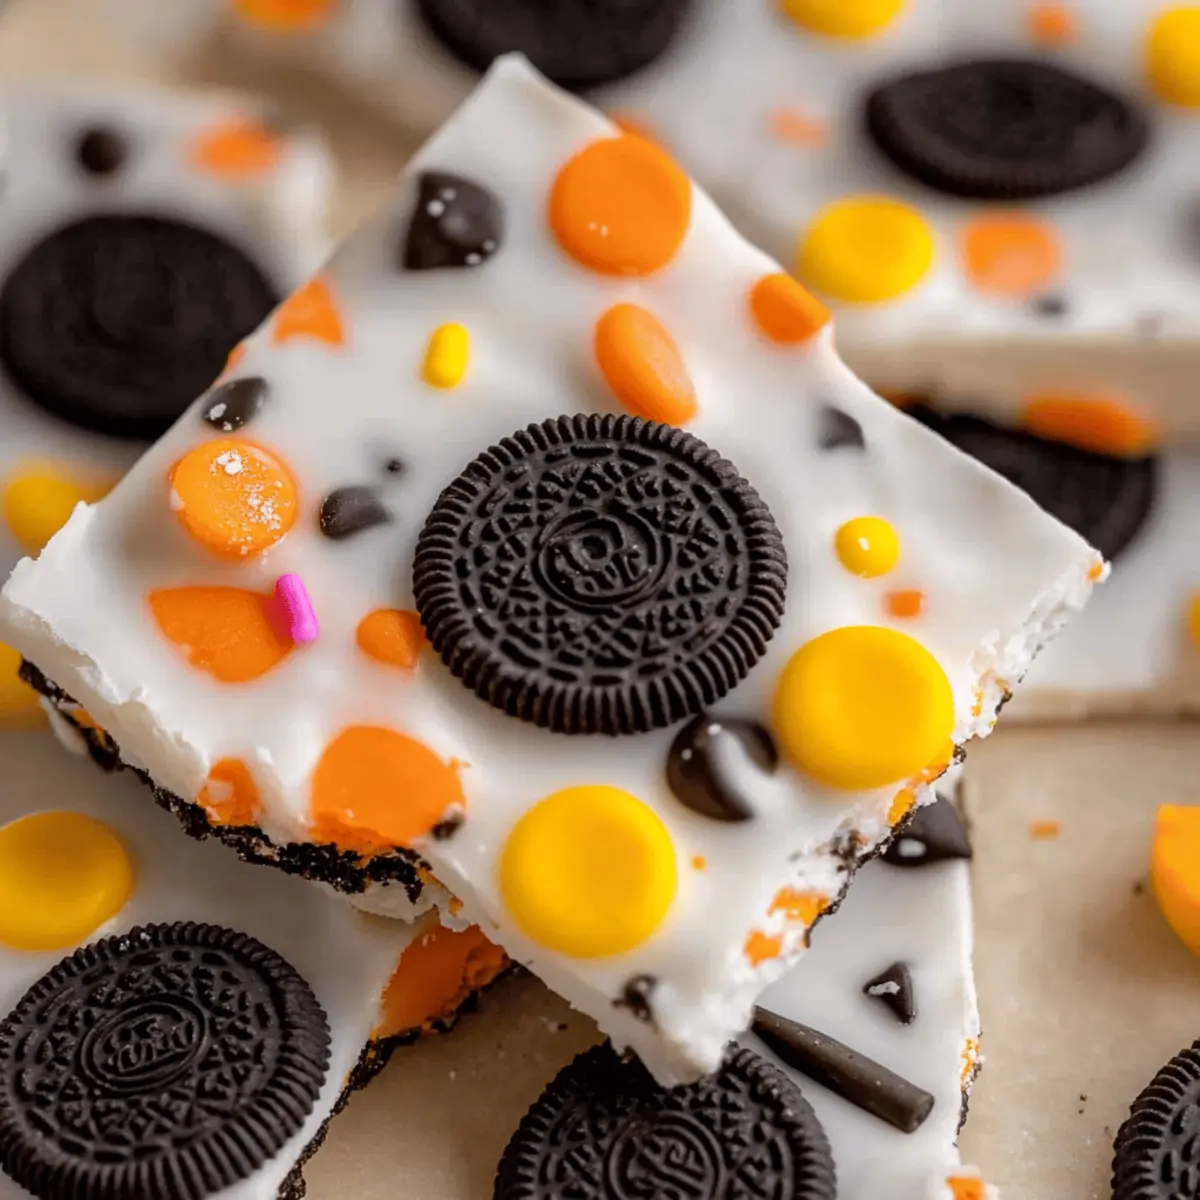
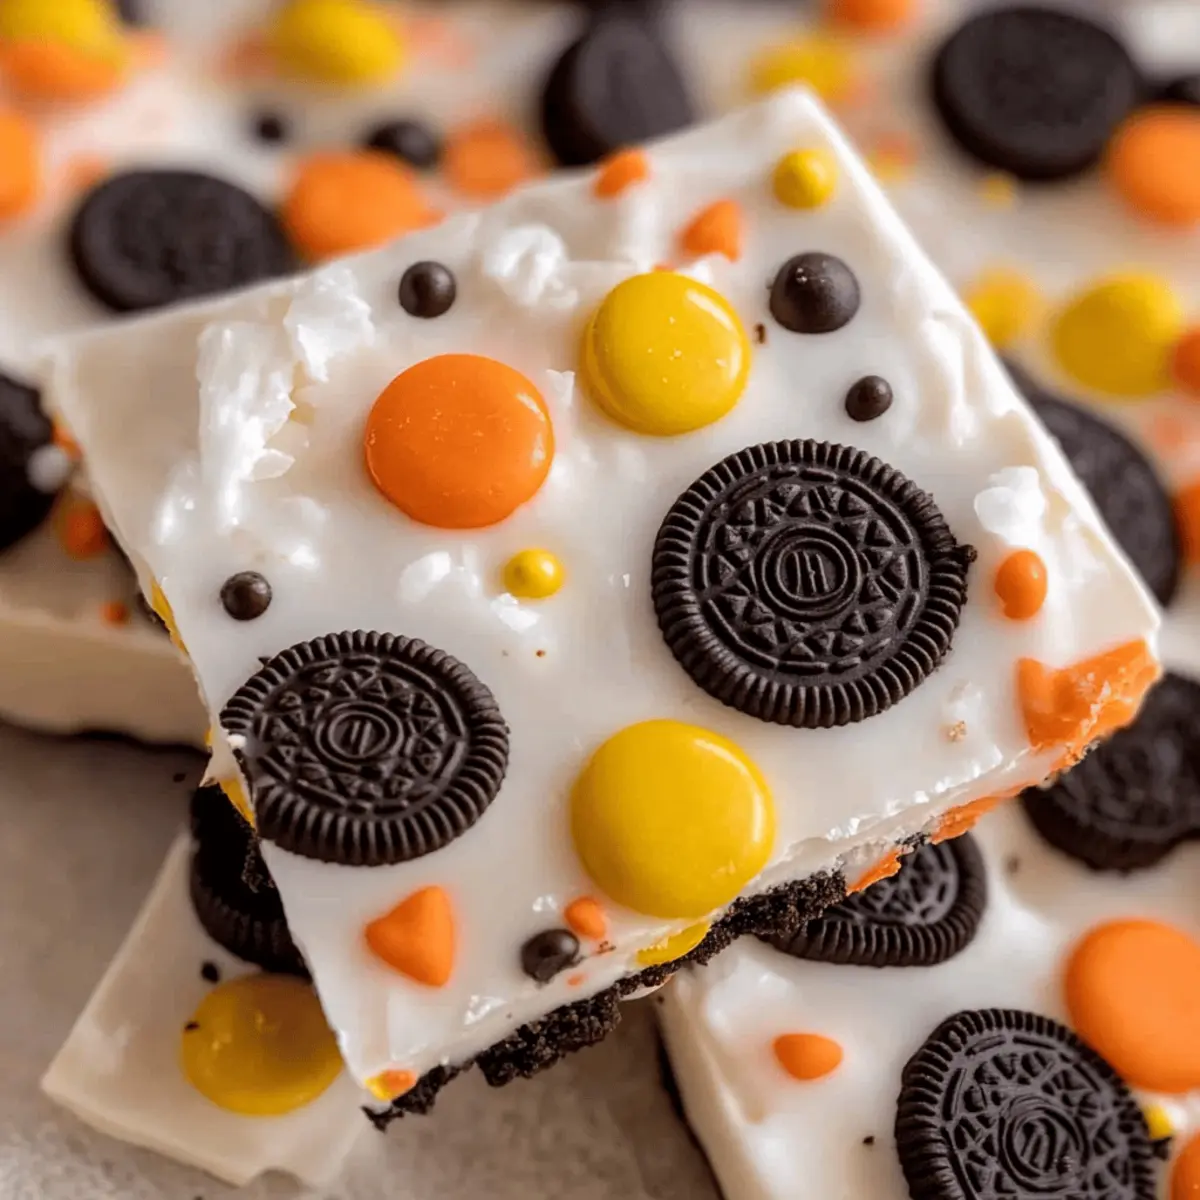
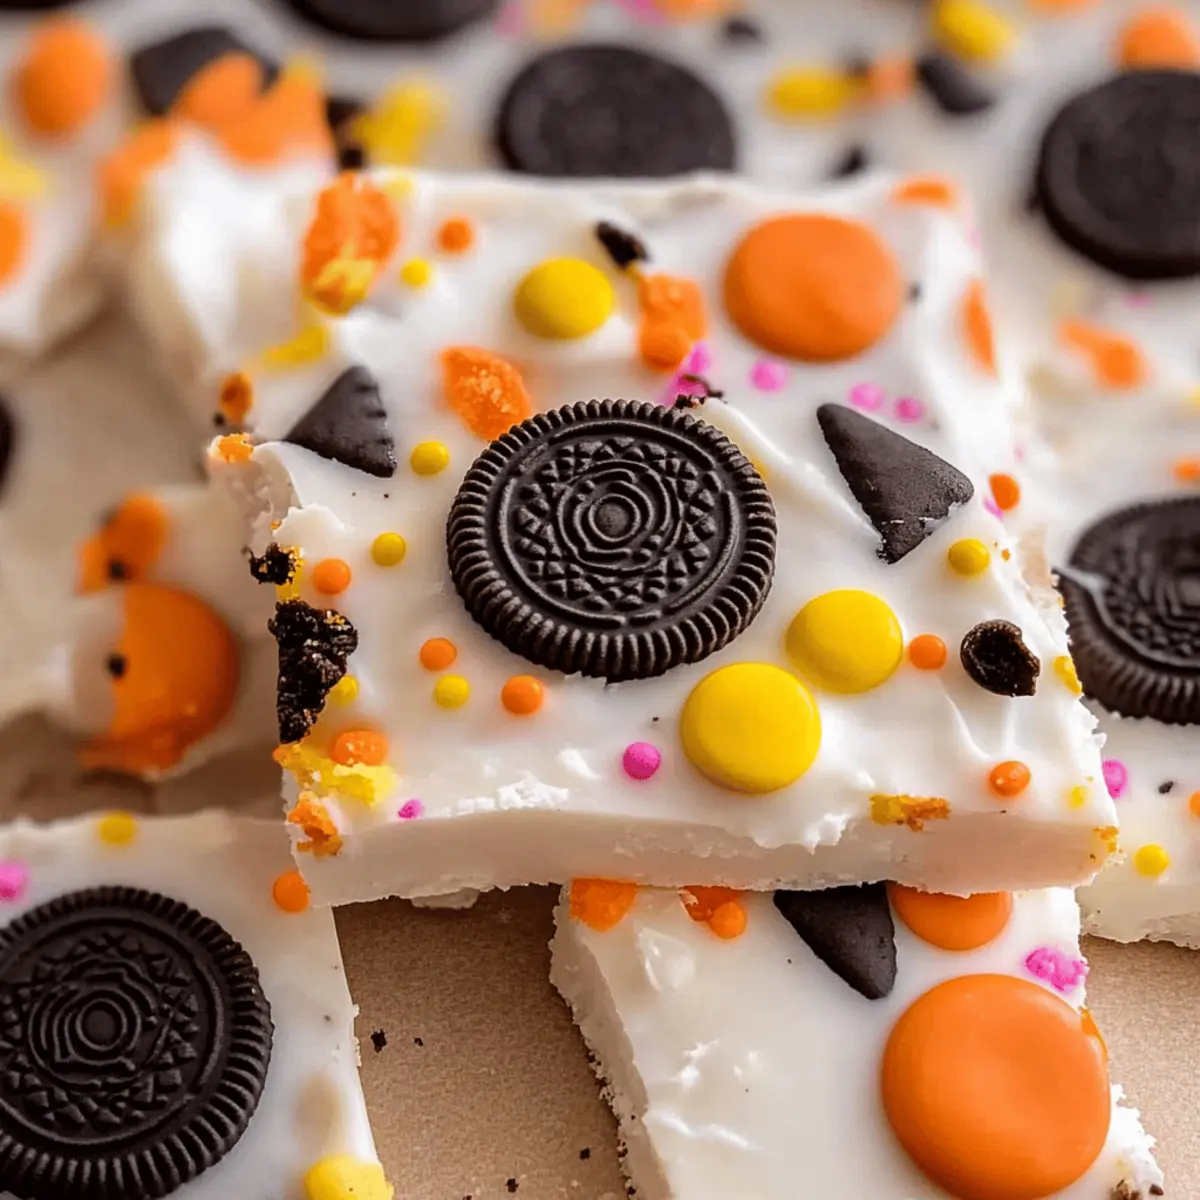
As I stood in my kitchen, the smell of melting chocolate beckoned me closer, hinting at the delight I was about to create. With Halloween just around the corner, I couldn’t resist whipping up this Easy White Chocolate Halloween Oreo Bark. It’s a no-bake treat that masterfully combines creamy white chocolate with the delightful crunch of Halloween-themed Oreos and colorful candy surprises—ideal for when you need a quick dessert that impresses! In just minutes, you’ll have a show-stopping treat that’s perfect for parties or a fun snack to share with the family. So grab your ingredients and let’s embrace the spooky season together—your taste buds are in for a festive treat! What will you sprinkle on top to make it your own?
Why Will You Love This Oreo Bark?
Simplicity at Its Best: The no-bake nature of this recipe makes it a breeze, perfect for novice bakers or those busy with Halloween preparations.
Irresistible Flavor: The smooth, creamy white chocolate paired with crunchy Halloween Oreos creates a flavor explosion that’s both festive and delicious.
Customizable Treat: From the choice of Oreos to the types of candies, you can easily adapt this bark to suit your preferences or theme, ensuring it’s always a hit.
Quick Preparation: With just a few steps and minimal ingredients, this dessert can be ready in no time, making it ideal for last-minute gatherings—much like my Cheeseburger Soup Cozy!
Crowd-Pleaser: Its vibrant colors and fun presentation make it a beautiful addition to any Halloween party, sure to impress both kids and adults alike.
Storage-Friendly: Leftovers can be easily stored for future sweet cravings, retaining their delightful taste and texture.
Easy White Chocolate Halloween Oreo Bark Ingredients
For the Bark
- White Chocolate – Adds a creamy sweetness; can be substituted with almond bark or candy melts for variations.
- Halloween Oreos – Provides a festive crunch; you can use regular Oreos if Halloween-themed aren’t available.
For the Toppings
- Reese’s Pieces – Offers a chocolate-peanut flavor and bright colors; swap for colorful candies to mix it up.
- Halloween Sprinkles – Enhances decoration and visual appeal; optional but recommended for that extra spooky touch.
- Halloween Eyeball Candies – Boosts the eerie vibe; edible candy eyes are a fun alternative to consider.
With these ingredients gathered, you’re ready to create your Easy White Chocolate Halloween Oreo Bark!
Step‑by‑Step Instructions for Easy White Chocolate Halloween Oreo Bark
Step 1: Melt White Chocolate
In a microwave-safe bowl, add 2 cups of chopped white chocolate. Microwave in 30-second increments, stirring after each round, until completely melted and smooth, which usually takes 1 to 2 minutes. This creamy base is the heart of your Easy White Chocolate Halloween Oreo Bark, so ensure there are no lumps or burnt bits before moving on.
Step 2: Prepare Baking Sheet
While the chocolate melts, line a baking sheet with parchment paper, ensuring the edges are well covered to prevent sticking. Use a standard baking sheet for best results, and smooth out the parchment for a clean surface. This step is crucial as it allows for easy removal of your festive treat once set and cool.
Step 3: Assemble Bark
Once your white chocolate is melted and smooth, carefully pour it onto the prepared baking sheet. Using a spatula, spread the chocolate evenly and smoothly across the parchment, leaving no gaps. While the chocolate is still warm, sprinkle the chopped Halloween Oreos, vibrant Reese’s Pieces, and if desired, a generous amount of sprinkles and eyeball candies on top to create a festive design.
Step 4: Chill
Place the baking sheet in the refrigerator for about 1 hour, allowing the Easy White Chocolate Halloween Oreo Bark to firm up. Make sure to check after 30 minutes; it should be set but not overly hard. You’ll know it’s ready when the surface is solid to the touch and the decorative toppers hold in place.
Step 5: Break and Enjoy
Once it’s sufficiently chilled, take the baking sheet out of the refrigerator and let it sit for a few minutes at room temperature. Then, use your hands to break the bark into uneven pieces as desired. Get ready to savor your creation! This delightful treat can be shared with family or packed as spooky delights for Halloween gatherings.
What to Serve With Spooky White Chocolate Halloween Oreo Bark
Pairing this delightful no-bake treat with the right accompaniments will elevate your Halloween spread and ensure every bite is full of festive fun.
-
Creamy Vanilla Ice Cream: The cold creaminess balances the bark’s sweetness and adds a rich texture contrast, creating a delightful dessert duo. Scoop it right next to the warm, melty chocolate, and watch your guests swoon!
-
Pumpkin Spice Latte: Infuse your gathering with cozy autumn flavors. The warm spice notes complement the sweetness of the bark while enticing your guests with seasonal delight.
-
Fresh Fruit Salad: Bright, juicy fruits like strawberries and oranges bring a refreshing contrast to the decadent bark. The lightness of the fruit cuts through the sweetness, making it a balanced option alongside this festive treat.
-
Hot Cocoa: Rich, velvety hot cocoa pairs perfectly as a festive drink to sip alongside the bark. The chocolate warmth will complete your Halloween experience, making it a delightful seasonal combination.
-
Ghostly Meringues: These airy treats add a fun, whimsical touch to your spread. Their light texture and sweetness complement the thicker bark, creating a variety of textures on your dessert table.
-
Spooky Cheese Platter: A selection of soft cheeses, crackers, and dried fruits can provide a savory contrast. The rich, creamy flavors of the cheese add depth, balancing the sweet toppings on the bark.
-
Caramel Apple Slices: Dipped in caramel, these bites of freshness provide a chewy, sweet treat that pairs wonderfully with the creamy bark. It’s a whimsical nod to classic autumn flavors that everyone adores.
-
Halloween-Themed Cocktails: Consider a fun Halloween punch or spooky cocktails. A spooky drink served alongside this bark creates an enticing presentation and a festive atmosphere that your guests will love!
Expert Tips for Easy White Chocolate Halloween Oreo Bark
Melting Technique: Ensure you melt the white chocolate gently in 30-second increments, stirring well each time to prevent scorching and achieve a smooth consistency.
Ingredient Freshness: Always use colorful, fresh candies and sprinkles to enhance visual appeal and add festive flair to your Easy White Chocolate Halloween Oreo Bark.
Parchment Paper: Line your baking sheet properly with parchment paper, making sure it covers all edges for easy bark removal once set.
Chill Wisely: Keep an eye on your bark as it chills. Check after 30 minutes to ensure it’s firm but not rock hard for perfect texture.
Creative Customization: Don’t hesitate to play with different types of Oreos or candies to match your theme or personal taste—this makes your treat uniquely yours!
Storage Tips: Store any leftovers in an airtight container in the refrigerator to maintain freshness and consistent texture for future spooky cravings.
Easy White Chocolate Halloween Oreo Bark Variations
Let your creativity shine as you customize this delightful treat with a few simple swaps and additions!
- Dark Chocolate: Substitute the white chocolate with dark chocolate for a richer, more intense flavor.
- Peanut Butter Swirl: Melt peanut butter together with the white chocolate for a creamy, nutty twist that pairs perfectly with Oreos.
- Minty Surprise: Add a few drops of peppermint extract to the white chocolate for a refreshing minty flair, perfect for Halloween.
- Different Oreos: Mix it up by using different Oreo flavors, such as peanut butter, mint, or even the red velvet variety. Each option brings something unique to the table!
- Textured Crunch: Incorporate crushed nuts or pretzel bits for an added crunch that contrasts beautifully with the smooth chocolate.
- Fruit Flavor: Drizzle some melted fruit-flavored candy melts over the top for a pop of color and a fruity taste that’s fun and unexpected.
- Hot & Spicy: For a daring twist, sprinkle a hint of cayenne or chili powder on top before chilling for a sweet and spicy combination.
- Loaded Toppings: Go wild with toppings like gummy worms or candy corn to create a fun, themed treat that’ll be the talk of any Halloween gathering.
For more delicious ideas, check out my Pumpkin White Chocolate or turn the classic into a treat with Chocolate Zucchini Bread—you’ll find endless fun in the kitchen! 🎃🍬
Storage Tips for Easy White Chocolate Halloween Oreo Bark
Room Temperature: Store the bark in a cool, dry place in an airtight container for up to a week, avoiding any humidity that might affect the texture.
Fridge: For extended freshness, keep the Easy White Chocolate Halloween Oreo Bark in the refrigerator, where it will last up to two weeks in an airtight container.
Freezer: If you want to savor your treats longer, you can freeze the bark for up to two months. Wrap pieces individually in plastic wrap before placing them in a freezer-safe bag.
Reheating: When ready to enjoy frozen bark, simply transfer it to the fridge to thaw overnight; avoid using a microwave, as it may alter the delightful texture.
Make Ahead Options
This Easy White Chocolate Halloween Oreo Bark is perfect for those busy days when you want to get ahead of the game! You can melt the white chocolate and prepare the baking sheet up to 24 hours in advance, storing the melted chocolate in an airtight container at room temperature. Additionally, you can chop the Halloween Oreos and other toppings a day ahead, keeping them in separate containers to maintain their crunch. When ready to assemble, simply melt the chocolate again if it has set, spread it on the lined baking sheet, sprinkle your prepped toppings, and chill as directed. This way, you’ll have a delightful, ready-to-serve treat with minimal effort right when you need it!
Easy White Chocolate Halloween Oreo Bark Recipe FAQs
What type of white chocolate should I use for this recipe?
I recommend using high-quality white chocolate chips or bars for the best flavor and texture. You can also substitute with almond bark or candy melts if you prefer. Just ensure they are suitable for melting and won’t scorch easily in the microwave.
How can I tell if my ingredients are fresh enough to use?
When selecting candies, look for ones that are vibrant in color and free of any visible signs of aging, such as fading or dark spots. If your Halloween Oreos have a crumbly texture or an off smell, it’s best to avoid using them as they may impact the flavor of your bark.
How should I store any leftover Easy White Chocolate Halloween Oreo Bark?
Store your bark in an airtight container at room temperature for up to a week. If you want to keep it longer, refrigerate it for up to two weeks, making sure it’s sealed well to maintain freshness. For even longer storage, wrap pieces in plastic wrap and place them in a freezer-safe bag to freeze for up to two months.
Can I freeze the bark, and how do I do it properly?
Absolutely! To freeze your bark, break it into pieces, then wrap each individually in plastic wrap. Place them in a freezer-safe bag and label with the date. When you’re ready to enjoy, transfer the required amount from the freezer to the fridge the night before. This gentle thawing will help maintain that wonderful texture.
What if my white chocolate seizes up while melting?
Oh no! If your white chocolate seizes, it could be due to moisture. If that happens, add a small amount of vegetable oil (about a teaspoon) and stir until smooth again. Always ensure your bowl and utensils are completely dry before melting chocolate to prevent this.
Are there any dietary considerations to keep in mind for this treat?
Yes! If serving to others, check for allergies related to chocolate, dairy, or specific candies. The recipe contains common allergens such as chocolate and could also involve gluten from Oreos. You can also customize your bark with gluten-free Oreos and dairy-free chocolate to accommodate dietary needs.
Easy White Chocolate Halloween Oreo Bark You'll Crave
Ingredients
Equipment
Method
- In a microwave-safe bowl, add 2 cups of chopped white chocolate. Microwave in 30-second increments, stirring after each round, until completely melted and smooth, about 1 to 2 minutes.
- While the chocolate melts, line a baking sheet with parchment paper, ensuring the edges are well covered to prevent sticking.
- Once your white chocolate is melted, carefully pour it onto the prepared baking sheet. Use a spatula to spread it evenly. While still warm, sprinkle the chopped Halloween Oreos, Reese's Pieces, and other toppings on top.
- Place the baking sheet in the refrigerator for about 1 hour to firm up.
- Once chilled, break the bark into uneven pieces and enjoy!
Leave a Reply