
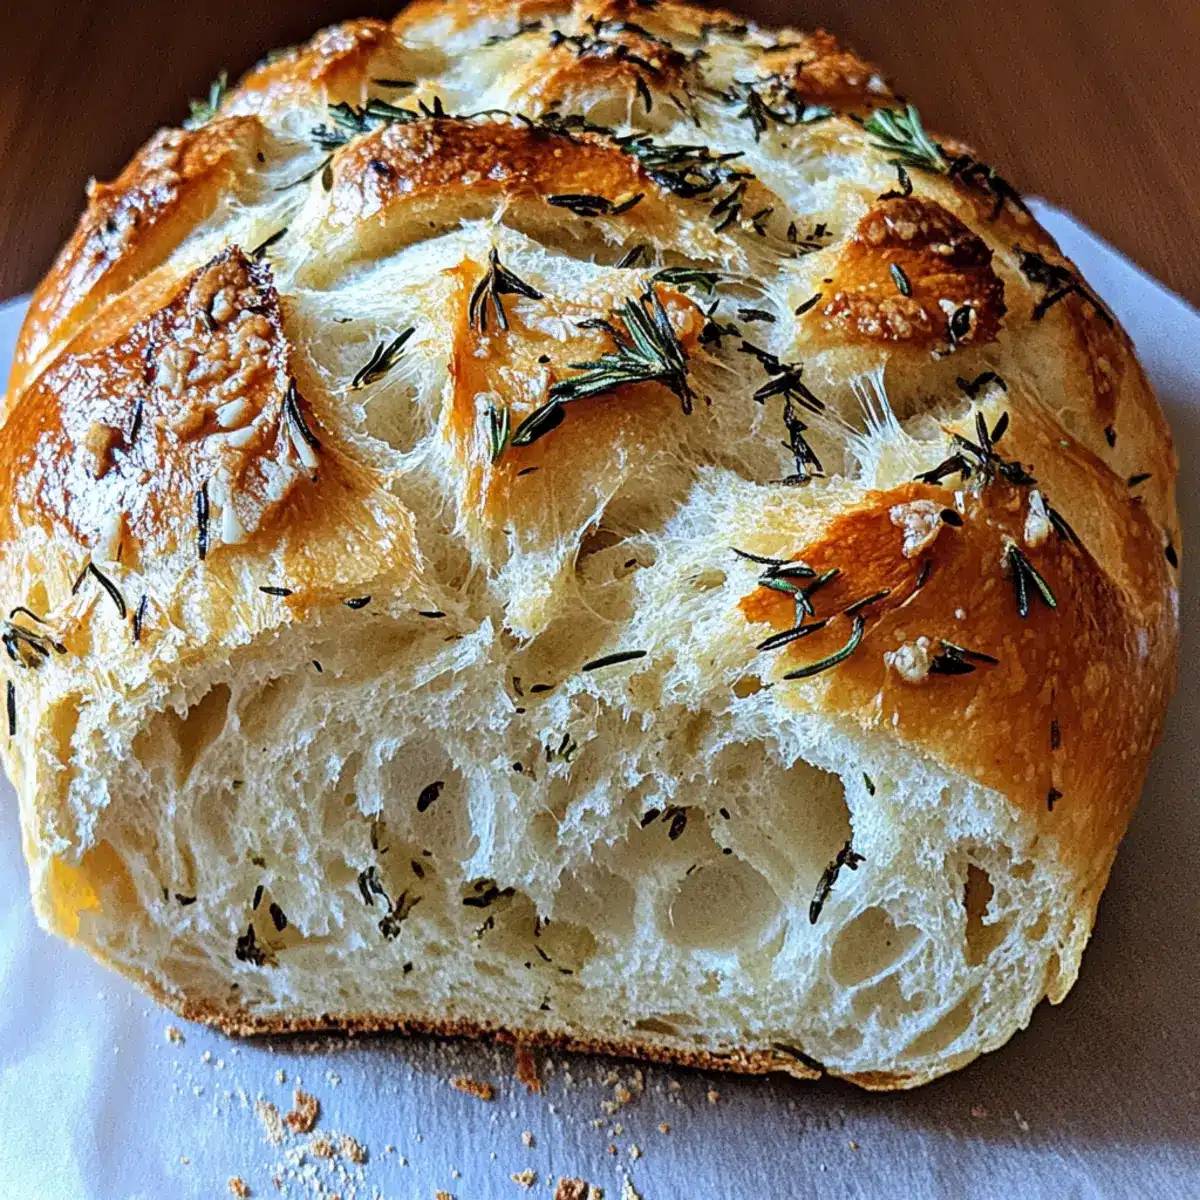
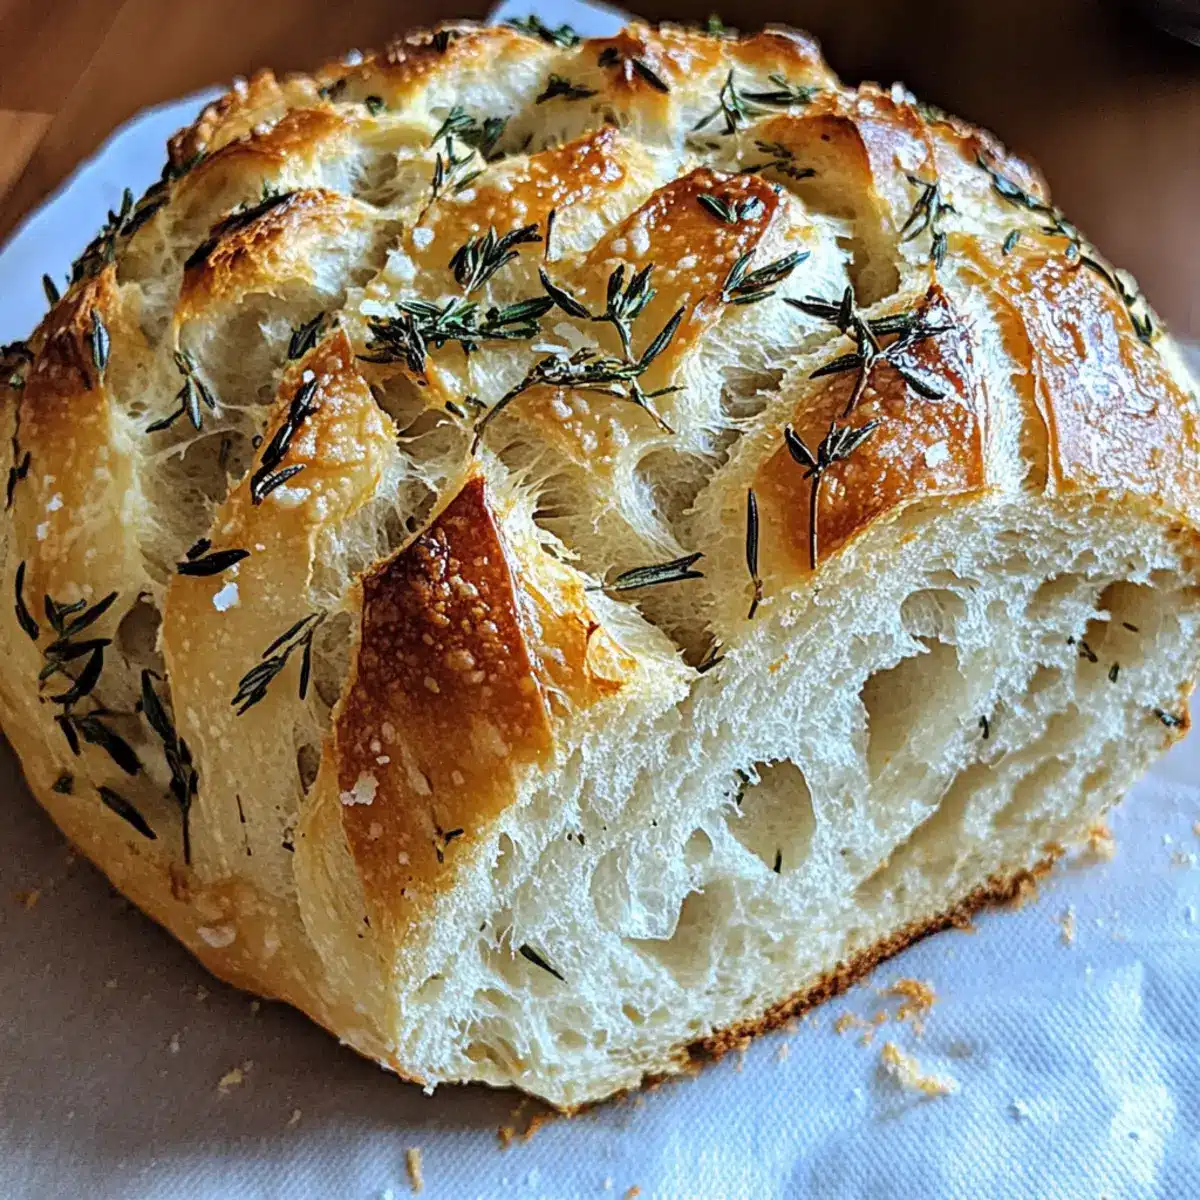
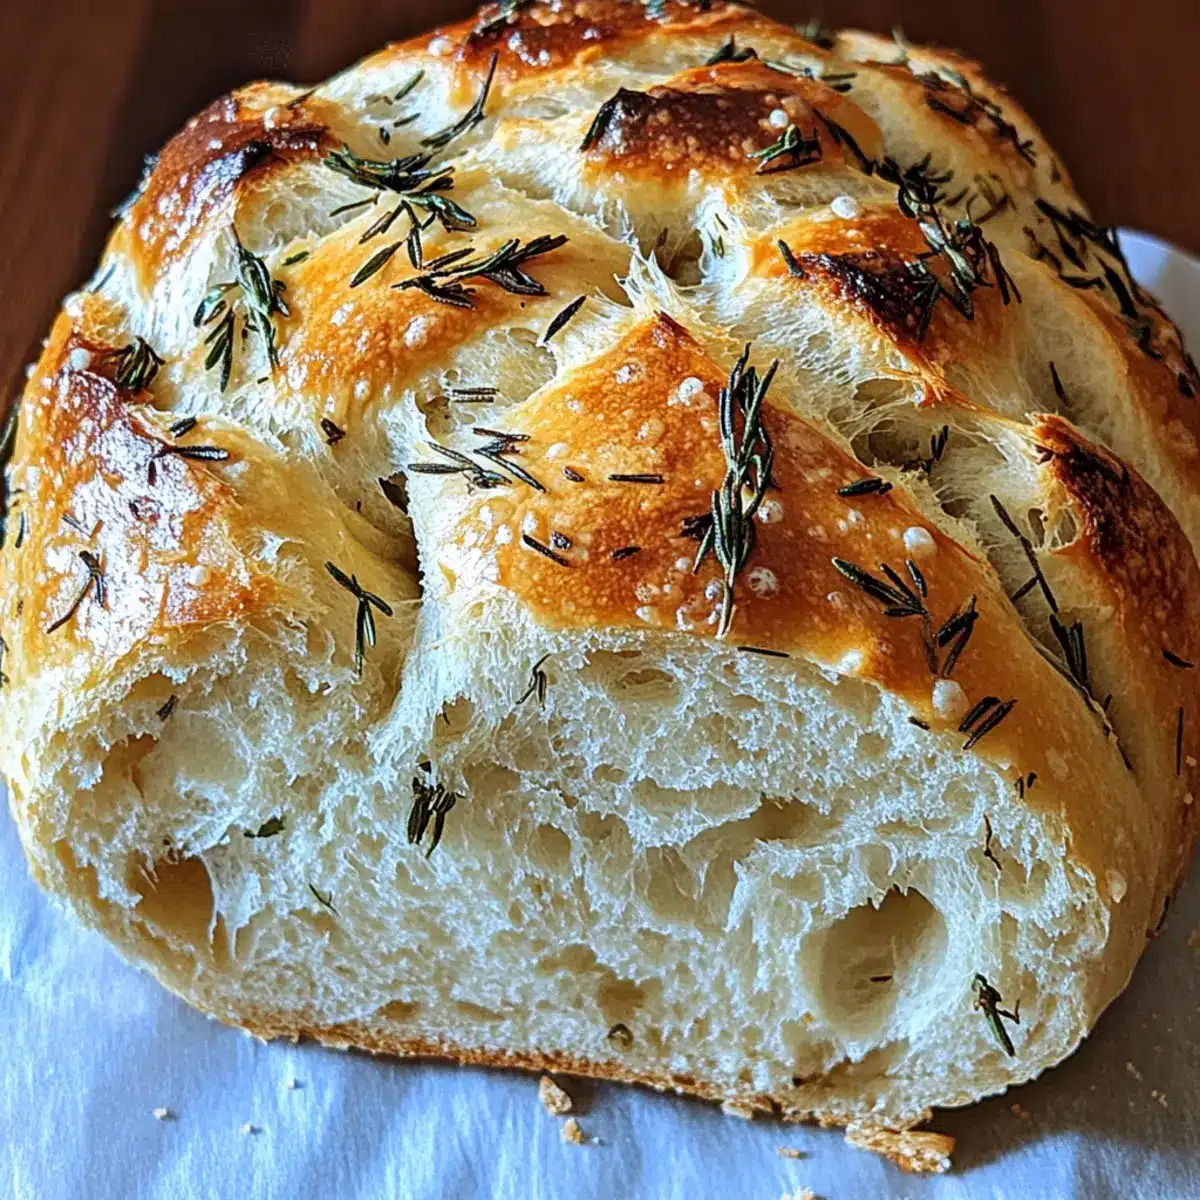
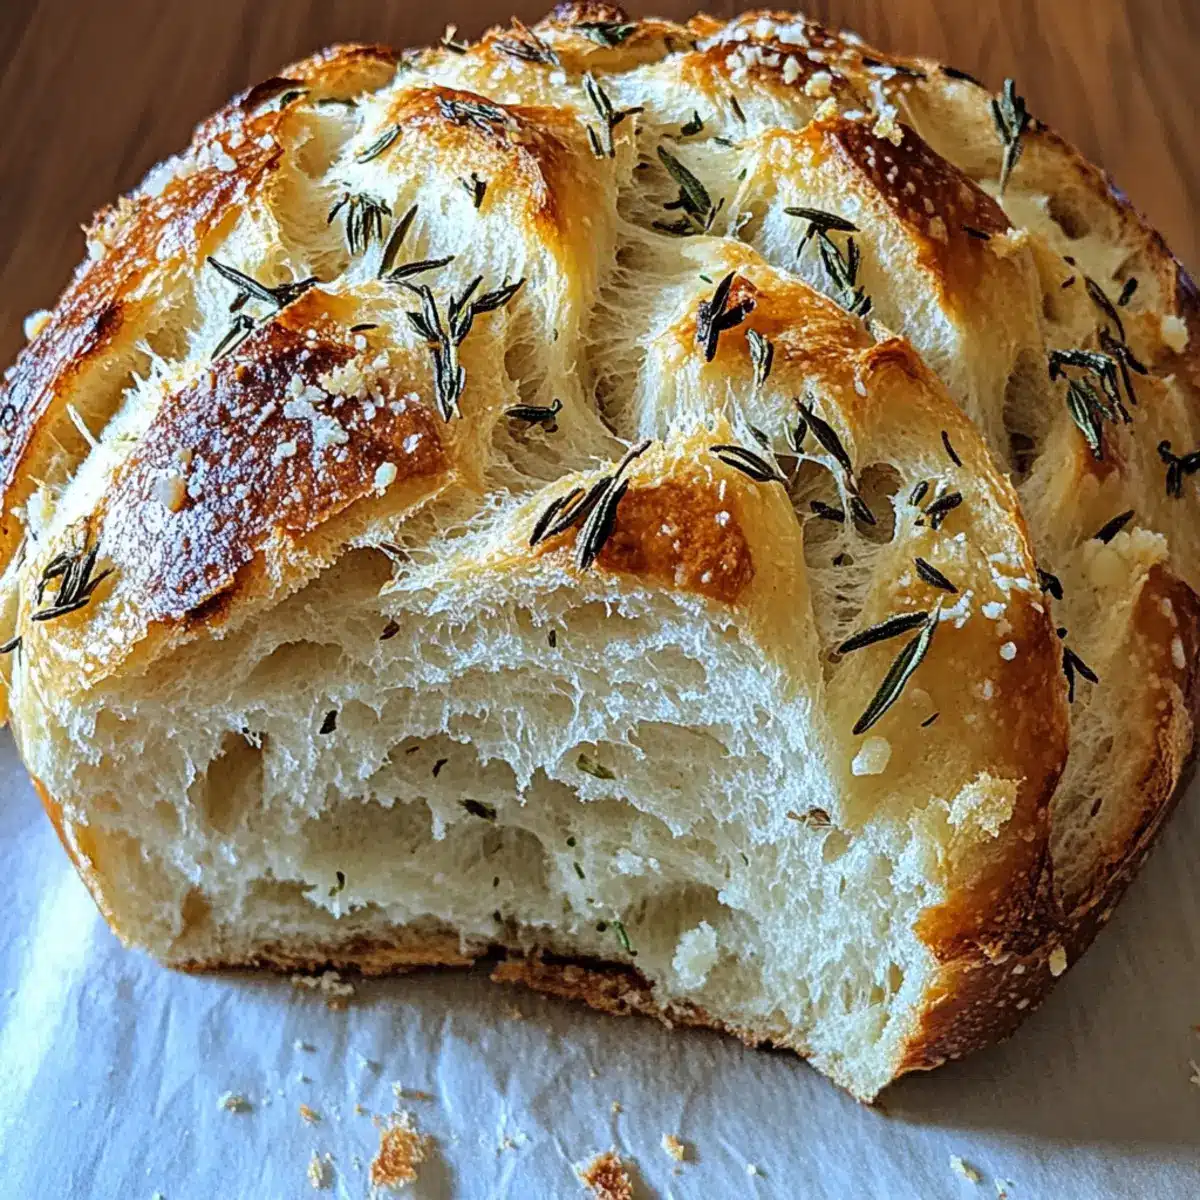
As the golden crust begins to form and the inviting scent of garlic wafts through the kitchen, I can’t help but smile. There’s something magical about making homemade Garlic Herb Braided Bread that transforms the ordinary into a feast. This artfully braided loaf is not only eye-catching but also easy enough for anyone to tackle, making it a perfect choice for both bustling weeknights and special gatherings. Picture serving it warm with a pat of butter or pairing it with your favorite soup—its fluffy interior and savory notes of roasted garlic and Parmesan are sure to delight. Whether you’re a seasoned baker or just starting your culinary adventure, this recipe will quickly become a staple. So, are you ready to impress your loved ones with a homemade loaf that looks as good as it tastes? Let’s get baking!
Why is Garlic Herb Braided Bread a must-try?
Irresistible Aroma: As it bakes, the delightful scent of garlic and herbs fills your kitchen, enticing everyone to gather around.
Visual Appeal: The braided design will elevate any table setting, making it perfect for impressing guests at gatherings.
Easy to Make: Even if you’re new to baking, this simple recipe is beginner-friendly and requires minimal effort.
Versatile Pairing: Great with soups, salads, or as a standalone snack, it’s the perfect addition to any meal.
Customizable Options: Feel free to explore your creativity by adding cheese or spices—check out our Cranberry Zucchini Bread for more flavor inspiration!
Garlic Herb Braided Bread Ingredients
For the Dough
- All-purpose or Bread Flour – Provides structure and gluten; you can opt for a gluten-free flour blend for a variation, but results may vary.
- Active Dry Yeast – Cultivates dough rise; using instant yeast can speed up the process.
- Warm Water – Activates yeast at the ideal temperature (110°F) for the best results.
- Olive Oil – Adds moisture and richness; for a more intense flavor, substitute with garlic butter.
- Salt – Enhances flavor and strengthens the dough.
- Sugar – Feeds yeast during fermentation for optimal rising.
- Garlic (minced or roasted) – Delivers a bold, savory flavor that defines this Garlic Herb Braided Bread.
- Dried Mixed Herbs (oregano, thyme, basil) or Fresh Herbs – Offers aromatic depth to elevate your loaf.
For the Topping
- Grated Parmesan Cheese – Adds a savory richness that complements the other flavors beautifully.
- Melted Butter – Used for brushing the top of the loaf to enhance flavor and give it a shiny, appealing finish.
Optional Add-ins
- Red Pepper Flakes – For a touch of heat, perfect for those who enjoy a spicier bread.
- Shredded Mozzarella – Adds extra cheesiness and a gooey texture.
- Fresh Parsley – Use as a garnish to beautify your bread while adding a touch of freshness.
Step‑by‑Step Instructions for Garlic Herb Braided Bread
Step 1: Activate the Yeast
In a large mixing bowl, combine 1 cup of warm water (110°F) with 1 tablespoon of sugar. Sprinkle 2 teaspoons of active dry yeast on top and let it sit for 5–10 minutes until it becomes foamy and bubbly. This vital step ensures the yeast is alive and ready to create that fluffy texture in your Garlic Herb Braided Bread.
Step 2: Create the Dough
Once the yeast mixture is foamy, stir in 2 tablespoons of olive oil, 4 cloves of minced garlic, 1 tablespoon of dried mixed herbs, 1 teaspoon of salt, and 2½ cups of all-purpose flour. Mix until a soft dough forms, adjusting with more flour as necessary. Aim for a slightly sticky yet manageable consistency that will soon become the delightful base of your Garlic Herb Braided Bread.
Step 3: Knead the Dough
Transfer the dough onto a floured surface or use a stand mixer with a dough hook. Knead for about 6-8 minutes until the dough is smooth and elastic, incorporating ½ cup of grated Parmesan cheese halfway through. You’ll know it’s ready when it springs back during your touch, indicating that it’s developing that lovely structure for your braided bread.
Step 4: Let the Dough Rise
Form the kneaded dough into a ball and place it in a greased bowl, turning it once to coat. Cover the bowl with a kitchen towel or plastic wrap and let it rise in a warm spot until doubled in size, approximately 1 hour. This step allows the yeast to do its magic, creating air pockets that make your Garlic Herb Braided Bread soft and airy.
Step 5: Prepare for Braiding
Once risen, gently punch down the dough to release air and divide it into three equal pieces. Roll each piece into a long rope, about 14-16 inches in length. Braid the three ropes together, pinching the ends securely and tucking them under for a polished look. Your beautifully braided Garlic Herb Braided Bread is now starting to take shape!
Step 6: Second Rise
Carefully transfer the braided loaf onto a parchment-lined baking sheet, covering it loosely with plastic wrap or a towel. Allow it to rise for an additional 30-40 minutes. This second rise is crucial for achieving that airy texture while enhancing the lovely shape of your Garlic Herb Braided Bread before baking.
Step 7: Preheat the Oven
As the dough rises, preheat your oven to 375°F (190°C). This ensures the oven is ready to create a perfect crust as soon as the bread is placed inside. It’s during this time that the aroma of garlic and herbs will start to fill your kitchen, heightening the anticipation of that delicious Garlic Herb Braided Bread.
Step 8: Bake the Bread
Once the oven is preheated, gently brush the loaf with melted butter, adding a light sprinkle of herbs or additional Parmesan cheese if desired. Bake for 25-30 minutes, until the bread turns golden brown and sounds hollow when tapped on the bottom. This stunning loaf of Garlic Herb Braided Bread is now ready to impress with its aroma and appearance.
Step 9: Cool and Serve
After baking, remove the bread from the oven and let it cool on a wire rack for about 10 minutes. This slight cooling period enhances the flavor and texture. Once slightly cooled, slice your beautiful Garlic Herb Braided Bread and serve warm with butter, or alongside your favorite soup. Enjoy the cozy, heartwarming experience that comes from homemade bread!
Garlic Herb Braided Bread Variations
Feel free to get creative with your Garlic Herb Braided Bread and make it your own!
- Gluten-Free: Use a gluten-free flour blend for a delicious alternative; just be aware that the texture may vary.
- Cheesy Surprise: Incorporate shredded mozzarella into the dough for an added layer of gooey cheesiness that melts beautifully.
- Herb Medley: Mix different fresh herbs like rosemary or dill for a unique flavor twist that elevates every bite.
- Spicy Kick: Add red pepper flakes or diced jalapeños for a hint of heat that’ll excite your taste buds.
- Sweet Addition: Experiment with a touch of honey or brown sugar in the dough for a subtle sweetness that complements the garlic.
- Nutty Flavor: Fold in chopped walnuts or pecans to add a delightful crunch and a nutty depth to your bread.
- Savory Veggies: Incorporate finely chopped sun-dried tomatoes or olives for an extra layer of flavor that will surprise your guests.
- Individual Rolls: Divide the dough into smaller portions to make delightful garlic herb rolls; perfect for casual gatherings or dinner parties.
Don’t forget, if you love experimenting with flavors, you might also want to try whipping up Cranberry Zucchini Bread or our rich Pumpkin Banana Bread for delightful variations! Enjoy the journey of creating your perfect bread!
Expert Tips for Garlic Herb Braided Bread
• Perfect Temp: Ensure your water is at exactly 110°F to properly activate the yeast, avoiding dough that is too dense.
• Kneading Technique: Knead until smooth and elastic; this helps develop the gluten needed for a perfect texture in your Garlic Herb Braided Bread.
• Second Rise: Don’t skip the second rise; it’s essential for creating that light and airy interior that makes your bread irresistible.
• Storage Secrets: Preserve freshness by storing in an airtight container, but always allow the bread to cool completely before sealing.
• Flavor Enhancements: Experiment with herbs or add sun-dried tomatoes for unique flavors, elevating your delicious Garlic Herb Braided Bread.
Make Ahead Options
These Garlic Herb Braided Bread loaves are a lifesaver for busy weeknights! You can prepare the dough up to 24 hours in advance by letting it rise first, then punching it down and covering it tightly with plastic wrap in the refrigerator. Not only does this save time, but it also allows the flavors to develop even further. When you’re ready to bake, simply take the dough out, let it sit at room temperature for 30 minutes, then shape and braid it as instructed. Lastly, follow the final rising and baking steps, ensuring your bread is just as delicious and fresh. This way, you can enjoy homemade bread with minimal effort any day of the week!
What to Serve with Garlic Herb Braided Bread
This elegant bread deserves delightful companions to create a memorable feast.
-
Creamy Tomato Soup: The savory notes of the garlic bread beautifully complement the tangy sweetness of tomato soup, creating a cozy pairing. Nothing warms the soul quite like this classic duo.
-
Mixed Green Salad: Fresh greens with a light vinaigrette provide a refreshing contrast to the rich bread. Add some nuts or cheese to enhance the flavor and texture.
-
Garlic Roasted Vegetables: For a herbaceous feast, serve your bread alongside a platter of seasonal veggies tossed in olive oil and herbs. The flavors will harmonize beautifully!
-
Herbed Goat Cheese: Spreadable cheese adds a tangy edge that pairs wonderfully with the savory flavors of the bread. You can also include some fig jam for a touch of sweetness.
-
Pasta Primavera: A hearty pasta dish filled with fresh vegetables in a light garlic sauce will balance the richness of the Garlic Herb Braided Bread. Perfect for a wholesome dinner!
-
White Wine Spritzer: For a refreshing drink, this delightful spritzer made with white wine and soda water pairs perfectly with the bread’s herbaceous flavors, creating a light and enjoyable experience.
-
Cheesy Garlic Knots: If you can’t get enough garlic bread, serve alongside these delightful bites! The extra cheesiness makes for a fun, indulgent twist.
-
Homemade Pizza: Impress your guests by serving both garlic bread and pizza. The blend of flavors will surely entertain taste buds, elevating your meal to the next level!
How to Store and Freeze Garlic Herb Braided Bread
Room Temperature: Store your Garlic Herb Braided Bread in an airtight container or wrapped in plastic wrap to keep it fresh for up to 3 days.
Fridge: If you need to extend freshness, refrigerate the bread in a sealed bag for up to a week, though this may slightly affect its texture.
Freezer: For longer storage, wrap the bread tightly in plastic wrap and then foil, keeping it in the freezer for up to 3 months.
Reheating: To restore the crust’s crispness, reheat slices in the oven at 300°F for about 10 minutes before serving, ensuring a delightful dining experience.
Garlic Herb Braided Bread Recipe FAQs
How do I choose ripe ingredients for Garlic Herb Braided Bread?
Absolutely! For the best flavor in your Garlic Herb Braided Bread, choose fresh garlic that is firm and plump, avoiding any that has dark spots or is sprouting. Select dried herbs that have a rich color and strong aroma. Always check your flour for freshness, as stale flour can affect the bread’s rise and flavor.
What is the best way to store Garlic Herb Braided Bread?
I recommend storing your Garlic Herb Braided Bread in an airtight container at room temperature for up to 3 days. If you want to keep it longer, wrap it tightly in plastic wrap or foil and place it in the refrigerator for up to a week, although this may slightly change its texture. To enjoy it fresh, you can also freeze it for up to 3 months.
How can I freeze the Garlic Herb Braided Bread?
To freeze your Garlic Herb Braided Bread, let it cool completely after baking. Wrap the loaf tightly in plastic wrap, making sure there is no air inside, then cover it with aluminum foil for extra protection. When you’re ready to eat it, simply remove from the freezer, unwrap, and let it thaw at room temperature. You can also reheat it in the oven at 300°F for about 10 minutes to refresh the crust!
What if my Garlic Herb Braided Bread doesn’t rise properly?
Very! If your bread isn’t rising, check the temperature of your water; it should be around 110°F when activating yeast. If the water is too hot, it can kill the yeast; too cold, and it won’t activate. Also, ensure that the dough is kept in a warm, draft-free area to encourage proper rising. If you find it too dense, try kneading it a little longer to develop the gluten structure needed for a good rise.
Is Garlic Herb Braided Bread suitable for vegetarians or those with allergies?
Absolutely! Garlic Herb Braided Bread is naturally vegetarian-friendly. However, if you’re cooking for someone with allergies, please check the ingredient labels. For those with gluten sensitivities, you can substitute all-purpose flour with a gluten-free flour blend, although results may vary. Always ensure that the additional toppings you choose are safe for any dietary restrictions.
Garlic Herb Braided Bread: Your New Go-To Artisan Delight
Ingredients
Equipment
Method
- In a large mixing bowl, combine 1 cup of warm water with 1 tablespoon of sugar. Sprinkle 2 teaspoons of active dry yeast on top and let it sit for 5–10 minutes until foamy.
- Stir in 2 tablespoons of olive oil, 4 cloves of minced garlic, 1 tablespoon of dried mixed herbs, 1 teaspoon of salt, and 2½ cups of all-purpose flour. Mix until a soft dough forms.
- Transfer the dough onto a floured surface and knead for 6-8 minutes, incorporating ½ cup of grated Parmesan cheese halfway through.
- Form the kneaded dough into a ball and place it in a greased bowl. Cover and let it rise in a warm spot for about 1 hour.
- Gently punch down the dough, divide it into three pieces, roll into ropes, and braid together.
- Place the braided loaf on a parchment-lined baking sheet, covering it loosely and allowing it to rise for 30-40 minutes.
- Preheat the oven to 375°F (190°C).
- Brush the loaf with melted butter and bake for 25-30 minutes until golden brown.
- Let the bread cool on a wire rack for about 10 minutes before slicing and serving warm.
Leave a Reply