
As I stood in my kitchen, the enticing aroma of warm cookies wafted through the air, taking me back to sun-drenched afternoons filled with laughter and Italian heritage. I couldn’t resist the allure of making Cannoli Cookies, a delightful twist on the classic Italian dessert that merges buttery cookie crispness with a creamy, rich ricotta filling. Perfect for busy afternoons or unexpected guests, this simple six-step recipe not only satisfies a yearning for something sweet but also brings a touch of tradition to your table. Whether you’re baking for a crowd or keeping them all to yourself, these cookies are absolutely freezer-friendly, making them a quick go-to for whenever a sweet craving strikes. Ready to create these adorable treats that never fail to impress? Let’s get baking!
Why are Cannoli Cookies a must-try?
Unique Flavors: These Cannoli Cookies offer a delightful fusion of crispy cookie and creamy ricotta, creating a flavor profile that’s both nostalgic and exciting.
Quick to Make: With just six straightforward steps, these cookies can be whipped up in a flash, making them an ideal choice for last-minute gatherings or sweet cravings.
Versatile Filling: You can customize the filling by adding mini chocolate chips or even zesty orange for a refreshing twist.
Impressive Presentation: Dust with powdered sugar and serve on a beautiful platter to wow your guests, just like you would with traditional desserts.
Freezer-Friendly: Bake a batch and keep them tucked away in your freezer, ready to be enjoyed at a moment’s notice, perfect for busy weeks ahead.
Crowd-Pleaser: These delightful cookies are sure to be a hit at every occasion, from family gatherings to festive celebrations!
Cannoli Cookies Ingredients
• Here’s everything you need to create these delightful Cannoli Cookies.
For the Cookie Dough
- All-Purpose Flour – Provides structure to the cookies; substitute with gluten-free flour for a gluten-free version.
- Granulated Sugar – Adds sweetness and helps the cookies brown; coconut sugar can be a healthier option.
- Large Egg – Binds the ingredients and adds moisture; flax egg can be used as a vegan alternative.
- Vanilla Extract – Offers a sweet aroma and depth of flavor; use pure vanilla for the best taste.
- Lemon Zest – Adds a fresh citrus note that brightens the flavors; fresh zest is more potent than bottled juice.
For the Filling
- Ricotta Cheese – Creates a creamy filling that enhances flavor; ensure it’s well-drained for optimal texture.
- Mini Chocolate Chips – Provide a touch of sweetness and chocolate flavor; dark chocolate chips or chopped chocolate can be used.
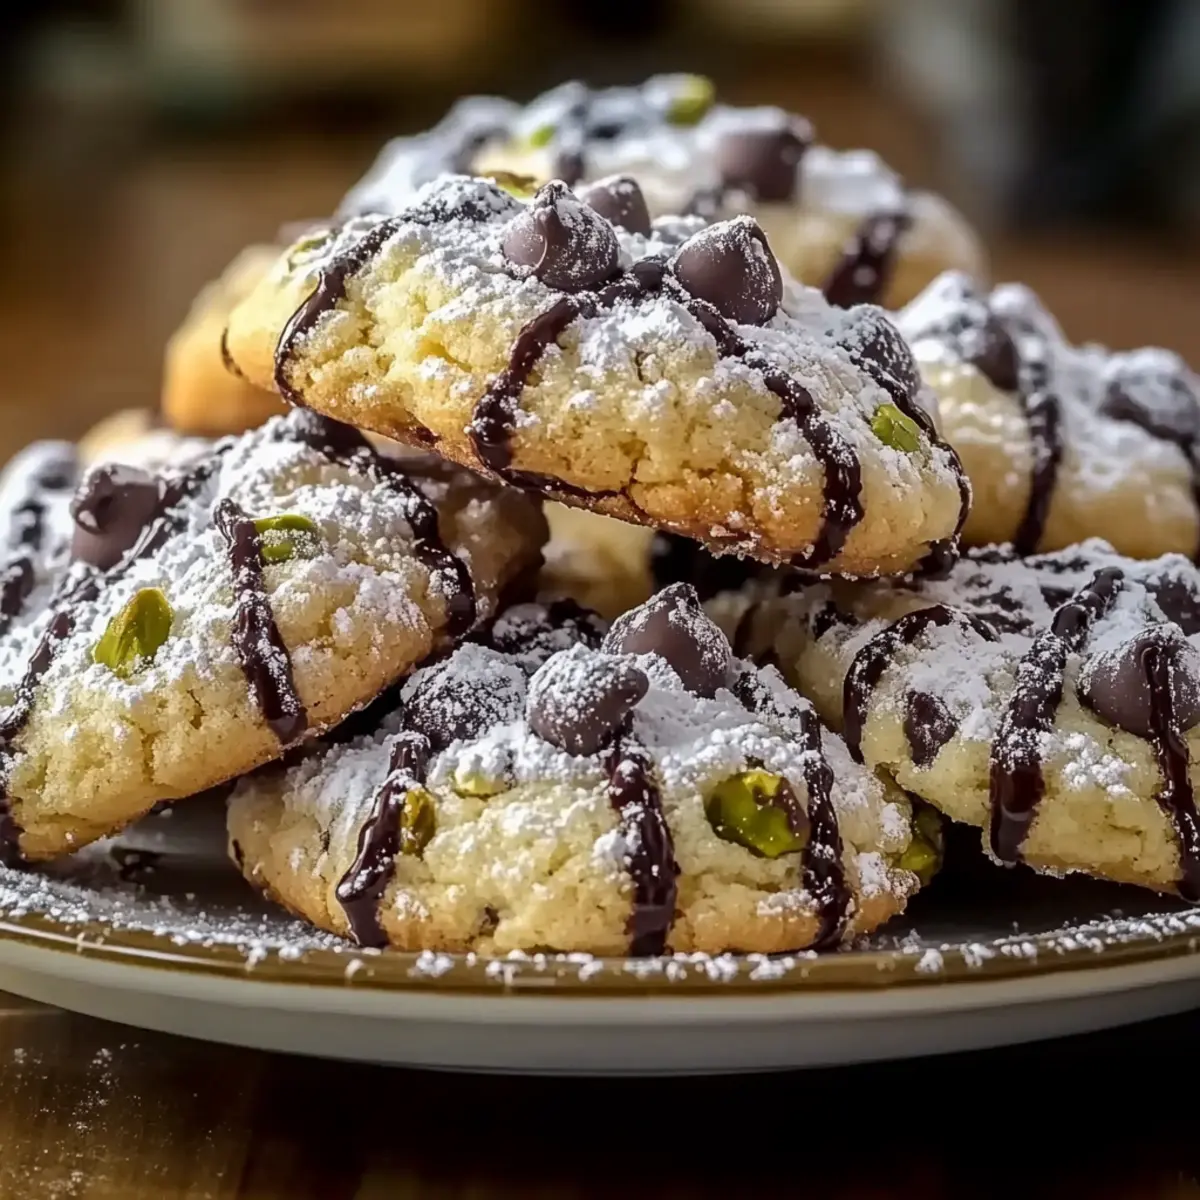
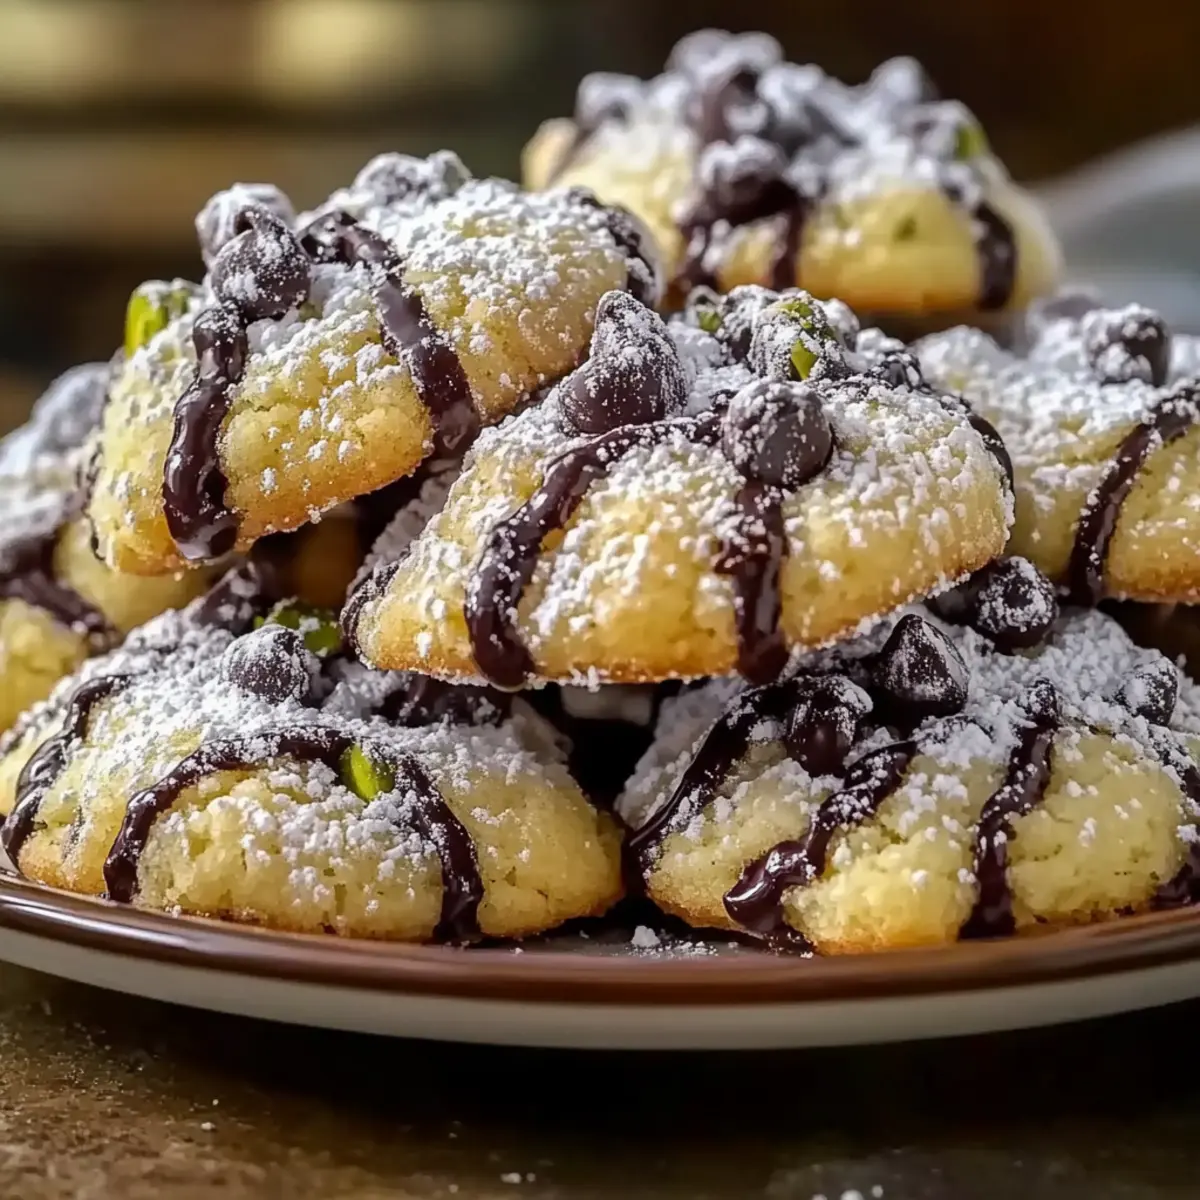
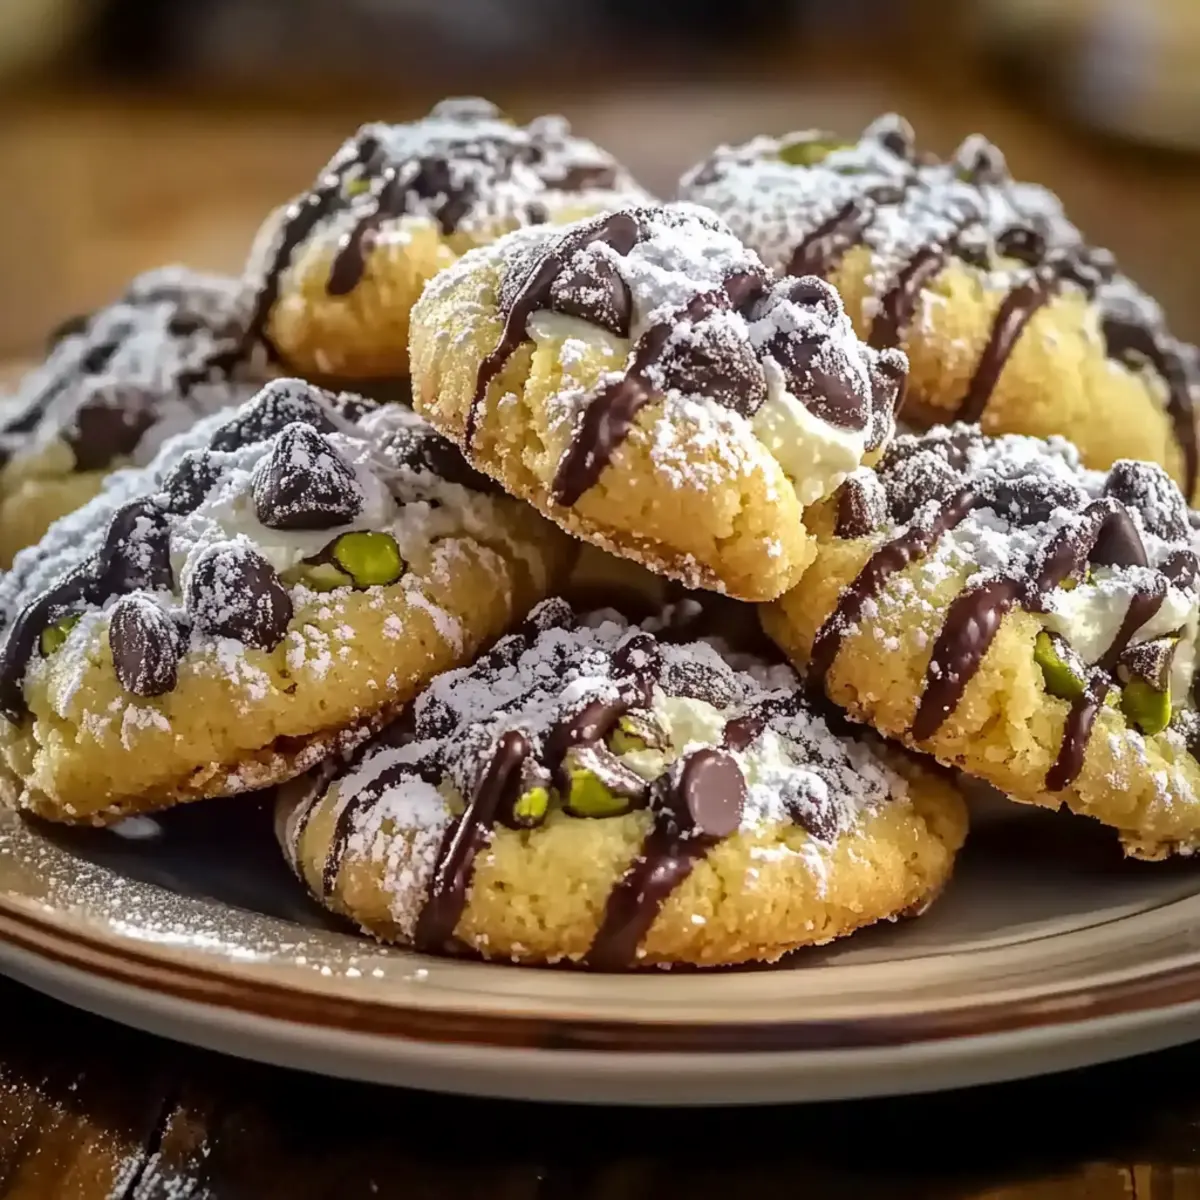
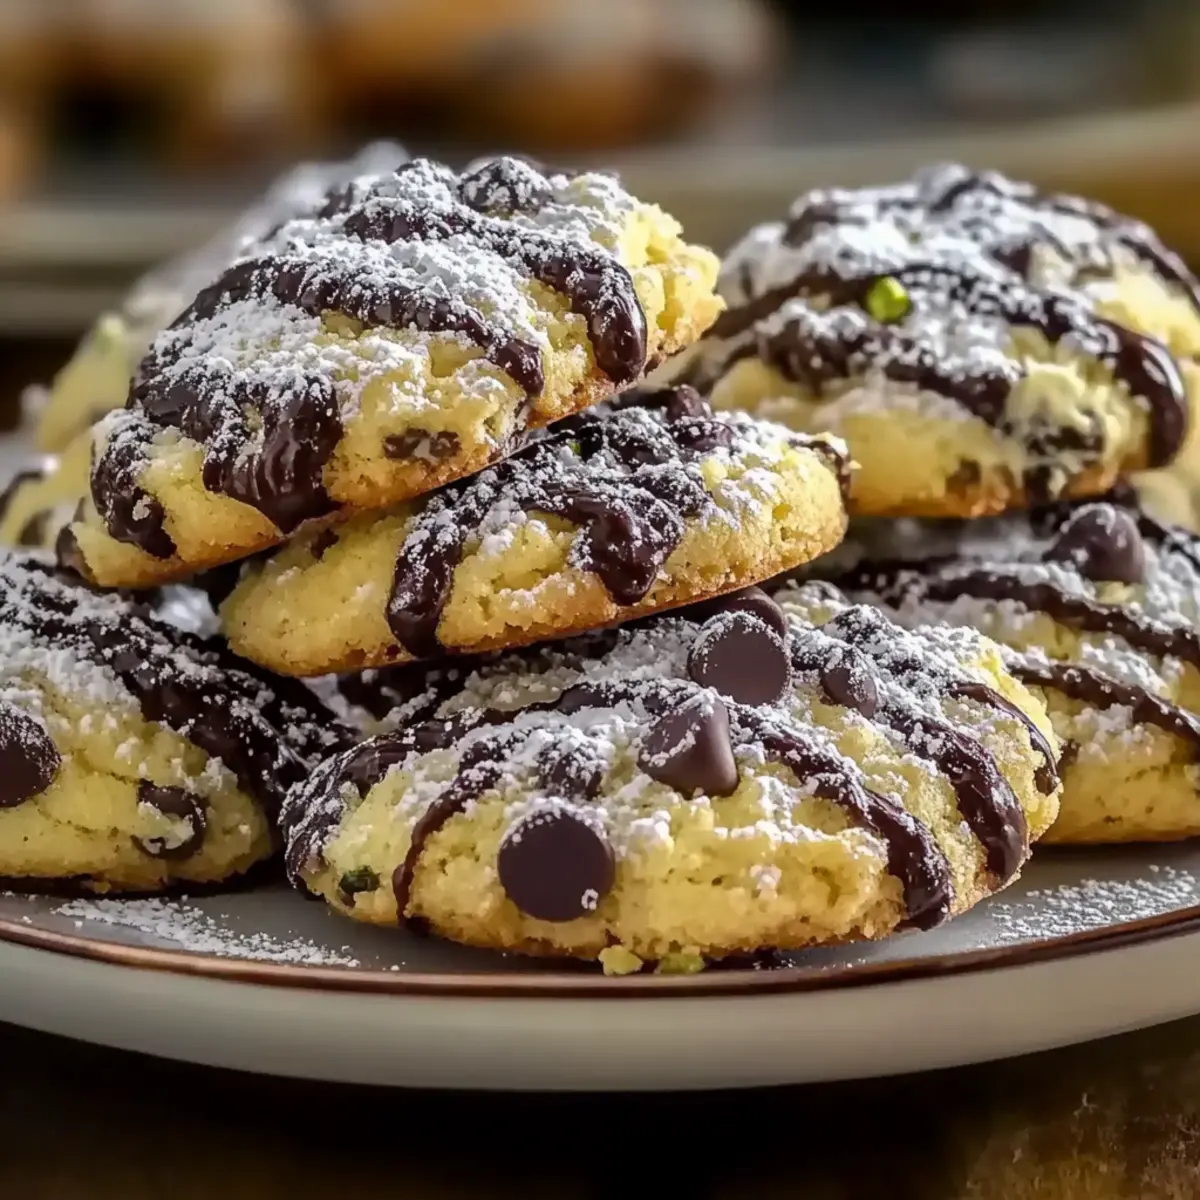
- Chopped Pistachios – Adds a delightful crunch and unique flavor; feel free to substitute with almonds or walnuts.
For Dusting
- Powdered Sugar – Enhances appearance and sweetness for a beautiful finish; omit for a lower-sugar version.
Step‑by‑Step Instructions for Cannoli Cookies
Step 1: Preheat the Oven
Begin by preheating your oven to 350°F (175°C). This ensures a perfectly baked Cannoli Cookies with a delightful crispness. As the oven warms up, gather all your ingredients and equipment, including a large mixing bowl, a whisk, and parchment paper for lining the baking sheets.
Step 2: Combine Dry Ingredients
In a large bowl, whisk together the all-purpose flour and granulated sugar until the mixture is thoroughly combined. This step is essential to create a uniform dough for your Cannoli Cookies. Take a moment to admire the fluffy texture of your dry ingredients; it sets the stage for the delightful cookies to come.
Step 3: Mix the Wet Ingredients
In a separate bowl, combine the well-drained ricotta cheese, large egg, vanilla extract, and lemon zest. Mix until the mixture is smooth and creamy. This rich filling will elevate your Cannoli Cookies, so take your time here to blend well and achieve a velvety consistency.
Step 4: Combine Wet and Dry Mixtures
Gradually add the dry ingredients to the wet mixture, stirring gently until combined. Be cautious not to overmix, as you want to maintain a tender texture in your Cannoli Cookies. After mixing, cover the dough and let it rest at room temperature for 30 minutes, allowing flavors to meld for a richer result.
Step 5: Roll and Cut the Dough
Lightly flour your work surface and roll out the rested dough to a thickness of about ¼ inch. Use a sharp knife or a pizza cutter to cut the dough into 2×3 inch rectangles. As you cut, feel free to shape the cookies in ways that appeal to you, laying the groundwork for not just taste but aesthetic appeal.
Step 6: Prepare the Filling
In a small bowl, mix remaining ricotta with mini chocolate chips and chopped pistachios until well combined. This filling adds a delicious contrast to the crispy exterior of your Cannoli Cookies. As you prepare this mixture, delight in the colors and textures, knowing they’ll shine in your finished cookie.
Step 7: Assemble the Cookies
Place a generous dollop of filling in the center of each rectangle, then fold the dough over and pinch the edges to seal tightly. This step is crucial to ensure the filling stays inside while baking, so be sure to check for any openings. The appearance of your Cannoli Cookies is just as important, so seal them well.
Step 8: Bake the Cookies
Arrange the filled cookies on a parchment-lined baking sheet, spacing them about an inch apart. Bake in the preheated oven for 15-18 minutes or until they are golden brown and fragrant. Keep an eye on them, as you want a lovely golden hue without darkening too much; this will indicate they’re ready.
Step 9: Cool and Dust with Sugar
Once baked, remove the cookies from the oven and transfer them to wire racks to cool completely. As they cool, prepare to dust them with powdered sugar, which enhances their visual appeal. Before serving, sprinkle your Cannoli Cookies generously with sugar for that classic finishing touch.
How to Store and Freeze Cannoli Cookies
Room Temperature: Keep your Cannoli Cookies in an airtight container at room temperature for up to 3 days to maintain their freshness and crispness.
Fridge: If you live in a warm climate, consider storing the cookies in the fridge for added longevity, but be sure to bring them back to room temperature before serving for the best texture.
Freezer: For longer storage, wrap the cookies tightly in plastic wrap and place them in a freezer-safe container. They can be stored for up to 2 months, and can be enjoyed after thawing at room temperature.
Reheating: If you prefer warm cookies, simply reheat them at 350°F (175°C) for about 5 minutes before serving to restore their delightful crispness.
Cannoli Cookies: Delicious Variations
Feel free to get creative and personalize your Cannoli Cookies with these enticing variations that speak to your palate!
- Gluten-Free: Substitute all-purpose flour with a gluten-free blend to make these cookies suitable for gluten-sensitive guests.
- Vegan Twist: Use a flax egg instead of a large egg and substitute ricotta with a dairy-free cream for a completely plant-based version.
- Citrus Burst: Add orange zest in place of lemon for a bright, refreshing flavor that complements the creaminess beautifully.
- Nutty Delight: Experiment with different nuts by using hazelnuts or pecans instead of chopped pistachios for unique flavor combinations.
- Dried Fruit Bliss: Instead of chocolate chips, mix in dried cranberries or cherries for a sweet-tart filling that adds a fruity twist.
- Spiced Up: Add a pinch of cinnamon or nutmeg to the dough for a warm aroma and comforting spice that elevates your cookies.
- Rich Chocolate: For an indulgent take, use a chocolate ricotta filling or fold in cocoa powder into the original filling for extra richness.
- Cookie Sandwich: Make them a double treat by creating cookie sandwiches with additional filling or frosting in between two cookies!
Once your Cannoli Cookies are a hit, you might also like to try making some sweeties like Soft Pumpkin Cookies or Pumpkin Snickerdoodle Cookies for a change of pace! Each variation invites a delightful twist while still embracing the essence of that cherished Italian tradition. Happy baking!
Make Ahead Options
These Cannoli Cookies are perfect for busy home cooks who want to save time during the week! You can prepare the cookie dough up to 24 hours in advance—simply mix the dry and wet ingredients, then wrap the dough tightly in plastic wrap and refrigerate. Additionally, the filling can be made ahead and stored in the refrigerator for up to 3 days. When you’re ready to bake, roll and cut the dough, fill each rectangle, and bake as directed. This way, you’ll have fresh, scrumptious Cannoli Cookies ready to enjoy in no time, maintaining their delightful taste and texture!
What to Serve with Cannoli Cookies
Indulging in Cannoli Cookies invites a delightful experience that pairs perfectly with a variety of flavors and textures to create a memorable dessert spread.
-
Rich Espresso: The boldness of a freshly brewed espresso enhances the sweet and creamy notes of the cookies, creating a delightful contrast. Sip it slowly and savor each flavor melding together.
-
Vanilla Ice Cream: A scoop of creamy vanilla ice cream adds a delightful chill that complements the warm, crispy cookies. The smoothness of the ice cream balances the crunchy texture, making every bite a dream.
-
Fresh Berries: Sweet, juicy berries like strawberries or raspberries provide a refreshing tartness that cuts through the richness of the cookies. Their bright colors also make for a beautiful presentation!
-
Chocolate Sauce: Drizzling warm chocolate sauce over the cookies elevates the experience, adding an extra layer of indulgence. The luscious chocolate melds perfectly with the creamy ricotta filling.
-
Lemon Sorbet: The zesty profile of lemon sorbet cleanses the palate while offering a refreshing balance to the sweet cookies. Each spoonful brightens the taste of the Cannoli Cookies delightfully.
-
Nutty Biscotti: Pairing Cannoli Cookies with crisp, nutty biscotti provides a variety of textures. Dip the biscotti in coffee or tea for a delightful snack while savoring these treats.
-
Prosecco: A glass of bubbly Prosecco or sparkling wine adds a celebratory touch to your dessert table. The effervescence perfectly complements the cookies’ rich flavors, creating a joyous occasion.
-
Coconut Macaroons: These chewy treats bring additional texture and flavor full circle. Their slight sweetness and chewy goodness allow guests to enjoy contrasting tastes alongside the delicate Cannoli Cookies.
-
Homemade Whipped Cream: Light and airy whipped cream not only adds creaminess but also makes the presentation richer and more inviting. It perfectly accents the cookies, making each serving feel special.
-
Chocolate-Covered Almonds: Offering a sweet nutty crunch, chocolate-covered almonds round out the dessert experience beautifully. Their crunchy texture adds to the variety and makes for a delightful little extra treat.
Expert Tips for Cannoli Cookies
- Perfectly Drained Ricotta: Ensure your ricotta is well-drained to avoid soggy cookies; use cheesecloth or a fine mesh strainer for best results.
- Gentle Mixing: Avoid overmixing the dough to keep your Cannoli Cookies tender and flaky; mix just until combined.
- Watch the Bake Time: Keep a close eye on your cookies during the last few minutes of baking; they should be golden without becoming too dark.
- Sealing Edges: Pinch the edges of the cookies well when assembling to prevent any filling from leaking out during baking.
- Chill for Flavor: If time allows, let the dough rest longer in the fridge before rolling; this enhances the flavors and improves texture.
Cannoli Cookies Recipe FAQs
How do I choose the best ricotta cheese for my Cannoli Cookies?
Absolutely! Opt for ricotta that is labeled “whole milk” and ensure it’s well-drained. I recommend letting it sit in a fine mesh strainer for at least 30 minutes before use to remove excess moisture, which will help prevent soggy cookies.
How should I store my Cannoli Cookies to keep them fresh?
For optimal freshness, store your Cannoli Cookies in an airtight container at room temperature for up to 3 days. If you prefer, you can refrigerate them to extend their shelf life, just be sure to bring them to room temperature before enjoying to retain their delightful texture.
Can I freeze Cannoli Cookies for later?
Yes, you certainly can! Wrap each cookie tightly in plastic wrap and place them in a freezer-safe container. They can be frozen for up to 2 months. When you’re ready to indulge, simply thaw them at room temperature. If you want that fresh-baked taste back, reheat them in the oven at 350°F (175°C) for about 5 minutes before serving.
What should I do if my cookie dough is too sticky?
Very! If your dough is sticky, sprinkle a little extra flour while kneading until it’s manageable. Remember, it’s important not to overmix, so only add flour until you get a workable dough. You can also chill the dough in the fridge for about 20 minutes, which may help firm it up.
Can I make Cannoli Cookies without eggs?
Certainly! To make these cookies vegan-friendly, you can substitute the egg with a flax egg. Simply combine 1 tablespoon of ground flaxseed and 3 tablespoons of water. Let it sit for about 5 minutes until it thickens, then use this mixture in place of the egg in the recipe for binding.
Crispy Cannoli Cookies with Creamy Ricotta Delight
Ingredients
Equipment
Method
- Preheat your oven to 350°F (175°C).
- Whisk together the all-purpose flour and granulated sugar until combined.
- Combine the well-drained ricotta cheese, egg, vanilla extract, and lemon zest until smooth and creamy.
- Gradually add the dry ingredients to the wet mixture, stirring gently until combined. Cover the dough and let it rest for 30 minutes.
- Roll out the rested dough to a thickness of about ¼ inch and cut into 2x3 inch rectangles.
- Mix the remaining ricotta with mini chocolate chips and chopped pistachios until well combined.
- Place a dollop of filling in the center of each rectangle, fold the dough over, and pinch edges to seal.
- Arrange the filled cookies on a parchment-lined baking sheet and bake for 15-18 minutes until golden brown.
- Cool the cookies on wire racks and dust generously with powdered sugar before serving.
Leave a Reply