
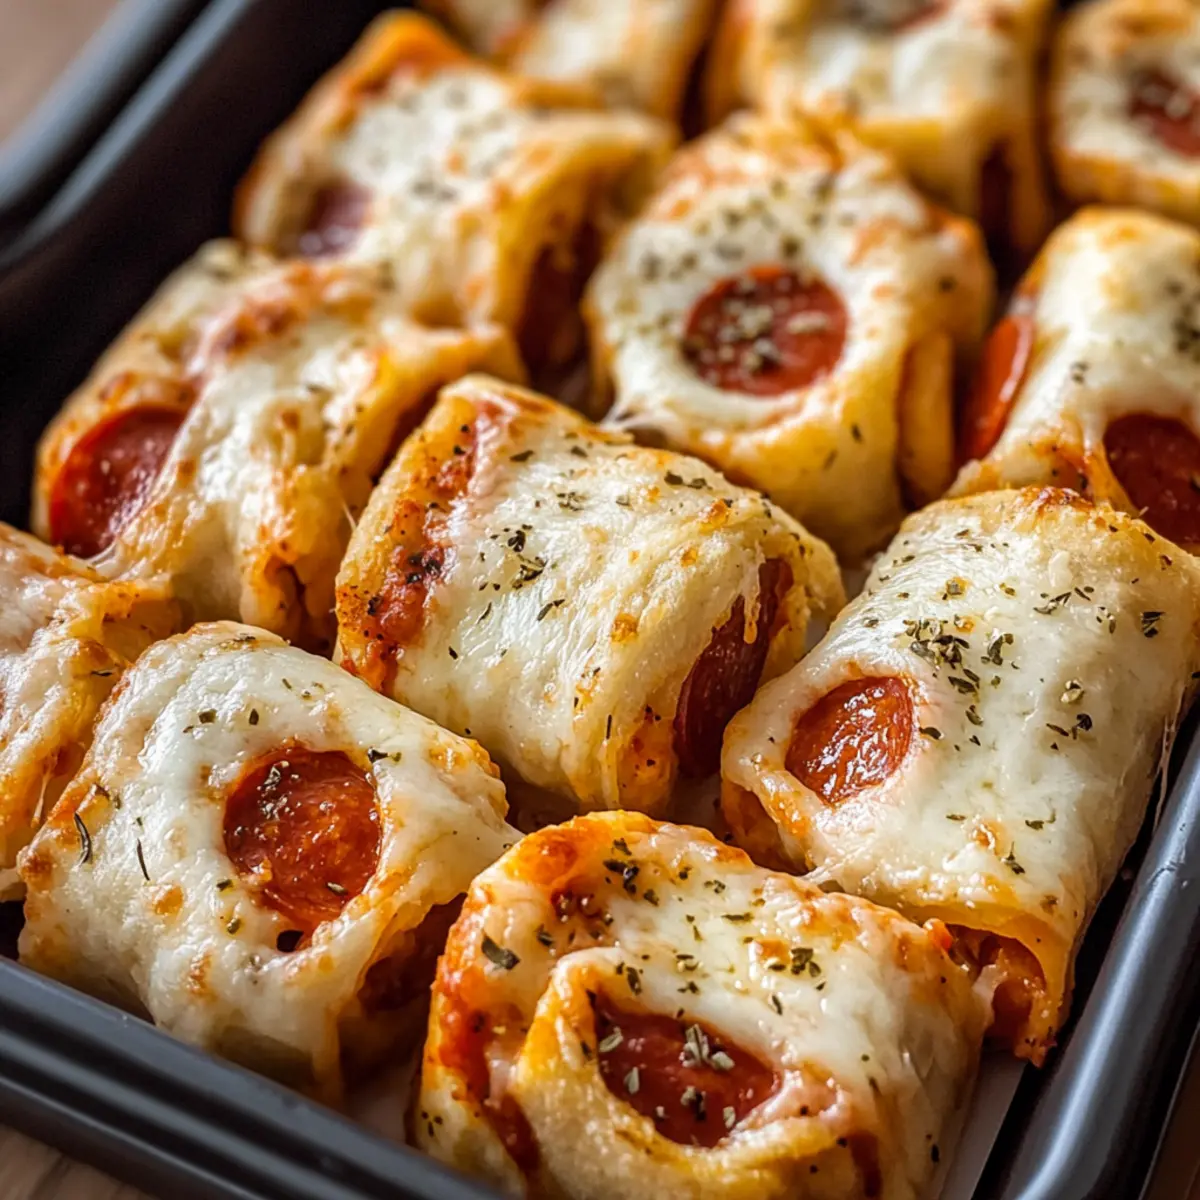
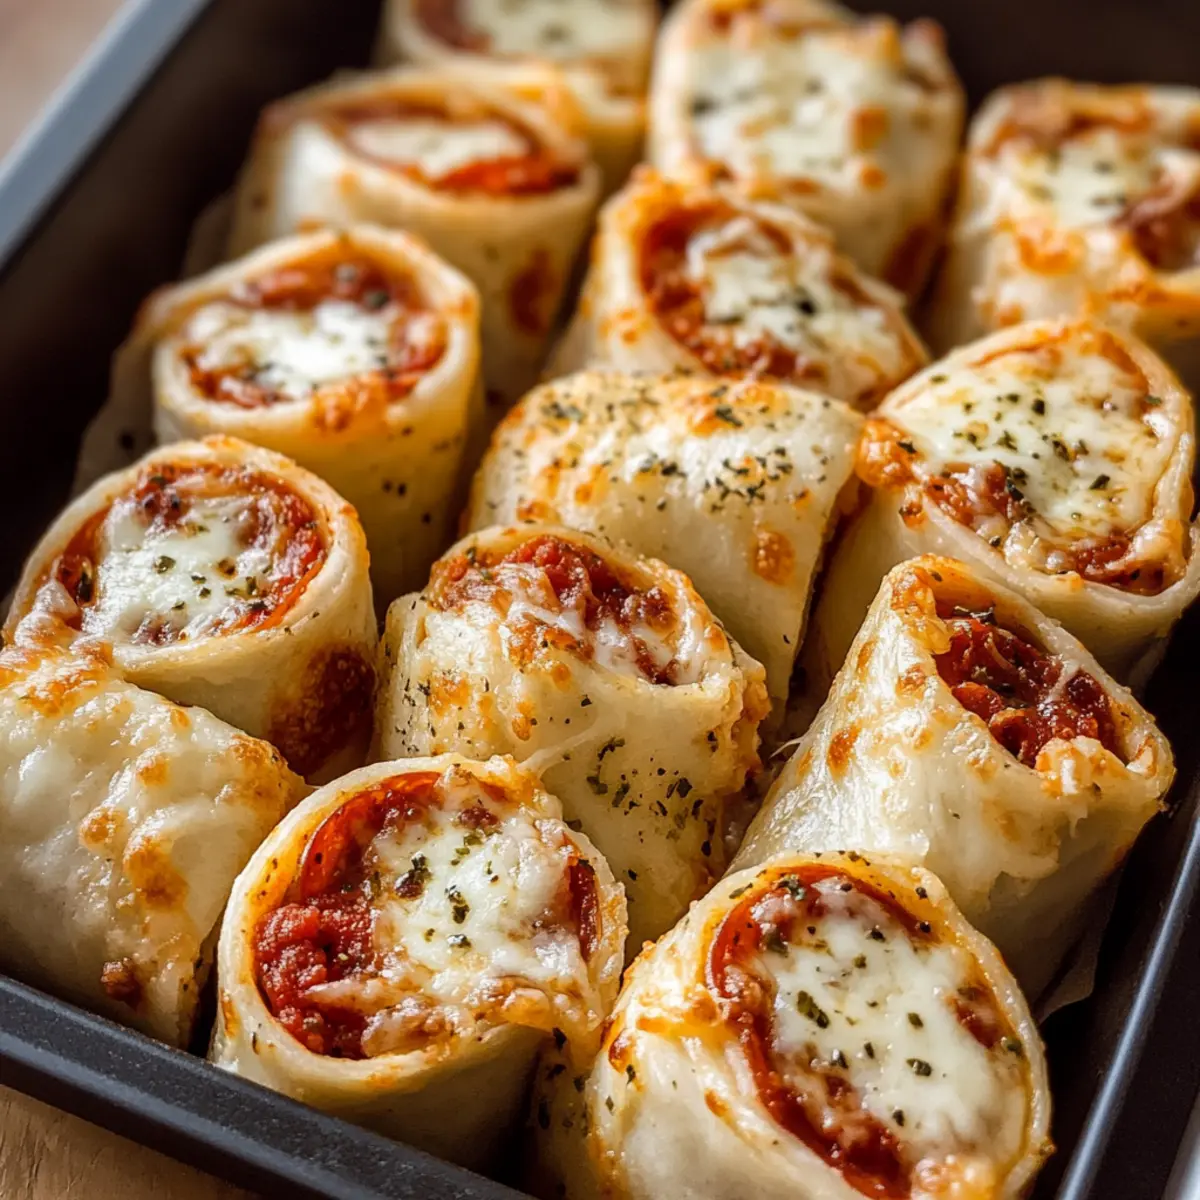
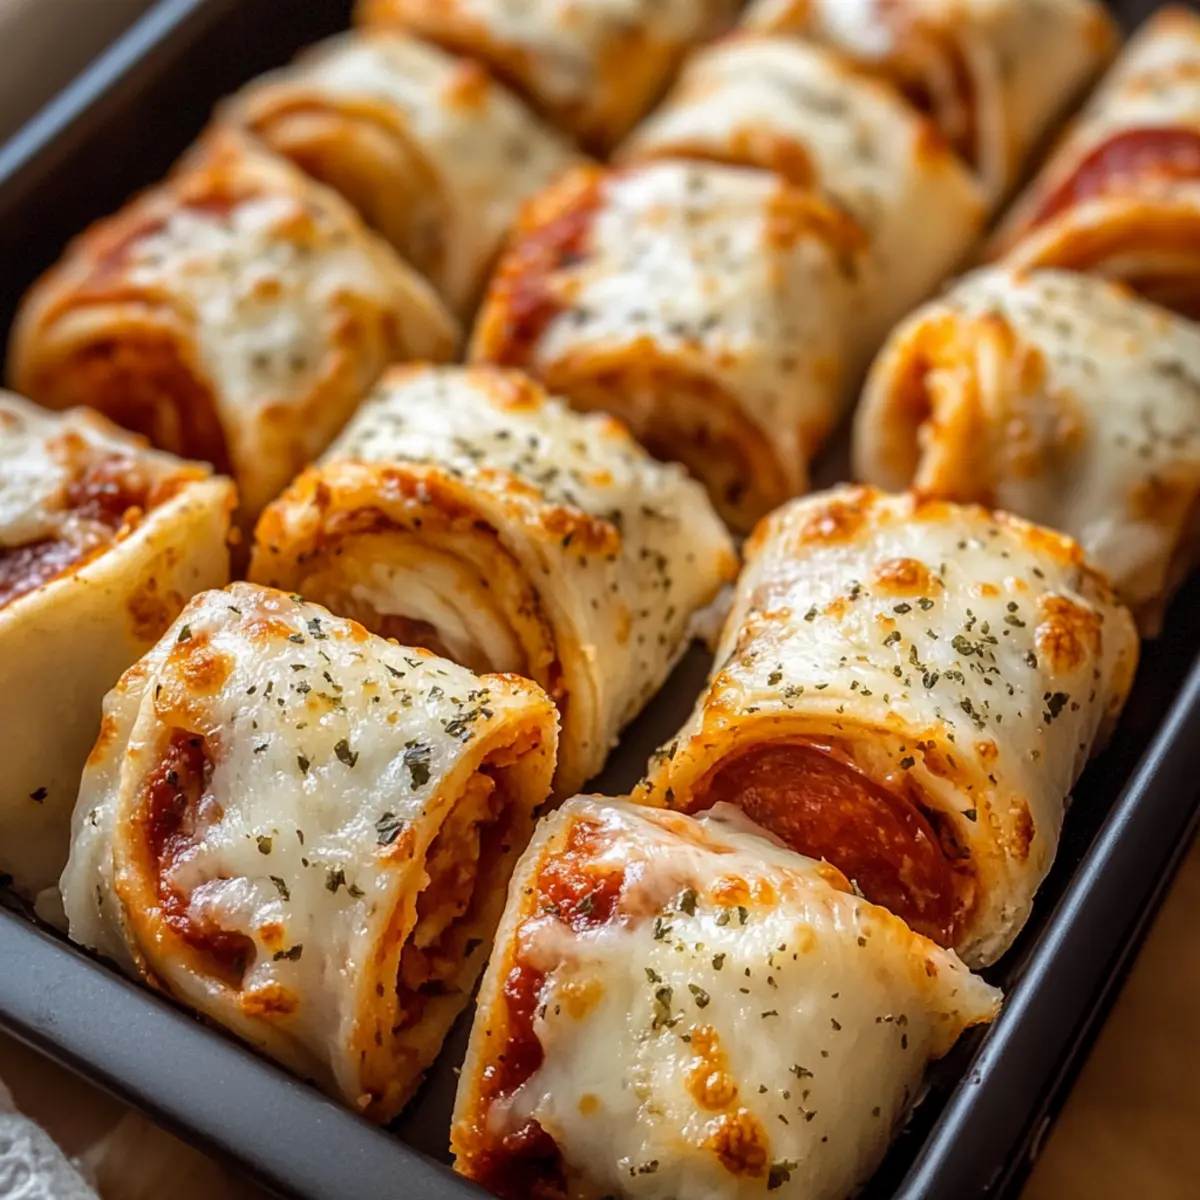
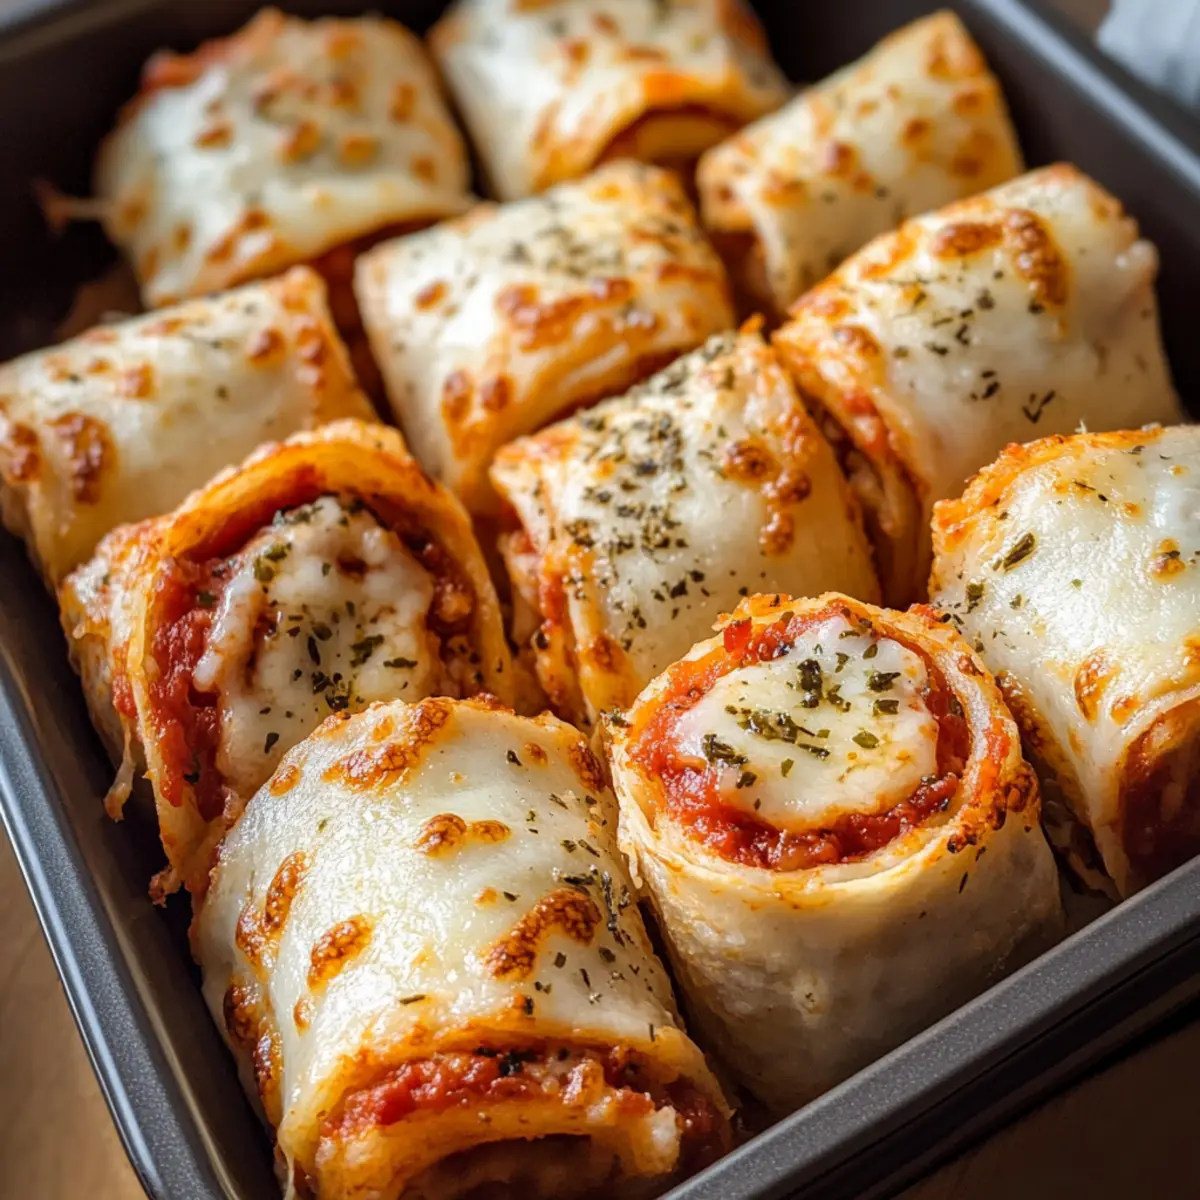
As I rolled out of bed one Saturday morning, the craving hit me: gooey cheese and savory goodness wrapped in a fun, portable snack. That’s when I realized it was the perfect day to whip up some Easy Cheesy Pizza Roll Ups! These delicious bites combine all the classic flavors of pizza into an easy-to-make treat that everyone loves. Not only are they quick to prepare, making them ideal for busy days, but they’re also super customizable—perfect for any pantry finds you have on hand. Whether your family prefers a vegetarian twist or a little bit of spice, these roll-ups are a hit! Curious about how to create these delicious morsels in your kitchen? Let’s dive into this mouthwatering recipe!
Why are Pizza Roll Ups so popular?
Versatile and Customizable: These roll-ups can easily adapt to your taste preferences or dietary needs. Think of delicious variants like Vegetarian Roll Ups packed with fresh veggies, or Cheesy Garlic Roll Ups for a garlicky delight.
Kid-Friendly Fun: Perfect as a lunch option, kids love the fun finger food aspect, making them a hit for school lunches or after-school snacks.
Quick and Easy: With simple ingredients and minimal prep, you can whip up these Pizza Roll Ups in no time, ideal for busy weeknights or last-minute gatherings.
Crowd-Pleasing Appetizer: Whether for a game day party or a casual family get-together, these roll-ups are sure to please everyone at the table!
Portable Goodness: Their compact shape makes them an excellent choice for on-the-go snacking or picnics, allowing you to indulge in pizza flavors wherever you are.
Get ready to enjoy these Delicious Pizza Roll Ups that will quickly become a family favorite!
Pizza Roll Ups Ingredients
Get ready to create a cheesy delight!
For the Roll Ups
• Flour Tortillas (20 small, 5-inch) – Provides the ideal base; try whole wheat for a healthier twist.
• Pizza Sauce (14 oz) – Adds that classic pizza flavor; consider marinara or BBQ as tasty alternatives.
• Shredded Mozzarella Cheese (24 oz) – Ensures a melty texture; mixing different cheeses can enhance flavor complexity.
• Pepperoni Slices (80 slices) – Offers authentic pizza taste; substitute with veggies for vegetarian variants.
For Extra Flavor
• Cooking Oil (1 tbsp) – Ensures golden crispiness; olive oil is a healthier option for brushing the tops.
• Garlic Powder (1/2 tsp) – Adds a touch of aromatic goodness; fresh garlic boosts the flavor if you prefer.
• Italian Seasoning (1/2 tsp) – Provides herby notes; dried basil and oregano can work well as a substitute.
• Garlic Salt (1/2 tsp) – Enhances savory depth; adjust to your personal taste for the right amount of flavor.
Step‑by‑Step Instructions for Pizza Roll Ups
Step 1: Preheat the Oven
Begin by preheating your oven to 350°F (175°C). While the oven warms up, prepare a large baking pan by spraying it with cooking oil to prevent the Pizza Roll Ups from sticking. This will help achieve a crispy, golden exterior as they bake.
Step 2: Spread the Sauce
Take each flour tortilla and spread 1 tablespoon of pizza sauce evenly across the surface. Ensure the sauce covers the tortilla, leaving a small border around the edges for easy rolling. This layer will keep your Pizza Roll Ups moist and flavorful, setting the stage for the cheesy goodness that follows.
Step 3: Add the Cheese and Toppings
Sprinkle 1/4 cup of shredded mozzarella cheese over the pizza sauce on each tortilla, creating a nice layer of gooeyness. Next, add 4-5 slices of pepperoni on top of the cheese. Feel free to customize your roll-ups by substituting ingredients based on your taste, like adding veggies for a vegetarian version.
Step 4: Roll the Tortillas
Carefully roll each tortilla tightly, making sure to tuck in the ends as you go to keep the filling secure. Once rolled, place each tortilla seam-side down on the prepared baking pan. This orientation helps them hold together during baking and enhances their golden appearance.
Step 5: Brush with Oil
Using a brush, lightly coat the tops of the rolled tortillas with cooking oil. This small step is essential for achieving a deliciously crispy texture. The oil will help give the Pizza Roll Ups their inviting golden-brown color as they bake in the oven.
Step 6: Season for Extra Flavor
In a small bowl, combine garlic powder, Italian seasoning, and garlic salt. Mix them well and then sprinkle this flavorful blend evenly over the tops of your roll-ups. This seasoning not only enhances the flavor but also adds an aromatic touch that elevates the overall dish.
Step 7: Bake to Perfection
Place the baking pan in the preheated oven and bake the Pizza Roll Ups for approximately 10 minutes. Keep an eye on them as they bake; they should become golden brown and the cheese should be melted and bubbly. This is the moment when the irresistible aroma fills your kitchen!
Step 8: Cool and Serve
Once done, take the Pizza Roll Ups out of the oven and let them cool slightly. This brief cooling period allows the filling to settle, making them easier to handle. Serve warm, perhaps with some extra pizza sauce for dipping, and enjoy these delightful, gooey bites!
What to Serve with Easy Cheesy Pizza Roll Ups
Delight in crafting the perfect meal alongside these cheesy treats, tempting your taste buds with savory flavors and textures.
- Crunchy Side Salad: A fresh garden salad with crisp greens and a tangy vinaigrette offers a refreshing balance to the rich, cheesy roll-ups.
- Garlic Breadsticks: Soft and warm breadsticks brushed with garlic butter are a fantastic complement, perfect for dipping into marinara sauce.
- Creamy Dipping Sauce: Serve with ranch or a cheesy dip to elevate each bite of your Pizza Roll Ups, adding an extra layer of flavor.
- Zesty Antipasto Platter: Include olives, marinated vegetables, and cheese cubes for a Mediterranean touch that pairs beautifully with the Italian-inspired roll-ups.
- Roasted Veggies: Try serving with seasoned roasted vegetables like bell peppers and zucchini. Their mild flavor and tender texture enhance the meal.
- Sweet Dessert: Finish off on a sweet note with chocolate-dipped strawberries or fruit skewers for a fun, light treat after your savory feast.
- Sparkling Lemonade: A bubbly, refreshing drink like sparkling lemonade offers a zesty contrast that refreshes palate between tasty bites.
- Classic Italian Soda: An Italian soda with a fruity flavor can be a fun, nostalgic drink that pairs well with the savory roll-ups.
- Warm Marinara Sauce: For a classic approach, a small bowl of warm marinara sauce for dipping is an absolute must-have alongside your Pizza Roll Ups.
Pizza Roll Ups Variations & Substitutions
Customize your Pizza Roll Ups with these fun and tasty twists that will delight your taste buds!
-
Vegetarian Roll Ups: Use an assortment of fresh veggies, like bell peppers and mushrooms, instead of meat for a colorful, healthy option.
Imagine sinking your teeth into a burst of vibrant vegetables wrapped in warm, cheesy goodness! -
Chicken Pizza Roll Ups: Swap out pepperoni for shredded chicken and add a drizzle of BBQ sauce for a tangy flavor explosion.
This version is perfect for those days when you crave a little protein with your pizza fix! -
Cheesy Garlic Roll Ups: Spread a garlic butter mixture instead of pizza sauce for a heightened garlic experience.
Each bite will be a dreamy embrace of garlic and cheese, making it hard to resist your next roll-up! -
Spicy Roll Ups: Fire things up by adding sliced jalapeños or spicy sausage to the mix for a delightful kick.
Perfect for heat lovers, this variation brings a whole new level of flavor and excitement! -
Bacon Lovers Roll Ups: Integrate crispy bacon bits into your roll-ups for a deliciously crunchy and savory treat.
The smoky flavor of bacon pairs beautifully with the gooey interior, creating a mouthwatering sensation! -
Italian Style: Opt for a mix of Italian cheeses along with fresh basil for a gourmet pizza roll-up experience.
Elevate your roll-ups by introducing fresh flavors that bring a taste of Italy right into your kitchen! -
Gluten-Free Option: Substitute flour tortillas with gluten-free tortillas for a gluten-free version that everyone can enjoy.
Don’t let dietary restrictions keep you from enjoying these delightful bites—go gluten-free and dig in!
Explore the wonderful world of flavors with your own Cinnamon Roll Zucchini or enjoy some delectable Pumpkin Cinnamon Roll on the side!
How to Store and Freeze Pizza Roll Ups
Fridge: Keep your Pizza Roll Ups in an airtight container, and they’ll stay fresh for up to 3 days. Reheating in the oven can help maintain crispness.
Freezer: If you want to save some for later, freeze the roll-ups in a single layer on a baking sheet first, then transfer to a freezer-safe container. They can be kept frozen for up to 2 months.
Reheating: For best results, reheat frozen Pizza Roll Ups in a preheated oven at 350°F (175°C) for about 15-20 minutes or until heated through and crispy.
Room Temperature: If left out, enjoy your Pizza Roll Ups within 2 hours to ensure they remain safe and delicious.
Make Ahead Options
These Easy Cheesy Pizza Roll Ups are perfect for meal prep enthusiasts! You can assemble the roll-ups up to 24 hours in advance, simply wrap them tightly in plastic wrap or foil, and refrigerate to maintain their freshness. If you’re feeling extra organized, you can even freeze them for up to 3 months. When you’re ready to enjoy, just bake from frozen, adding a few extra minutes to the cooking time. This approach allows you to have delicious, homemade snacks on hand whenever cravings hit, taking the hassle out of busy weeknights. Enjoy the convenience without sacrificing quality—these roll-ups will still emerge golden and crispy!
Expert Tips for Pizza Roll Ups
-
Tight Rolling: Ensure that you roll the tortillas tightly to prevent the filling from leaking out during baking. A snug roll makes for the best Pizza Roll Ups!
-
Layer Evenly: Distribute the cheese and toppings evenly on each tortilla. This ensures every bite is packed with flavor and helps the roll-ups hold together better.
-
Oil Brush: Don’t skip brushing the tops with cooking oil. This step is key for achieving that golden, crispy finish you crave in Pizza Roll Ups.
-
Avoid Overcrowding: Bake the roll-ups in a single layer on the pan. Overcrowding can lead to uneven cooking and soggy textures, so give them room to crisp up!
-
Cooling Time: Let your Pizza Roll Ups cool for a few minutes before serving. This helps them firm up, making it easier to enjoy without spilling the cheesy goodness.
-
Dipping Options: Pair with a selection of dipping sauces like marinara, ranch, or garlic butter to elevate your Pizza Roll Ups and cater to everyone’s tastes!
Pizza Roll Ups Recipe FAQs
What is the best way to choose ripe ingredients for my Pizza Roll Ups?
Absolutely! Freshness matters in this recipe. When selecting your ingredients, choose tortillas that are soft and free from cracks. Mozzarella cheese should be fresh and not past its expiration date for the best melt. For toppings like pepperoni, look for slices that are vibrant in color and not overly greasy. If you’re using vegetables, ensure they’re firm and crisp, avoiding any with dark spots or signs of wilting.
How should I store leftover Pizza Roll Ups?
Very! To keep your Pizza Roll Ups fresh, place them in an airtight container and store them in the fridge. They’ll retain their optimal taste and texture for up to 3 days. When ready to enjoy again, simply reheat them in the oven at 350°F (175°C) for about 5-7 minutes until they’re crispy again. If you notice any sogginess, you might want to put them under the broiler for a minute or two to refresh that delightful crunch.
Can I freeze Pizza Roll Ups for later use?
Absolutely! If you want to prepare ahead, freeze the Pizza Roll Ups after baking. Lay them out in a single layer on a baking sheet and place them in the freezer until frozen solid. Once firm, transfer them to a freezer-safe bag or container to prevent freezer burn. They are best used within 2 months. To reheat, bake straight from the freezer at 350°F (175°C) for about 20-25 minutes or until heated through.
What if my Pizza Roll Ups are leaking filling while baking?
The more the merrier! If you notice your roll-ups are leaking, it may be due to rolling them too loosely or overstuffing. Ensure you roll them tightly, tucking in the ends well, and stick to the recommended ingredient amounts for a perfect fit. If they still leak, consider adjusting the filling by reducing the amount of cheese or broth-like toppings, which can make it too soggy.
Are Pizza Roll Ups safe for kids with allergies?
Very! For kids with allergies, you can customize the Pizza Roll Ups according to their needs. Substituting dairy with non-dairy cheese, or omitting common allergens like pepperoni for veggies, makes it easy to adapt. Always check the ingredients of pre-packaged items like tortillas and sauces to ensure they are allergy-friendly. For example, opt for gluten-free tortillas if your child is gluten-sensitive.
What is the shelf life of Pizza Roll Ups once cooked?
Good question! Cooked Pizza Roll Ups should be enjoyed right away for the best texture, but they can last in the refrigerator for about 3 days. If they’re left at room temperature, aim to eat them within 2 hours to ensure they’re safe for consumption. For longer storage, freezing is your best option!
Delicious Pizza Roll Ups – A Fun Twist on Your Favorite Snack
Ingredients
Equipment
Method
- Preheat your oven to 350°F (175°C) and spray a large baking pan with cooking oil.
- Spread 1 tablespoon of pizza sauce on each flour tortilla, leaving a small border around the edges.
- Sprinkle 1/4 cup of shredded mozzarella cheese over the sauce and add 4-5 pepperoni slices on top.
- Roll each tortilla tightly, tucking in the ends, and place seam-side down on the baking pan.
- Brush the tops of the rolled tortillas lightly with cooking oil.
- Mix garlic powder, Italian seasoning, and garlic salt in a bowl, then sprinkle over the tops of the roll-ups.
- Bake in the oven for about 10 minutes until golden brown and the cheese is melted.
- Let the Pizza Roll Ups cool slightly before serving, perhaps with extra pizza sauce for dipping.
Leave a Reply