
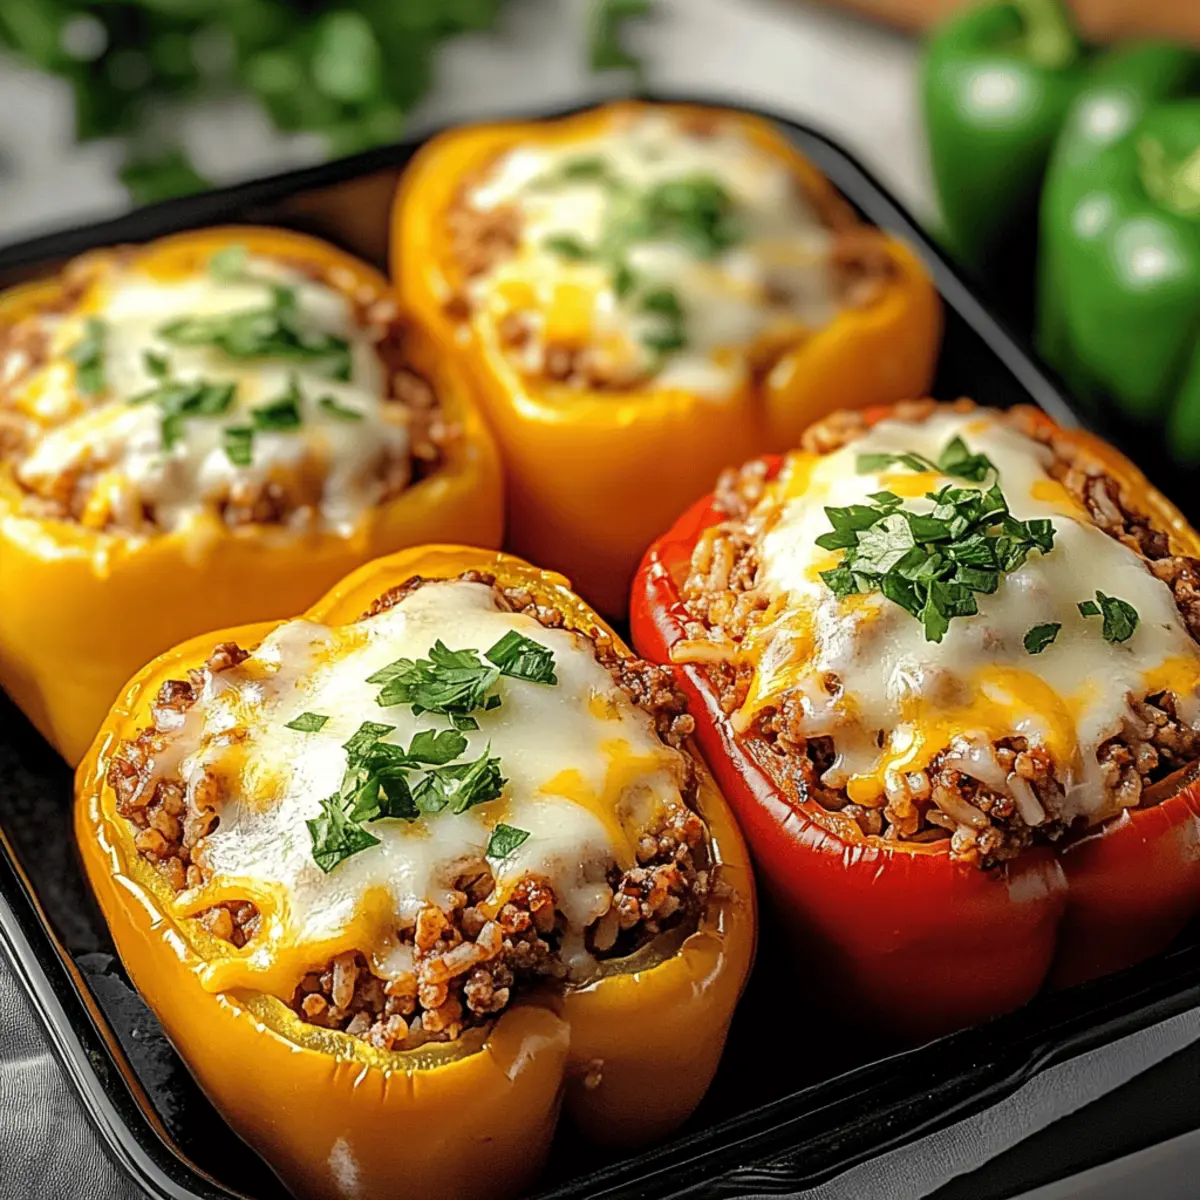
Stepping into my kitchen, I’m greeted by the vibrant colors of bell peppers, their glossy skins shimmering like jewels, ready to be transformed into something wonderful. Classic Stuffed Peppers have a special charm—these beauties not only look appetizing, but they also deliver on taste and convenience. In just 20 minutes, you can whip up this comforting dish, perfect for busy weeknights and gatherings alike. The best part? They’re endlessly customizable, whether you choose a hearty ground turkey filling or a delicious vegetarian twist. With flavorful, aromatic ingredients that invite joy into every bite, you’ll want these stuffed peppers to become a staple at your dinner table. What unique variation will you try first?

Why are Classic Stuffed Peppers a Must-Try?
Quick Preparation: In just 20 minutes, you can have a delicious meal ready without sacrificing flavor!
Endless Customization: Featuring options for ground turkey or even a vegetarian filling, these stuffed peppers cater to every taste preference.
Meal Prep Friendly: Prepare these in advance and store leftovers for an effortless weeknight dinner.
Crowd Pleaser: Perfect for family gatherings, they appeal to both kids and adults—just like Buffalo Chicken Stuffed cannot be missed!
Flavorful Guarantee: Each bite bursts with flavor thanks to the combination of savory spices, cheeses, and fresh herbs.
Elevate your dining experience with these tasty, comforting gems.
Classic Stuffed Peppers Ingredients
Unlock the secret to this delicious meal!
For the Filling
• Bell Peppers – Choose vibrant colors for a sweet flavor and appealing presentation; poblanos or zucchini work as delightful substitutes.
• Ground Beef – A hearty base for your filling; swap it out for ground turkey or a plant-based option for a leaner choice.
• Cooked Rice – Provides the necessary texture; feel free to use white, brown, or cauliflower rice based on your dietary needs.
• Onion – This aromatic vegetable levels up the flavor; finely chop to ensure even cooking.
• Garlic – Adds a rich depth of flavor; make sure to mince it before tossing it in the skillet.
• Tomato Sauce – Merges all the flavors and adds moisture; crushed tomatoes can be used as a fun alternative.
• Diced Tomatoes – Freshness in every bite; remember to drain excess liquid for the best stuffing result.
• Italian Seasoning – Infuses a fragrant herb blend; single herbs like oregano and basil also work beautifully.
• Salt and Black Pepper – Essential for balancing flavors; season to your taste for the best outcome.
• Mozzarella and Parmesan Cheese – Creates a gooey, delicious topping; feel free to swap mozzarella for gouda or pepper jack for added kick.
• Olive Oil – Perfect for sautéing your aromatics; vegetable or canola oil are great alternatives if needed.
• Fresh Parsley – Adds a pop of color and freshness to finish off the dish beautifully.
For the Topping
• Extra Cheese – Feel free to add more cheese for an irresistible, melty crown on your stuffed peppers; it’s hard to find anyone who doesn’t love extra gooey goodness!
Step‑by‑Step Instructions for Classic Stuffed Peppers
Step 1: Preheat the Oven
Begin by preheating your oven to 375°F (190°C). This crucial step ensures that your Classic Stuffed Peppers will cook through evenly while developing a lovely golden top. As the oven warms, gather your ingredients and prepare your baking dish to keep the workflow smooth.
Step 2: Prepare the Peppers
Wash your bell peppers thoroughly and carefully slice off the tops, ensuring to preserve the structure. Use a spoon to remove the seeds and membranes from inside, creating a hollow shell ready for stuffing. Rinse the cleaned peppers again, then drain and set them upright in your baking dish, ready to be filled with tasty goodness.
Step 3: Sauté Aromatics
In a large skillet, warm about a tablespoon of olive oil over medium heat. Once shimmering, add finely chopped onions and minced garlic, sautéing for 3-4 minutes until the onions become translucent and fragrant. This base builds the essential flavor for your Classic Stuffed Peppers, setting the stage for the delicious filling.
Step 4: Cook the Meat
Add the ground beef to the skillet, using a wooden spoon to break it up. Cook for 5-7 minutes, stirring often, until the meat is thoroughly browned and no longer pink. As it cooks, the savory aroma will fill your kitchen, heightening anticipation for these delightful stuffed peppers.
Step 5: Combine the Filling Ingredients
Stir in the cooked rice, tomato sauce, and drained diced tomatoes, along with the Italian seasoning, salt, and black pepper. Allow this mixture to simmer for 5 minutes so the flavors can meld beautifully. The resulting filling should be moist but not overly watery, ready to be heaped into each pepper.
Step 6: Stuff the Peppers
Once the filling is well-mixed, begin to stuff each prepared pepper generously with your savory mixture. Be sure to pack the filling firmly to avoid any gaps; this will help each Classic Stuffed Pepper hold its shape. Feel free to overfill a bit, as there’s nothing wrong with a hearty portion!
Step 7: Arrange in a Baking Dish
Position the stuffed peppers upright in your baking dish. Pour about 1/4 inch of water at the bottom to help steam the peppers during baking, keeping them juicy and flavorful. This step is essential in preventing dryness as they cook to perfection in the oven.
Step 8: Bake Covered
Cover the baking dish tightly with aluminum foil and place it in the preheated oven. Bake for 35 minutes to allow the peppers to soften while the flavors meld beautifully. Keep an eye on them; you want them tender but still holding their shape.
Step 9: Add Cheese and Bake Uncovered
After 35 minutes, carefully remove the foil and sprinkle the tops of each pepper generously with mozzarella and Parmesan cheeses. Return the dish to the oven, uncovered, for an additional 10-15 minutes, or until the cheese is bubbly and golden. The gooey cheese will provide a delightful contrast to the tender peppers.
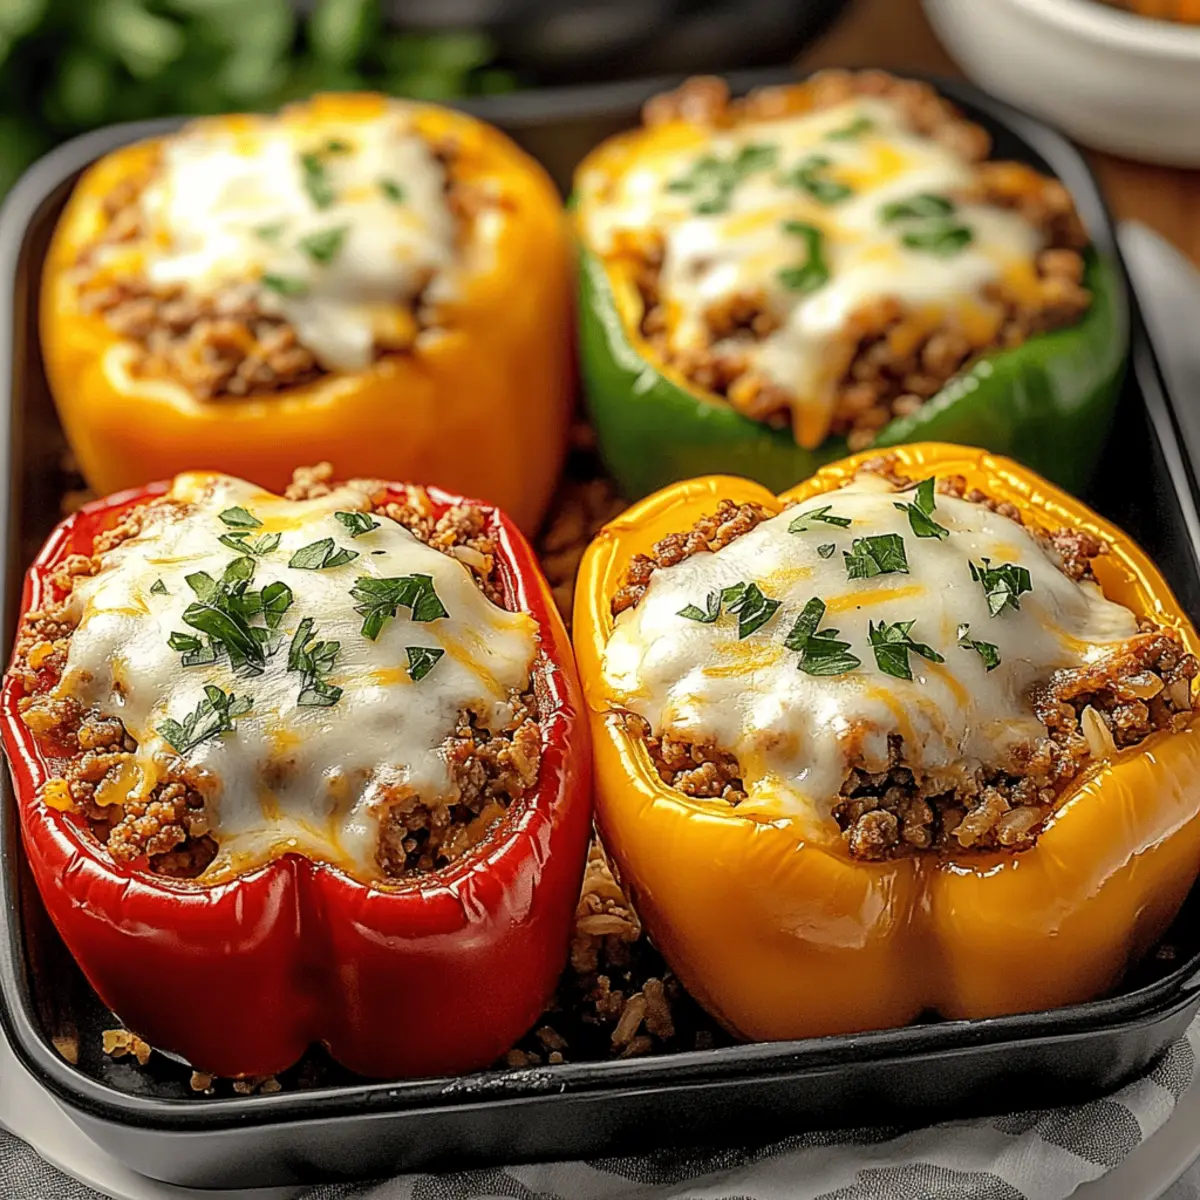
Step 10: Cool, Garnish, and Serve
Once baked, allow the Classic Stuffed Peppers to cool slightly before serving. Garnish with fresh parsley for a burst of color and added flavor. Each vibrant pepper is now ready to be plated, bringing joy and comfort to your dinner table.
Classic Stuffed Peppers Variations & Substitutions
Feel free to get creative with these Classic Stuffed Peppers and tailor them to your taste and dietary needs!
-
Ground Turkey: Swap in ground turkey for a leaner option that still packs flavorful punch. A delicious alternative that retains all the heartiness.
-
Vegetarian Delight: Use a mix of quinoa and black beans for a protein-rich, meatless option. This variation provides a satisfying texture and all the heartiness you crave.
-
Spicy Kick: Add diced jalapeños or sprinkle red pepper flakes into your filling for an added layer of heat. The spice wakes up the flavors and turns up the excitement!
-
Herb Infusion: Incorporate fresh herbs like cilantro or basil for an aromatic twist. These vibrant additions elevate your dish by adding freshness and complexity.
-
Rice Alternatives: Try cauliflower rice or wild rice instead of traditional rice for a healthier, lower-carb option. Each provides a unique texture that enhances the overall experience.
-
Cheese Variations: Swap mozzarella for gouda or pepper jack cheese to introduce a bolder flavor profile. Different cheeses can transform your dish into a new delight!
-
Cooked Lentils: Replace the meat with cooked lentils for a veggie-packed filling that’s both nutritious and delicious. This substitution creates a great blend of taste and texture.
-
Nutty Crunch: Experiment by incorporating chopped nuts like pine nuts or almond slivers into your filling for added crunch and earthiness. It’s a surprising twist that creates a delightful contrast!
These variations not only spice up the classic recipe, but also allow you to make it your own. If that piques your interest, you may also enjoy Cajun Chicken with Bell Peppers or a comforting Irresistible One-Pot Lasagna Soup for more culinary inspiration!
Expert Tips for Classic Stuffed Peppers
-
Choose the Right Peppers: Use similar-sized bell peppers for even cooking; different sizes may result in uneven tenderness.
-
Add Moisture: Don’t skip the water at the bottom of the dish—this crucial step helps steam the peppers and keeps them moist during baking.
-
Simmer Properly: Ensure the filling simmers long enough to thicken, preventing watery stuffing that could make for soggy Classic Stuffed Peppers.
-
Go Heavy on Cheese: Be generous when adding cheese for that irresistible gooey topping; it elevates flavor and texture beautifully.
-
Prep Ahead: You can prepare the stuffed peppers a day in advance and refrigerate them. Just add cheese shortly before baking to maintain its freshness.
How to Store and Freeze Classic Stuffed Peppers
-
Fridge: Store any leftover Classic Stuffed Peppers in an airtight container for up to 3 days to maintain freshness and flavor.
-
Freezer: Wrap tightly in plastic wrap and place in a freezer-safe bag for up to 2 months. This method preserves taste and texture nicely.
-
Reheating: To reheat, place in the oven at 350°F (175°C) for 20-25 minutes. Consider adding a splash of water to keep them moist.
Make Ahead Options
These Classic Stuffed Peppers are perfect for meal prep enthusiasts! You can prepare the filling up to 24 hours in advance by cooking the ground beef, sautéing the onions and garlic, and mixing in the rice, tomato sauce, and seasonings. Store the filling in an airtight container in the refrigerator. You can also stuff the peppers and refrigerate them, but be sure to add cheese just before baking for the best texture. When you’re ready to enjoy your meal, simply bake the stuffed peppers from the refrigerator, adding 10-15 minutes to the cooking time to ensure they’re heated through. With these make-ahead options, you can enjoy delicious, home-cooked comfort with minimal effort during busy weeknights!
What to Serve with Classic Stuffed Peppers
Elevate your meal with delightful sides that complement the savory goodness of these vibrant stuffed gems.
- Crisp Green Salad: A refreshing salad with mixed greens and a tangy vinaigrette balances the hearty stuffing beautifully. The crunch of fresh vegetables adds a lovely texture contrast.
- Garlic Bread: Warm, buttery garlic bread pairs perfectly, providing a rich, comforting addition to your dinner spread. The aroma alone will have everyone eagerly anticipating their meal.
- Roasted Vegetables: Seasonal roasted veggies bring a caramelized sweetness that enhances the filling flavors of stuffed peppers. Choose a vibrant rainbow of veggies for visual appeal!
- Quinoa Pilaf: A lightly seasoned quinoa pilaf offers a nutritious boost to your plate. Its fluffy texture and nutty flavor create a nice counterpoint to the savory stuffing.
- Stuffed Mushroom Caps: Enhance the comfort food theme with savory stuffed mushrooms topped with cheese. They are bite-sized and perfect for nibbling alongside your peppers.
- Classic Coleslaw: The creamy crunch of a classic coleslaw provides a cool and zesty contrast, making each bite of stuffed peppers even more satisfying.
- Sweet Tea or Lemonade: A sweet, refreshing beverage like iced tea or homemade lemonade enhances the meal’s comfort and can seamlessly transition into dessert.
- Chocolate Mousse: Finish on a sweet note with rich and airy chocolate mousse. Its luxurious texture and deep flavor offer a delightful contrast to the savory dinner.
Classic Stuffed Peppers Recipe FAQs
How do I select the best bell peppers?
Absolutely! Look for bell peppers that are firm with smooth, unblemished skins. The colors should be vibrant without dark spots all over, indicating freshness. When selecting, feel free to choose a mix of colors for a stunning presentation—each color has its unique sweetness and flavor!
What’s the best way to store leftover stuffed peppers?
Very! For optimal freshness, store any leftover Classic Stuffed Peppers in an airtight container in the refrigerator for up to 3 days. Make sure they cool completely before sealing to avoid moisture buildup inside the container.
Can I freeze Classic Stuffed Peppers?
Absolutely! To freeze, wrap each stuffed pepper tightly in plastic wrap, then place them in a freezer-safe bag. They can be kept in the freezer for up to 2 months. When you’re ready to enjoy, simply thaw overnight in the refrigerator before reheating.
What’s the best way to reheat stuffed peppers?
I often recommend reheating stuffed peppers in the oven for the best results. Preheat your oven to 350°F (175°C) and place the peppers on a baking dish. Cover with aluminum foil to keep them from drying out and heat for 20-25 minutes. Adding a splash of water at the bottom can help retain moisture and keep the filling tender.
Can I make substitutions for allergies?
Absolutely! If you’re catering to specific dietary needs, you can easily exchange ground beef for a plant-based ground meat or leave it out entirely for a vegetarian version. Also, for cheese allergies, consider using dairy-free cheese alternatives; you can still enjoy the gooeyness while being mindful of food sensitivities.
What if my filling is too runny?
Not to worry! If your filling ends up too runny, simply simmer it on low heat for an additional 3-5 minutes to help reduce excess moisture. Be sure to stir frequently to prevent sticking. Also, consider using less tomato sauce next time. This ensures the filling stays thick and hearty, perfect for stuffing!

Classic Stuffed Peppers: Quick Comfort Food You'll Love
Ingredients
Equipment
Method
- Preheat your oven to 375°F (190°C).
- Wash and slice off the tops of the bell peppers, removing seeds and membranes.
- In a skillet, warm olive oil and sauté chopped onions and minced garlic for 3-4 minutes.
- Add ground beef and cook until browned, about 5-7 minutes.
- Stir in rice, tomato sauce, diced tomatoes, Italian seasoning, salt, and pepper. Simmer for 5 minutes.
- Stuff the prepared peppers with the filling firmly.
- Arrange the peppers in a baking dish and add 1/4 inch of water at the bottom.
- Cover with aluminum foil and bake for 35 minutes.
- Remove foil, add cheese on top, and bake uncovered for 10-15 minutes until cheese is golden.
- Allow to cool slightly, garnish with parsley, and serve.
Leave a Reply