
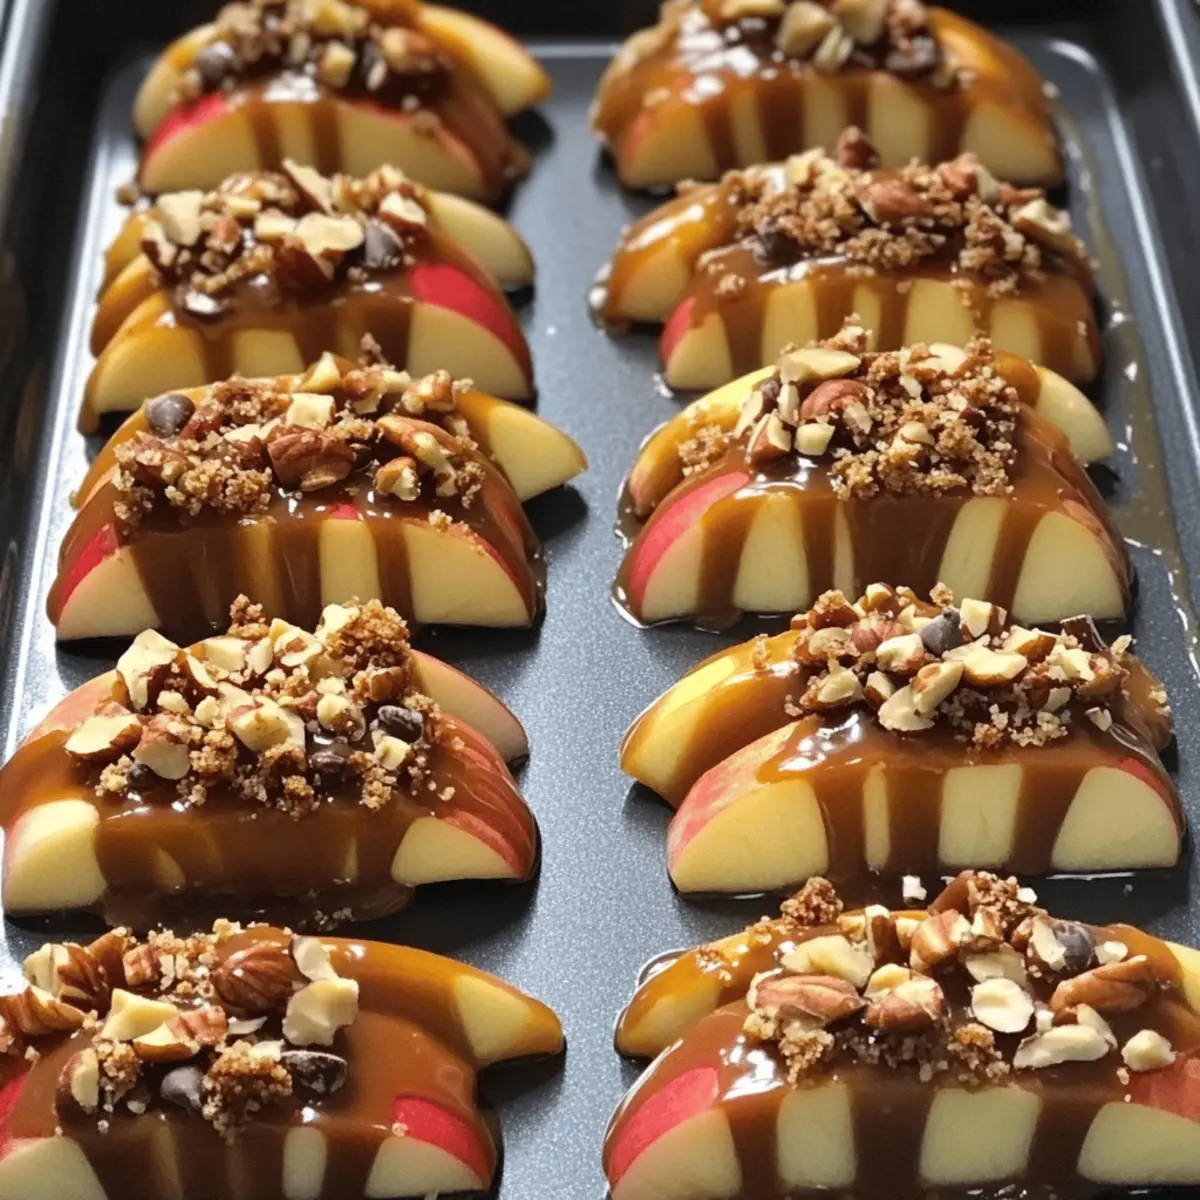
As the crisp autumn air settles in, a delightful aroma wafts through the kitchen, sparking sweet nostalgia. I found myself yearning for the comfort of fall treats, and that’s when I stumbled upon the idea of transforming classic caramel apples into an exciting sheet pan version. These Easy Sheet Pan Caramel Apples are not just a breeze to whip up, but they also bring a fun twist to a beloved favorite. With perfectly sliced apples dressed in gooey caramel, topped with crunchy graham cracker crumbs and a sprinkle of nuts or chocolate chips, it’s a dessert that effortlessly blends convenience with a delicious family-friendly dish. Perfectly suited for gatherings or cozy movie nights, this quick dessert is sure to win over hearts—and taste buds. Ready to recreate this twist on a classic? Let’s dive into the sweet simplicity of fall!
Why are Sheet Pan Caramel Apples a Must-Try?
Simplicity at its finest: This recipe requires minimal effort—perfect for busy weekdays or unexpected guests.
Irresistible flavors: The combination of sweet caramel and tart apples, finished with crunchy toppings, creates a dessert that hits all the right notes.
Family-friendly fun: Kids love helping to prep and enjoy this treat, making it a great way to bond over cooking.
Versatile toppings: Personalize your sheet pan creation with your favorite nuts, cookies, or even a sprinkle of sea salt for an added twist.
Perfect for gatherings: Whether it’s a cozy night in or fall festivities, these sheet pan caramel apples are sure to impress.
Ready to savor this delightful autumn treat? Check out more in my post on easy fall recipes.
Easy Sheet Pan Caramel Apples Ingredients
For the Apples
• Apples – Choose tart varieties like Granny Smith for a perfect balance with sweet caramel.
For the Caramel
• Caramel Sauce – Use store-bought for convenience or make your own for a personal touch; it brings that signature gooeyness to the dish.
For the Toppings
• Graham Cracker Crumbs – Adding delightful crunch; subs with crushed cookies or nuts are great if you’re looking for variety.
• Nuts (optional) – Pecans or almonds add extra crunchy goodness; feel free to omit for a nut-free treat.
• Chocolate Chips (optional) – These enhance the sweetness and creaminess; white or dark chocolate can be delightful substitutions.
Now you’re all set to create these scrumptious Easy Sheet Pan Caramel Apples! Just gather your ingredients, and let’s start cooking!
Step‑by‑Step Instructions for https://fullrecipe.net/easy-and-delicious-sheet-pan-caramel-apples/
Step 1: Preheat the Oven
Begin by preheating your oven to 350°F (175°C). This ensures that when you place your sheet pan inside, the hot air will help caramelize the sauce beautifully. While the oven warms up, you’ll have time to prepare your apples and other ingredients, setting the stage for your Easy Sheet Pan Caramel Apples.
Step 2: Prepare the Apples
Wash and slice your chosen apples into wedges, ensuring they are about the same thickness for even cooking. Arrange these vibrant apple slices in a single layer on a lined sheet pan, creating a beautiful canvas for your caramel. The tartness of the apples will complement the sweet, gooey caramel perfectly once it’s added.
Step 3: Melt the Caramel Sauce
In a medium saucepan over low heat, gently melt your caramel sauce. If you’re using store-bought, stir occasionally to keep it smooth; if homemade, make sure it’s velvety and gooey. Once completely melted, drizzle the caramel generously over the apple slices, making sure each piece is well-coated for that delectable taste in your Easy Sheet Pan Caramel Apples.
Step 4: Add the Toppings
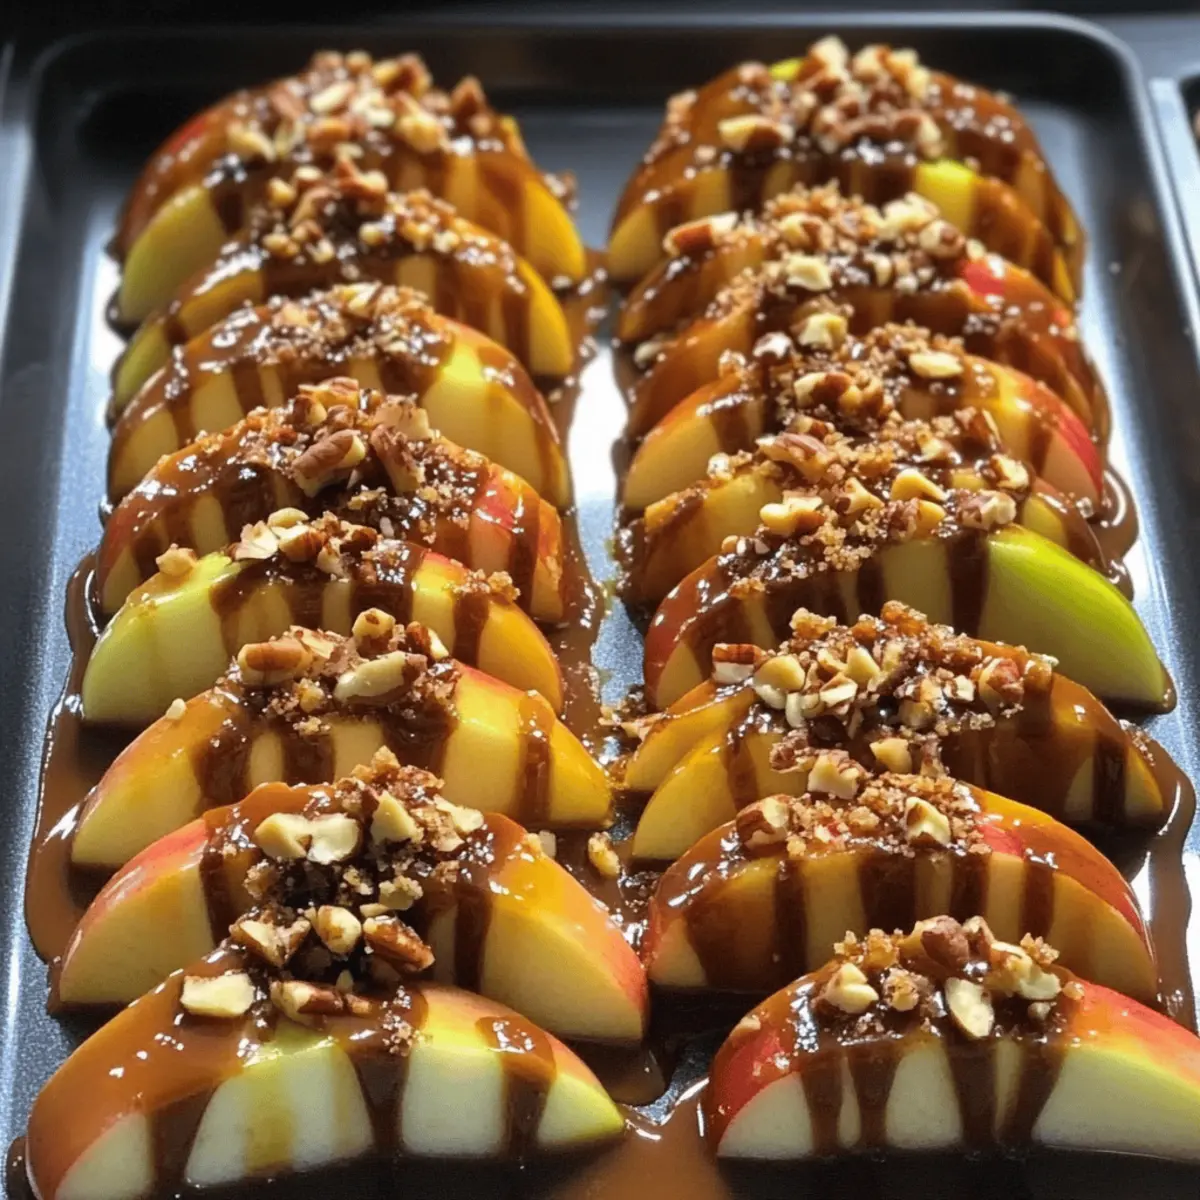
Sprinkle graham cracker crumbs, nuts, and chocolate chips liberally over the caramel-covered apples. This is your chance to get creative! Ensure an even distribution, so every bite of your sheet pan caramel apples offers a satisfying crunch. Take a moment to appreciate the delightful blend of textures before baking.
Step 5: Bake to Perfection
Place the sheet pan into your preheated oven and bake for 10-15 minutes. Keep an eye on them as they bake; the caramel should be bubbling, and the apples will soften slightly. You’re looking for a golden, glossy finish that tantalizes the senses and promises a warm, gooey treat.
Step 6: Cool and Serve
Once out of the oven, allow the Easy Sheet Pan Caramel Apples to cool slightly before serving. This helps set the caramel a bit while maintaining that wonderful warmth. Serve them either warm or at room temperature, perfect for cozy gatherings or sweet movie nights with friends and family.
Make Ahead Options
These Easy Sheet Pan Caramel Apples are perfect for meal prep and can save you precious time during busy weekdays! You can wash and slice the apples and arrange them on the sheet pan up to 24 hours in advance, keeping them covered in the refrigerator to prevent browning. Additionally, you can prepare the caramel sauce and store it in an airtight container for up to 3 days. When you’re ready to serve, simply melt the caramel, drizzle it over the apples, add your toppings, and bake as instructed. This way, you’ll enjoy a delightful treat that’s just as delicious but requires minimal effort!
What to Serve with Easy Sheet Pan Caramel Apples
A delightful dessert deserves equally delicious companions to create a full autumn feast.
- Vanilla Ice Cream: Creamy vanilla ice cream perfectly contrasts the warm caramel apples while enhancing the sweetness for a comforting dessert experience.
- Crisp Green Salad: A fresh salad, perhaps with mixed greens, nuts, and apple slices, adds a refreshing crunch that balances the rich caramel flavor beautifully.
- Hot Cocoa: Cozy up with a cup of rich hot cocoa; the warm chocolate complements the sweetness of the apples, creating a heartwarming pairing.
- Cheese Platter: A selection of sharp cheddar or creamy brie offers a delightful savory contrast that pairs beautifully with the sweet caramelized apples.
- Spiced Cider: A warm spiced apple cider elevates the seasonal theme, enhancing the flavors of the dish while wrapping you in the essence of fall.
- Pumpkin Bread: Moist pumpkin bread adds a seasonal touch with its warm spices; enjoy it alongside the apples for a comforting and satisfying combination.
Embrace the flavors of fall with these pairings and create memorable moments with your loved ones!
Easy Sheet Pan Caramel Apples Variations
Feel free to customize this delightful recipe to suit your taste and dietary preferences, making it even more special!
-
Fruit Swap: Replace apple slices with pear or banana for a unique twist. Each fruit brings its own flavor, enhancing the overall experience.
-
Chocolate Lovers: Use dark chocolate sauce instead of caramel for a richer dessert. The deep flavor contrasts beautifully with the tart apples.
-
Spicy Kick: Add a sprinkle of cayenne pepper to the caramel for a surprising heat. This elevates the flavor profile, making it truly unforgettable.
-
Nut-Free Delight: Skip the nuts for a nut-free treat or substitute with pumpkin seeds for an equally crunchy texture. Perfect for those with allergies!
-
Alternative Toppings: Experiment with toppings like crushed pretzels, mini marshmallows, or shredded coconut for a creative flair. Each one adds a new layer of fun and flavor!
-
Flavor Infusions: Try using flavored caramel sauces, like coffee or salted caramel, to give your apples a delicious twist. This simple change can make the dessert feel entirely different.
-
Ice Cream Pairing: Serve the warm apples over a scoop of vanilla ice cream for an indulgent dessert. The cool creaminess perfectly complements the warm, gooey caramel.
-
Healthy Twist: Drizzle with honey or maple syrup instead of caramel for a more wholesome treat. You’ll still enjoy the sweetness, but with a lighter touch.
With these additions and alterations, your Easy Sheet Pan Caramel Apples can be as unique as your family’s taste! For more fun ideas, you might want to explore my guide on quick desserts.
Expert Tips for Easy Sheet Pan Caramel Apples
-
Choose the Right Apples: Use firm, tart apples like Granny Smith to ensure they hold up well against the sweet caramel and remain flavorful.
-
Watch the Caramel: Keep an eye on the caramel while baking to avoid burning; it can quickly go from perfectly golden to dark if not monitored closely.
-
Utilize Parchment Paper: Line your sheet pan with parchment paper for easy cleanup and to prevent the apples from sticking to the pan during baking.
-
Mix Up Your Toppings: Don’t hesitate to experiment with different toppings like toffee bits or coconut flakes for a unique twist on your sheet pan caramel apples.
-
Adjust for Moisture: Make sure the apples are thoroughly dried after washing; excess moisture can dilute the caramel, making it less sticky and flavorful.
These tips will ensure your Easy Sheet Pan Caramel Apples are a delightful hit this fall!
How to Store and Freeze Easy Sheet Pan Caramel Apples
Room Temperature: Allow the caramel apples to cool completely, then store them in an airtight container for up to 2 days. Enjoy them fresh for the best flavor!
Fridge: If you have leftovers, keep them in the refrigerator in a sealed container for up to 5 days. Note that the caramel may harden slightly when chilled.
Freezer: For longer storage, place cooled caramel apple slices in a single layer on a baking sheet, freeze until solid, then transfer to an airtight container. They can last up to 3 months in the freezer.
Reheating: To enjoy, thaw in the fridge overnight, then warm gently in the oven at 250°F (120°C) for about 10 minutes until the caramel becomes gooey again. Ideal for reviving your Easy Sheet Pan Caramel Apples!
Easy Sheet Pan Caramel Apples Recipe FAQs
What type of apples are best for caramel apples?
I recommend using tart varieties like Granny Smith apples for a perfect balance with the sweet caramel. Their firm texture holds up well during baking, ensuring every bite is both juicy and flavorful.
How should I store leftover caramel apples?
Once cooled, store any remaining caramel apples in an airtight container at room temperature for up to 2 days. If you choose to keep them longer, place them in the fridge, where they can last up to 5 days. Just be aware that the caramel may harden a bit when chilled.
Can I freeze my sheet pan caramel apples?
Absolutely! For freezing, lay the cooled caramel apple slices in a single layer on a baking sheet and freeze until solid. Then, transfer them to an airtight container. They can stay in the freezer for up to 3 months. When you’re ready to enjoy them, simply thaw in the fridge overnight and warm gently in the oven at 250°F (120°C) for about 10 minutes.
What should I do if the caramel is too runny?
If your caramel turns out too runny, it could be due to excess moisture on the apples or the type of caramel used. To remedy this, ensure apples are well-drained after washing and consider using a thicker caramel sauce. If all else fails, you can add a touch of cornstarch to your melting caramel to help thicken it before pouring it over the apples.
Can I make these caramel apples nut-free?
Yes, you can easily make these Easy Sheet Pan Caramel Apples nut-free! Simply omit the nuts from the recipe and substitute any crunchy toppings like graham cracker crumbs or seeds for an equally delightful crunch.
How can I customize the toppings?
Feel free to get creative with your toppings! If you want to switch things up, consider using coconut flakes, toffee bits, mini marshmallows, or even a sprinkle of sea salt for an added flavor twist. Your sheet pan caramel apples can be as unique and versatile as your imagination!
Easy and Delicious Sheet Pan Caramel Apples for Fall Fun
Ingredients
Equipment
Method
- Preheat your oven to 350°F (175°C).
- Wash and slice your chosen apples into wedges and arrange them in a single layer on a lined sheet pan.
- Melt your caramel sauce in a medium saucepan over low heat, stirring occasionally until smooth.
- Drizzle the melted caramel over the apple slices ensuring each is well-coated.
- Sprinkle graham cracker crumbs, nuts, and chocolate chips liberally over the caramel-covered apples.
- Place the sheet pan into the oven and bake for 10-15 minutes until the caramel is bubbly and apples soften slightly.
- Allow to cool slightly before serving, either warm or at room temperature.
Leave a Reply