
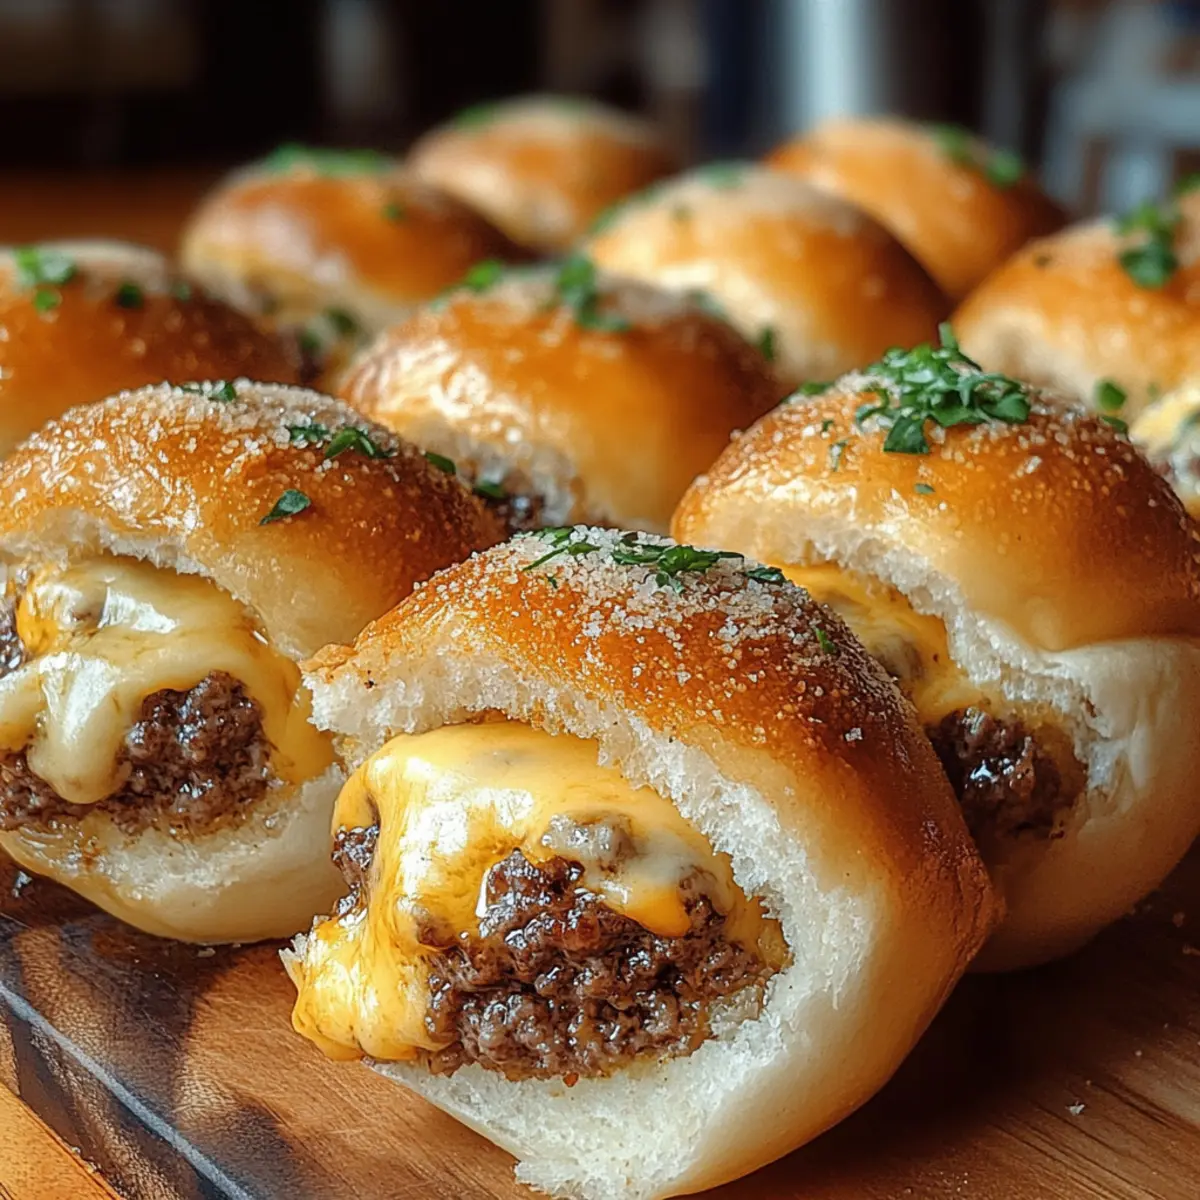
As I was pulling together yet another meal for my friends, I stumbled upon the ultimate game-changer: Garlic Parmesan Cheeseburger Bombs. These delightful little pockets bring all the comforting flavors of a classic cheeseburger without the fuss of assembling a full meal. What’s remarkable is that they come together in no time, making them a go-to for gatherings or a cozy night in. With each bite, you’ll experience the soft, buttery dough mingling with the juicy beef and melted cheese, all enhanced by a garlicky finish. Plus, these bombs are highly customizable—swap in different fillings or dough options based on what you have in your kitchen. Ready to impress your guests or simply treat yourself to a solid snack? Let’s dive into this easy and delicious recipe!
Why Are These Bombs a Must-Make?
Quick Convenience: You’ll love how effortlessly these Garlic Parmesan Cheeseburger Bombs come together, allowing you to whip them up for any occasion with minimal prep time.
Flavor Explosion: Each bite is a delightful blend of savory beef, gooey cheese, and aromatic garlic that will leave your taste buds dancing.
Flexible Variations: Got leftovers? Feel free to swap the fillings or use different dough types to suit your pantry—think Garlic Parmesan Chicken or a tasty twist on options.
Party Pleaser: These crowd-pleasing bites are perfect for gatherings, ensuring everyone goes home happy and satisfied.
Make-Ahead Magic: Assemble them in advance and refrigerate, baking them fresh just before serving for optimal deliciousness!
Garlic Parmesan Cheeseburger Bombs Ingredients
For the Filling
• Ground Beef – Adds protein and heartiness; feel free to use lean ground beef for less grease.
• Salt & Pepper – Essential for seasoning; adjust to enhance the flavor of the beef to your liking.
• Garlic Powder – Provides a delicious depth of flavor; can be substituted with fresh minced garlic if preferred.
• Onion Powder – Adds subtle sweetness; fresh onions make a great alternative.
• Worcestershire Sauce – Infuses umami goodness; soy sauce mixed with balsamic works well as a substitute.
• Shredded Cheese (Cheddar/Mozzarella) – Gives a creamy touch; consider swapping for provolone or Swiss for variety.
• Optional Add-ins (Bacon, Pickles, Caramelized Onions) – Customize the filling with your favorite flavors for a unique twist.
For the Dough
• Refrigerated Biscuit or Pizza Dough – Forms the outer layer; homemade dough can make it even fresher.
• Unsalted Butter (melted) – Used for brushing the tops; you can substitute with olive oil for a lighter touch.
• Minced Garlic (for brushing) – Enhances the aroma; if you’re out of fresh, garlic powder is a solid backup.
• Freshly Grated Parmesan Cheese – Adds a savory finish; feel free to omit if you don’t have it on hand.
For Garnish
• Fresh Parsley – Adds a pop of color and freshness; totally optional, but visually appealing!
These Garlic Parmesan Cheeseburger Bombs are the perfect blend of cozy comfort and fun, ready to elevate any meal or snack time!
Step‑by‑Step Instructions for Garlic Parmesan Cheeseburger Bombs
Step 1: Prepare Beef Filling
In a skillet over medium heat, cook 1 pound of ground beef for about 6-8 minutes, stirring until browned and no longer pink. Drain the excess fat, then season the meat with salt, pepper, garlic powder, onion powder, and Worcestershire sauce. Allow the mixture to cool for a few minutes while you gather your dough and other ingredients.
Step 2: Mix Filling
Once the beef mixture has cooled slightly, fold in 1 cup of shredded cheese and any optional add-ins such as crumbled bacon, diced pickles, or caramelized onions. Combine everything thoroughly to ensure each bomb is packed with flavor. Set the filling aside and preheat your oven to 190°C (375°F).
Step 3: Shape Dough
On a clean surface, roll out your refrigerated biscuit or pizza dough to about ¼ inch thick. Cut the dough into approximately 10 cm circles using a sharp knife or a round cutter. Place 1-2 tablespoons of the beef filling in the center of each circle, then fold the dough over and press the edges securely to seal.
Step 4: Prepare for Baking
Arrange the sealed dough balls seam-side down on a baking tray lined with parchment paper. Brush the tops of the Garlic Parmesan Cheeseburger Bombs with melted unsalted butter mixed with minced garlic for added flavor. Sprinkle freshly grated Parmesan cheese generously over the tops for that final touch before baking.
Step 5: Bake
Pop the tray into your preheated oven and let the bombs bake for 15-18 minutes, or until they turn golden brown and puff up beautifully. Keep an eye on them, as the right color will indicate that they are perfectly cooked and have a nice, crispy exterior.
Step 6: Finish & Serve
Once baked, remove the Garlic Parmesan Cheeseburger Bombs from the oven and brush them with any leftover garlic butter for an extra rich taste. Garnish with fresh parsley for a pop of color, and serve them warm alongside your favorite dipping sauces. Enjoy these delightful bites as a perfect party snack or a cozy treat!
Storage Tips for Garlic Parmesan Cheeseburger Bombs
Room Temperature: Keep these delicious bombs at room temperature for up to 2 hours if they’re out for a gathering, but they’re best enjoyed warm.
Fridge: Store cooled bombs in an airtight container in the refrigerator for up to 3 days to maintain their freshness and flavor.
Freezer: To freeze, individually place bombs on a tray until firm, then transfer to a freezer bag. They can be stored for up to 2 months.
Reheating: Reheat in a preheated oven at 190°C (375°F) for about 10-12 minutes until heated through and crispy, perfect for bringing back the delightful texture of your Garlic Parmesan Cheeseburger Bombs!
Make Ahead Options
These Garlic Parmesan Cheeseburger Bombs are a fantastic choice for meal prep! You can prepare the beef filling up to 3 days in advance; just cook and season the ground beef, then allow it to cool before mixing in the cheese and any optional ingredients. Store the filling in an airtight container in the refrigerator. Additionally, you can assemble the bombs and refrigerate them for up to 24 hours before baking to let the flavors meld beautifully. When it’s time to serve, simply preheat your oven and bake the bombs directly from the fridge for a fresh, piping-hot treat that’s just as delicious as when made the same day!
What to Serve with Garlic Parmesan Cheeseburger Bombs
Elevate your meal experience by pairing these delightful bites with perfect side dishes and drinks that tantalize your taste buds.
-
Crispy French Fries: Their salty crunch complements the savory cheeseburger flavors while providing that classic fast-food vibe everyone loves.
-
Refreshing Coleslaw: The creamy, tangy crunch of coleslaw adds a refreshing contrast to the warm, hearty bombs, creating a balanced plate.
-
Garlic Aioli: This creamy dip enhances the garlic flavor while providing a rich, velvety texture that brings out the best in the bombs. Try drizzling some on top for extra pizzazz!
-
Pickle Platter: A variety of pickles brightens the meal with a tangy bite that cuts through the richness of the cheeseburgers, cleansing the palate.
-
Mixed Green Salad: Tossed greens with a light vinaigrette add freshness and brightness, perfectly offsetting the savory richness of the bombs.
-
Sweet Potato Wedges: Their natural sweetness and crispy edges pair beautifully with the savory cheeseburger filling, adding a delightful twist to your meal.
-
Craft Beer: A cold craft beer with hoppy notes complements the rich flavors of cheeseburger bombs, making the meal feel extra special.
-
Chocolate Chip Cookies: Finish off on a sweet note with warm, gooey cookies that contrast beautifully with the savory flavors of the meal.
-
Sparkling Lemonade: Refreshing and slightly tart, sparkling lemonade is the ideal drink to cleanse the palate between bites, keeping your taste experience lively.
Expert Tips for Garlic Parmesan Cheeseburger Bombs
• Seal Edges Well: Ensure dough edges are tightly sealed to prevent filling leaks during baking, which can lead to messy results.
• Chill Before Baking: Assemble and refrigerate the unbaked bombs for a few hours to enhance flavors; this helps to keep them juicy while baking.
• Choose Your Cheese: Experiment with a mix of cheeses for more complex flavors—blend cheddar, mozzarella, or even pepper jack for a spicy kick!
• Preheat Properly: Make sure your oven is fully preheated to 190°C (375°F) before baking. This ensures even cooking and a perfect golden crust on your bombs.
• Dip Ideas: Serve with a variety of dipping sauces like ranch, BBQ, or garlic aioli to elevate your Garlic Parmesan Cheeseburger Bombs experience.
Garlic Parmesan Cheeseburger Bombs Variations
Feel free to unleash your culinary creativity and personalize these bombs to match your taste buds!
-
Ground Turkey: Swap the ground beef for lean ground turkey or chicken for a lighter option, adding similar flavors with less fat.
-
Alternative Dough: Use crescent roll dough for a flaky twist that packs a punch of buttery goodness, reducing prep time and effort.
-
Cheese Options: Experiment with cheeses like Gruyère for a nutty twist or spicy pepper jack to give these bombs a kick that will tantalize your taste buds.
-
Veggie Bombs: Swap the meat for sautéed mushrooms and spinach for a delightful vegetarian variation that doesn’t skimp on flavor. These earthy notes can add an unexpected depth.
-
Flavor Boosters: Consider adding jalapeños or diced green chilies to the filling for a spicy kick that complements the cheeseburger flavor beautifully.
-
Herb Infusion: Mix in fresh herbs like chopped basil or oregano with the beef filling for a burst of freshness that elevates every bite.
-
Crispy Finish: Sprinkle some panko bread crumbs on top before baking for an extra crunchy layer that perfectly contrasts the soft filling inside.
-
Make-Ahead: Assemble and refrigerate unbaked bombs overnight, so you can simply pop them into the oven when guests arrive. They’ll be fresh and hot, just like my Garlic Sauce Potatoes.
Make these Garlic Parmesan Cheeseburger Bombs your own, and don’t hesitate to explore flavors and textures that excite you! Happy cooking!
Garlic Parmesan Cheeseburger Bombs Recipe FAQs
What type of ground beef should I use for the filling?
Absolutely! I recommend using lean ground beef for a balance of flavor and reduced grease. If you’re after a healthier twist, you could also substitute with ground turkey or chicken.
How should I store leftovers?
Store cooled Garlic Parmesan Cheeseburger Bombs in an airtight container in the refrigerator for up to 3 days. This keeps them fresh and ready to enjoy again.
Can I freeze these cheeseburger bombs?
Yes! To freeze, first arrange the unbaked filled bombs on a tray in a single layer and freeze until firm. Then, transfer them to a freezer bag and they’ll keep well for up to 2 months. When you’re ready to enjoy, bake them from frozen, adding a few extra minutes to the baking time.
What can I do if my dough edges aren’t sealing properly?
If you find that the dough is not sealing well, try moistening your fingers with a little water and pressing the edges together firmly. This helps create a better seal. Remember, a well-sealed bomb keeps all the delicious filling inside while baking!
Are there any substitutions for dietary restrictions?
Certainly! If you have allergies, consider using gluten-free dough options or plant-based meat substitutes. For dairy-free diets, you can use vegan cheese and omit the butter or use a dairy-free alternative. Just be sure to check labels for any hidden allergens.
How can I tell when the bombs are fully cooked?
The key is to look for a golden brown color on the outside. They usually take about 15-18 minutes in the oven. You can also use a kitchen thermometer to check the internal temperature; it should reach at least 70°C (160°F) to ensure the beef is cooked through.
Irresistible Garlic Parmesan Cheeseburger Bombs You'll Love
Ingredients
Equipment
Method
- In a skillet over medium heat, cook ground beef for about 6-8 minutes, stirring until browned and no longer pink. Drain fat, season with salt, pepper, garlic powder, onion powder, and Worcestershire sauce. Allow to cool.
- Fold in shredded cheese and any optional add-ins. Combine thoroughly and set aside. Preheat your oven to 190°C (375°F).
- Roll out biscuit or pizza dough to ¼ inch thick. Cut into approximately 10 cm circles. Place 1-2 tablespoons of filling in the center of each circle, fold over and press edges to seal.
- Arrange sealed balls seam-side down on a baking tray lined with parchment. Brush tops with melted butter mixed with minced garlic. Sprinkle with Parmesan cheese.
- Bake for 15-18 minutes until golden brown and puffed. Keep an eye on them for perfect cooking.
- Remove from oven, brush with leftover garlic butter, garnish with parsley, and serve warm with dipping sauces.
Leave a Reply