
As the leaves begin to swirl and the air takes on a crisp chill, I can’t help but feel the magic of Halloween creeping in. And what better way to celebrate than by whipping up a batch of delightful Halloween Crinkle Cookies? These irresistible treats, with their fudgy texture and charmingly spooky appearance, are perfect for enjoying with friends or sharing at gatherings. The best part? They’re incredibly easy to whip together, making them a fantastic choice for both seasoned bakers and kitchen newcomers alike. Plus, you can mix up the colors using vibrant gel food coloring to create a festive platter that dazzles! Curious how to conjure up this sweet spell? Let’s dive in!

Why Will You Crave These Cookies?
Irresistible Flavor: A rich fudgy base combines perfectly with the sweetness of powdered sugar for a treat that will have everyone coming back for more.
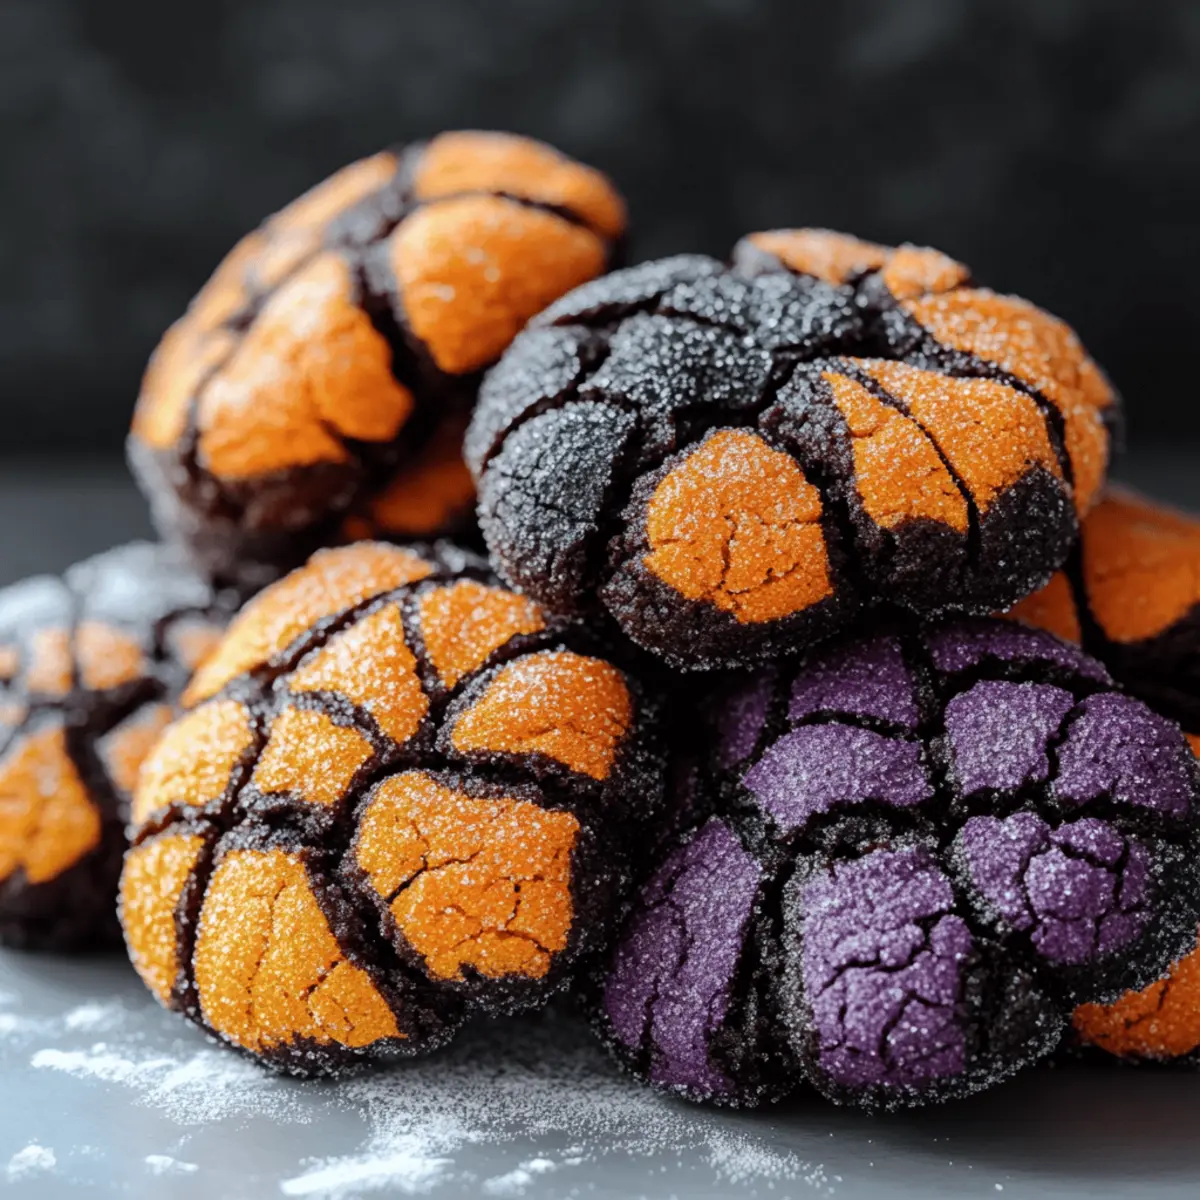
Fun & Festive: Mix and match gel food colors like orange and purple to create a spooky display that’s sure to delight at any Halloween gathering.
No-Fuss Preparation: Suitable for all skill levels, these cookies are so easy to make that even novice bakers can impress their friends with a batch of these delicious treats.
Gluten-Free Friendly: With a straightforward swap, you can easily turn these into gluten-free Halloween Crinkle Cookies, making them accessible for everyone to enjoy.
Chill for Quality: Don’t miss the crucial dough chilling step to achieve that dreamy crinkle effect; it’s the secret to their melt-in-your-mouth texture!
For a delightful variation, you might also want to try out the flavors from my Pumpkin Sugar Cookies with Cream Cheese Frosting or the festive White Chocolate Halloween Oreos. Get ready to indulge!
Halloween Crinkle Cookies Ingredients
• Get ready to bake these festive treats!
For the Cookie Dough
- All-purpose flour – Provides structure to the cookies; swap with a gluten-free blend for Halloween Crinkle Cookies.
- Unsweetened cocoa powder – Adds rich chocolate flavor; ensure a smooth texture for the best results.
- Baking powder – Helps the cookies rise; check for freshness to achieve that classic crinkle.
- Salt – Enhances flavor; sea salt or kosher salt can offer a unique twist.
- Granulated sugar – Sweetens and contributes to chewiness; coconut sugar can deepen the flavor.
- Vegetable oil – Keeps the cookies moist; melted coconut oil adds a tasty hint of coconut.
- Eggs – Provide moisture and structure; use room temperature eggs for optimal mixing.
- Vanilla extract – Infuses warmth and flavor; pure vanilla is preferred for the best outcome.
- Gel food coloring – Provides vibrant colors for a spooky appearance; vital for a fun and festive look.
- Powdered sugar – Coating for rolling; adds sweetness and that ghostly effect—roll twice for extra coverage.
Step‑by‑Step Instructions for HALLOWEEN CRINKLE COOKIES
Step 1: Prepare Dry Mix
In a mixing bowl, whisk together 1 cup of all-purpose flour, 1/3 cup of unsweetened cocoa powder, 1 teaspoon of baking powder, and 1/4 teaspoon of salt. This dry mixture lays the foundation for your Halloween Crinkle Cookies. Ensure all ingredients are well combined and lump-free for a smooth batter that bakes evenly.
Step 2: Mix Wet Ingredients
In a separate bowl, combine 1 cup of granulated sugar, 1/3 cup of vegetable oil, 2 large eggs, and 1 teaspoon of vanilla extract. Using a whisk or electric mixer, beat the mixture until smooth and slightly frothy. Gradually add your desired gel food coloring, making sure to mix thoroughly until achieving a vibrant hue that reflects the Halloween spirit.
Step 3: Combine Mixtures
Gently fold the dry ingredients into the wet mixture using a spatula, taking care not to overmix. Stop once you see no more flour streaks, as this will keep your Halloween Crinkle Cookies soft and fudgy. The goal is a thick, cohesive dough that’s well blended yet still retains some texture.
Step 4: Chill Dough
Cover the dough tightly with plastic wrap and refrigerate for at least 1 hour, or for a quicker option, freeze for 30 minutes. Chilling is essential to prevent the cookies from spreading too much during baking, ensuring that classic crinkle effect we adore.
Step 5: Preheat Oven
While your dough chills, preheat your oven to 350°F (175°C) and prepare your baking sheets by lining them with parchment paper. This ensures your Halloween Crinkle Cookies come out cleanly and preserves their lovely shape while baking. Set the baking sheets aside until you’re ready.
Step 6: Shape Cookies
Once the dough is chilled, scoop tablespoon-sized portions and roll them into balls between your hands. For a spooky finish, roll each cookie ball generously in powdered sugar until fully coated. The powdered sugar creates that ghostly outer layer, helping to achieve the signature crinkle look once baked.
Step 7: Bake
Space the cookie balls about 2 inches apart on the prepared baking sheets. Bake in the preheated oven for 10 to 12 minutes, until the tops crack but the centers remain soft and slightly underbaked. Monitor closely to ensure they don’t lose their chewy texture, which is the hallmark of great Halloween Crinkle Cookies.
Step 8: Cool
Once baked, remove the sheets from the oven and let the cookies sit for about 5 minutes. This allows them to set before moving them to a wire rack for complete cooling. The cookies will continue to firm up slightly during this resting time, leaving you with a perfect soft and chewy treat.

How to Store and Freeze Halloween Crinkle Cookies
Airtight Container: Store cookies in an airtight container at room temperature for up to 1 week to maintain their soft and chewy texture.
Refrigeration: If you have leftover dough, refrigerate it for up to 2 days. Make sure it’s well wrapped to prevent it from drying out.
Freezing: You can freeze the shaped cookie balls for up to 3 months. Place them on a baking sheet until frozen, then transfer to a freezer bag for easy access.
Reheating: When you’re ready to enjoy, bake frozen cookie balls straight from the freezer for an additional 2-3 minutes to preserve their fudgy goodness. Enjoy your Halloween Crinkle Cookies at their best!
HALLOWEEN CRINKLE COOKIES Variations & Substitutions
Feel free to explore your creativity and personalize these delightful cookies to suit your taste!
-
Gluten-Free: Substitute all-purpose flour with a 1:1 gluten-free baking blend for a crowd-friendly treat. You’ll maintain that lovely texture while accommodating the gluten-sensitive.
-
Coconut Flavor: Swap out vegetable oil for melted coconut oil. This adds a subtle coconut taste that can elevate your Halloween Crinkle Cookies to new tropical heights.
-
Darker Chocolate: Use dark cocoa powder instead of regular unsweetened cocoa. It intensifies the chocolate flavor, giving your cookies a rich and sophisticated twist.
-
Pumpkin Spice: Replace the vanilla extract with pumpkin spice extract for a seasonal vibe. It will infuse your cookies with a warm, autumnal essence that’s perfect for Halloween!
-
Chocolate Chip Boost: Add 1/2 cup of mini chocolate chips into the batter for extra texture and melty pockets of chocolate. Mixed with the fudge base, it creates a heavenly experience.
-
Color Variety: Mix and match gel food colors! Create a vibrant platter using orange, purple, and green for a festive Halloween spread that’s as appealing to the eyes as it is to the palate.
-
Sprinkles Change-Up: Fold in some Halloween-themed sprinkles for added crunch and fun. The bright colors and shapes will surely capture the spirit of the holiday.
-
Chilly Treat: For a mouth-watering twist, roll the cookie balls in crushed candy corn or Halloween-themed candies before baking. They’ll burst with holiday magic in every bite!
For more delightful cookie inspiration, check out my recipe for Soft Pumpkin Cookies with Cinnamon Frosting or indulge in some Pumpkin White Chocolate Chip Cookies. Get ready for some festive baking fun!
Make Ahead Options
These Ghostly Halloween Crinkle Cookies are perfect for meal prep, saving you time during busy days leading up to Halloween! You can prepare the cookie dough up to 24 hours in advance by chilling it in the refrigerator, just be sure to cover it tightly with plastic wrap to prevent drying out. Additionally, if you have extra time, you can roll the cookie balls in powdered sugar and refrigerate again for 3 days or freeze them for longer storage—just remember to let them thaw slightly before baking. When you’re ready to enjoy these spooky treats, simply bake them straight from the fridge or freezer, adjusting baking time as needed for a fresh, delicious batch that’s just as tasty as when made the same day!
Expert Tips for Halloween Crinkle Cookies
-
Chill Time Matters: Allowing the dough to chill is crucial for preventing spreading. Stick to the recommended chilling time for optimal crinkles.
-
Check Baking Powder Freshness: Old baking powder can lead to flat cookies instead of the desired rise. Ensure you’re using fresh baking powder for your Halloween Crinkle Cookies.
-
Gel vs. Liquid Colors: Stick to gel food coloring for vibrant hues; liquid variants can make the dough too runny, affecting the texture.
-
Double Coat for Extra Sweetness: Rolling cookies in powdered sugar twice gives them a thicker, ghostly look—perfect for Halloween vibes!
-
Watch Baking Time: Cookies should be cracked but soft in the center; overbaking results in dry cookies. Keep a close eye on them around the 10-minute mark.
-
Room Temperature Ingredients: Using room temperature eggs helps the mixture combine better, ensuring a smooth batter for your Halloween Crinkle Cookies.
What to Serve with Halloween Crinkle Cookies
As you whisk up these spooky delights, consider pairing them with comforting accompaniments that enhance their festive spirit and satisfy sweet cravings.
-
Cold Milk: A classic pairing that brings out the fudginess of the cookies, making every bite even more decadent. Your taste buds will dance with joy!
-
Hot Cocoa: Rich, creamy, and topped with marshmallows, hot cocoa creates a warming experience that perfectly complements the chocolatey goodness of these Halloween treats.
-
Pumpkin Spice Lattes: Celebrate the season with a warm, spiced latte that matches the cozy vibes of your cookies. The flavors meld delightfully for a true October indulgence.
-
Vanilla Ice Cream: A scoop of creamy vanilla offers a delightful contrast to the rich, chewy cookies. The cold ice cream will melt slightly, creating a heavenly pairing with every bite.
-
Fruity Halloween Punch: Prepare a vibrant punch with apple juice and sparkling water, garnished with oranges and cranberries. It adds a refreshing touch that balances the sweetness of the cookies.
-
Ghoulish Cupcakes: Bake some fun-themed cupcakes to create a dessert table bursting with flavors and colors. The variety not only looks great but enhances the overall spooky celebration.
-
Dessert Charcuterie Board: Assemble a spread of assorted treats, fruits, and chocolates to pair with the cookies, providing a range of textures and flavors that will delight your guests.
-
Spooky Brownies: For chocoholics, complement your crinkle cookies with some fudgy brownies; the rich, dense texture will create a blissful dessert experience to remember!

Halloween Crinkle Cookies Recipe FAQs
What type of flour should I use for Halloween Crinkle Cookies?
For the best results, all-purpose flour is recommended as it provides the right structure and chewiness. If you need a gluten-free option, you can substitute with a 1:1 gluten-free baking blend, ensuring that it mimics the texture and rise of traditional flour.
How should I store leftover Halloween Crinkle Cookies?
Store your Halloween Crinkle Cookies in an airtight container at room temperature for up to 1 week. This helps maintain their delightful, chewy texture. If you live in a humid environment, consider using a cookie-specific container with a desiccant to keep them fresh!
Can I freeze the cookie dough for later use?
Absolutely! To freeze the shaped cookie dough, roll it into balls and place them on a baking sheet. Freeze until solid, then transfer them to a freezer bag. They can be stored for up to 3 months. When ready to bake, you can bake them straight from the freezer, adding an extra 2-3 minutes to the baking time to ensure they are perfectly fudgy.
What should I do if my cookies are not crinkling properly?
If your Halloween Crinkle Cookies aren’t achieving that signature crinkle, it might be due to insufficient chilling time or old baking powder. Ensure to chill the dough for at least 1 hour (or 30 minutes in the freezer) to prevent spreading. Also, check that your baking powder is fresh; expired baking powder can hinder the rise, leading to flat cookies instead of crinkly delights.
Can I use liquid food coloring instead of gel for these cookies?
I recommend using gel food coloring to achieve vibrant and rich colors without changing the dough’s consistency. Liquid food coloring can make the dough too runny, resulting in cookies that may not hold their shape. Stick to gel for those spooky, vibrant hues!
Are Halloween Crinkle Cookies suitable for anyone with allergies?
While these cookies can be tailored to suit gluten-free diets with the right flour substitution, they still contain common allergens like eggs and vegetable oil. If you’re making these for someone with food allergies, be sure to check all ingredient labels for any possible cross-contamination and consider making additional substitutions based on specific allergies.
Soft and Chewy Halloween Crinkle Cookies for Spooky Fun
Ingredients
Equipment
Method
- In a mixing bowl, whisk together all-purpose flour, cocoa powder, baking powder, and salt.
- In a separate bowl, combine granulated sugar, vegetable oil, eggs, and vanilla extract. Beat until smooth and frothy.
- Gently fold the dry ingredients into the wet mixture until just combined.
- Cover the dough tightly with plastic wrap and refrigerate for at least 1 hour.
- Preheat your oven to 350°F (175°C) and prepare baking sheets with parchment paper.
- Scoop tablespoon-sized portions and roll them into balls, coating in powdered sugar.
- Bake the cookie balls for 10 to 12 minutes until the tops crack but centers remain soft.
- Let the cookies cool for about 5 minutes before transferring to a wire rack.
Leave a Reply