
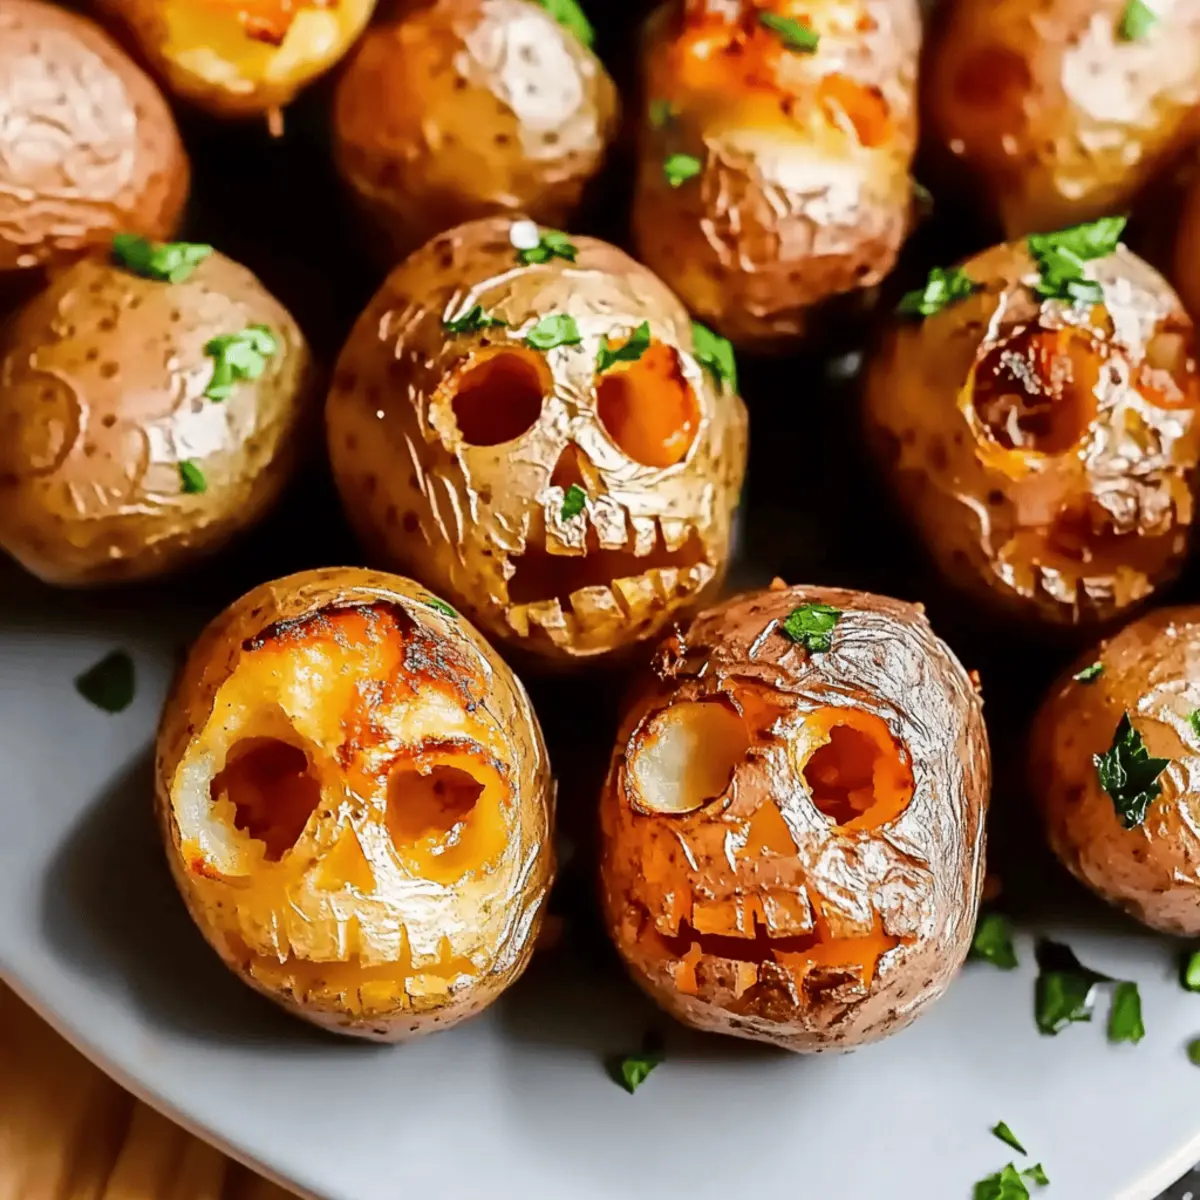
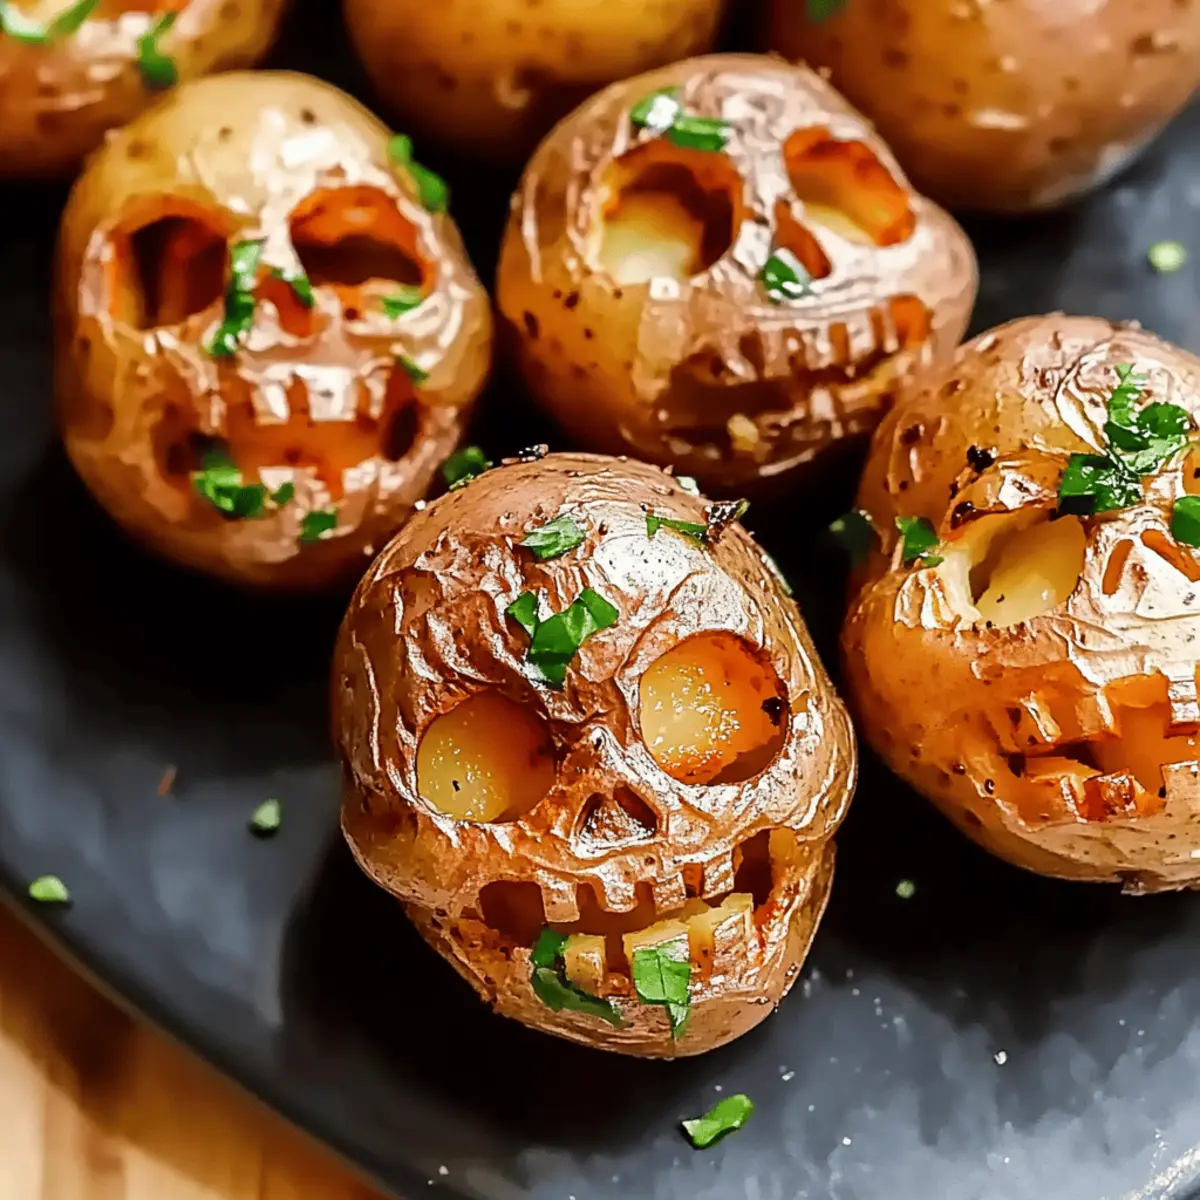
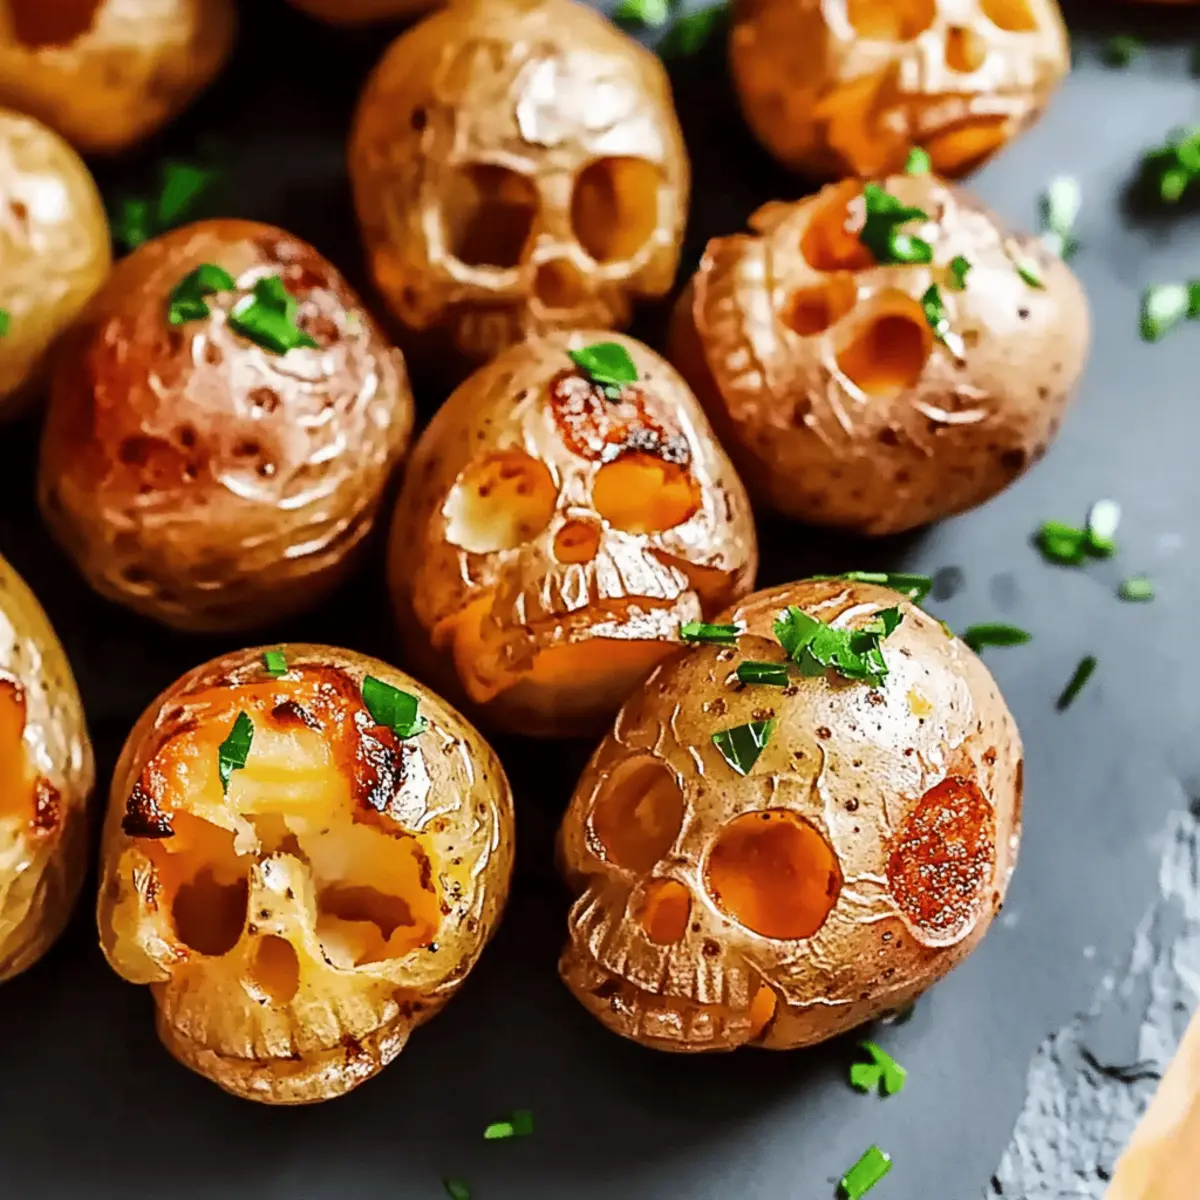
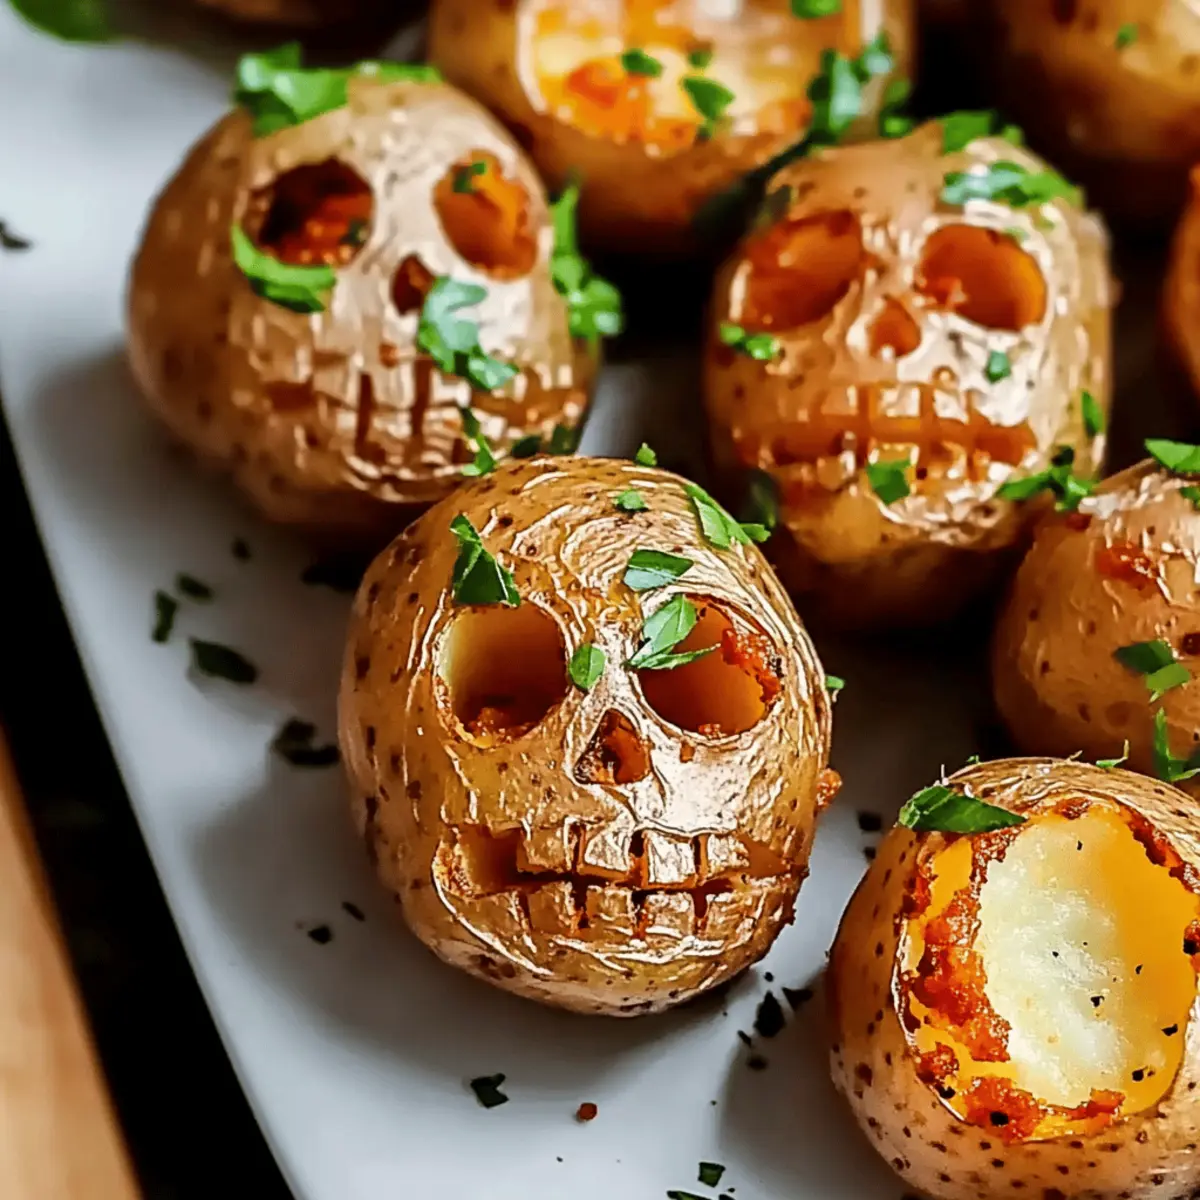
As the leaves turn to shades of gold and crimson, I find myself drawn to the kitchen, crafting dishes that celebrate the playful spirit of Halloween. This year, I’m excited to share my Crispy Halloween Skull Potatoes—a delightful side dish that brings both flavor and fun to your festive table. These spooky snacks are not only a hit with adults and kids alike, but they also deliver the perfect combination of fluffy insides and irresistibly crunchy exteriors. Plus, they come together effortlessly, making them an ideal choice for those themed gatherings when time is of the essence. Get ready to carve out some smiles and surprises; who wouldn’t love to indulge in such a creative Halloween treat? What kind of spooky faces will you create?
Why Are These Skull Potatoes a Must-Try?
Crispy Texture: You’ll love the contrast between the crunchy exterior and fluffy interior that makes each bite a delight.
Fun Presentation: These spooky skull-shaped potatoes add a playful twist to your Halloween feast, making them a conversation starter.
Quick Preparation: Perfect for busy evenings, this recipe requires minimal ingredients and can be whipped up in no time.
Versatile Flavor: Feel free to experiment with seasonings or even add melted cheese for a unique twist! Pair them with other fun treats, like Halloween Chocolate Chip, for a festive spread.
Crowd-Pleaser: Adults and kids alike will adore these fun snacks, ensuring smiles all around at your Halloween gathering!
Halloween Skull Potatoes Ingredients
For the Potatoes
• Mini Creamer or Baby Yukon Gold Potatoes – These create a perfect canvas for carving and roast evenly for that crispy texture.
• Vegetable Oil – Essential for achieving maximum crispiness when roasting these Halloween skull potatoes.
• Salt – Enhances flavor; feel free to adjust to your taste preference.
For Optional Flavor Enhancements
• Herbs/Seasonings – Add flavor variations post-baking; rosemary or garlic powder work wonderfully!
• Cheese – Melted cheese can be added after baking for that extra layer of deliciousness.
Get ready to carve, roast, and enjoy these delightful Halloween treats, perfect for bringing a touch of spookiness to your table!
Step‑by‑Step Instructions for Halloween Skull Potatoes
Step 1: Preheat the Oven
Preheat your oven to 425°F (220°C), ensuring it’s nice and hot to achieve that perfect crispness for your Halloween Skull Potatoes. This high temperature is key for roasting, so while the oven warms up, you can prepare your potatoes. Make sure to have a baking sheet ready for easy transfer later.
Step 2: Prepare the Potatoes
Select mini creamer or baby Yukon Gold potatoes, as they create an ideal canvas for carving. Using a paring knife, carefully carve spooky faces into each potato. Start by outlining the features to maintain control and then deepen the cuts, always cutting away from your hands for safety.
Step 3: Oil and Season the Potatoes
Once your spooky skull faces are carved, toss each potato in a bowl with vegetable oil and sprinkle them lightly with salt. This step ensures the skins become golden and deliciously crispy when roasted. Make sure each potato is well-coated with oil for the best texture.
Step 4: Arrange and Roast
Place the seasoned skull potatoes on a baking sheet, making sure there is enough space between each piece for optimal crisping. Roast in the preheated oven for 25-30 minutes, flipping them halfway through. Look for a beautiful golden-brown color and a crispy exterior as visual cues for doneness.
Step 5: Cool and Serve
Once your Halloween Skull Potatoes are perfectly roasted, take them out and let them cool for a few minutes. This cooling step helps them crisp up even more. Serve your delightful spooky treats warm, and consider adding optional toppings like herbs or melted cheese for extra flavor.
What to Serve with Halloween Skull Potatoes
As you prepare these spooky treats, consider adding delightful accompaniments that elevate your Halloween feast to new levels of fun and flavor.
- Crispy Brussels Sprouts: These add a crunchy, slightly bitter contrast that balances the richness of the potatoes beautifully.
- Creamy Garlic Dip: A creamy, garlicky dip offers a rich flavor that complements the crispy texture of the skull potatoes, making each bite more indulgent.
- Roasted Pumpkin Soup: The warm, comforting flavors of pumpkin soup provide a cozy touch while tying in with the Halloween theme, perfect for dipping!
- Spooky Veggie Platter: Include carrots, celery sticks, and your favorite dips shaped like Halloween creatures, adding freshness and crunch alongside those fun skulls.
- Witch’s Brew Punch: A vibrant, fruity punch served in a cauldron will not only quench thirsts but also add a festive flair to your table.
- Chocolate-Dipped Ghosts: These sweet treats create a playful dessert option, blending the perfect chocolatey indulgence to conclude your spooky meal with delight!
Storage Tips for Halloween Skull Potatoes
Fridge: Store leftover Halloween Skull Potatoes in an airtight container for up to 3 days. This helps maintain their flavor while keeping them fresh.
Freezer: For longer storage, freeze your Halloween Skull Potatoes in a single layer on a baking sheet before transferring them to a freezer-safe bag. They can last up to 2 months.
Reheating: To restore crispiness, reheat the potatoes in a preheated oven at 375°F (190°C) for about 10-15 minutes, ensuring they stay crunchy and delicious.
Avoid Softening: Do not store potatoes in a sealed container without ventilation, as that could lead to steam and sogginess. Proper storage will keep your spooky snacks enjoyable!
Variations & Substitutions for Halloween Skull Potatoes
Open the door to creativity with these playful twists that will turn your Halloween Skull Potatoes into a delightful feast for the senses!
-
Dairy-Free: Replace cheese with nutritional yeast for a cheesy flavor without dairy. It’s a great way to add umami without guilt.
-
Spicy Kick: Add cayenne pepper or paprika to the oil for a fiery touch! Your Halloween gathering will have an exciting twist that daring guests will love.
-
Flavorful Infusion: Infuse your oil with garlic or rosemary before tossing the potatoes to elevate their flavor profile. Aromatic additions turn these spooky spuds into something extraordinary.
-
Veggie Upgrade: Substitute potatoes with pumpkin or sweet potatoes for a festive fall flavor. Both options maintain that delightful sweetness while aligning perfectly with Halloween festivities.
-
Cheese Lovers: Experiment with different cheeses, like Monterey Jack or cheddar, for varied gooey satisfaction. You can layer these cheese options inside the carved skulls before roasting for a melty surprise!
-
Crispy Herb Topping: Enhance the crunch factor by tossing some panko breadcrumbs with Italian seasoning before roasting. This addition provides a delightful textural contrast to the fluffy interiors.
-
Ghoulish Colors: For a fun twist, use purple or red potatoes to create vibrant skull potatoes that stand out on your Halloween table. These colorful choices are visually striking and tasty too!
-
Serve with Dips: Pair with a delicious Garlic Sauce Potatoes or your favorite dipping sauce for a flavor-packed experience that guests will rave about.
Get creative with your skulls, and watch them become an unforgettable centerpiece for any Halloween gathering!
Make Ahead Options
These Halloween Skull Potatoes are perfect for meal prep, making your spooky feast easier to manage! You can carve the potatoes and soak them in salted water up to 24 hours in advance to prevent browning. After soaking, drain and pat them dry, then toss with oil and seasonings just before roasting. You can also prepare your seasoning mix ahead of time, storing it in an airtight container. When you’re ready to bake, simply preheat your oven to 425°F (220°C), arrange the potatoes on a baking sheet, and roast them for 25-30 minutes. This way, you’ll have restaurant-quality Halloween treats with minimal effort!
Expert Tips for Halloween Skull Potatoes
-
Carving Precision: Ensure you have clean, deep cuts while carving your skull potatoes to create distinct facial features that pop visually.
-
Crispy Perfection: Avoid overcrowding the baking sheet; giving your Halloween Skull Potatoes enough space allows them to roast properly and achieve that coveted crunch.
-
Flavor Boosting: After baking, consider enhancing your potatoes with fresh herbs or cheese, which can elevate their flavor profile and make them even more irresistible.
Halloween Skull Potatoes Recipe FAQs
How do I select the best potatoes for Halloween Skull Potatoes?
Absolutely! For this recipe, mini creamer or baby Yukon Gold potatoes are ideal. They not only roast evenly but also provide a sturdy canvas for carving your spooky skull faces. When selecting, look for firm potatoes free of dark spots or blemishes and with smooth skins.
How should I store leftover Halloween Skull Potatoes?
To keep your leftover Halloween Skull Potatoes fresh, store them in an airtight container in the fridge. They can last up to 3 days, but remember that the crispy texture is best enjoyed fresh. If you reheat them, do so in the oven to maintain their crunch.
Can I freeze Halloween Skull Potatoes?
Yes, you absolutely can! To freeze your Halloween Skull Potatoes, first place them in a single layer on a baking sheet. Once they are frozen solid, transfer them to a freezer-safe bag. They can be stored in the freezer for up to 2 months. When you’re ready to enjoy them, simply reheat in a preheated oven.
What should I do if my potatoes aren’t crisping up?
If your Halloween Skull Potatoes aren’t achieving that crispy finish, there are a few things to check. First, make sure not to overcrowd the baking sheet, as space is essential for air circulation. Additionally, ensure they are well-coated with oil, which is crucial for crispy skin. If they still aren’t crisping, a quick 5-minute broil at the end of baking can help!
Are these spooky skull potatoes safe for pets?
Very! While potatoes can be safe for dogs to eat in moderation, be cautious about any additional toppings you might use, such as cheese or seasonings. Always check if those ingredients are pet-friendly, as some seasonings can be harmful to animals. If unsure, it’s always a good idea to consult your veterinarian.
Can I make Halloween Skull Potatoes ahead of time?
Absolutely! You can prepare the potatoes and carve them earlier in the day. Keep the carved potatoes in a bowl of cold water to prevent browning until you’re ready to roast them. Just drain and follow the roasting instructions when it’s time to serve. Enjoy your spooky creation!
Crispy Halloween Skull Potatoes for a Spooky Feast
Ingredients
Equipment
Method
- Preheat your oven to 425°F (220°C) for perfect crispiness.
- Select mini creamer or baby Yukon Gold potatoes and carve spooky faces into each potato.
- Toss each potato in a bowl with vegetable oil and sprinkle lightly with salt.
- Place on a baking sheet and roast for 25-30 minutes, flipping halfway through.
- Let cool for a few minutes before serving warm with optional toppings.
Leave a Reply