
There’s something magical about the thrill of creating your own Halloween treats, and these Nutter Butter Ghost Cookies bring that enchantment right into your kitchen. In just 20 minutes, you can whip up these playful no-bake cookies that are not only fun to make but also a crowd-pleaser at any spooky gathering. Made with only four simple ingredients, this easy recipe is perfect for both experienced home chefs and newcomers alike. Plus, with a few clever substitutions for dietary needs, everyone can join in on the fun. Imagine serving these sweet little specters at your next Halloween party—who could resist their charming, ghostly faces? Are you ready to create some spooky treats that will have everyone saying “boo-tiful”? Let’s dive in!

Why Are Nutter Butter Ghost Cookies Irresistible?
Simplicity at Its Best: These cute cookies require just four easy ingredients, making them a breeze to whip up even for the busiest home cooks.
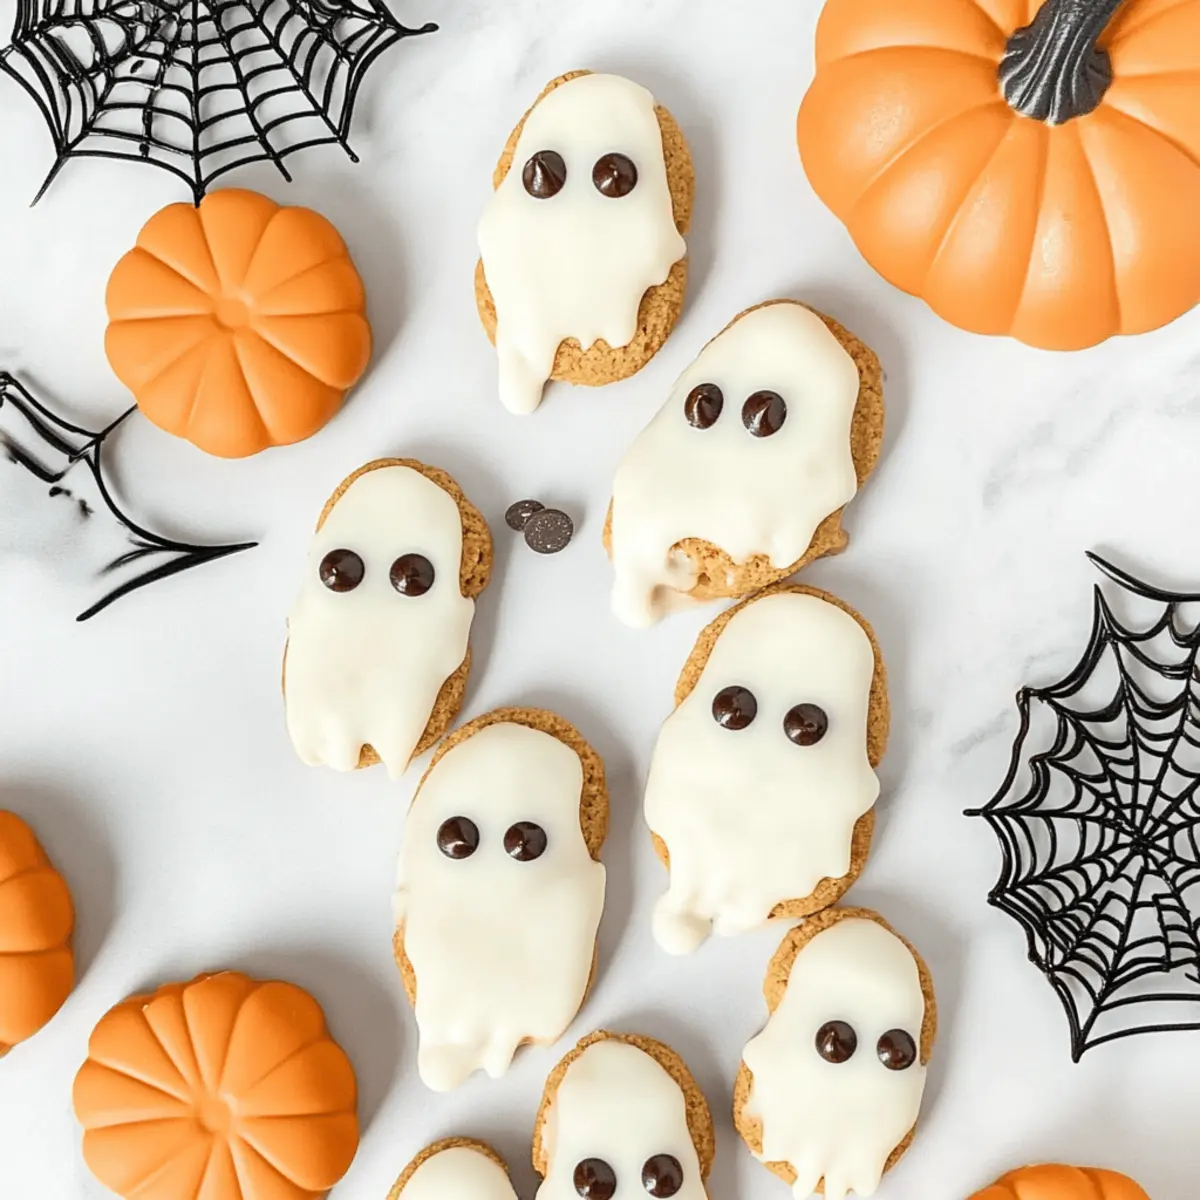
No-Bake Delight: Skip the oven! These no-bake treats are perfect for quick last-minute Halloween preparations.
Customizable Fun: Whether you’re using traditional Nutter Butter or opting for Milano cookies for nut allergies, this recipe is versatile enough to delight everyone.
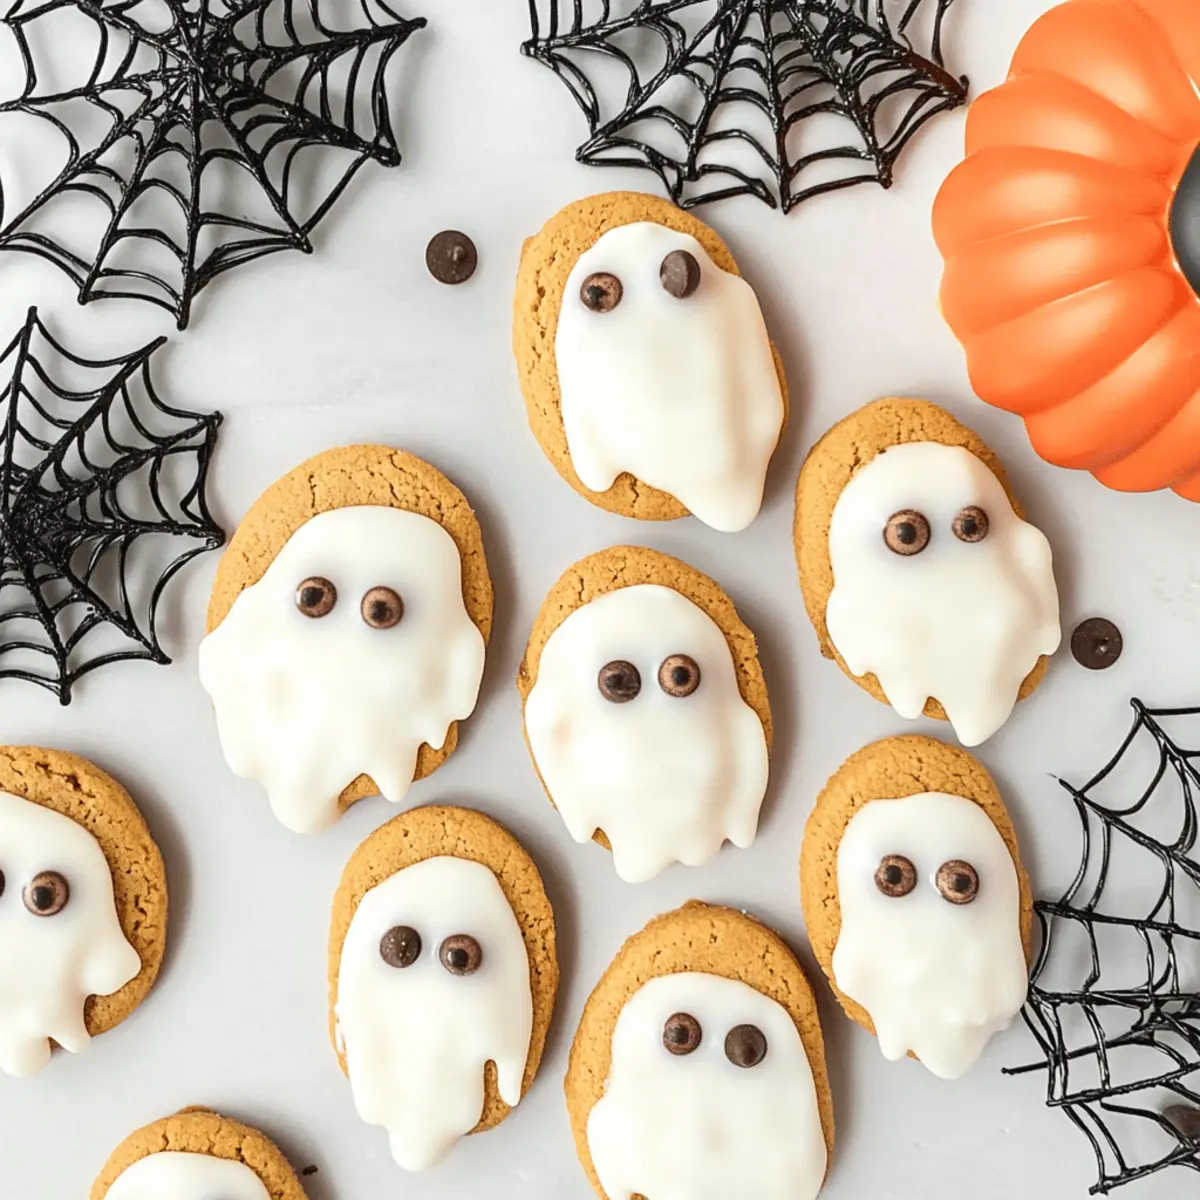
Crowd-Pleasing Treat: Their charming, ghostly faces make them a showstopper at parties, ensuring smiles all around!
Perfect for Little Helpers: Invite the kids into the kitchen to help with decorating, creating a fun and memorable family experience—just like making Pumpkin Sugar Cookies together!
These Nutter Butter Ghost Cookies are destined to be a favorite; don’t miss out on adding them to your Halloween celebration!
Nutter Butter Ghost Cookies Ingredients
For the Cookies
- Nutter Butter Cookies – These serve as the delicious base, offering a rich peanut butter flavor.
- White Candy Melts – Used for coating, adding sweetness and a ghostly charm to your treats.
- Candy Eyeballs – These fun decorations give your cookies their whimsical ghostly faces.
- Mini Chocolate Chips – Perfect for creating adorable little mouths, adding character to your cookies.
Substitution Options
- Milano Cookies – A nut-free alternative, ideal for those with peanut allergies.
- White Almond Bark or Chocolate Chips – These can be used instead of candy melts for a different finish.
- Mini Chocolate Chips – Can replace candy eyeballs if needed, maintaining a cute touch!
Get ready to create some spooky yet delightful Nutter Butter Ghost Cookies that will haunt your taste buds!
Step‑by‑Step Instructions for Nutter Butter Ghost Cookies
Step 1: Prepare Your Workspace
Start by lining a baking sheet with wax paper to prevent sticking. This will serve as your place to set the finished Nutter Butter Ghost Cookies while they cool and harden. Make sure to have all your ingredients within reach, including Nutter Butter cookies, white candy melts, candy eyeballs, and mini chocolate chips, so your preparation is smooth and efficient.
Step 2: Melt the Candy Coating
In a microwave-safe bowl, add the white candy melts and microwave them in 30-second intervals at 50% power. Stir the melts after each interval until they are completely smooth and melted, which usually takes about 4-5 minutes total. Keep an eye on them to prevent burning, as this can alter the taste and texture of your Nutter Butter Ghost Cookies.
Step 3: Dip the Cookies
Once the candy melts are ready, take a Nutter Butter cookie and carefully dip it into the melted coating, ensuring that about 70-75% of the cookie is covered. Allow any excess coating to drip back into the bowl. The warm melted candy should give your cookies a delightful, glossy finish, setting the stage for their ghostly appearance.
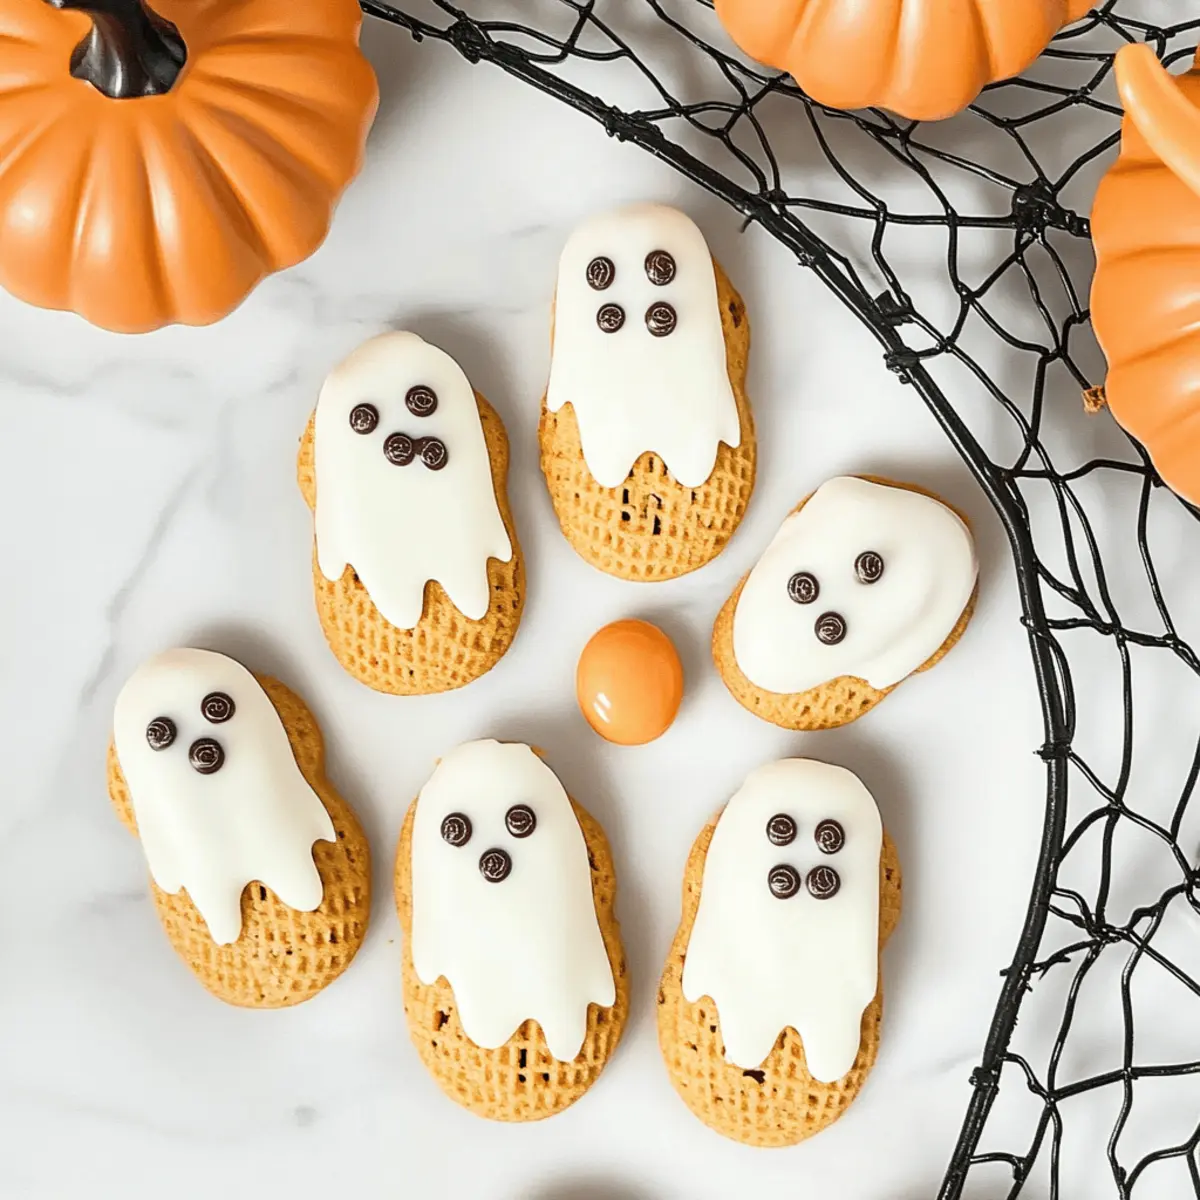
Step 4: Add Fun Decorations
Before the coating sets, quickly place two candy eyeballs on the dipped portion of the cookie, followed by a mini chocolate chip to create a mouth. Act fast during this step to ensure everything sticks nicely; working while the coating is still wet will make your Nutter Butter Ghost Cookies come to life with personality!
Step 5: Let Them Set
Carefully transfer the decorated cookies to the prepared baking sheet. Allow the coating to harden at room temperature for about 5-10 minutes. The ghostly candy shell will firm up, creating that satisfying crunch with every bite of your Nutter Butter Ghost Cookies.
Step 6: Serve and Enjoy
Once the cookies are set, they are ready to be enjoyed! Serve these playful Nutter Butter Ghost Cookies at your Halloween gatherings or any fun occasion. Gather your friends and family around, and get ready for everyone to revel in their deliciously spooky charm!
Make Ahead Options
These Nutter Butter Ghost Cookies are a fantastic option for meal prep enthusiasts! You can prepare the cookies’ base by dipping the Nutter Butter cookies in melted white candy up to 24 hours in advance. Simply allow them to cool completely before storing them in an airtight container to maintain their fresh crunch. When it’s time to serve, quickly embellish them with candy eyeballs and mini chocolate chips for the ghostly effect. This way, you can enjoy a delightful treat with minimal effort on the day of your Halloween gathering, saving you precious time and ensuring your cookies are just as delicious and cute as when first made!
Nutter Butter Ghost Cookies Variations
Feel free to twist and tweak this recipe to match your taste and dietary needs!
- Nut-Free: Use Milano cookies to ensure everyone can enjoy these spooky treats without worry.
- Dairy-Free: Opt for dark chocolate chips in place of white candy melts for a vegan-friendly coating.
- Colorful Coating: Add food coloring to the white candy melts for festive variations—think orange for Halloween or teal for a twist!
- Crunchy Texture: Try adding crushed nuts or sprinkles to the melted coating for extra crunch and fun.
- Flavor Boost: Mix in a splash of vanilla extract to the melted candy for an added flavor dimension.
- Bittersweet Twist: Use semi-sweet chocolate instead of candy melts to balance the sweetness with a rich cocoa flavor.
- Spiced Ghosts: Incorporate pumpkin spice into the melted coating for a seasonal flavor boost, perfect for fall celebrations.
- Cute Alternatives: Swap out candy eyeballs for mini marshmallows for a different artistic flair, keeping it playful and fun!
With these delightful variations, your Nutter Butter Ghost Cookies can easily cater to everyone’s preferences, making them a must-have for any Halloween gathering! Enjoy crafting your ideal spooky treats!
What to Serve with Nutter Butter Ghost Cookies
Enjoy these spooky treats by pairing them with delightful additions that enhance their festive charm.
-
Hot Apple Cider: The warm and spiced flavors of hot apple cider complement the sweetness of the cookies, bringing a cozy autumn vibe to your gathering.
-
Pumpkin Spice Muffins: Their moist texture and pumpkin spice warmth mirror the festive spirit of Halloween, making them a perfect companion for your ghostly cookies.
-
Chocolate Milkshake: The rich, creamy chocolate shake adds a playful twist, balancing the peanut butter sweetness with its own chocolaty goodness. It’s a treat that kids will love!
-
Ghoulish Fruit Cups: Create fruit cups with spooky elements—think sliced apples and orange segments for a fresh, colorful contrast to the ghost cookies. The lightness of the fruit provides a refreshing bite.
-
Caramel Dipping Sauce: Offer a sweet and gooey dipping option that plays well with the cookie texture. This pairing brings an additional layer of flavor, making each bite irresistible!
-
Spooky Halloween Punch: Whip up a colorful punch with festive garnishes to match the occasion, delighting both young and old guests alike. It’s the perfect whimsical drink to wash down those Nutter Butter Ghost Cookies!
Expert Tips for Nutter Butter Ghost Cookies
-
Mind the Melting: Ensure you’re melting white candy melts at low power to avoid burning; this is crucial for the perfect coating on your Nutter Butter Ghost Cookies.
-
Quick Decoration: Timing is everything! Place the candy eyeballs and mini chocolate chips on the wet coating for the best adhesion, creating those cute ghostly faces.
-
Storage Solutions: Keep your Nutter Butter Ghost Cookies in an airtight container at room temperature. This preserves their texture, ensuring they remain delicious for up to 5 days.
-
Try Fun Variations: Consider adding food coloring to the melted candy for a festive twist. Orange is particularly fun for Halloween!
-
Stay Organized: Preparing all your ingredients before starting will make the process smoother and more enjoyable. Happy baking!
How to Store and Freeze Nutter Butter Ghost Cookies
Room Temperature: Store leftover Nutter Butter Ghost Cookies in an airtight container at room temperature for up to 5 days to maintain their delightful texture and freshness.
Fridge: For longer-lasting cookies, keep them in the fridge in an airtight container, where they can stay fresh for up to a week. Just let them come to room temperature before serving.
Freezer: Freeze Nutter Butter Ghost Cookies in a sealed container for up to 2 weeks. Thaw them at room temperature for about 30 minutes before enjoying again.
Reheating: These cookies are best enjoyed at room temperature, but if you prefer a softer texture, gently warm them in the microwave for a few seconds before serving.
Nutter Butter Ghost Cookies Recipe FAQs
What type of Nutter Butter cookies should I use?
For the best flavor, use traditional Nutter Butter cookies, which provide a rich peanut butter taste. If you or someone you’re serving has a peanut allergy, I recommend using Milano cookies as a delightful substitute—they’re equally tasty!
How should I store Nutter Butter Ghost Cookies?
Keep your Nutter Butter Ghost Cookies in an airtight container at room temperature for up to 5 days. This will preserve their crunchy texture and sweet flavor. If you’d like them to last longer, you can store them in the refrigerator where they will stay fresh for about one week.
Can I freeze Nutter Butter Ghost Cookies?
Absolutely! You can freeze Nutter Butter Ghost Cookies in a sealed container for up to two weeks. Here’s how: place the cookies in a single layer separated by parchment paper to avoid sticking, then cover tightly. When you’re ready to enjoy them, simply thaw them at room temperature for about 30 minutes before serving.
Why is my melted candy coating not smooth?
If your melted candy coating is not smooth, it could be due to overheating. Always melt candy melts in 30-second intervals at 50% power, stirring in between. If you do overheat it, the candy may seize or burn. If this happens, adding a small teaspoon of vegetable oil can help rescue the melted candy and bring back its smoothness.
Are there any allergy considerations for making these cookies?
Yes! If you’re preparing these Nutter Butter Ghost Cookies for someone with allergies, remember to substitute the Nutter Butter cookies with Milano cookies for peanut allergies. For other dietary restrictions, ensure your candy melts are gluten-free, as not all brands are. Always check packaging for specific allergen information.
How long does it take for the candy coating to set?
Generally, it takes about 5-10 minutes for the candy coating on the cookies to set at room temperature. Be sure to let them cool fully on the wax paper-lined baking sheet before serving to ensure the candy shell has hardened and holds its shape.
Nutter Butter Ghost Cookies That Will Haunt Your Taste Buds
Ingredients
Equipment
Method
- Prepare your workspace by lining a baking sheet with wax paper.
- Melt the white candy melts in a microwave-safe bowl in 30-second intervals until smooth.
- Dip each Nutter Butter cookie into the melted coating, covering about 70-75% of the cookie.
- Quickly place two candy eyeballs on the dipped cookies and use a mini chocolate chip for the mouth.
- Transfer decorated cookies to the baking sheet to let the coating harden for about 5-10 minutes.
- Serve and enjoy these spooky treats at your Halloween gatherings!
Leave a Reply