
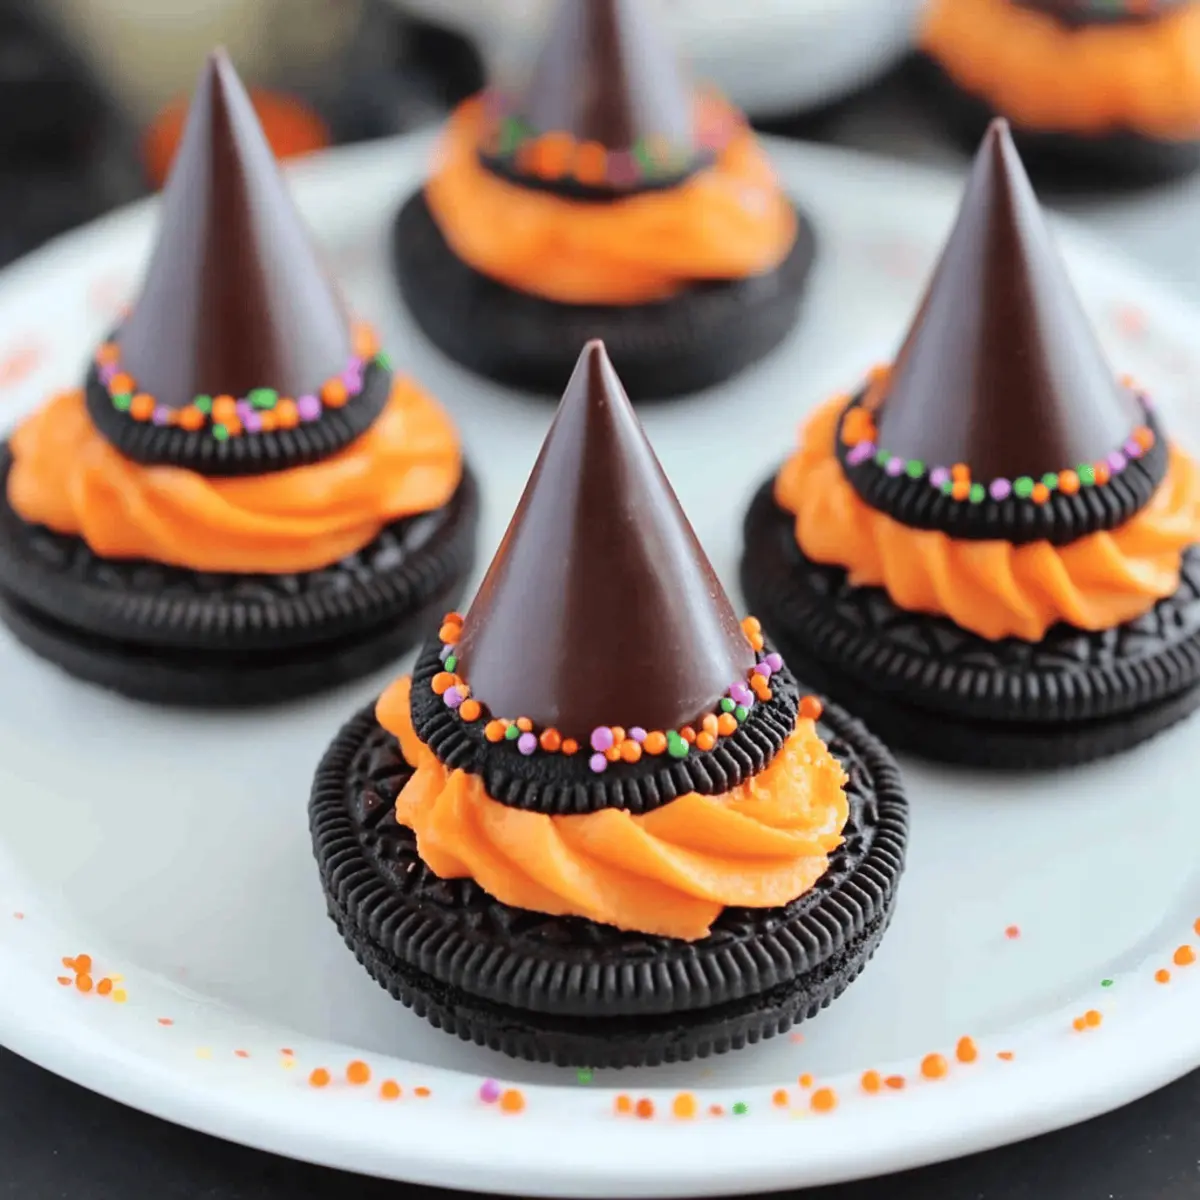
As I stood in the kitchen, a cauldron of ideas bubbling over, I stumbled upon the ultimate Halloween delight: Oreo Witch Hat Cookies. These enchanting little treats are not just visually captivating but also incredibly quick to whip up, making them perfect for anyone who wants to celebrate without the fuss of baking. With a creamy frosting cap and a chocolate kiss to create that perfect witch hat point, they offer a whimsical twist on traditional sweets. Best of all, these cookies are highly customizable—you can switch it up with different cookie types or frosting colors to match your spooky theme. Whether you’re hosting a Halloween bash or need a festive snack for the kids, these cookies are sure to charm. Are you ready to cast a spell on your dessert table?
Why Will You Love Oreo Witch Hat Cookies?
Quick and Easy: Whipping up these Oreo Witch Hat Cookies takes less than 30 minutes, ensuring you can conjure up spooky treats without breaking a sweat!
No Baking Required: With just a few ingredients and no oven involved, these treats are perfect for anyone looking to avoid the hassle of baking.
Customizable Creations: Feel free to get creative! You can swap in different cookie varieties like Fudge Covered Oreos or even mix up frosting colors for unique designs—green and purple make stunning witch hats.
Family Fun: These cookies offer a delightful project for both kids and adults alike, making them a fantastic addition to any festive gathering.
Crowd-Pleasing: Whether for a Halloween party or a school function, these cookies are a guaranteed hit with everyone, even those who typically shy away from sweets.
If you’re looking for more festive ideas, don’t miss these tasty treats like Pumpkin Sugar Cookies or Pumpkin Cheesecake Cookies!
Oreo Witch Hat Cookies Ingredients
Unlock the magic of Halloween with these delightful treats!
For the Base
- Oreo Cookies – The star of the show, providing the perfect crunch; substitute with any favorite chocolate cookie for a twist.
For the Frosting
- Vanilla Frosting – Adds a sweet, creamy layer; choose store-bought for convenience or make your own for a personal touch—color it orange for an extra Halloween flair!
For the Topping
- Halloween Sprinkles – A fun and festive decorative touch that enhances the visual appeal of your Oreo Witch Hat Cookies.
- Chocolate Kisses – Create the iconic witch hat point—be sure to unwrap them beforehand for easy assembly.
Step‑by‑Step Instructions for Oreo Witch Hat Cookies
Step 1: Prepare the Frosting
Start by tinting your vanilla frosting with a few drops of food coloring, opting for orange for a classic Halloween look. Mix thoroughly until the color is even, creating a vibrant hue. This colorful frosting will serve as the delicious base for your Oreo Witch Hat Cookies.
Step 2: Fill the Piping Bag
Fit a piping bag with a large round or star tip, then carefully fill it with the tinted frosting. This will allow for easy and precise application. Make sure to leave a little frosting at the top for a smooth seal once filled. This step enhances the presentation of each cookie when decorated.
Step 3: Pipe Frosting onto Oreos
Grab your Oreo cookies and, using the filled piping bag, pipe a generous dollop of frosting onto the center of each cookie. Aim for a mound that is roughly the size of a golf ball for maximum effect. The frosting will not only add sweetness but also serve as the adhesive for the chocolate kiss.
Step 4: Add Halloween Sprinkles
Immediately after piping the frosting, sprinkle Halloween-themed sprinkles generously atop the frosting. These colorful toppings bring festive cheer and visual appeal to your Oreo Witch Hat Cookies. Let your creativity shine as you mix different sprinkles to elevate the spooky look!
Step 5: Attach the Chocolate Kisses
Gently press an unwrapped chocolate kiss into the center of the frosted Oreo. Ensure the kiss sinks into the frosting just enough to create the iconic witch hat point without toppling over. This final touch transforms your cookies into whimsical and delicious Halloween treats, ready for any gathering.
Step 6: Repeat the Assembly
Continue the same process with the remaining Oreo cookies, frosting, sprinkles, and chocolate kisses. Aim to assemble all the cookies efficiently while maintaining quality. Each cookie should be a delightful representation of the imaginative Oreo Witch Hat Cookies, perfect for sharing or displaying!
Step 7: Serve and Store
Once all cookies are assembled, place them on a festive serving platter for immediate enjoyment. If you have leftovers, store them in an airtight container at room temperature for up to three days. This ensures your Oreo Witch Hat Cookies remain fresh, crunchy, and irresistibly sweet for everyone to savor!
What to Serve with Oreo Witch Hat Cookies
These delightful treats will add a pop of fun to any Halloween spread, inviting cheerful nibbling and spooky conversations.
-
Creamy Ice Cream: A scoop of vanilla or pumpkin spice ice cream pairs beautifully with the crunchy cookies, offering a comforting and cool contrast that enhances the flavor.
-
Hot Cocoa Bar: Serve with warm, creamy hot cocoa topped with marshmallows for a delightful pairing. The warmth melds perfectly with the coolness of the frosting.
-
Spooky Fruit Platter: Slice up some fresh apples and oranges to balance the sweetness of the cookies. The refreshing fruits will cleanse the palate and offer a bright, festive touch.
-
Ghoulish Cocktails: Create a simple themed drink like a green punch or a spooky mocktail with limeade. This will elevate the treat experience and excite guests of all ages.
-
Chocolate-Dipped Pretzels: The salty crunch of pretzels dipped in chocolate makes for a perfect snack that complements the sweeter flavors of the Oreo Witch Hat Cookies.
-
Pumpkin Spice Muffins: These moist muffins will amplify the seasonal theme, and their spice notes enhance every bite of the cookies, creating a well-rounded dessert table.
-
Ghostly Cupcakes: Decorate simple cupcakes with fluffy white frosting and ghostly designs. Their light texture contrasts well with the density of the cookies while keeping the festive spirit alive.
-
Caramel Sauce: Offer a side of warm caramel sauce for dipping. The rich, buttery flavor creates an indulgent experience that pairs perfectly with the Oreo base.
How to Store and Freeze Oreo Witch Hat Cookies
Airtight Container: Store your Oreo Witch Hat Cookies in an airtight container at room temperature for up to 3 days to keep them fresh and crunchy.
Fridge: If you want to extend their life slightly, you can refrigerate them. This may affect their texture slightly, but they will keep for up to a week.
Freezer: For long-term storage, freeze unassembled cookies (Oreo bases and frosting separately) in airtight containers. They will last for up to 3 months.
Reheating: If chilled, allow them to come to room temperature before serving, ensuring that delightful crunch and sweetness are as satisfying as the day they were made!
Oreo Witch Hat Cookies: Customization Galore
Let your creativity shine as you explore exciting ways to personalize your cookies for the spookiest celebration!
-
Cookie Variety: Swap out Oreo Cookies for different chocolate cookies like Keebler Fudge Stripes or even homemade chocolate cookies for a unique taste. The variations can introduce delightful surprises for every bite!
-
Frosting Flavors: Go beyond vanilla frosting—try chocolate or cream cheese frosting for a rich twist. Imagine biting into a spooky chocolatey hat, adding richness that will enchant your guests!
-
Colorful Creations: Tint your frosting in vibrant hues like green or purple for an eye-catching look. A colorful frosting spectrum can bring a fun, quirky vibe to your Halloween treats!
-
Alternative Toppings: Use Mini M&Ms instead of chocolate kisses for a fun twist, creating a playful alternative hat buckle. You could even use peanut butter cups for an unexpectedly delicious flavour combination!
-
Spooky Sprinkles: Elevate visual appeal by experimenting with different Halloween-themed sprinkles such as ghost or pumpkin shapes. The right sprinkles not only make them festive but also add a texture contrast to your cookies!
-
Heated Variants: Add a dash of cayenne pepper to your frosting for a spicy surprise. This unexpected heat can surprise your taste buds and thrill adventurous eaters, making the treats more memorable.
-
Mini Cookie Versions: Create mini versions of these cookies for bite-sized delights at parties. Everyone loves a little sweet snack! Plus, it allows for even more variety on your dessert table.
If you’re looking for more delightful treats that dazzle, consider making Pumpkin Sugar Cookies or Soft Pumpkin Cookies for a festive finish to your Halloween soirée.
Make Ahead Options
These Oreo Witch Hat Cookies are perfect for busy home cooks looking to save time! You can prepare the Oreo cookie base and frosting up to 24 hours in advance. Simply store the cookies in an airtight container at room temperature, and refrigerate the frosting in a separate sealed container. To maintain quality and avoid drying out, keep the frosting covered tightly. When you’re ready to assemble, simply pipe the frosting onto the cookies, add sprinkles, and top with chocolate kisses. This way, your festive treats will be just as delightful and fresh when it’s time to serve—ensuring you can enjoy the fun without any last-minute stress!
Expert Tips for Oreo Witch Hat Cookies
-
Piping Perfection: Use a piping bag with a large tip for clean frosting application. It not only looks better but also helps create a fun, whimsical shape!
-
Frosting Fun: Don’t hesitate to mix and match food coloring. A swirl of green and purple frosting on your Oreo Witch Hat Cookies can add an extra spooky touch!
-
Keep It Fresh: Store assembled cookies in an airtight container to maintain their crunch. This prevents them from getting soggy, ensuring every bite is delightful!
-
Chocolate Kiss Trick: If your chocolate kisses are struggling to stay upright, add a tiny dollop of frosting underneath as glue. It’ll keep them secure and looking like perfect witch hats!
-
Experiment with Sprinkles: Get creative with different sprinkle shapes and colors. Using themed sprinkles can elevate the festive look of your Oreo Witch Hat Cookies even more!
Oreo Witch Hat Cookies Recipe FAQs
What kind of Oreos should I use for my Oreo Witch Hat Cookies?
Absolutely! You can use classic Oreo cookies as your base, but feel free to switch it up with other chocolate varieties. Keebler Fudge Stripes or Fudge Covered Oreos can also work beautifully. Just ensure whichever cookie you choose complements the frosting and adds that crunchy texture we all love.
How should I store leftover Oreo Witch Hat Cookies?
To keep your delightful cookies fresh, store them in an airtight container at room temperature for up to 3 days. This storage method helps maintain their crunchy texture. If you decide to refrigerate them, they can last around a week, but their texture might soften slightly.
Can Oreo Witch Hat Cookies be frozen?
Yes, you can freeze your cookies! For the best results, freeze the unassembled cookies—separating the Oreo bases and the frosting—in airtight containers. This keeps them fresh for up to 3 months. When you’re ready to enjoy, simply thaw them at room temperature, then assemble with frosting and chocolate kisses.
What if my frosting is too runny?
Very! If your frosting seems too runny, this can be easily fixed. Just add a bit more powdered sugar until you achieve a thicker consistency that’s easy to pipe. If you’re using store-bought frosting, you might want to chill it in the fridge for about 15 minutes to help it firm up before piping.
Are there any dietary considerations I should be aware of?
When making Oreo Witch Hat Cookies, it’s important to check for allergies, especially with the frosting and chocolate kisses. If you’re serving to a crowd, consider listing key ingredients, such as potential allergens like dairy or nuts. Additionally, if you need to accommodate dietary restrictions, you can use gluten-free cookies and dairy-free frosting to ensure everyone can enjoy these spooky treats!
How long does it take to prepare Oreo Witch Hat Cookies?
These charming cookies can be made in less than 30 minutes! From preparation to assembly, you can whip up a batch without spending your entire day in the kitchen. It’s the perfect Halloween treat when you’re short on time but still want to impress!
Oreo Witch Hat Cookies: Easy Halloween Treats for Everyone
Ingredients
Equipment
Method
- Tint vanilla frosting with a few drops of food coloring.
- Fill a piping bag with the tinted frosting.
- Pipe frosting onto the center of each Oreo cookie.
- Sprinkle Halloween-themed sprinkles atop the frosting.
- Press an unwrapped chocolate kiss into the center of the frosted Oreo.
- Repeat the assembly with remaining cookies.
- Serve on a festive platter or store in an airtight container for up to three days.
Leave a Reply