
As Halloween approaches, my mind shifts to nostalgic moments filled with laughter, costumes, and, of course, festive treats! One recipe that stands out among the spooky crowd is my Spooky Graveyard Pudding Cookie Cups Recipe for Halloween. These delightful creations are a creative twist on traditional desserts, combining chewy cookie cups with creamy pudding that recalls those carefree childhood Halloweens. What I adore about them is how easily customizable they are—switch up the pudding flavor or get playful with decorations like gummy worms and candy eyeballs! Plus, they’re perfect for making with the kids, turning dessert into a fun and interactive activity. Ready to add a dash of whimsy to your Halloween festivities? Let’s dive into making these unforgettable treats together!
Why Are Graveyard Pudding Cookie Cups Awesome?
Nostalgic Fun: These cookie cups bring back delightful memories of childhood Halloween festivities, combining whimsy and flavor for the ultimate treat!
Easy Customization: With options to switch up pudding flavors and decorations, you can create your unique spooky masterpieces.
Kid-Friendly: Get everyone involved in the kitchen! Making these treats becomes a fun family activity, sure to spark creativity.
No Fuss Baking: Simple to whip up in under an hour, they fit perfectly into your busy Halloween schedule.
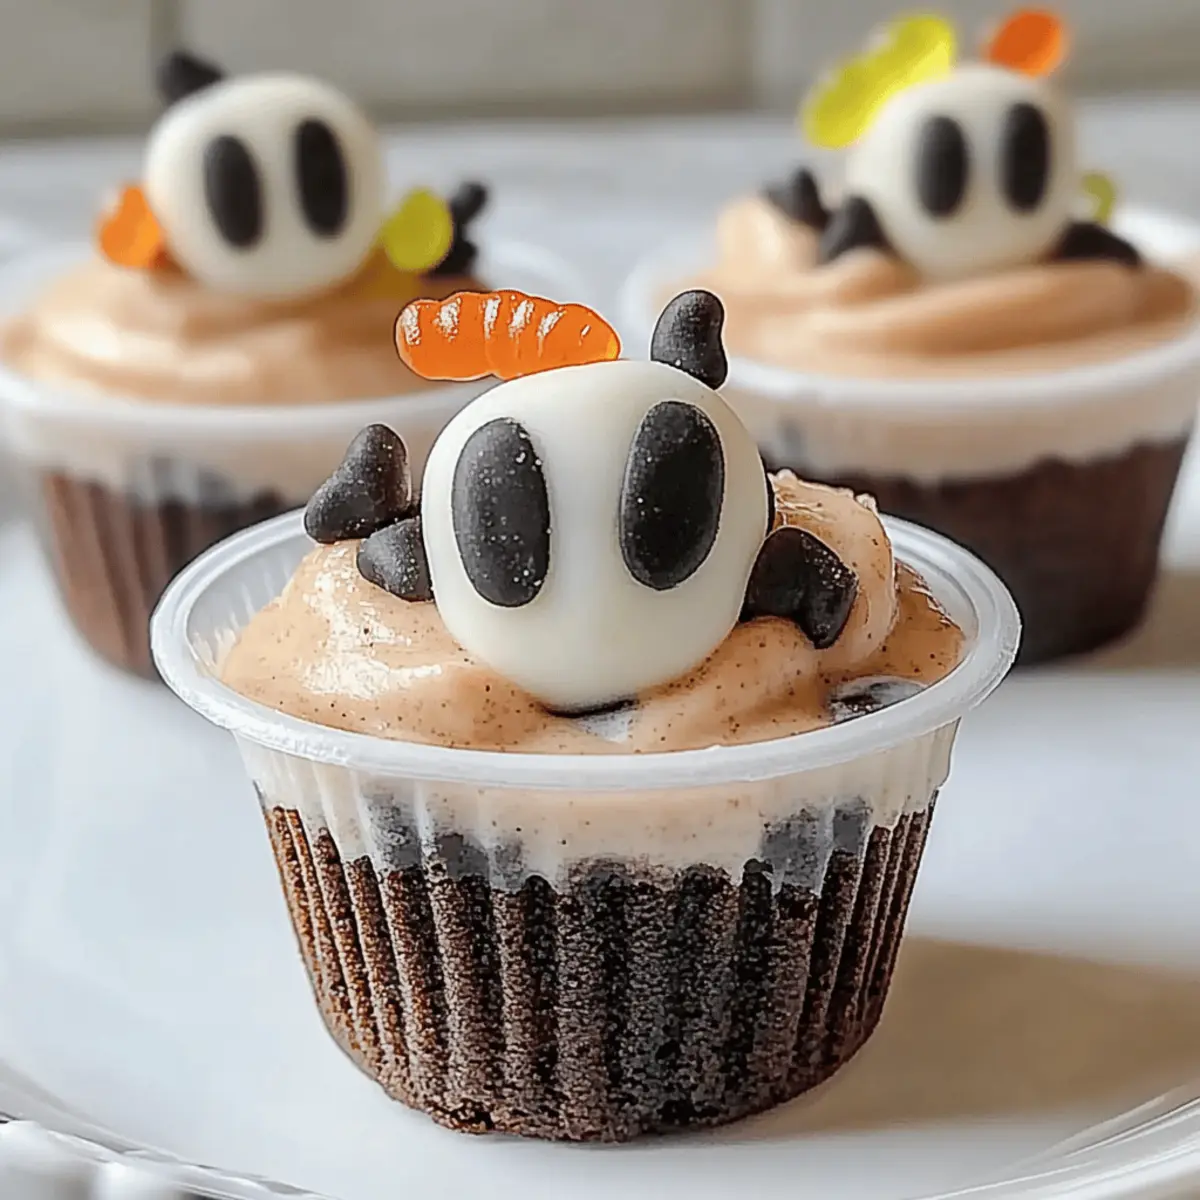
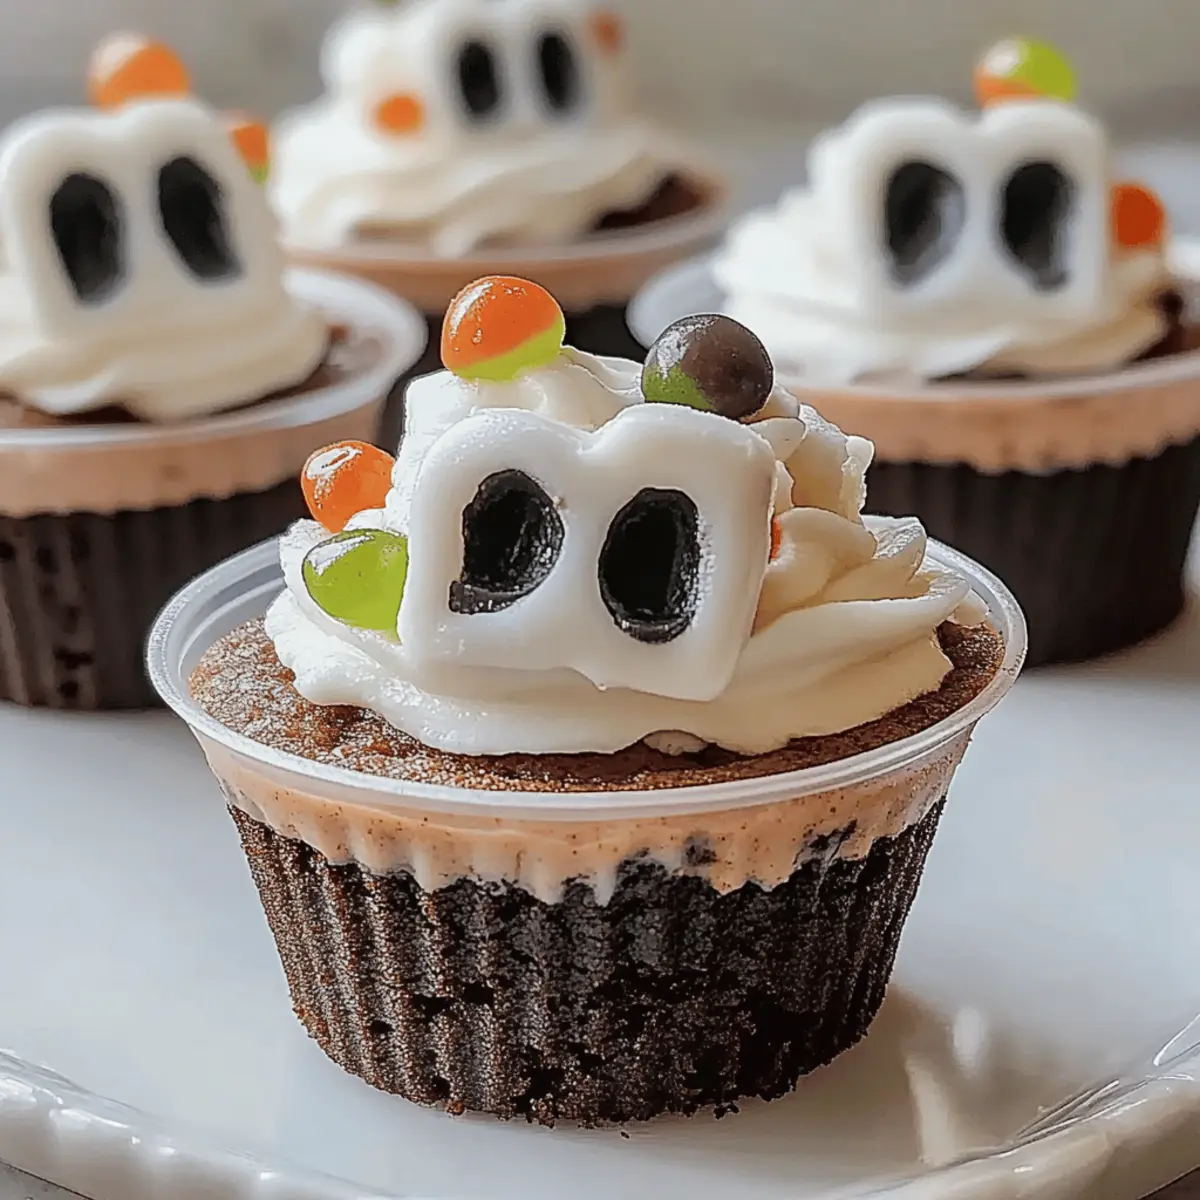
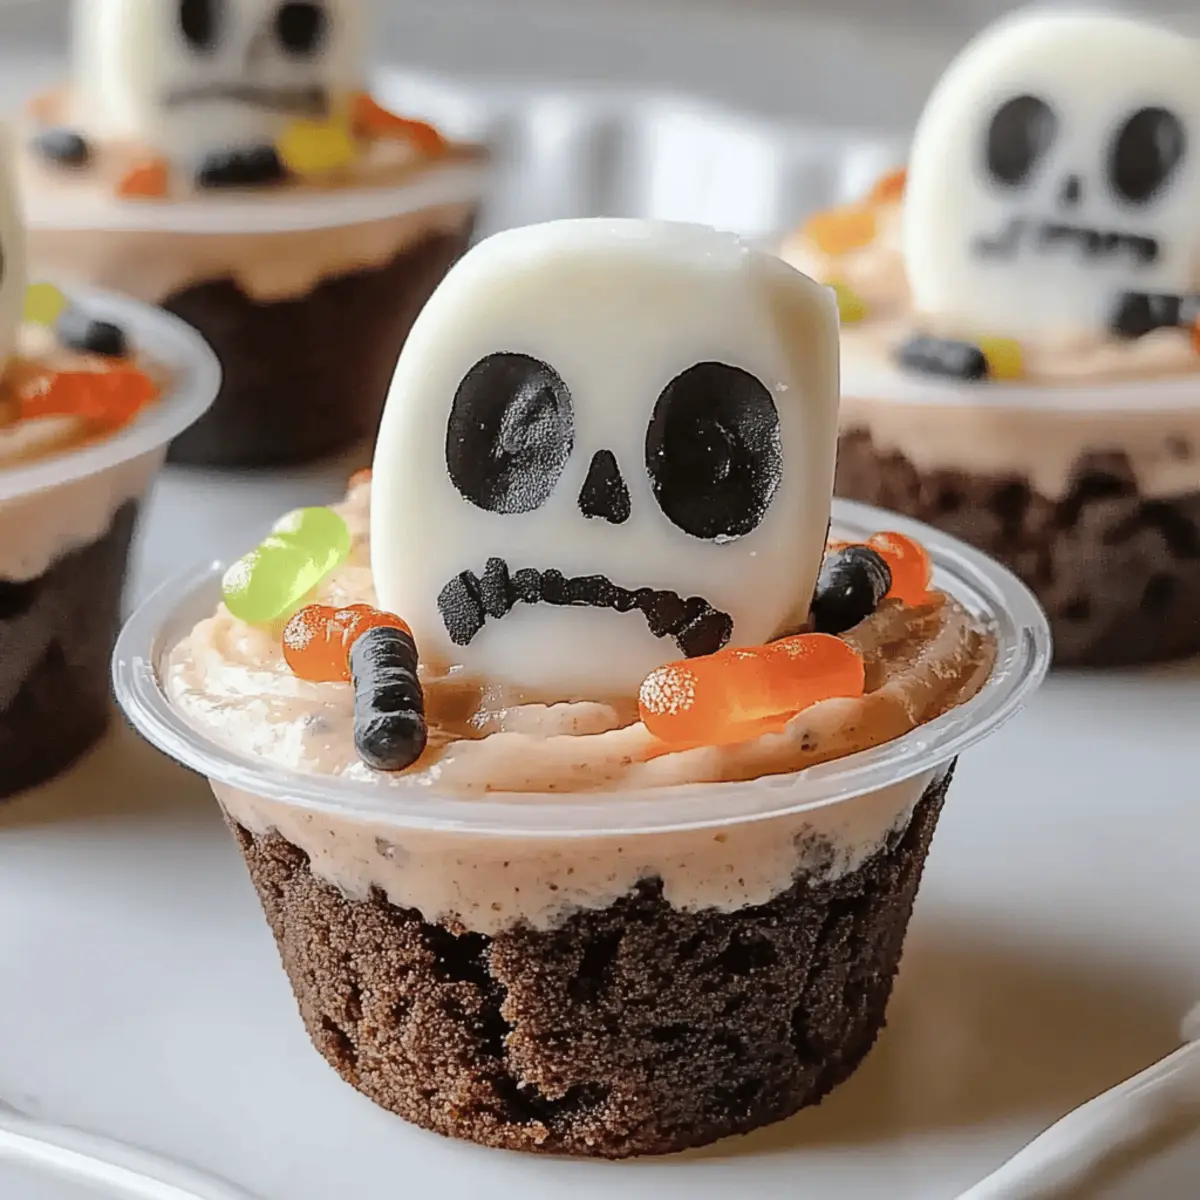
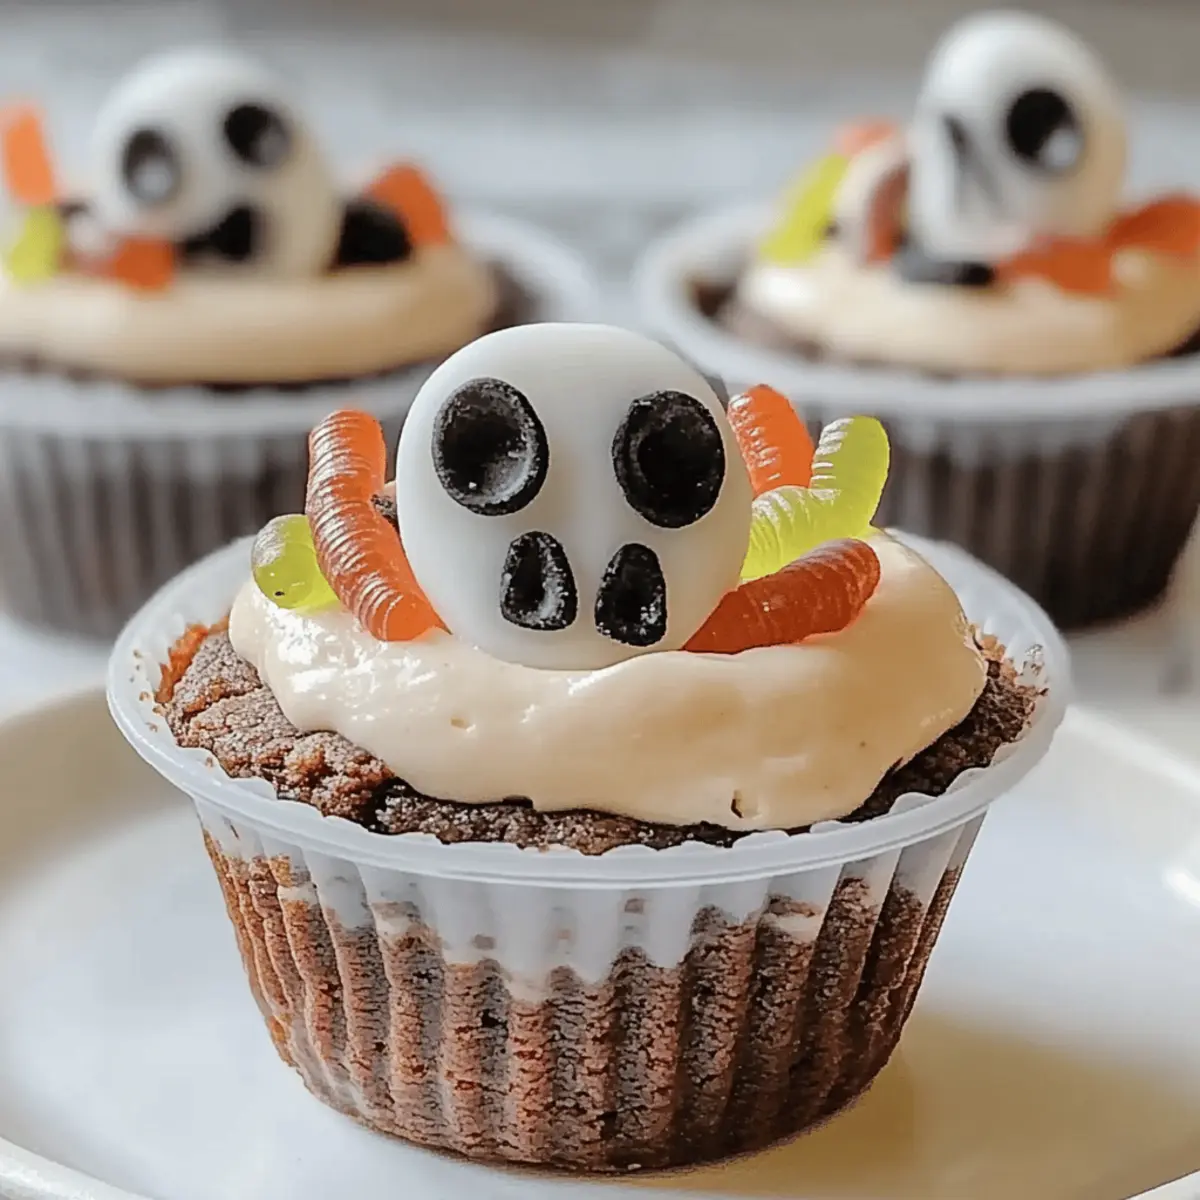
Enticing Presentation: Topped with gummy worms and candy eyeballs, these desserts steal the show on any festive table. Check out more fun ideas like Halloween Chocolate Chip or Monster Cookie Fudgy Brownies for the full spooky experience!
Spooky Graveyard Pudding Cookie Cups Ingredients
For the Cookie Cups
- Chocolate Chip Cookie Dough – Provides a delightful base; homemade or store-bought dough works perfectly!
For the Pudding Filling
- Vanilla Pudding Mix – Offers a creamy texture; feel free to substitute with chocolate or butterscotch pudding for a twist.
- Whole Milk – Essential for smooth pudding consistency; almond milk or oat milk can be great lactose-free alternatives.
For the Decorations
- Gummy Worms – Brightens up your dessert with a playful touch; any gummy candy can work if you’re feeling adventurous.
- Candy Eyeballs – Elevates the spooky vibe; swap in other Halloween-themed candies to customize your decoration!
Let’s bring these Spooky Graveyard Pudding Cookie Cups to life and make this Halloween unforgettable!
Step‑by‑Step Instructions for Spooky Graveyard Pudding Cookie Cups Recipe for Halloween
Step 1: Preheat the Oven
Begin by preheating your oven to 350°F (175°C). While the oven warms up, take a muffin tin and line it with parchment paper. This will help the cookie cups release easily after baking. Get your baking tray and spatula ready as you’ll need them for shaping the cookie cups!
Step 2: Shape Cookie Cups
Next, scoop out tablespoon-sized portions of chocolate chip cookie dough and gently press them into the muffin tin. Make sure to create a slight well in the center of each dough ball to hold the pudding later. Ensure the dough is evenly pressed to form nice, round cookie cups that will hold their shape while baking.
Step 3: Bake
Carefully place the muffin tin in the preheated oven. Bake your cookie cups for about 10-12 minutes, or until they turn a delightful golden brown. Keep an eye on them, as over-baking can make them too hard. Once done, remove them from the oven and let them cool completely in the tin or on a wire rack.
Step 4: Prepare the Pudding
While the cookie cups cool, it’s time to prepare your pudding. In a mixing bowl, whisk together the vanilla pudding mix and whole milk according to the package instructions until the mixture thickens up, which usually takes about 2 minutes. You want a smooth and creamy texture that complements the cookie cups perfectly.
Step 5: Fill Cookie Cups
Once the cookie cups are cool, generously fill each with the thickened pudding using a spoon or piping bag for a more decorative touch. Aim to fill them just to the top, ensuring a delightful mix of cookie and creamy pudding in every bite. The Spooky Graveyard Pudding Cookie Cups are really taking shape now!
Step 6: Decorate
Finally, unleash your creativity by decorating the filled cookie cups! Top each one with gummy worms and candy eyeballs, arranging them playfully to enhance the spooky Halloween aesthetic. Feel free to let the kids get involved for a fun finishing touch! These delightful decorations will transform your cookie cups into a frightfully fun treat.
Storage Tips for Spooky Graveyard Pudding Cookie Cups
-
Room Temperature: These cookie cups are best enjoyed fresh, but can be left at room temperature for up to 2 hours during serving.
-
Fridge: Store any leftovers in an airtight container in the fridge for up to 3 days. This keeps both the cookie and pudding fresh, maintaining the delightful textures.
-
Freezer: For longer storage, freeze the cookie cups (without pudding) in an airtight container for up to 2 months. Thaw in the fridge before filling and decorating.
-
Reheating: If you prefer warm cookie cups, briefly reheat them in the microwave for about 10 seconds before filling with pudding. Enjoy your Spooky Graveyard Pudding Cookie Cups!
Make Ahead Options
These Spooky Graveyard Pudding Cookie Cups are perfect for busy home cooks looking to save time during the Halloween rush! You can bake the cookie cups and store them in an airtight container for up to 3 days. Make sure they’re completely cool before refrigerating to prevent any sogginess. On the day of serving, prepare the vanilla pudding mix and fill the cookie cups shortly before you want to present them. This ensures that the cookie remains soft and the pudding retains its creamy texture, offering you a delightful treat that’s just as delicious as fresh. By prepping ahead, you’ll have more time to enjoy the festivities with loved ones!
Spooky Graveyard Pudding Cookie Cups Variations
Make your spooky treat even more exciting with a few fun twists that bring variety to your Halloween festivities!
- Flavor Swap: Try different pudding flavors, like chocolate, butterscotch, or even pumpkin spice to suit your taste.
- Dairy-Free Option: Use coconut milk or almond milk to make the pudding, ensuring everyone can enjoy this treat.
- Crushed Cookie Topping: Sprinkle crushed chocolate cookies on top to mimic “dirt” for your dessert—perfect for a spooky touch!
- Layering Fun: Layer different pudding flavors within the cookie cups for a delicious surprise in every bite.
- Add a Kick: For older kids and adults, consider a sprinkle of cinnamon or pumpkin pie spice in the cookie dough for warmth and flavor.
- Colorful Decorations: Swap out gummy worms for colorful candy corn, enhancing the festive atmosphere with vibrant hues.
- Nutty Crunch: Incorporate crushed nuts or granola as a topping for added crunch and texture.
- Spooky Chocolate Drizzle: Drizzle some melted dark chocolate over the top for an extra touch of decadence.
Don’t forget to combine your delicious cookie cups with other festive treats like Vanilla Pudding Pumpkin or a fun batch of White Chocolate Halloween for a delightful Halloween spread!
What to Serve with Spooky Graveyard Pudding Cookie Cups
These playful treats are sure to steal the show, but let’s complement them with some delicious sides for a complete Halloween feast!
-
Creepy-Crawly Fruit Salad:
A refreshing mix of seasonal fruits, think apple slices and grapes, garnished with gummy spiders for a fun touch. -
Witch’s Brew Punch:
A spooky green punch made from lime soda and sherbet. It’s a bubbly addition that’s both festive and refreshing. -
Ghostly Vanilla Ice Cream:
Creamy vanilla ice cream is the perfect contrasting texture against the cookie cups. Top with chocolate syrup for an extra treat! -
Mummy Hot Dogs:
Wrap hot dogs in crescent roll dough to resemble mummies, adding simplicity and fun to your spooky buffet. -
Zombie Veggie Platter:
A colorful array of fresh vegetables paired with spooky dip options like hummus or ranch, encouraging healthier snacking. -
Spooky Chocolate Milk:
An indulgent chocolate milk flavored with a dash of cinnamon; serve it in ghostly themed glasses to delight your guests. -
Cauldron Cake:
A rich chocolate cake shaped like a cauldron with green frosting; paired with your cookie cups, it creates a decadent dessert table. -
Pumpkin Spice Popcorn:
Flavored with pumpkin spice, this crunchy snack adds a seasonal twist and is ideal for munching while indulging in your treats.
Expert Tips for Spooky Graveyard Pudding Cookie Cups
- Cool Completely: Allow cookie cups to cool fully before filling with pudding to prevent meltiness and maintain that delightful crust.
- Pudding Layering: Consider layering different pudding flavors in each cookie cup for an exciting twist and variety in taste.
- Fill Just Before Serving: For the freshest experience, fill cookie cups with pudding right before serving to keep the cookie texture perfect.
- Playful Decorations: Encourage kids to get creative with toppings! Experiment with other Halloween-themed candies to personalize your spooky treats.
- Avoid Overbaking: Keep a close eye on the baking time to prevent cookie cups from becoming too hard; they should be soft and chewy.
Spooky Graveyard Pudding Cookie Cups Recipe FAQs
How do I choose ripe ingredients for my Spooky Graveyard Pudding Cookie Cups?
Absolutely! When selecting chocolate chip cookie dough, look for one that feels slightly soft and pliable. If you’re using fresh ingredients like milk, choose ones with a longer shelf life to ensure freshness. For the pudding mix, avoid boxes with damaged seals, and check the expiration date to enjoy the best flavor.
How should I store leftover cookie cups?
For delicious leftovers, store your Spooky Graveyard Pudding Cookie Cups in an airtight container in the fridge for up to 3 days. This maintains the freshness and textures of both the cookies and pudding, making them a delightful treat whenever you’re ready to indulge!
Can I freeze the cookie cups for later use?
Certainly! To freeze your cookie cups, begin by allowing them to cool completely. Place them in an airtight container, ensuring there’s no pudding filled inside, and freeze for up to 2 months. When you’re ready to use, simply thaw them in the fridge overnight, then fill and decorate before serving. This way, they’ll taste fresh and delicious!
What if my cookie cups turn out too hard?
Very! If you accidentally overbake them, don’t fret! You can try reheating the cookie cups in the microwave for about 10 seconds before filling them. This softens them up a bit, though to avoid this in the future, keep a close eye on the baking time, removing them once they’re golden brown and still soft in the center.
Are these cookie cups safe for kids with allergies?
Absolutely! However, you’ll want to consider all the allergies relevant to the guests. To make them more allergy-friendly, switch to gluten-free cookie dough or dairy-free milk alternatives. Always double-check the ingredient labels of the pudding mix and candies to ensure they are free from common allergens like nuts or dairy. Enjoy creating a treat that everyone can partake in!
Spooky Graveyard Pudding Cookie Cups Recipe Kids Will Love
Ingredients
Equipment
Method
- Preheat your oven to 350°F (175°C) and prepare a muffin tin with parchment paper.
- Scoop tablespoon-sized portions of cookie dough into the muffin tin, pressing gently to create a well.
- Bake the cookie cups for 10-12 minutes or until golden brown. Let them cool completely.
- Prepare the pudding by whisking together the pudding mix and milk until thickened.
- Fill the cooled cookie cups with the pudding mixture, just to the top.
- Decorate with gummy worms and candy eyeballs for a spooky touch!
Leave a Reply