
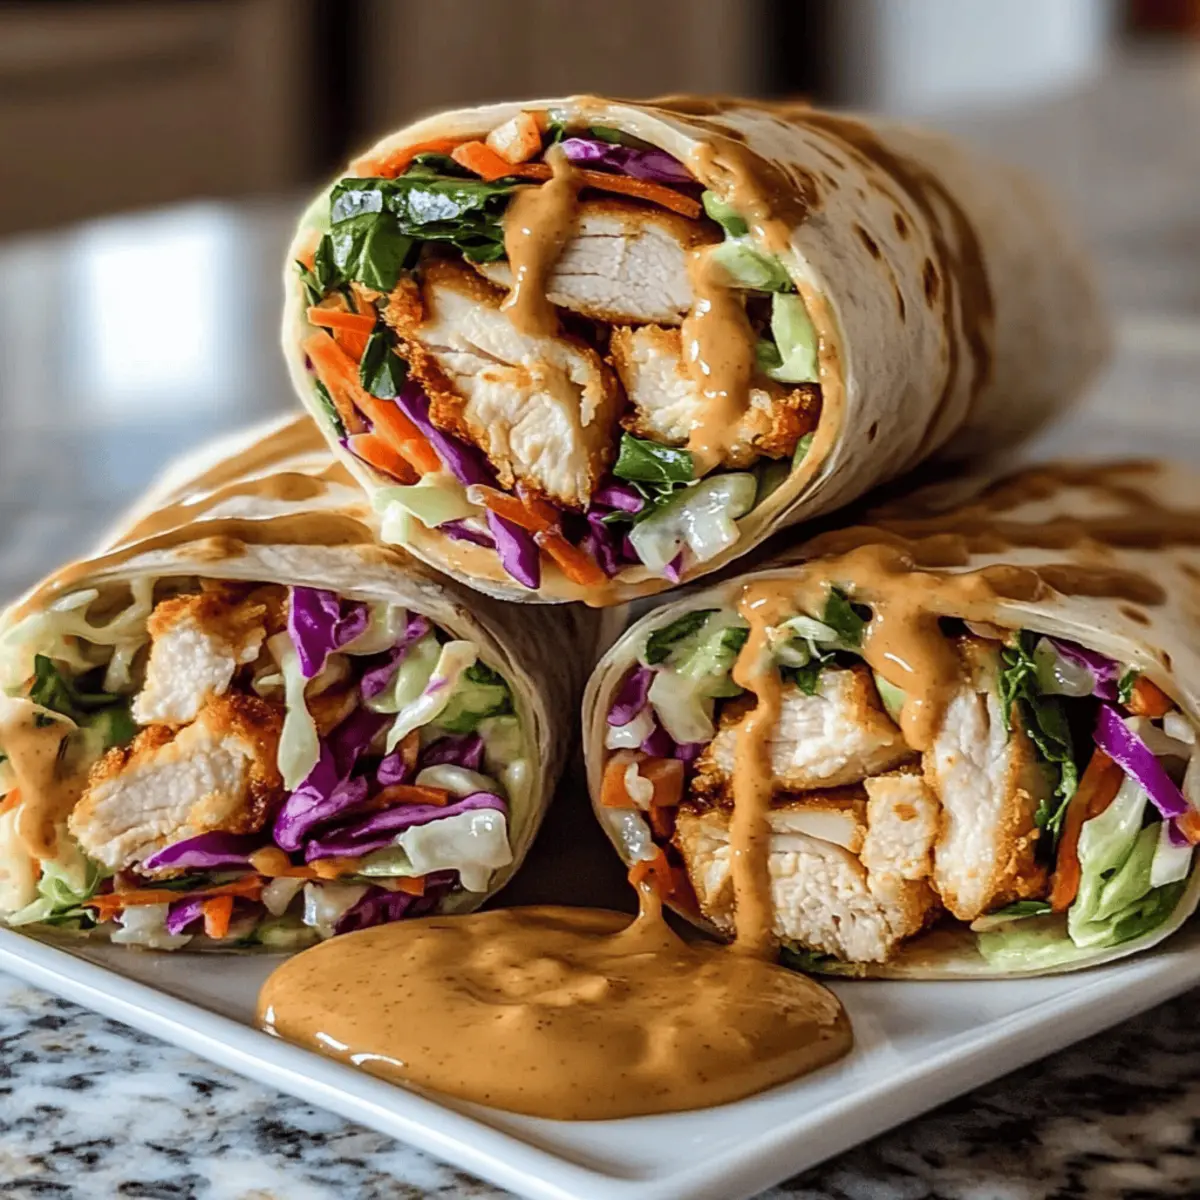
There’s a certain magic in wrapping up a delightful meal in just a few minutes, and that’s exactly what these Thai Peanut Chicken Wraps offer! With tender chicken, crunchy vegetables, and a creamy homemade peanut sauce, they make dinner feel special even on the busiest nights. In just 15 minutes, you can whip up this easy meal that’s not only versatile but also incredibly satisfying—perfect for both weekday lunches and family dinners. Plus, they’re customizable to suit your dietary needs; whether you opt for a vegetarian twist or a peanut-free version, there’s something here for everyone. Are you ready to dive into this flavor-packed adventure wrapped in goodness?
Why Are These Wraps So Irresistible?
Speedy Preparation: Whip up these Thai Peanut Chicken Wraps in just 15 minutes, making them perfect for nights when time is tight.
Flavor Explosion: The combination of tangy, creamy peanut sauce and fresh veggies creates a vibrant taste that dances on the palate.
Versatile Options: Whether you’re looking for a meaty delight or a vegetarian feast, this recipe easily adapts to your cravings, just like my Buffalo Chicken Stuffed wraps!
Healthful Ingredients: Packed with lean protein and crisp veggies, these wraps not only satisfy hunger but also nourish your body.
Customizable: With easy substitutions, you can make them dairy-free or peanut-free without missing out on flavor!
Thai Peanut Chicken Wraps Ingredients
For the Peanut Sauce
- Peanut Butter – Adds creaminess and flavor; substitute with sunflower seed butter or tahini for a peanut-free version.
- Low-Sodium Soy Sauce – Provides saltiness and umami; use tamari for a gluten-free option.
- Brown Sugar or Honey – Sweetens the sauce while balancing acidity; honey can be substituted for a vegan-friendly choice.
- Rice Wine Vinegar – Adds acidity to the sauce; apple cider vinegar can be used as an alternative.
- Minced Garlic – Enhances flavor; fresh garlic is recommended, but garlic powder can work in a pinch.
- Minced Ginger – Provides warmth and depth; fresh ginger is preferred; ground ginger can be used if fresh isn’t available.
- Sriracha Sauce – Introduces heat; adjust amounts to taste; for milder wraps, reduce or omit.
For the Filling
- Cooked Chicken Breasts – Lean protein source; rotisserie chicken is a time-saving option.
- Coleslaw Mix – Offers crunch and freshness; substitute with shredded lettuce or mixed greens if desired.
- Grated Carrot (optional) – Adds sweetness and texture; omit if not preferred.
- Chopped Cilantro – Adds freshness; can be replaced with parsley for a different flavor.
- Roasted, Salted Peanuts – Adds crunch and nuttiness; use sunflower seeds for a nut-free version.
For the Wraps
- Tortillas – Encloses the filling; any large flour or corn tortillas can be used; lettuce wraps are a low-carb alternative.
Step‑by‑Step Instructions for Thai Peanut Chicken Wraps
Step 1: Prepare Peanut Sauce
In a small bowl, whisk together 1/2 cup of peanut butter, 1/4 cup of low-sodium soy sauce, 2 tablespoons of brown sugar, 2 tablespoons of rice wine vinegar, 2 minced garlic cloves, 1 tablespoon of minced ginger, and 1 teaspoon of sriracha sauce. Ensure the mixture is smooth and creamy. If the sauce is too thick, thin it with a little warm water until you achieve your desired consistency.
Step 2: Mix Filling
In a large mixing bowl, combine 2 cups of cooked, shredded chicken, 2 cups of coleslaw mix, 1 grated carrot (if desired), 1/4 cup of chopped cilantro, and 1/4 cup of roasted, salted peanuts. Drizzle the prepared peanut sauce over the filling and gently toss everything together until well coated, ensuring that the flavors meld for that delicious Thai Peanut Chicken Wraps taste.
Step 3: Warm Tortillas
To make wrapping easier, heat 4 large tortillas in the microwave for about 30 seconds, or until they are warm and pliable. Alternatively, you can warm them in a dry skillet over medium heat for about 10-15 seconds on each side. Keep an eye on them to prevent drying out or becoming crispy, ensuring they remain soft and flexible for rolling.
Step 4: Assemble Wraps
Lay a warmed tortilla flat on a clean surface. Spoon a generous amount of the filling mixture onto the lower third of the tortilla, leaving space around the edges. Fold the sides inward, and then roll it up tightly from the bottom to the top. Repeat with the remaining tortillas and filling. Serve immediately for the best texture or keep wrapped in a damp cloth until ready to enjoy your Thai Peanut Chicken Wraps.
Make Ahead Options
These Thai Peanut Chicken Wraps are a fantastic choice for meal prep enthusiasts! You can prepare the peanut sauce and filling up to 3 days in advance, storing each component in airtight containers in the refrigerator to maintain freshness. The sauce should keep its creamy texture, while the filling will blend flavors over time—just as delicious! When it’s time to serve, simply warm the tortillas and fill them with the prepped mixture. For optimal taste and texture, reheat the filling gently in the microwave before assembling the wraps. This way, you’ll have a quick and satisfying meal ready to go for your busy week ahead!
What to Serve with Thai Peanut Chicken Wraps
Delight in a vibrant meal that complements the irresistible freshness of your wraps with these easy-to-prepare side dishes!
-
Cucumber Salad: This light salad, dressed in rice vinegar, adds a refreshing crunch that balances the richness of the peanut sauce.
-
Tom Yum Soup: With its aromatic herbs and spices, this soup provides a warm, comforting contrast to the crispy wraps, enhancing your dining experience.
-
Fruit Salad: A mix of seasonal fruits offers a sweet, juicy contrast, cleansing the palate while bringing a burst of freshness to your meal.
-
Roasted Sweet Potato Fries: The natural sweetness and crispy texture of these fries beautifully complement the savory flavors of the wraps while adding heartiness to the meal.
-
Coleslaw: Echoing the crunchiness of the wraps, a zesty coleslaw dressed with lime juice and sesame oil brings a delightful tang and pairs perfectly.
-
Iced Green Tea: Sip on this refreshing drink to cleanse your palate; its mild flavor complements the bold taste of the peanut chicken and adds a soothing element to your meal.
-
Peanut Noodles: For peanut lovers, a side of cold peanut noodles offers an extra kick of flavor that beautifully harmonizes with your Thai Peanut Chicken Wraps.
-
Chocolate Dipped Banana Bites: For dessert, these sweet bites provide a quick and satisfying end to your meal, leaving everyone with a smile.
Expert Tips for Thai Peanut Chicken Wraps
- Marinate for Flavor: Allow the filling to sit in the peanut sauce for a few minutes before assembly to deepen the flavor.
- Warm Tortillas Carefully: Heat tortillas briefly to avoid tearing. Use medium heat and do not overfill to ensure wraps can be rolled tightly.
- Keep Ingredients Fresh: Store the filling and sauce separately to maintain freshness. Assemble wraps just before serving for optimal texture.
- Make-Ahead Tips: Prepare the filling up to 3 days in advance, but assemble wraps only when ready to eat for the best experience.
- Customize Easily: Feel free to swap ingredients, like using chickpeas for the chicken or sunflower seed butter if allergies are a concern, ensuring delicious Thai Peanut Chicken Wraps for everyone.
How to Store and Freeze Thai Peanut Chicken Wraps
Fridge: Store assembled wraps in an airtight container for up to 2 days. To keep them fresh, add a little extra peanut sauce on the side before serving.
Freezer: Wrap separately in parchment paper, then foil, and freeze for up to 2 months. Thaw in the fridge overnight before reheating.
Reheating: Heat wrapped wraps in the microwave for about 30 seconds or in a skillet over medium heat until warmed through. Avoid overcooking to preserve texture.
Make-Ahead: Prepare the filling and peanut sauce up to 3 days in advance. Store them separately in airtight containers for convenient meal prep!
Thai Peanut Chicken Wraps Variations
Feel free to get creative and customize your Thai Peanut Chicken Wraps to suit your taste preferences and dietary needs!
-
Vegetarian Option: Replace chicken with firm tofu or canned chickpeas for a protein-packed vegetarian wrap. This delicious switch offers a satisfying texture that will surprise and delight any eater.
-
Nut-Free Alternative: Swap peanut butter with sunflower seed butter or tahini, making this dish perfect for those with nut allergies. The creamy richness will still shine through, ensuring no one feels like they’re missing out.
-
Gluten-Free Twist: For a gluten-free option, use tamari instead of soy sauce and wrap your fillings in rice paper or corn tortillas. This way, everyone can enjoy a lovely crunch while staying gluten-free.
-
Extra Crunch: Add layers of sliced bell peppers, shredded cabbage, or crunchy cucumbers to the filling for additional texture and color. These extra veggies not only taste great but also boost the freshness of each bite.
-
Spicy Kick: Increase the heat by adding fresh jalapeños or a dash more of sriracha sauce into the sauce mixture. This simple adjustment will give your wraps a tongue-tingling kick that spicy food lovers will adore.
-
Creamy Avocado: Incorporate creamy avocado slices into your filling for a luxurious texture. Avocado not only enhances creaminess but also brings a wealth of nutrients, making your wraps even more wholesome.
-
Herbed Delight: Swap chopped cilantro with fresh basil or mint for an herby twist. This simple herb substitution brings a new flavor profile to your wraps that feels fresh and exciting.
-
Fruity Addition: Toss in some sliced mango or apple for a refreshing contrast to the savory ingredients. The sweetness of the fruit beautifully balances the rich flavors in the wraps, creating a delightful surprise!
Each variation invites you to enjoy your wraps in a different and delicious way, just like my flavorful Cowboy Butter Chicken or zestful Green Chile Chicken. Get ready to dive into a world of flavors that cater to your cravings!
Thai Peanut Chicken Wraps Recipe FAQs
What type of peanut butter should I use for the sauce?
I recommend using creamy peanut butter for a smooth peanut sauce. If you need a peanut-free option, sunflower seed butter or tahini works wonderfully. They will still give you that creamy texture without the nuts.
How do I store the assembled wraps?
Store assembled Thai Peanut Chicken Wraps in an airtight container for up to 2 days in the fridge. To keep them fresh, I suggest adding a little extra peanut sauce on the side, which you can drizzle over just before serving and enjoy a refreshed taste.
Can I freeze Thai Peanut Chicken Wraps?
Absolutely! To freeze, wrap each assembled wrap separately in parchment paper, then in foil, and place them in a freezer-safe bag. They can last up to 2 months in the freezer. When you’re ready to eat, thaw them in the fridge overnight and reheat as needed.
What alterations can I make for dietary restrictions?
For a peanut-free version, substitute peanut butter with sunflower seed butter or tahini. If you have gluten sensitivities, consider using tamari instead of soy sauce. Also, swapping chicken for firm tofu or chickpeas makes a hearty vegetarian option!
How can I prevent my wraps from getting soggy?
To keep your Thai Peanut Chicken Wraps from becoming soggy, store the filling and sauce separately from the tortillas. Assemble the wraps just before enjoying them. If you’re meal prepping, keep a damp cloth over your wraps for the best texture until you’re ready to dive in.
Why did my peanut sauce turn out too thick?
If your peanut sauce feels too thick, you can easily thin it out by whisking in a little warm water until it reaches your desired consistency. This ensures a smooth, creamy sauce that’s perfect for drizzling on your wraps!
Delicious Thai Peanut Chicken Wraps Ready in 15 Minutes
Ingredients
Equipment
Method
- In a small bowl, whisk together peanut butter, low-sodium soy sauce, brown sugar, rice wine vinegar, minced garlic, minced ginger, and sriracha sauce until smooth and creamy.
- In a large mixing bowl, combine cooked, shredded chicken, coleslaw mix, grated carrot, chopped cilantro, and roasted peanuts. Drizzle with peanut sauce and toss until well coated.
- Heat tortillas in the microwave for about 30 seconds or in a dry skillet until warm and pliable.
- Lay a tortilla flat, spoon the filling on the lower third, fold sides in, and roll tightly. Repeat with remaining tortillas and serve.
Leave a Reply