
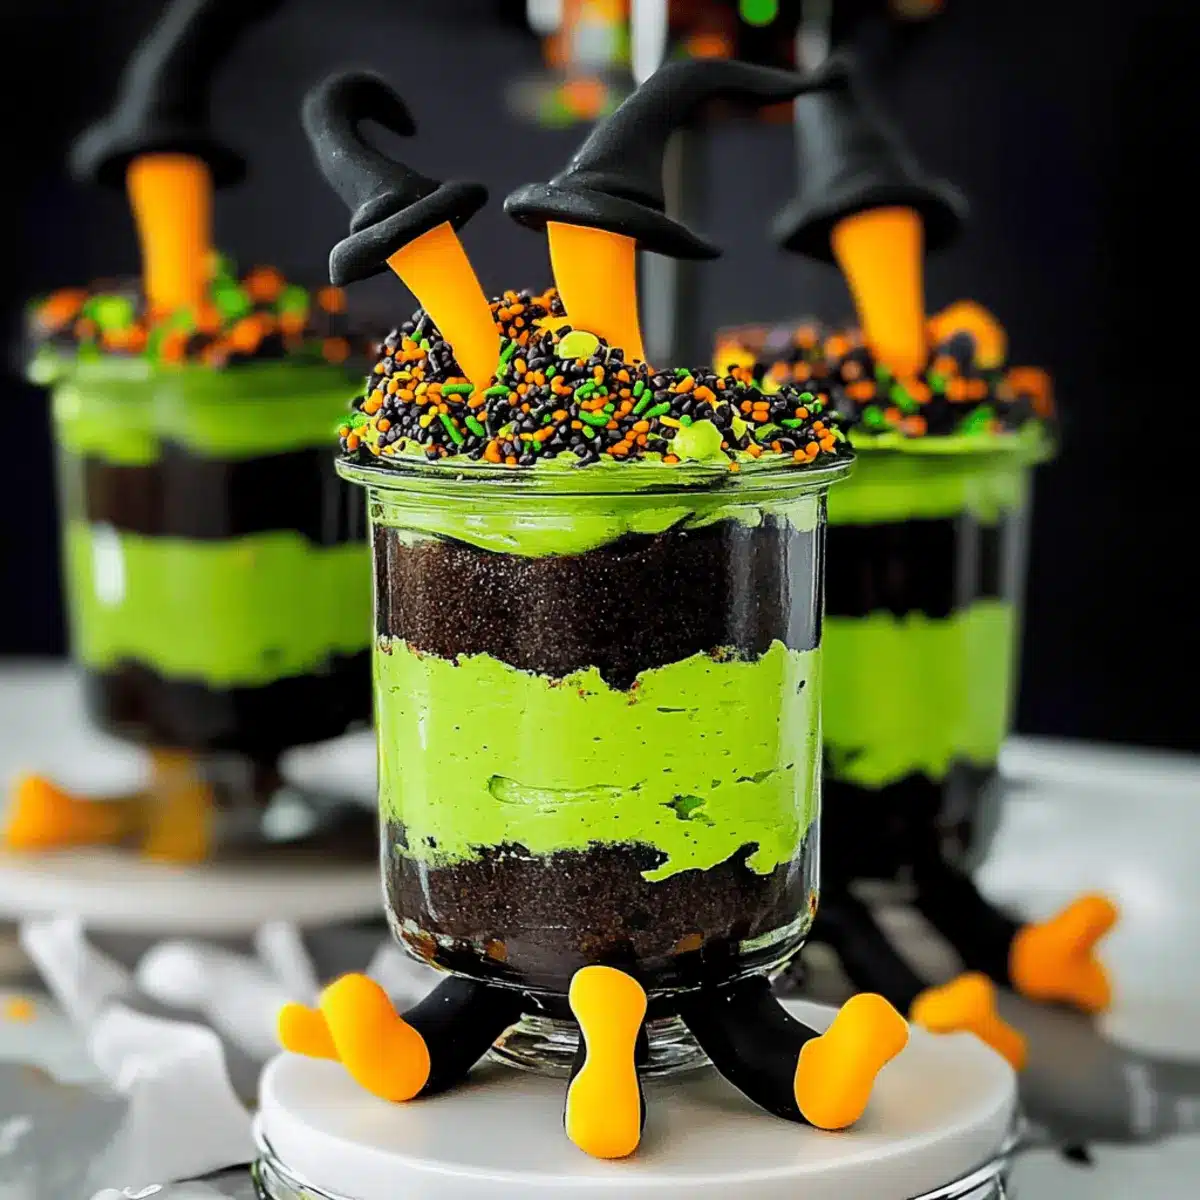
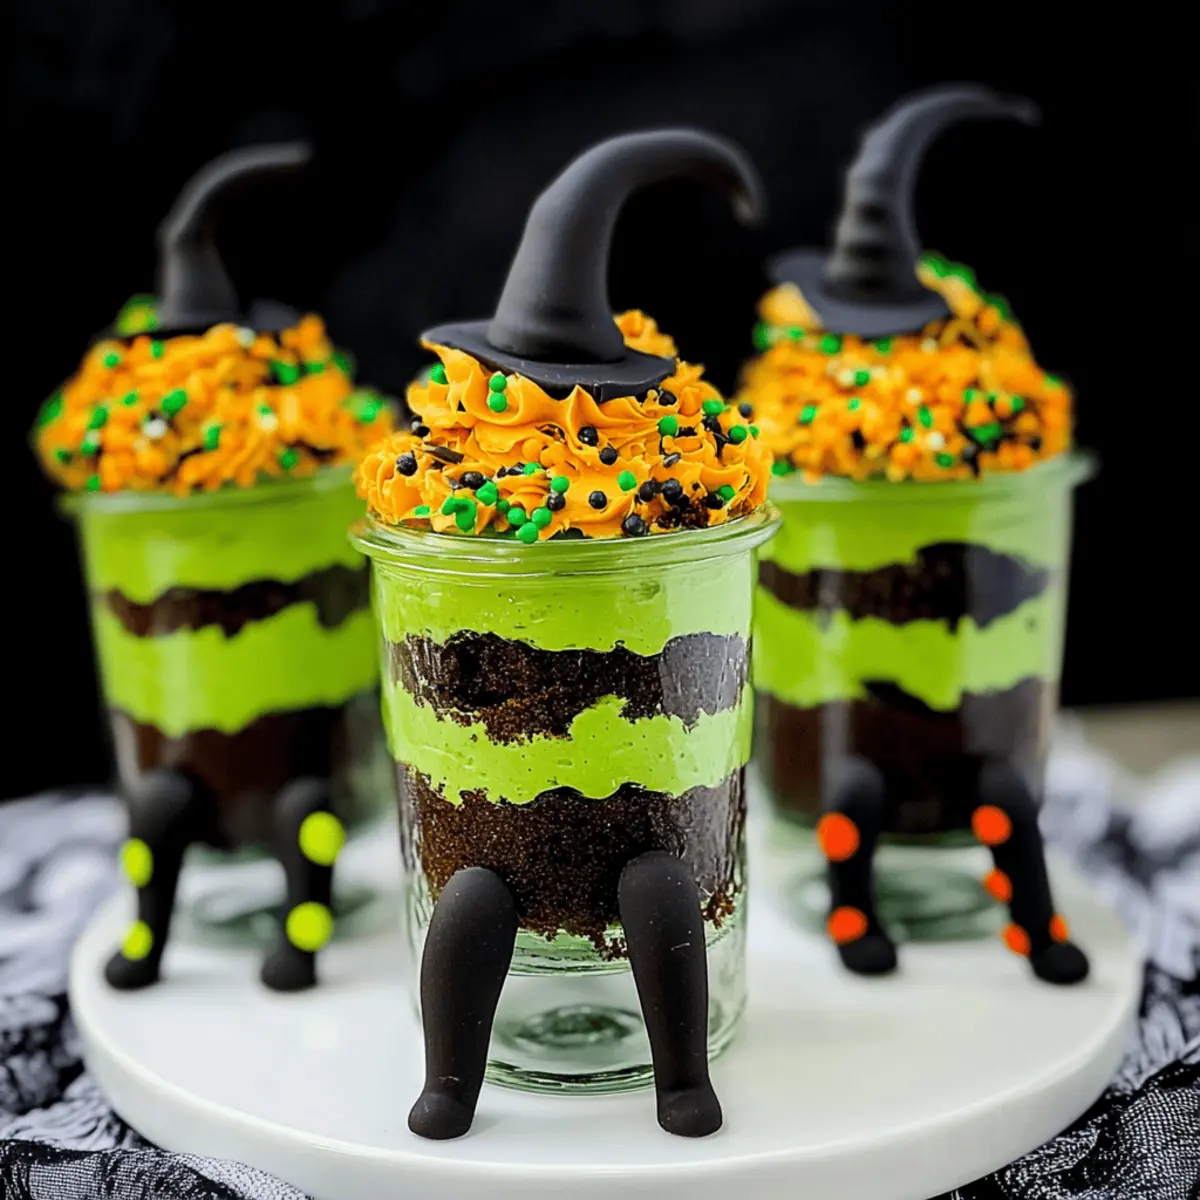
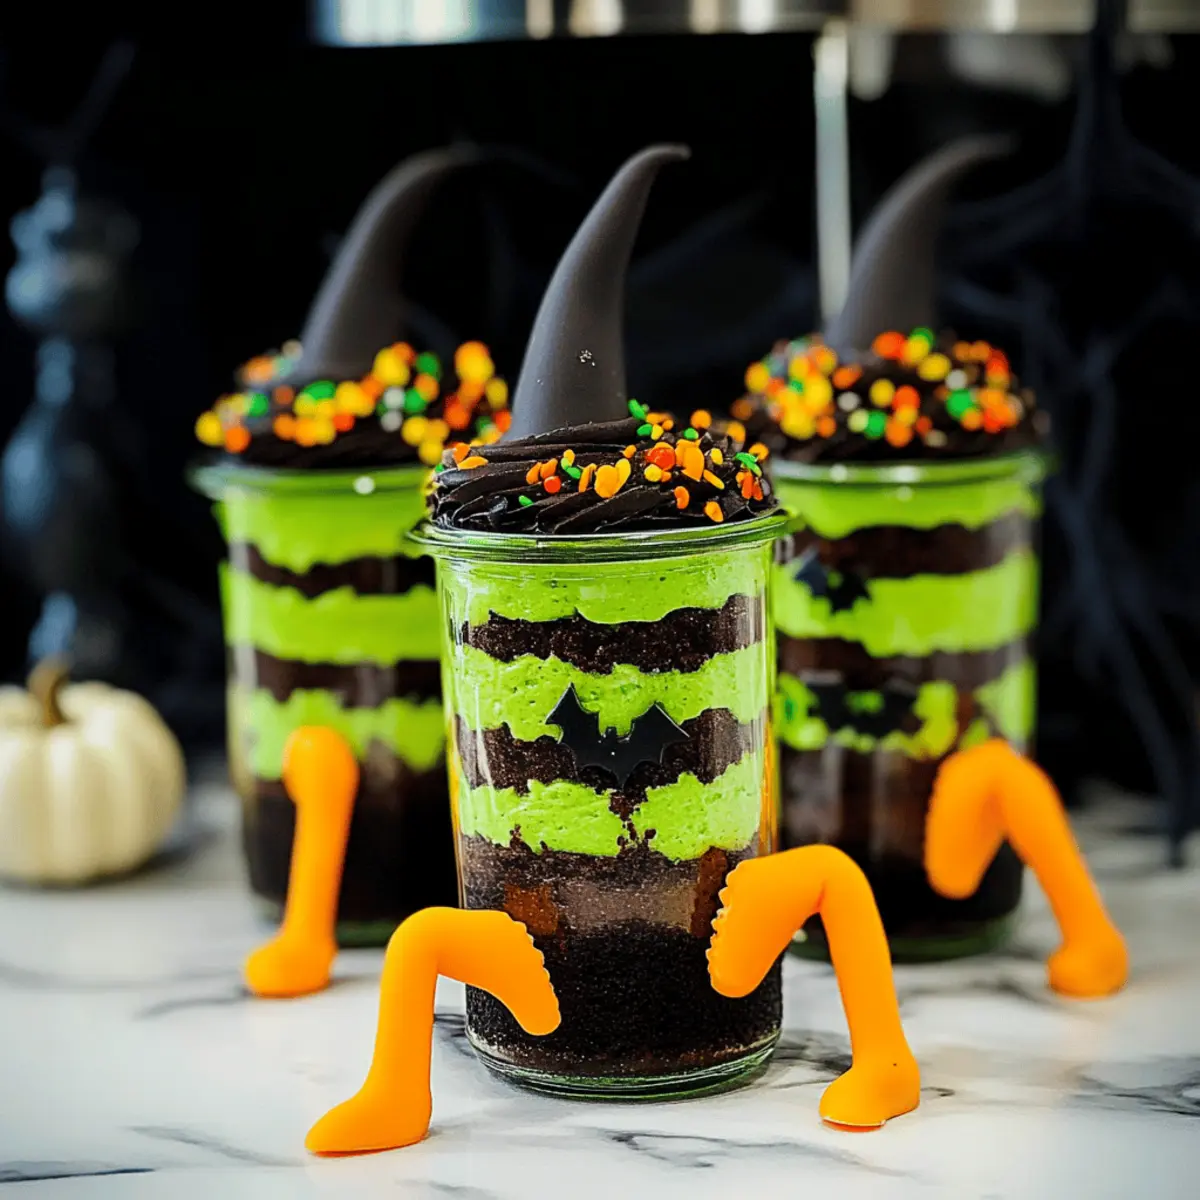
As the crisp autumn air starts to whisper secrets of Halloween, my thoughts turn to festive treats that bring a sprinkle of magic to the season. Enter the Witches’ Brew Halloween Cake Jars—a delightful dessert that transforms a classic chocolate cake into a bewitching layered masterpiece perfect for any spooky celebration. These easy-to-assemble jars boast a moist chocolate base, vibrant green buttercream, and whimsical fondant witch legs peeking out, making them not only visually stunning but also an incredible crowd-pleaser. Whether you’re hosting a haunted gathering or simply want to indulge in some seasonal fun, these cake jars are your flavorful ticket to a festive culinary adventure. Curious how to cast this sweet spell in your kitchen? Let’s dive into the recipe!
Why Are Witches’ Brew Cake Jars a Hit?
Memorable presentation: These enchanting jars are as delightful to look at as they are to eat, making them an impressive centerpiece for any Halloween party.
Easy assembly: With just a few simple steps, you can create stunning dessert layers that anyone can master, perfect for those new to baking.
Crowd-pleasing flavors: Rich chocolate cake paired with light, vibrant buttercream ensures every bite is a flavor explosion that guests will rave about.
Versatile treat: Feel free to customize the flavors or decorations, turning these cake jars into something unique for any occasion beyond Halloween, like a festive light version of the Cider Pound Cake.
Perfect for gatherings: These individual jars make serving easy and fun, eliminating messy slices while being the hit of your next gathering.
Save time: Assemble ahead of time and chill, allowing you to focus on other party preparations while still serving a delightful dessert!
Witches’ Brew Halloween Cake Jars Ingredients
For the Cake
- Granulated Sugar – Adds sweetness and helps create a tender cake texture.
- Butter – Enhances moisture; use unsalted for better salt control.
- Eggs – Essential for structure and moisture; consider flaxseed for a vegan twist.
- Unsweetened Black Cocoa Powder – Provides a rich chocolate flavor; swap with regular cocoa if needed, keeping in mind the color change.
- Self-Raising Flour – Gives structure and lightness; substitute with all-purpose flour mixed with baking powder if necessary.
- Milk – Adds moisture; non-dairy milk works well for a vegan option.
- Vanilla Extract – Elevates the flavor; stick with pure extract for maximum taste.
For the Buttercream
- Powdered Sugar – Crucial for the frosting texture; alternatives won’t give the same result.
- Green Food Coloring – Achieve that vibrant buttercream; gel food coloring is ideal for its intensity.
For Decoration
- Orange Fondant & Black Fondant – Used for the whimsical witch legs; other colors can work too if you’re feeling creative.
- Sprinkles – Sprinkle in the fun; any festive sprinkles will bright up your jars beautifully.
These Witches’ Brew Halloween Cake Jars are sure to be a showstopper at your next Halloween gathering!
Step‑by‑Step Instructions for Witches’ Brew Halloween Cake Jars
Step 1: Prepare Fondant Witches’ Legs
Begin by kneading CMC into the orange fondant until it’s pliable. Roll it into long strips and cut pieces for the length of the witch’s legs. Use black fondant to create stripes on the legs and tiny shoes at the bottom. Set these aside on a plate to harden, which should take about 30 minutes while you prepare the rest.
Step 2: Bake the Cake
Preheat your oven to 170°C (340°F) and grease a cake tin. In a large mixing bowl, cream together 1 cup of butter and 2 cups of granulated sugar until fluffy and light—about 3-5 minutes. Add in 4 eggs one at a time while mixing. Gradually combine the dry ingredients: 2 cups of self-raising flour mixed with ¾ cup of unsweetened black cocoa powder and alternate adding 1 cup of milk. Pour the batter into the prepared tin and bake for 45-50 minutes or until a toothpick inserted in the center comes out clean.
Step 3: Cool Cake
Once baked, remove the cake from the oven and allow it to cool in the tin for about 15 minutes. Transfer the cake to a wire rack to cool completely, which should take roughly another hour. Once cooled, slice the cake into 3-inch circles to perfectly fit into your jars.
Step 4: Make Buttercream
In a mixing bowl, beat 1 cup of unsalted butter until smooth and creamy, around 3-4 minutes. Gradually add 4 cups of powdered sugar while mixing on low to avoid a cloud of sugar dust. Add 1 teaspoon of vanilla extract and a few drops of green food coloring until you achieve a vibrant hue. Beat until fluffy for about 2-3 more minutes.
Step 5: Assemble Cake Jars
To assemble your Witches’ Brew Halloween Cake Jars, start by adding a spoonful of sprinkles at the bottom of each jar for a festive touch. Next, layer in the chocolate cake circles followed by a layer of green buttercream. Repeat the layers until the jars are filled, leaving some buttercream to pipe on top. Once filled, pipe the remaining buttercream and elegantly insert the fondant witch legs, making sure they’re peeking out.
Step 6: Store and Serve
These spooky treats are best enjoyed the same day they’re assembled to maintain the texture. However, they can be stored at room temperature for up to 2-3 days or refrigerated for about a week. Just remember, avoid stacking the jars to preserve the aesthetic of the Witches’ Brew Halloween Cake Jars!
Make Ahead Options
These Witches’ Brew Halloween Cake Jars are perfect for meal prep, allowing you to enjoy the festive fun with minimal last-minute effort! You can prepare the cake and buttercream up to 24 hours in advance. Bake the chocolate cake, cool it completely, and store the layers in an airtight container at room temperature, ensuring they retain their moisture. The buttercream can be made ahead as well; simply refrigerate it and bring it back to room temperature before use to maintain its creamy texture. When you’re ready to assemble, layer the cake circles with buttercream, finish with sprinkles, and top with the fondant witch legs. This way, you’ll have a delightful and visually stunning dessert with extra time to spare for your Halloween festivities!
Storage Tips for Witches’ Brew Halloween Cake Jars
-
Room Temperature: Enjoy your cake jars fresh on the day of assembly for the best texture and flavor. If left at room temperature, they can last for up to 2-3 days.
-
Fridge: To extend freshness, store your Witches’ Brew Halloween Cake Jars in the refrigerator for up to one week. Ensure they are covered with clear wrap or placed in airtight containers to avoid drying out.
-
Freezer: If you want to prepare ahead, you can freeze the assembled jars for up to 3 months. Be sure to wrap them tightly in plastic wrap and foil to prevent freezer burn.
-
Reheating: For the best experience, serve the cake jars chilled or at room temperature. If you find them too cold, allow them to sit out for about 30 minutes before enjoying!
What to Serve with Witches’ Brew Halloween Cake Jars
As Halloween approaches, a whimsical dessert deserves equally delightful companions—let’s set the stage for a festive feast.
-
Spiced Apple Cider: The warm, comforting flavors of spiced apple cider enhance the dessert’s sweetness, creating a perfect cozy pairing. Its seasonal warmth complements the cake jars beautifully.
-
Chilled Pumpkin Soup: This creamy autumn classic offers a smooth contrast to the rich chocolate and buttercream. Serve it as a start to your gathering for a touch of savory delight.
-
Monster Marshmallow Treats: These adorable, gooey snacks not only echo the Halloween theme but provide a fun and crunchy texture, ensuring every bite is a celebration.
-
Chocolate-Covered Pretzels: The crunchy salty-sweetness balances the cake jars while providing a delightful texture contrast that will leave guests reaching for more.
-
Ginger Snap Cookies: With their warm spices and crispy texture, ginger snaps complement the rich flavors of the Witches’ Brew Halloween Cake Jars perfectly, inviting a nostalgic taste of the season.
-
Halloween-Themed Mocktails: Whip up fun, colorful beverages for both kids and adults to sip alongside the weighty jars. Think vibrant berry blends or spooky black lemonade for a festive touch!
-
Candy Corn Parfaits: Layer candy corn in clear cups with whipped cream to visually echo the cake jars, enhancing your Halloween dessert table’s charm.
-
Cinnamon Sugar Doughnuts: Soft and fluffy doughnuts dusted in cinnamon sugar will add a deliciously warm and sweet touch to your spooky dessert spread.
-
Haunted Hot Chocolate: Complete the experience with cups of creamy hot chocolate topped with ghostly marshmallows, inviting guests into a world of seasonal indulgence.
These pairings will elevate your celebration as much as the Witches’ Brew Halloween Cake Jars themselves!
Witches’ Brew Halloween Cake Jars Variations & Substitutions
Feel free to sprinkle your own magic and personalize these jars to create a delightful twist on the classic recipe.
- Vanilla Cake: Swap out the chocolate cake for a fluffy vanilla or sponge cake for a lighter flavor profile that still wows.
- Dairy-Free: Substitute regular milk with almond or coconut milk, ensuring everyone can join in on the delicious fun.
- Gluten-Free: Use gluten-free all-purpose flour instead of self-raising flour to make these jars accessible for gluten-sensitive friends.
- Flavor Infusion: Add a dash of pumpkin spice to the buttercream to give it an autumnal flair, capturing the essence of the season.
- Color Play: Experiment with different food coloring shades for the buttercream; vibrant shades can create a unique visual appeal.
- Nutty Crunch: Toss in crushed nuts or cookie crumbles between the layers for added texture and a lovely crunch.
- Spicy Kick: For an adventurous twist, incorporate a hint of cayenne pepper in the chocolate cake to deliver a surprising heat!
- Themed Décor: Create a Halloween twist by incorporating themed decorations besides witch legs, like gummy worms or mini skeletons, to captivate your guests.
Don’t forget to check out variations that pair perfectly with these cake jars, like the delightful Cider Pound Cake or to make alongside Halloween Chocolate Chip cookies for a sweet spread!
Expert Tips for Witches’ Brew Halloween Cake Jars
- Perfectly Layered: Ensure each layer is even by using a measuring cup when adding cake and buttercream to your jars for a uniform look.
- Cooling Time: Allow the cake to cool completely before slicing to prevent it from crumbling. This step is vital for a clean layer in your Witches’ Brew Halloween Cake Jars.
- Fondant Fun: Keep fondant covered with a damp cloth when not in use to prevent it from drying out; work in small batches if necessary.
- Avoiding Sugar Dust: When making buttercream, mix powdered sugar on low speed before increasing; this prevents a powdered sugar cloud forming in your kitchen.
- Festive Flexibility: Experiment with different colors of food coloring for your buttercream to personalize your jars for various occasions beyond just Halloween!

Witches’ Brew Halloween Cake Jars Recipe FAQs
How do I choose the right ripeness of ingredients?
Absolutely! For the best results, use fresh eggs that have a firm shell and are not past their expiration date. Your butter should be at room temperature—soft but not melted—and for the milk, look for a clean, unexpired carton.
How should I store any leftover cake jars?
Very! These Witches’ Brew Halloween Cake Jars taste best when fresh, but you can keep them at room temperature for up to 2-3 days. If you want to extend their shelf life, refrigerate them for up to one week, ensuring they’re covered with clear wrap or in airtight containers to maintain texture.
Can I freeze the assembled cake jars?
Definitely! To freeze your Witches’ Brew Halloween Cake Jars, wrap them tightly in plastic wrap and then in foil to prevent freezer burn. They can be frozen for up to 3 months. When you’re ready to enjoy them, transfer to the fridge to thaw overnight or let them sit at room temperature for about 30 minutes when you’re ready to serve.
What can I do if my buttercream is too runny?
Oh, it happens! If your buttercream is too runny, this might be due to too much milk or insufficiently beating in the powdered sugar. To fix it, simply add more powdered sugar in small increments, mixing thoroughly until you reach the desired consistency. If it’s too thick, add a tiny splash of milk to loosen it slightly.
Are there any dietary considerations for this recipe?
Very important! This recipe contains allergens like eggs, gluten, and dairy. For a vegan alternative, you can replace the eggs with flaxseed meal (1 tablespoon flaxseed mixed with 2.5 tablespoons water equals one egg) and the milk with any non-dairy alternative. Always check your frostings and decorations for potential allergens if serving to others.
How can I prevent my sprinkles from bleeding?
Great question! Sprinkles can bleed if the cake jars are stored too long before serving. To minimize this, assemble your Witches’ Brew Halloween Cake Jars on the day of the event. If you must store them, keep sprinkles as a topping until just before serving to maintain their vibrant color.
Witches' Brew Halloween Cake Jars That Wow Every Party
Ingredients
Equipment
Method
- Step 1: Prepare Fondant Witches' Legs - Knead CMC into orange fondant until pliable, roll into strips and cut for witch's legs.
- Step 2: Bake the Cake - Preheat oven to 170°C (340°F). Cream butter and sugar, add eggs and mix dry ingredients. Bake for 45-50 minutes.
- Step 3: Cool Cake - Allow cooling for 15 minutes in tin, then transfer to a wire rack for 1 hour. Slice into 3-inch circles.
- Step 4: Make Buttercream - Beat butter, mix in powdered sugar, add vanilla and green food coloring until fluffy.
- Step 5: Assemble Cake Jars - Layer sprinkles, cake, and buttercream in jars, piping some buttercream on top with fondant legs.
- Step 6: Store and Serve - Best when fresh, store in airtight containers for up to a week.
Leave a Reply